What’s going on, fellas? Hello and welcome back to Filmmaking Elements. In this article, I will share 6 Tips When Color Grading 8 Bit Footage In Davinci Resolve much more effectively, whether it’s from a GoPro, a drone, or a DSLR.
6 Tips When Color Grading 8 Bit Footage In Davinci Resolve
1. Stop using Qualifiers
The first recommendation I have is to understand some lighting principles and invest in yourself before you even turn on your camera. Purchase a few lights for your setup. The reason I include this as my first advice is that being able to correctly light subjects can save you a lot of effort and aggravation in post-production because you won’t have to perform as much manipulation of the image.
Lighting on the set not only increases the production value of the shoot but also helps you achieve that separation on the set itself.
A lot of times that manipulation is what causes 8 bit footage to break.
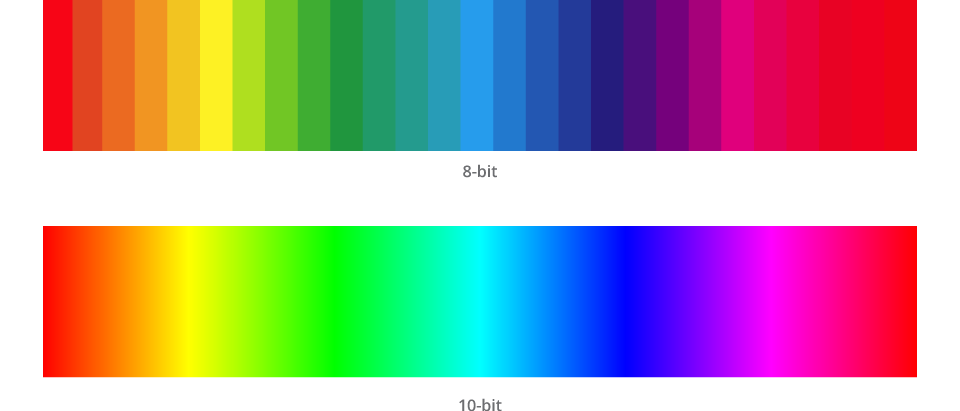
If you’re not sure what 8 bit, 10 bit, and 12 bit means it’s a way of describing how many colors a camera can record. So one of the main problems with 8 bit footage is that if you get heavy with the color grade, the image can start to fall apart or break, especially if you’re trying to pull keys or trying to qualify something using the qualifier tool present in Davinci Resolve.
The reason is that a camera capable of only recording 8 bit footage tends to record less color information hence it becomes difficult for a color grading software such as Davinci Resolve to distinguish between two shades of the same color.
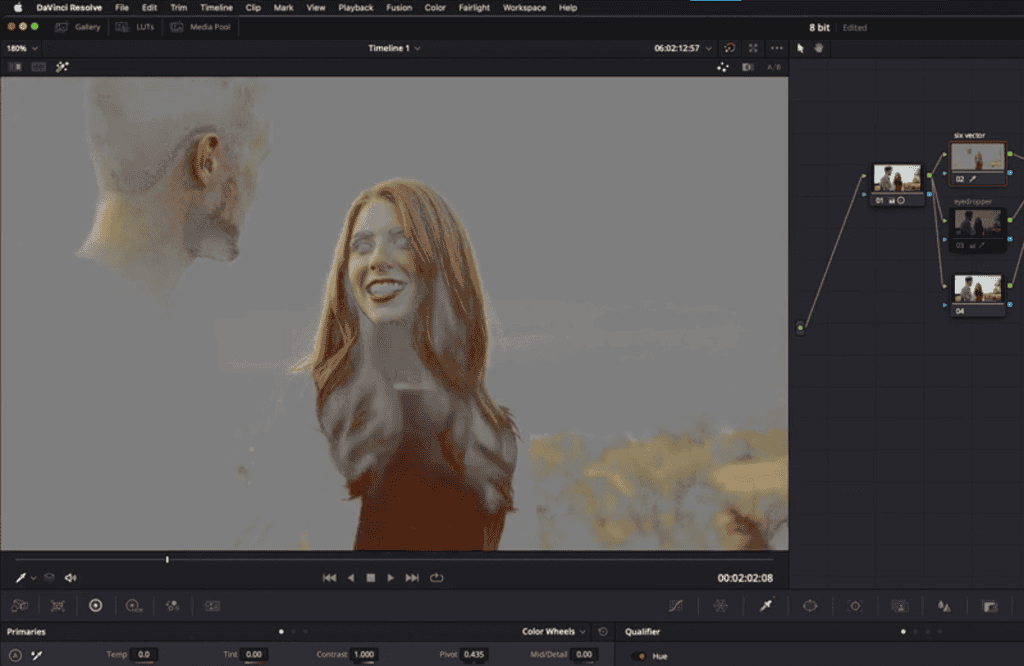
As I said, that can make it difficult to pull keys. So, stop using Qualifiers when working with 8 bit footage.
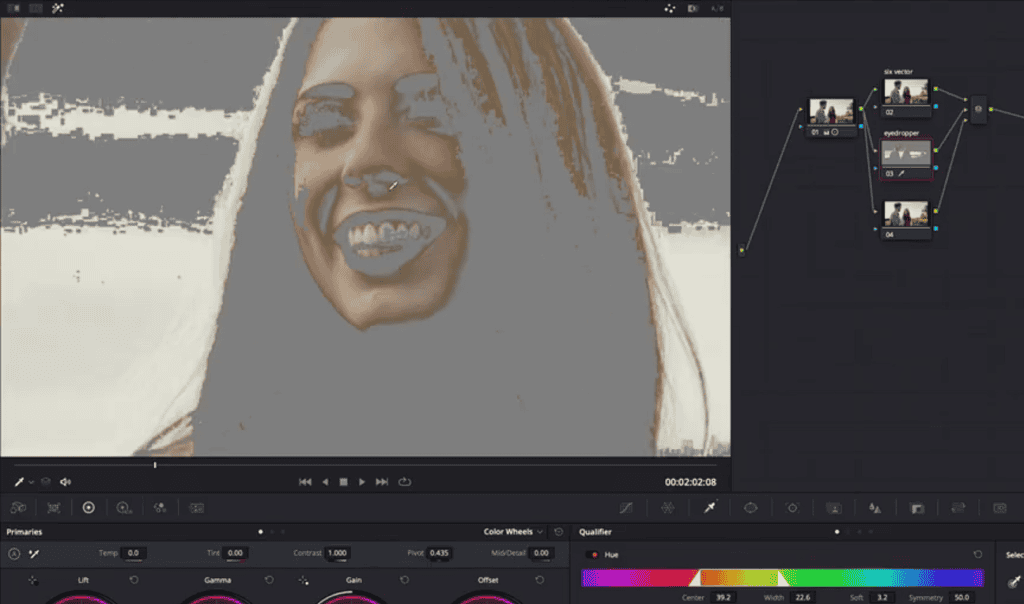
But if you must, have to qualify something, and you are left with no other option. Try not to use the eyedropper tool. For example, if you are trying to key out the skin, don’t use the eyedropper tool because you will end up with a very messy qualification in Davinci Resolve.
The better way to approach such scenarios when color grading 8 bit footage in Davinci Resolve is, to make broader keys or qualifications to start with.
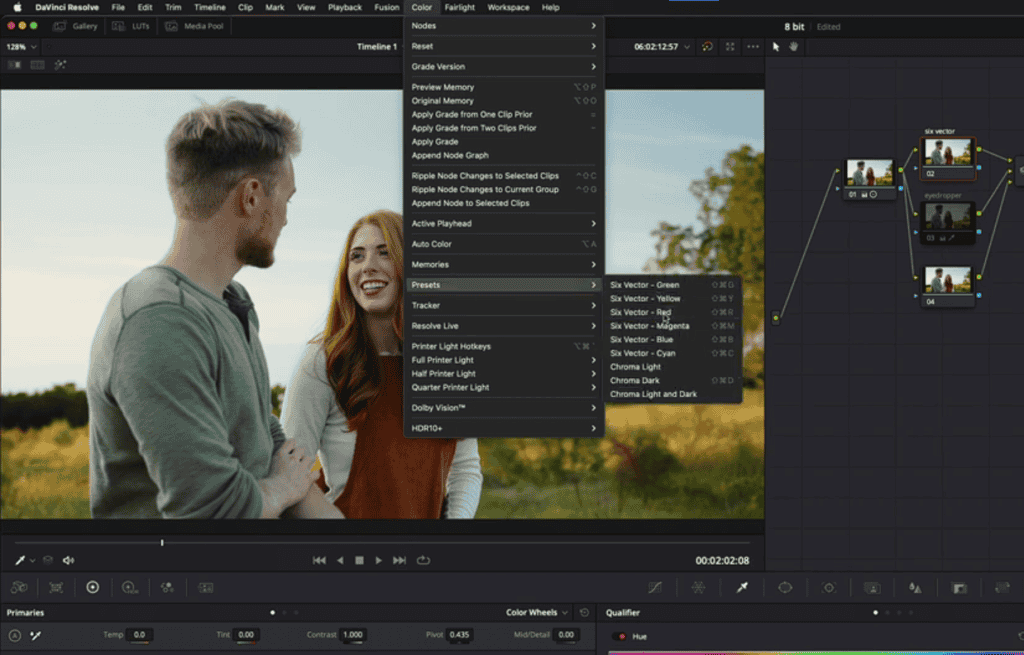
The best way to do this is to use the Six vector tool already present in Davinci Resolve.
- You can find it in the upper menu bar, Color>Presets.
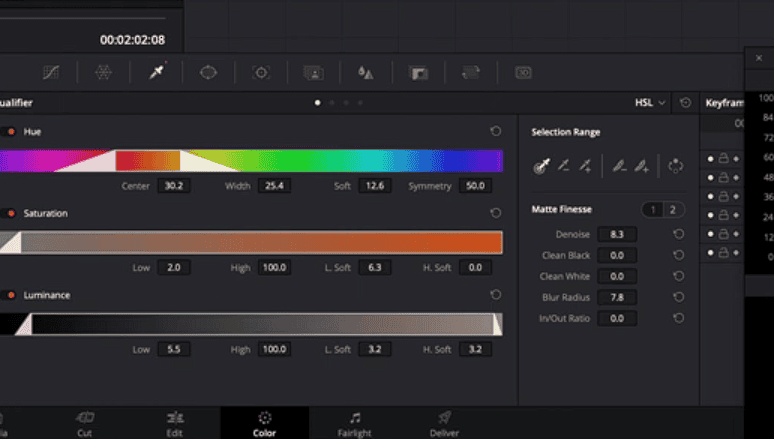
- In the case of qualifying the skins. You can choose Six Vector- Red.
- This will automatically just select the Red areas present in the shot from where you can narrow down your selection.
- From this point, don’t forget to use the “Matte Finesse” tools such as Denoise and Blur radius to get a clean key.
- If you feel you are selecting more areas that are red than just the skin tone, you can always use your Power Windows to restrict your selection to just the skin.
2. Utilizing the Hue vs Hue curves
On that note, let’s go ahead and look at another way to correct skin tones or even the skies bluer without pulling a key at all. The Hue vs Hue tool will help you change the Hue of a selected area seamlessly.
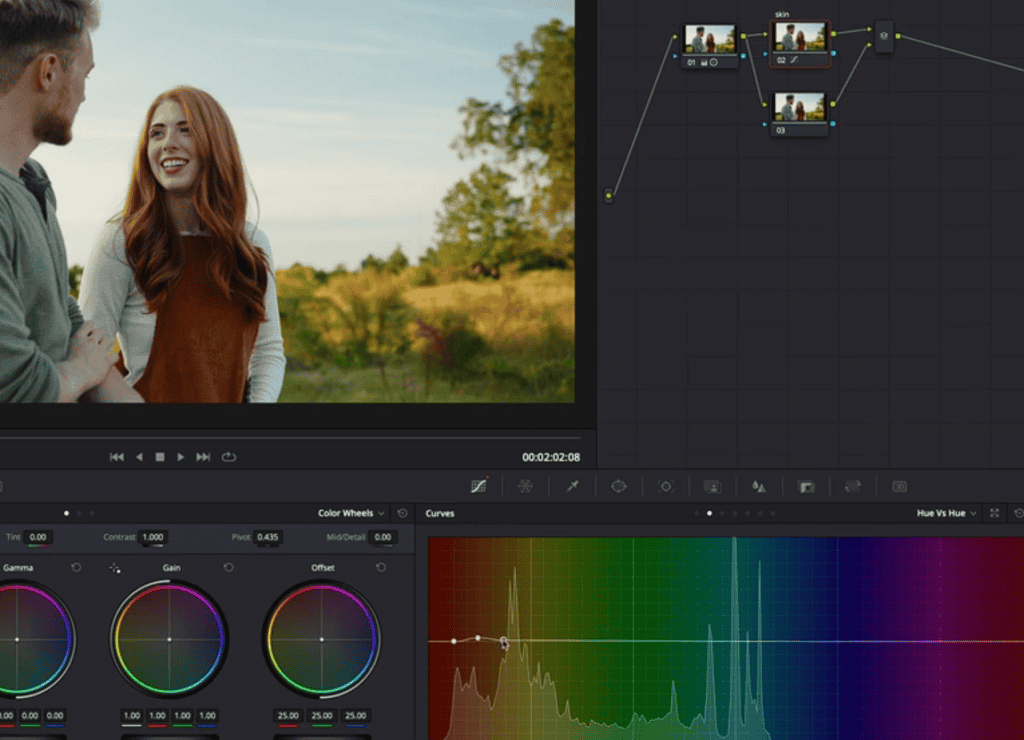
Now, here’s the instance where I do recommend using the eyedropper tool present in the same tab. You can use it to make the initial selection of the skin tone or a sky and work out from there.
Now if we wanted to adjust our skin tones, this is going to be the way we’re doing that. It’s going to be much cleaner. We’re not having any qualifications. There are not going to be any artifacts from this.
Another way to make it even cleaner is when you are done with selecting the right hue that you want to change in the Hue vs Hue panel of Davinci Resolve. You slightly make the selection a little wider. It will give a little more space to breathe and will drastically reduce the chances of witnessing blotchiness.
The reason why this step is necessary to do is that we don’t have “Matte Finesse” tools in the case of Hue vs Hue.
You can of course use the same method with your other Curves tools present in Davinci Resolve to color 8 bit footage such as Hue vs Sat and Hue vs Luma to achieve the required look.
One thing to always be sure about is because you are dealing with footage that tends to easily fall apart try not to push the colors way too much. Not only it will break your footage but it will also make your job more complicated when you have a lot of nodes in your node tree to reverse engineer and come out with a fix.
3. Using both the ways together
Now let’s suppose you are using footage from a stock website that is compressed and is 8 bit. Obviously, in such cases, you will have no control over the lighting or how the shot was taken.
It can sometimes turn into a nightmare to qualify anything, especially in the shots where there is little to no color separation.
If you really want to be specific, you could combine the last method with the six-factor qualification and the Hue vs Hue curve in one node. Then you may fine-tune where your qualifications are made and what adjustments you make to the overall look. You can also use “power windows” to further isolate your decision.
Remember to use all of these methods in just one particular node for the best results.
4. Preparing the 8 bit footage before color grading
So the next thing I have for you when working with 8 bit footage is that don’t bring your footage directly from your camera into Davinci Resolve for color grading or even Adobe Premiere Pro in that matter whatever it is.
Usually, the camera that shoots 8 bit footage is not recording those files in a very edit-friendly codec.
Do consider transcoding your footage into something like ProRes 422, which gives you great performance enhancements without taking up an ungraspable amount of space like ProRes 444. And if you do go this route, be sure to have a pretty fast external hard drive or a solid state drive (SSD), something like the Samsung T7 SSD, which has a read and write speed of over 1000 megabytes a second.
Keep in mind that, doing this will not improve the quality of your footage. Rather, you will be transcoding your footage from something like H.264 to ProRes. But you will notice some serious improvements in your computer’s ability to edit and grade these clips because it has less work to do.
It eliminates the need to decompress the material, make an edit, and then play it again. Because the footage is less compressed, it has a lot less work to do. Contrary to popular perception, larger file sizes do not necessarily imply that your computer will have a more difficult time playing back and editing those files.
5. Having the perfect approach
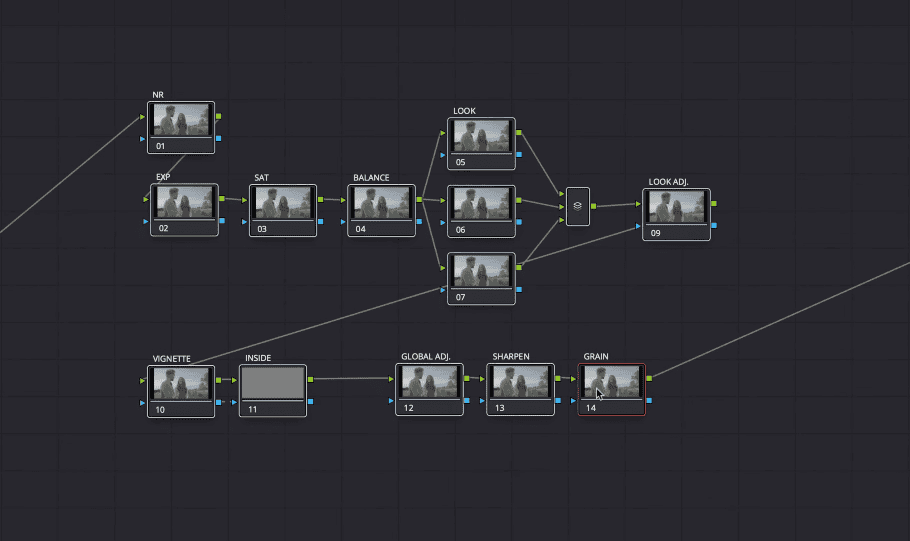
So the next tip is don’t just jump into color grading your 8 bit footage in Davinci Resolve without having a perfect strategy. A good structure and A perfect strategy will save you a ton of time. Of course, this applies to all footage, not just 8 bit, but since 8 bit footage is less forgiving, it’s a little more applicable here.
Don’t forget to name your Nodes while working on them. This way if you are moving on to clip to clip, you can always go back and exactly see where the problem source is and you can hop into just that node and make those changes right there.
In the case of dealing with very less quality 8 bit stock footage which is already looking blotchy without even starting. The best practice is to use the Noise Reduction tool to smoothen out those pixels. Keep in mind that the Noise Reduction tool is only available in the paid version and is a very CPU-intensive tool.
The best practice when using this method is to transcode your footage into something like ProRes as I told you in the previous point before you even start color grading.
So yes, a lot of these tips I’ve mentioned can be applied to working with 10 and 12 bit footage of course, but any problems they introduced there are only going to be amplified when it’s 8 bit.
6. Hold up to your senses

That brings me to my final point: don’t become frustrated. It’s quite fine if your footage begins to break while you’re grading it. Getting frustrated mid-way will increase your problems and complications rather than making things easier.
All you have to do now is figure out what’s causing the problem and then work around it. And perhaps, this article will keep you from reacting too strongly to them. However, as you improve and repeat the process, you’ll learn what works and what doesn’t.
Consider 8 bit footage to be a part of growing up to higher-quality material, because I’m still working with a lot of it right now. Not everything that comes across my desk is shot on high-end cinema cameras. Because 8 bit footage isn’t going away anytime soon, you’ll need to learn how to work with it, and it’ll only help you get to the next level faster. That’s all I’ve got. I hope you enjoy reading it. See you again soon.
- Also Read- Everything About Using LUTs In Davinci Resolve
- Also Read- How To Do Broadcast Safe Finishing In Davinci Resolve
- Also Read- Video Vs Full Data Levels In Davinci Resolve
- Also Read- Premiere Pro: Color Management & Export Highest Quality
- Also Read- 6 Tips to make a cinematic film with your smartphone