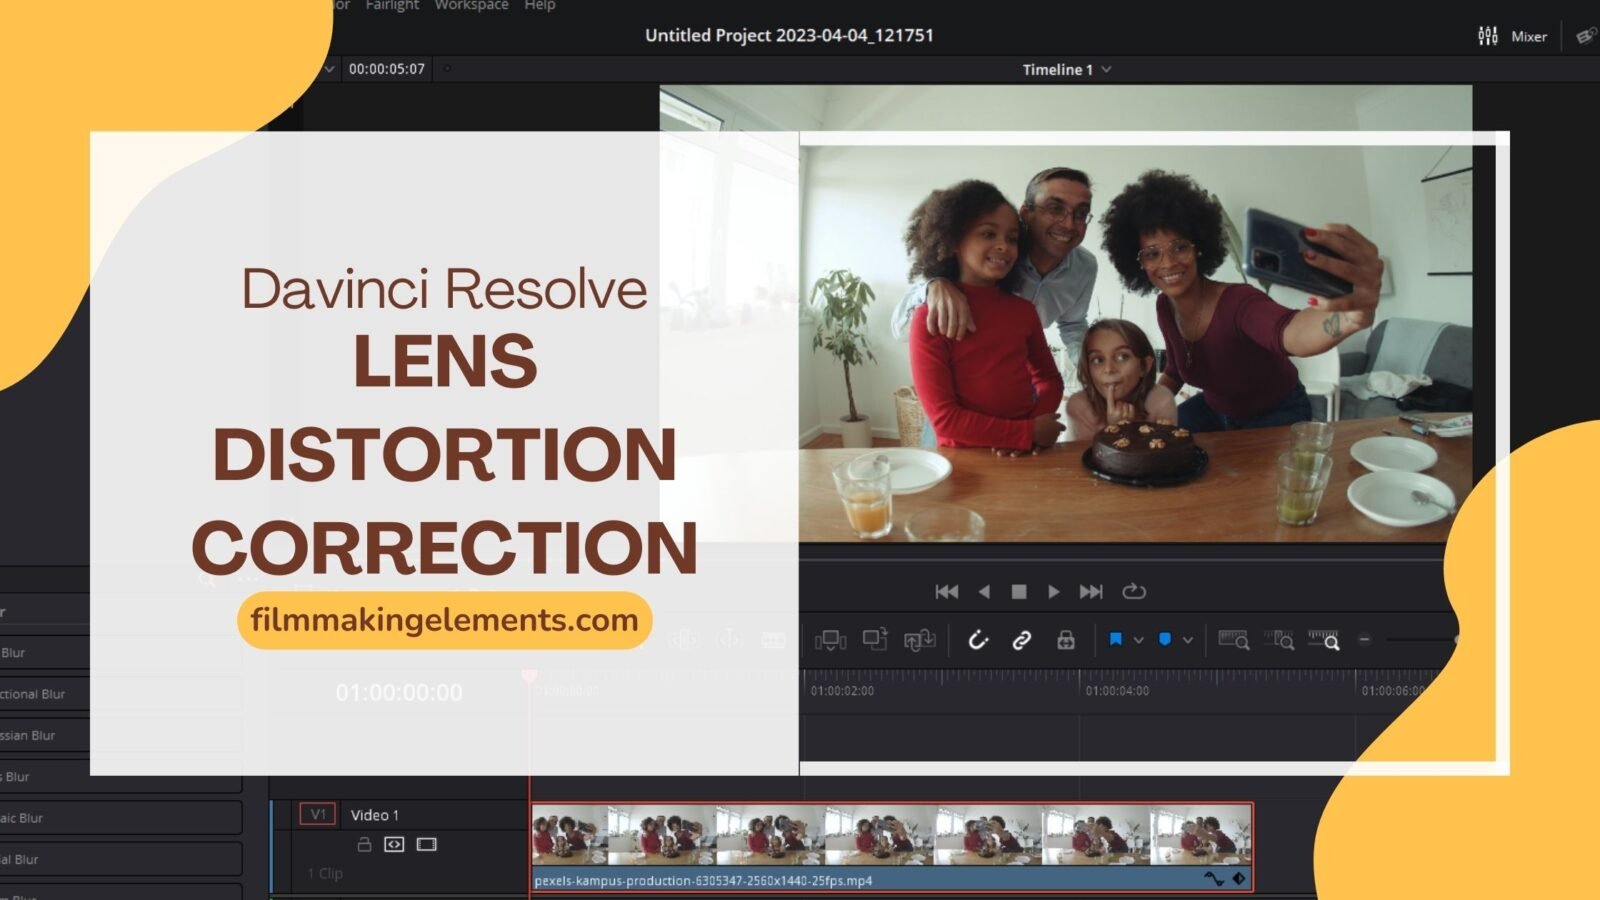
In the realm of videography, capturing the perfect shot involves not only a keen eye for detail but also the ability to address and rectify common challenges in post-production. One such challenge is lens distortion, an optical phenomenon that can detract from the visual appeal of your footage.
Lens distortion often occurs when using cameras with wide-angle lenses, such as fish-eye lenses, GoPros, and drones, where the lens curvature causes the image to appear warped or misshapen. Thankfully, Davinci Resolve, a robust video editing software, offers multiple solutions to help you tackle this issue effectively.
In this article, we will explore three practical methods for lens distortion correction in Davinci Resolve, empowering you to transform your footage into a stunning visual masterpiece. No matter your level of expertise in videography, these techniques will equip you with the necessary tools to create distortion-free, captivating content.
So, without further ado, let’s dive into the art of lens distortion correction in Davinci Resolve and learn how to overcome the challenges posed by fish-eye lenses, GoPros, and drones!
1. Basic Lens Distortion Correction in Davinci Resolve’s Edit Tab
In this section, we will delve deeper into the process of correcting lens distortion using the Edit tab in Davinci Resolve, a powerful video editing software. This method is ideal for those who prefer not to dive into the Color tab of Davinci Resolve and want a more straightforward approach.
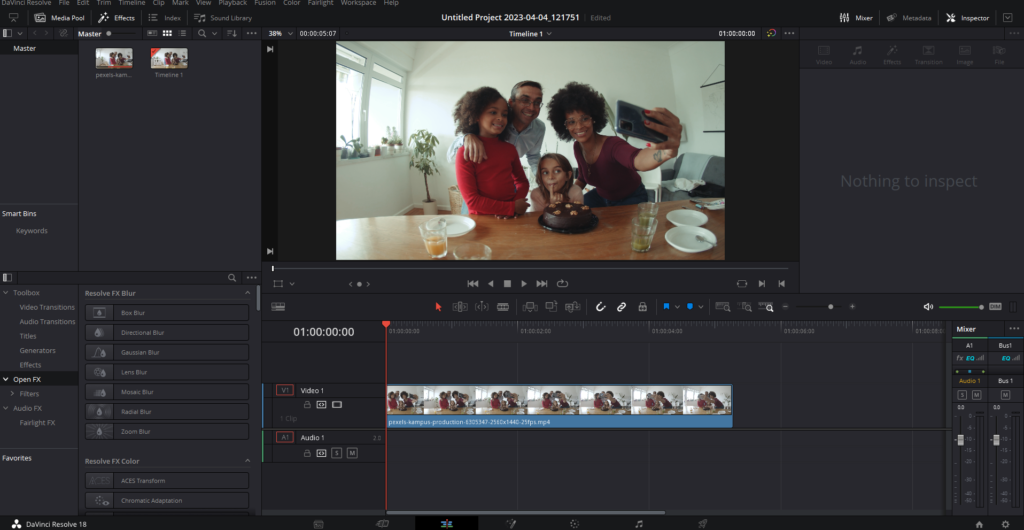
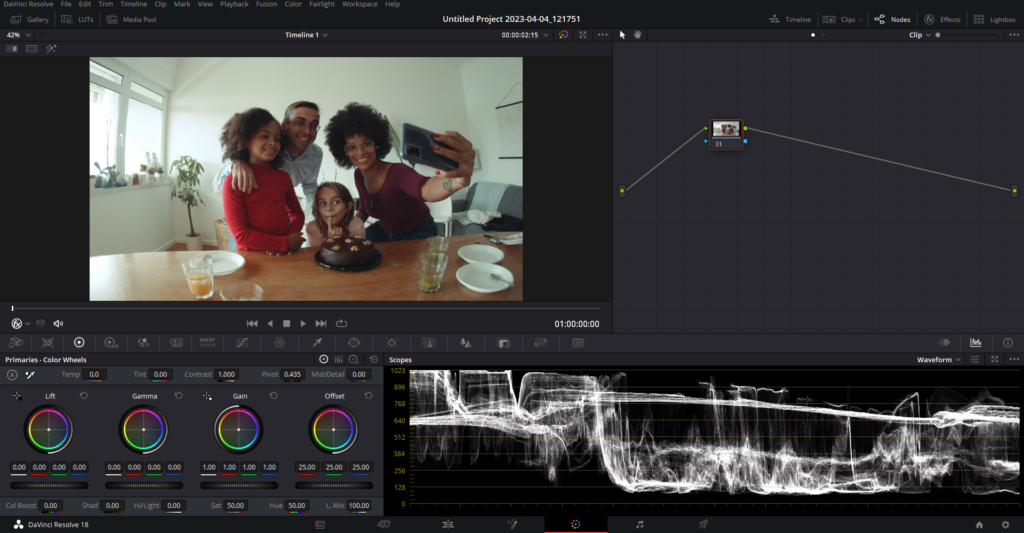
Step 1: Familiarize Yourself with the Davinci Resolve Interface
Before diving into lens distortion correction, take some time to familiarize yourself with the Davinci Resolve interface. This software offers a range of tools and features designed to help you create professional, high-quality content. Ensure you have a basic understanding of the Edit tab, the Timeline, the Inspector, and other essential components of the software.
Step 2: Import Your Footage
To begin correcting lens distortion, first, import your footage into Davinci Resolve. You can do this by navigating to the Media tab, locating the files on your computer, and dragging them into the Media Pool. Once your footage is imported, drag it onto the Timeline within the Edit tab.
Step 3: Ensure the Inspector is Selected
The Inspector is a crucial tool within Davinci Resolve’s Edit tab. It allows you to access various settings and adjustments, including lens distortion correction. To access the Inspector, first select the clip which needs to be corrected and click on the “Inspector” button located in the top right corner of the interface.
Step 4: Locate the Lens Correction Setting
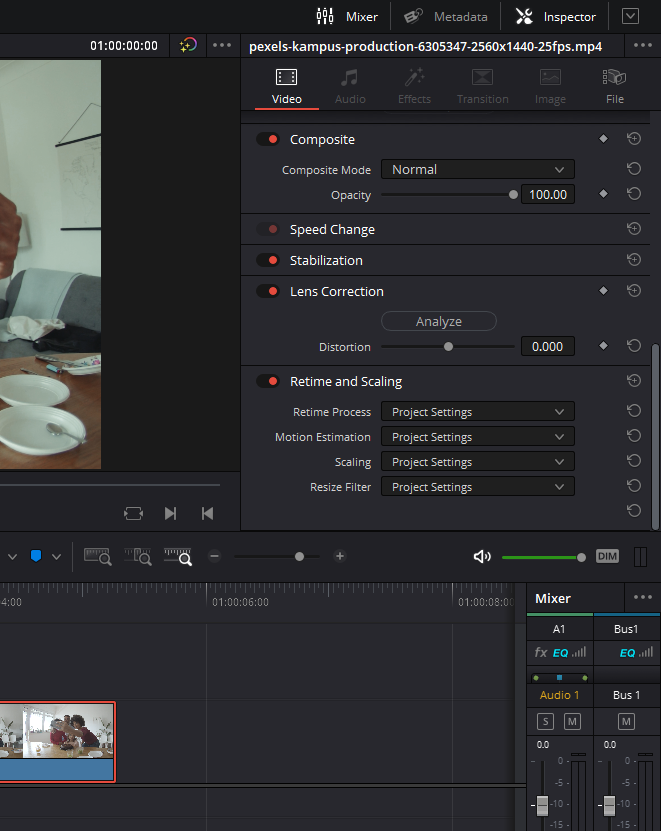
With the Inspector selected, scroll down and find the Lens Correction setting. This setting is designed to help you analyze and correct lens distortion in your footage. Double-click on the Lens Correction option to access its settings.
Step 5: Analyze Your Footage
Once you have accessed the Lens Correction settings, click on the “Analyze” button. This will prompt Davinci Resolve to analyze your footage and automatically correct any distortion it detects. In some cases, this automatic correction may be sufficient to fix the distortion in your footage.
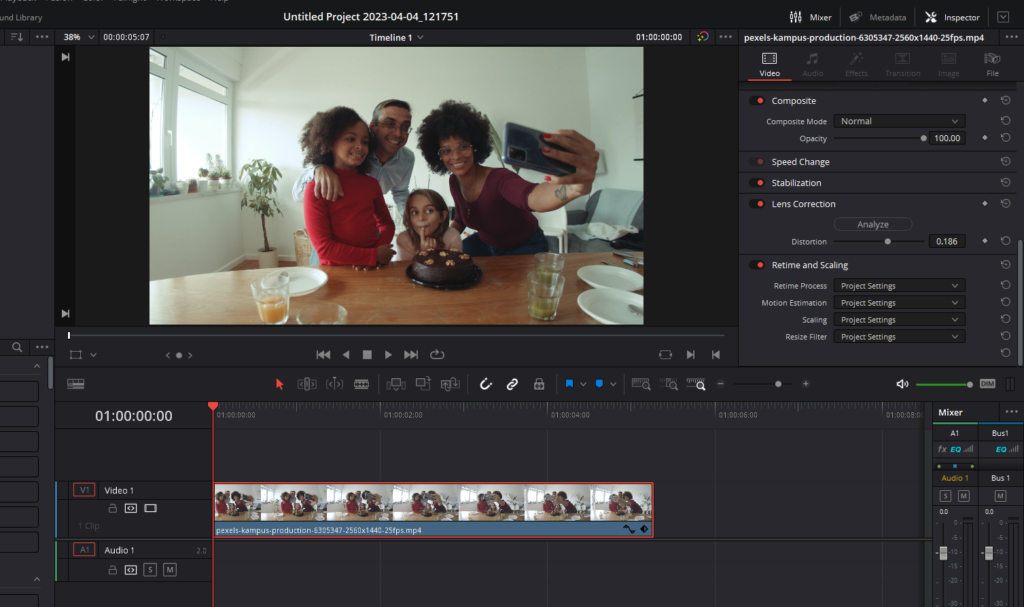
However, there may be instances where Davinci Resolve cannot automatically correct the distortion due to a lack of information in the footage. In such situations, you will need to manually adjust the distortion using the slider provided.
Step 6: Identify Distorted Areas in Your Footage
Before manually adjusting the distortion, identify areas in your footage that appear distorted. These areas may include curved walls, misshapen objects, or uneven lines. By pinpointing these areas, you can ensure that your adjustments are more precise and accurate.
Step 7: Manually Adjust the Distortion
To manually adjust the distortion, locate the slider within the Lens Correction settings. This slider can be moved left or right to correct the distortion in your footage. As you adjust the slider, observe the changes in the distorted areas you identified earlier.
It is essential to make incremental adjustments and continually assess the effect on your footage. This will help you avoid overcorrection and ensure that your final result is as accurate as possible.
2. Correcting Lens Distortion in Davinci Resolve’s Color Tab
The second method for correcting lens distortion in Davinci Resolve involves using the Color tab. This approach provides additional control over the correction process and allows for more precise adjustments.
Step 1: Familiarize Yourself with the Davinci Resolve Interface and Color Tab
Before delving into lens distortion correction, take some time to familiarize yourself with the Davinci Resolve interface, particularly the Color tab. The Color tab offers a range of tools and features designed to help you create professional, high-quality content. Ensure you have a basic understanding of the Color tab, nodes, the Effects library, and other essential components of the software.
Step 2: Import and Organize Your Footage
To begin correcting lens distortion, first, import your footage into Davinci Resolve. You can do this by navigating to the Media tab, locating the files on your computer, and dragging them into the Media Pool. Once your footage is imported, drag it onto the Timeline within the Edit tab.
Organize your footage by creating timelines, marking in and out points, and using flags or markers to indicate the clips that require lens distortion correction. This will streamline the process when working in the Color tab.
Step 3: Navigate to the Color Tab
Switch to the Color tab within Davinci Resolve by clicking on the “Color” button located at the bottom of the interface. The Color tab is where you will perform lens distortion correction using nodes and Open FX effect.
Step 4: Create a New Node
In the Color tab, create a new node by right-clicking on the existing node in the Node Editor and selecting “Add Node” followed by “Add Serial,” or use the keyboard shortcut “Alt + S” (or “Option + S” on a Mac).
Step 5: Access the Effects Library
With the new node selected, access the Effects library by clicking on the “Effects” button located in the top right corner of the interface. The OpenFX library contains a wide variety of effects and tools that can be applied to your footage.
Step 6: Locate and Apply the Lens Distortion Effect
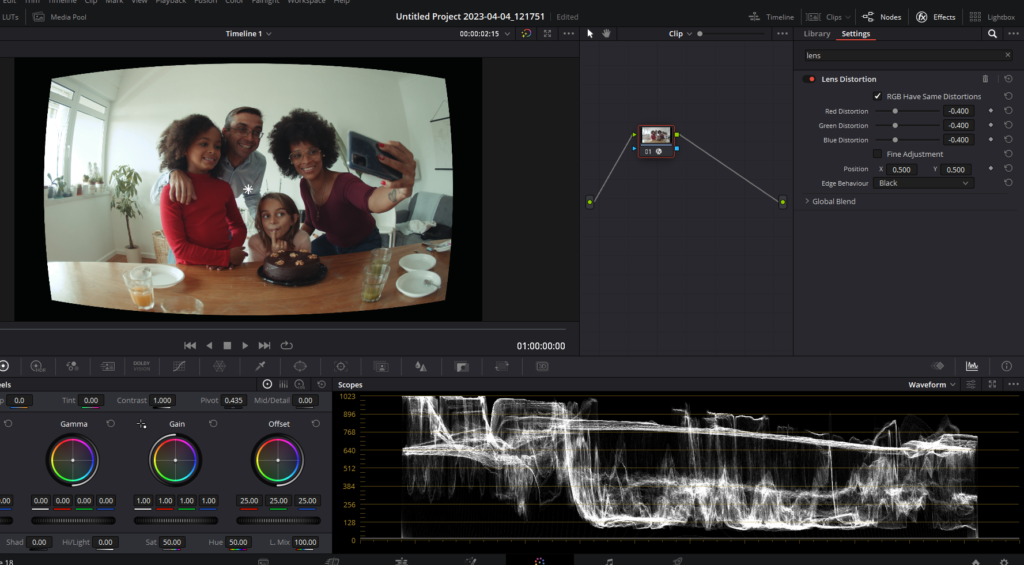
Type “lens distortion” in the search bar within the OpenFX library or locate the “Lens Distortion” effect in the list, which can be found under “Resolve FX Warp.” Drag the “Lens Distortion” effect onto the new node you created earlier. This will apply the effect to your footage, and the effect settings will appear in the OpenFX panel.
Step 7: Understand the Lens Distortion Effect Settings
Before making adjustments, take a moment to understand the Lens Distortion effect settings. The first set of sliders in the settings corresponds to the Red, Green, and Blue (RGB) channels. By default, the channels are “ganged,” meaning they are linked together and will move in tandem. If you want to manipulate each channel individually for creative effects or chromatic aberration correction, uncheck “RGB Have Same Distortions” to separate them.
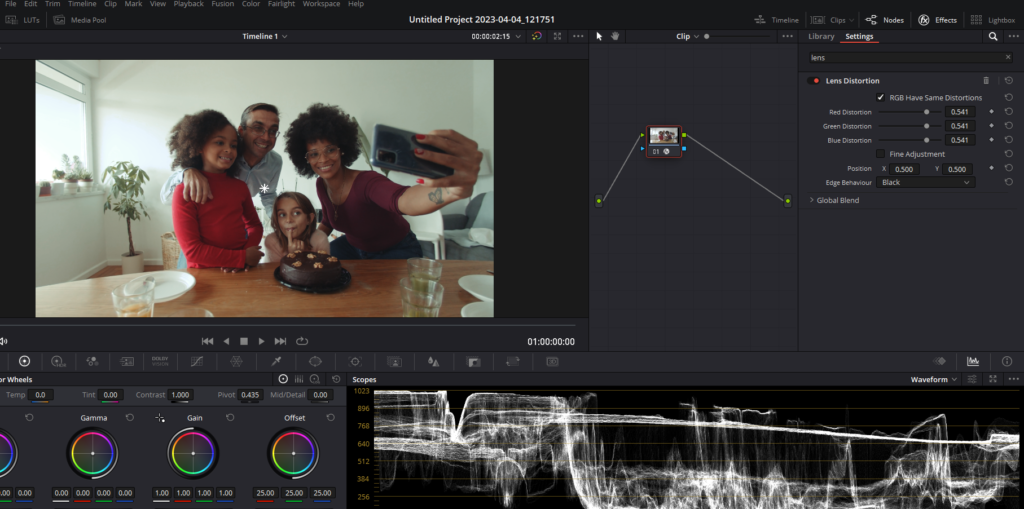
Adjust the sliders towards the left or right while all three channels are ganged to correct the lens distortion in your footage. Continuously observe the changes in your footage as you make these adjustments, paying close attention to areas with noticeable distortion, such as curved walls.
3. Correcting Lens Distortion in Davinci Resolve’s Fusion Tab
The third method for correcting lens distortion in Davinci Resolve is by utilizing the Fusion tab. Fusion offers advanced compositing and visual effects tools, allowing for more complex corrections and adjustments. In this section, we will discuss the steps to correct lens distortion using the Fusion tab in Davinci Resolve.
Step 1: Navigate to the Fusion Tab
Select the footage that requires lens distortion correction, and switch to the Fusion tab within Davinci Resolve. Fusion is a powerful node-based compositing tool that allows for advanced visual effects and adjustments.
Step 2: Apply the Lens Distort Node

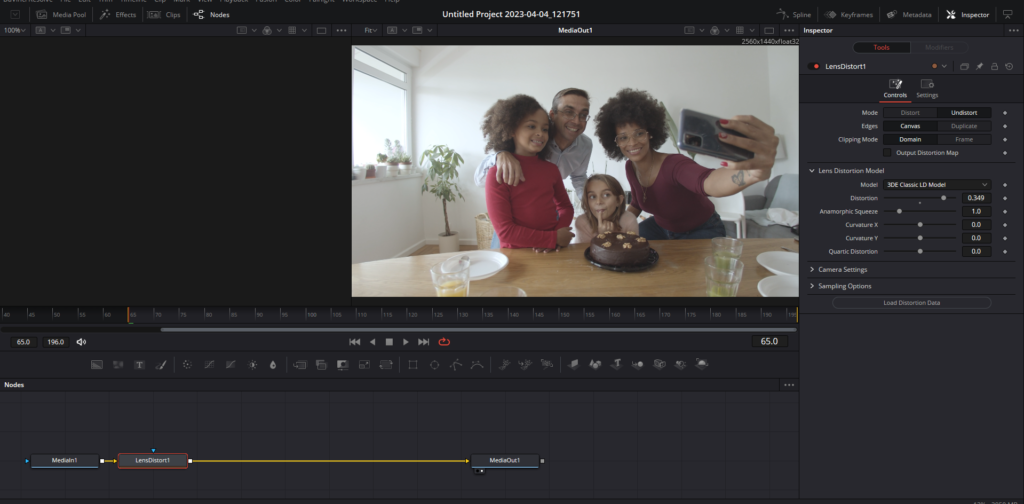
Select your MediaIn1 node in the Node Editor, press “Shift + Space” to bring up the search window, and type “lens distort.” The Lens Distort node will appear in the search results. Click on it to add it to your node tree. Click on the Lens Distort node to access its settings on the right in the Inspector panel.
Step 3: Configure the Lens Distort Node
The default mode for the Lens Distort node is “Undistort,” which is what you want for correcting lens distortion. Expand the Lens Distortion Model by double-clicking on it and leaving the Model set to “3DE Classic LD Model.” In most cases, you won’t need to adjust the camera settings. The primary setting to focus on is the “Distortion” slider.
Step 4: Add a Rectangle and Merge Node (Optional)
To help visualize your horizon line and make adjustments easier, you can add a Rectangle and Merge node to your node tree. This step is optional, but it can assist you in seeing how the distortion is affecting your footage more clearly.
Step 5: Adjust the Distortion Slider
Using the Lens Distort node, begin adjusting the Distortion slider to correct the lens distortion in your footage. Keep in mind that adjusting the distortion will warp your footage and may result in a loss of some of the original image. Toggle the effect on and off to compare the changes to your original footage.
We hope you found it informative and useful in enhancing your video editing skills. Keep experimenting with these techniques, and don’t hesitate to explore other tools and resources to help you create stunning visual content. Happy editing!