Hi, I’m Salik, the author of FilmmakingElements.com. I have been a filmmaker for over 10 years. I am also a certified DaVinci Resolve Trainer and I have used DaVinci Resolve for many of my projects. In this blog post, we will explore the process of adding drop shadow effects to text and PNG images in DaVinci Resolve. By the end of this tutorial, you will understand how to enhance your edits by adding depth and dimension to your text and images through the use of drop shadow effects.
Adding Drop Shadows to PNG Images in Davinci Resolve: A Step-by-Step Guide
Drop shadows are an effective way to add depth, dimension, and visual interest to your PNG images in Davinci Resolve. By following this detailed guide, you can easily apply and customize drop shadows to your images and elevate their overall appearance.
Step 1: Import Your Image and Set Up Your Timeline
- Open Davinci Resolve and create a new project.
- Import your PNG image by going to File > Import > Media from the menu on the top or by simply dragging the file into the Media Pool.
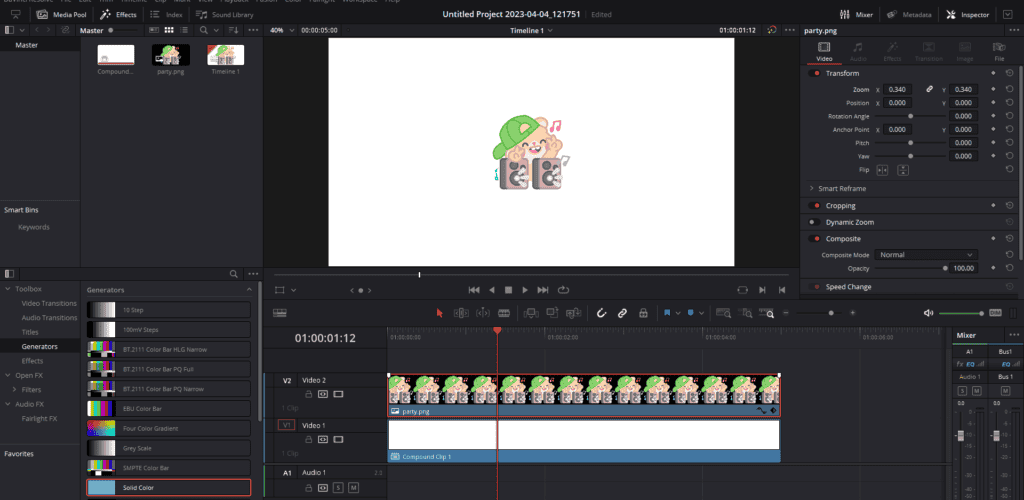
- In the edit page of Davinci Resolve, drag your imported image from the Media Pool to the timeline, placing it in Video Track 2. Make sure the image is separate from any underlying video tracks to ensure the drop shadow effect is applied correctly.
Step 2: Access the Effects Library and Find the Drop Shadow Effect
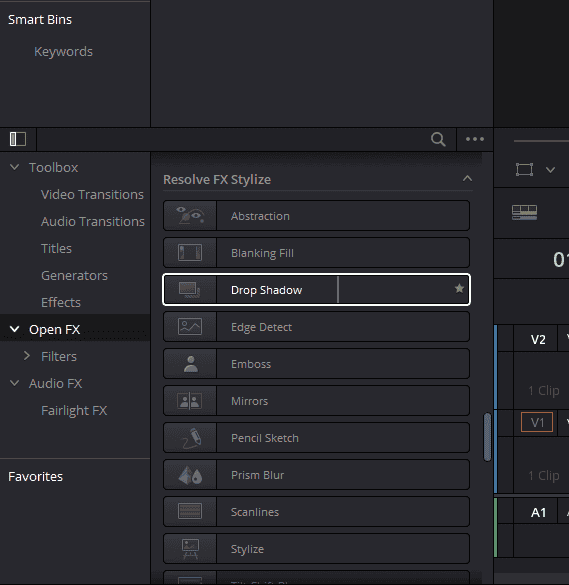
- Navigate to the top left corner of the screen and click on the “Effects” button.
- Click on “OpenFX” in the left sidebar to reveal a list of available effects.
- Scroll down to find the “Drop Shadow” effect.
Step 3: Apply the Drop Shadow Effect to Your Image
- Click and drag the “Drop Shadow” effect from the Effects Library onto your PNG image in the timeline.
- Once applied, you will notice a subtle shadow appearing around your image.
Step 4: Edit Drop Shadow Settings in the Inspector Panel
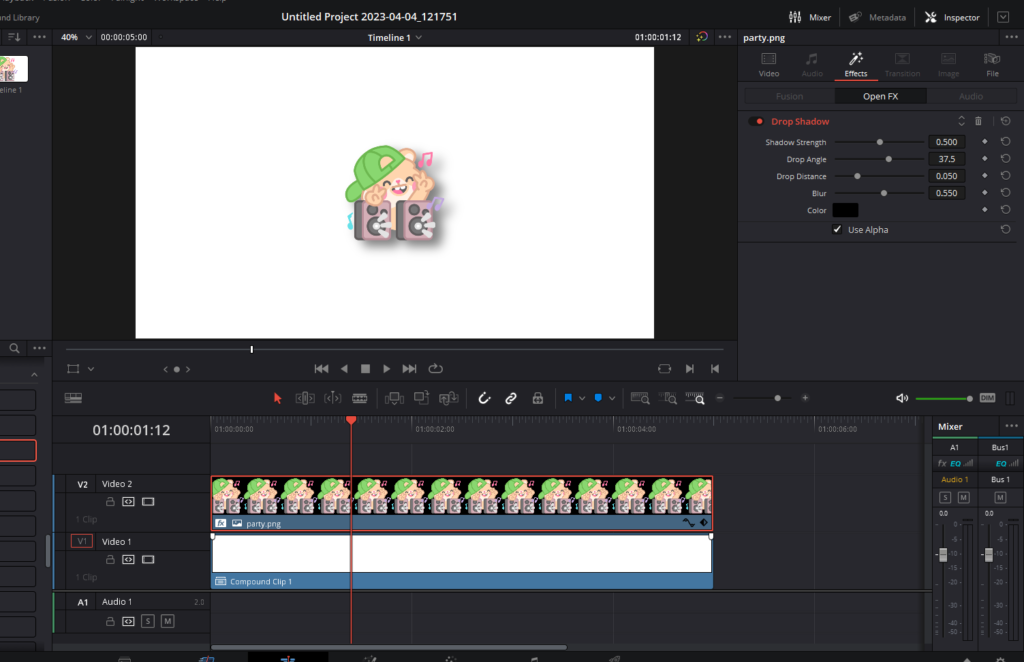
- Click on the png image in the timeline to select it.
- Head over to the Inspector panel, located in the top right corner of the screen.
- Click on the “Effects” tab to reveal the settings for the drop shadow effect.
- Customize the appearance of your drop shadow by adjusting the following parameters:
- Shadow Strength: This parameter controls the opacity of the drop shadow. Increase the shadow strength to make the shadow more visible. The closer the value is to 1.0, the less transparent the shadow will be. Experiment with different values to find the perfect balance between visibility and subtlety.
- Blur: This parameter controls the softness or sharpness of the drop shadow’s edges. Lower the blur value to make the shadow a more direct copy of the original image, giving it a sharper and more distinct appearance. Alternatively, increase the blur value to create a softer, more diffused shadow that blends more seamlessly with the background.
- Drop Distance: This parameter controls how far the shadow is cast from the original image. Adjust the distance value to change the perceived depth of the drop shadow effect. A smaller distance will create a more subtle shadow, while a larger distance will create a more dramatic, three-dimensional effect.
- Drop Angle: This parameter allows you to control the direction in which the shadow is cast. Adjust the angle value to change the position of the shadow relative to the original image. This can help you create a more consistent lighting effect across your entire project, especially when you have multiple elements with drop shadows.
With these simple steps, you can effortlessly add and customize drop shadows to your PNG images in Davinci Resolve, giving your graphics a professional and polished look that enhances the overall visual appeal of your project.
Adding Drop Shadows to Text in Davinci Resolve
Enhancing the appearance of text in Davinci Resolve is easy with the help of drop shadows. This guide will walk you through the process of adding drop shadows to your text on the Edit page.
Step 1: Add Text to Your Timeline
- Click on the Effects button on the top left corner, and click on the “Titles” category.
- Locate the “Text+” title, which is easily customizable directly within the timeline.
- Drag and drop the “Text+” title onto your timeline on video track 2 to super impose it on the background.
Step 2: Customize Text Settings

- Click on the Text+ title in the timeline to select it.
- In the Inspector panel on the right of the viewer, modify the text settings as desired. For example, you can change the font, adjust the size, and tweak other settings to make the text stand out.
Step 3: Add Drop Shadow to Text
To add a drop shadow to your text, you have two options:
Option 1: Use the OpenFX Stylize Effect
- In the Effects, navigate to the “Open FX” section and find “Drop Shadow”.
- Drag and drop the “Drop Shadow” effect onto your Text+ clip in the timeline.
Option 2: Utilize Advanced Settings with Text+ Shading
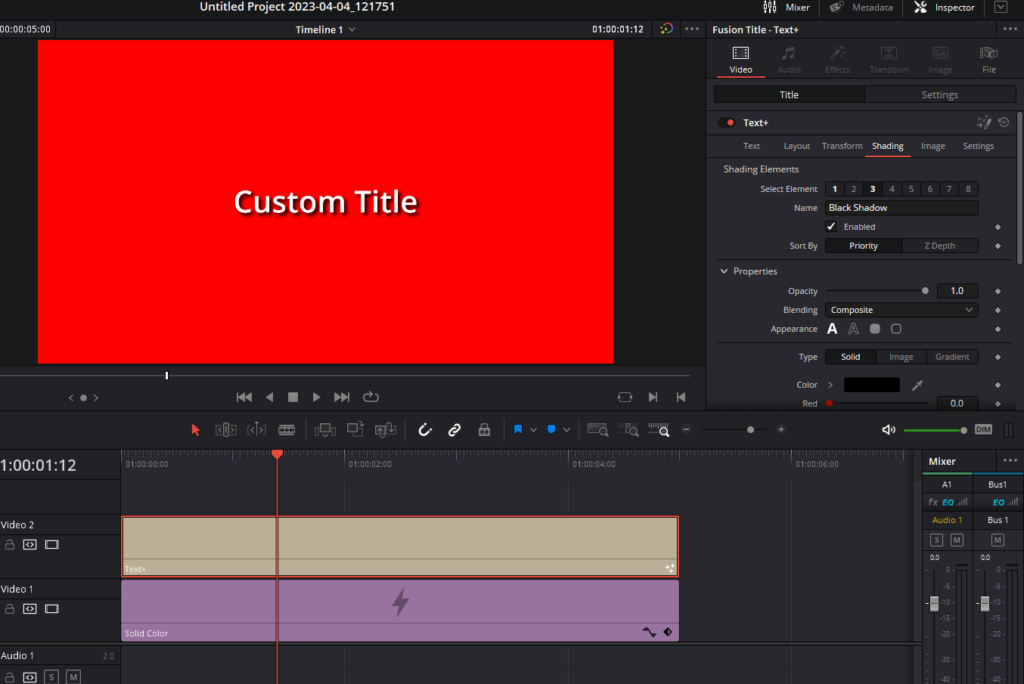
- With the Text+ title selected, go to the Inspector panel.
- Click on the “Shading” section to expand it.
- Change “Select Element” from 1 to 3, and enable the “Black Shadow” option.
Step 4: Customize Drop Shadow Settings
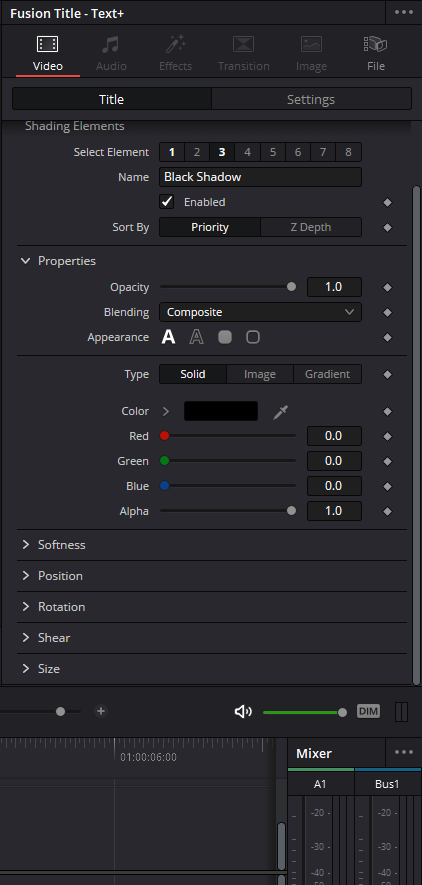
When using the “Shading” option with Text+, you have access to more advanced settings:
- Softness: Adjust the X and Y values to control the blurriness of the shadow. Lower values create a sharper shadow, while higher values result in a softer, more diffused effect.
- Offset: Modify the X and Y offset values to change the position of the shadow relative to the original text. Typically, drop shadows are cast down and to the right.
- Rotation and Shear: These less commonly used settings allow you to rotate the shadow or create a slanted appearance with the Shear option.
- Size: Adjust the size of the drop shadow if you want it to be larger or smaller than the original text.
By following these steps, you can quickly and easily add drop shadows to your text in Davinci Resolve, enhancing the overall appearance and readability of your titles and captions.
Adding Drop Shadows to Fusion Titles in Davinci Resolve: A Comprehensive Guide
Drop shadows are an effective way to add depth and dimension to your Fusion titles in Davinci Resolve. In this section, you’ll learn how to add and customize drop shadows for Fusion titles, giving them a more polished and professional appearance.
Step 1: Add a Fusion Title to Your Timeline
- Firstly on the edit page of Davinci Resolve click on the Effects button on the top left corner, click on the “Titles” category.
- Scroll down to the “Fusion Titles” section and select a title that you’d like to use.
- Drag and drop the chosen Fusion title onto your timeline.
Step 2: Access the Fusion Page
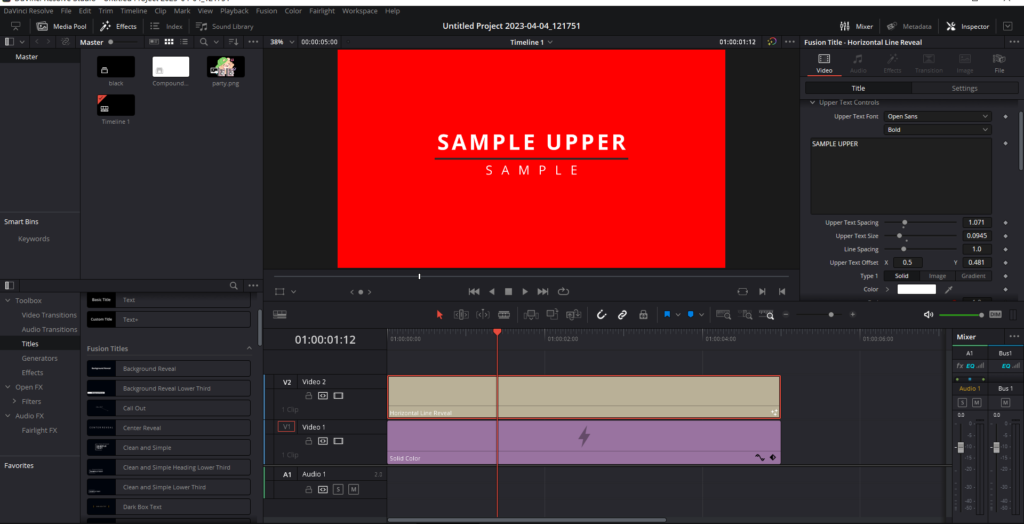
- Click on the Fusion title in the timeline to select it.
- In the inspector panel on the right, click on the wand-looking icon to jump to the Fusion page.
Step 3: Explore the Fusion Title’s Node Group
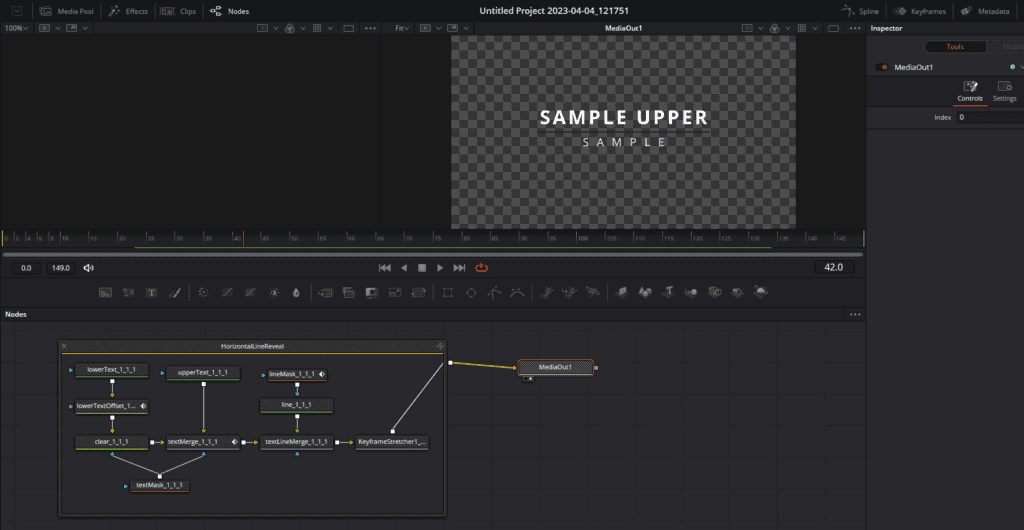
- Double-click on the node group representing the Fusion title (e.g., “Horizontal Line Reveal”) to reveal the individual nodes that create the title effect.
Step 4: Add Drop Shadows to Text Nodes
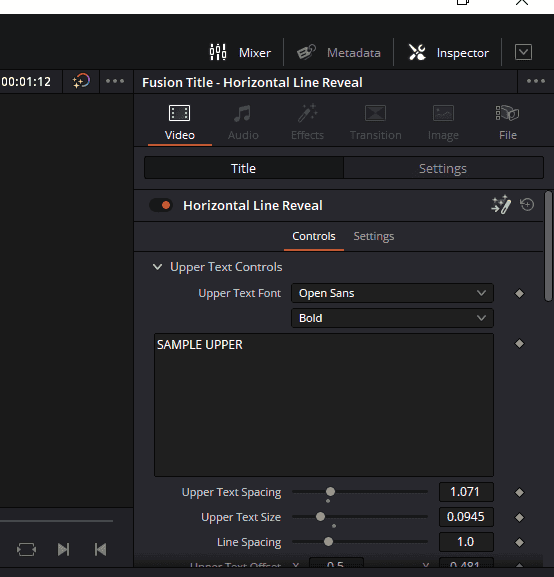
- Locate the “Text+” nodes within the node group, which represent the different text elements of the title.
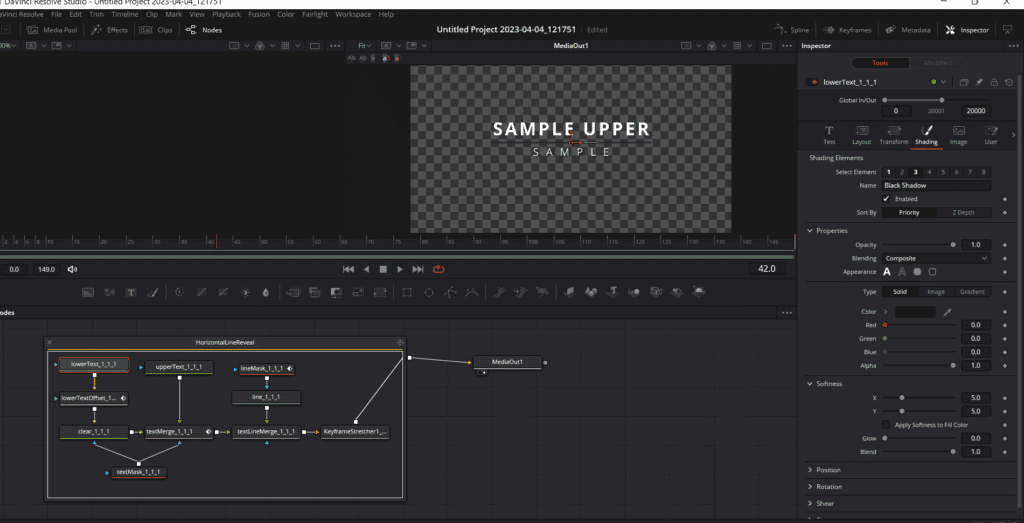
- Click on a “Text+” node to select it.
- In the Inspector panel, double-click on the node’s name if you don’t see all the settings.
- Navigate to the “Shading” section and change “Select Element” from 1 to 3 to access the default “Black Shadow” shading element. Enable it.
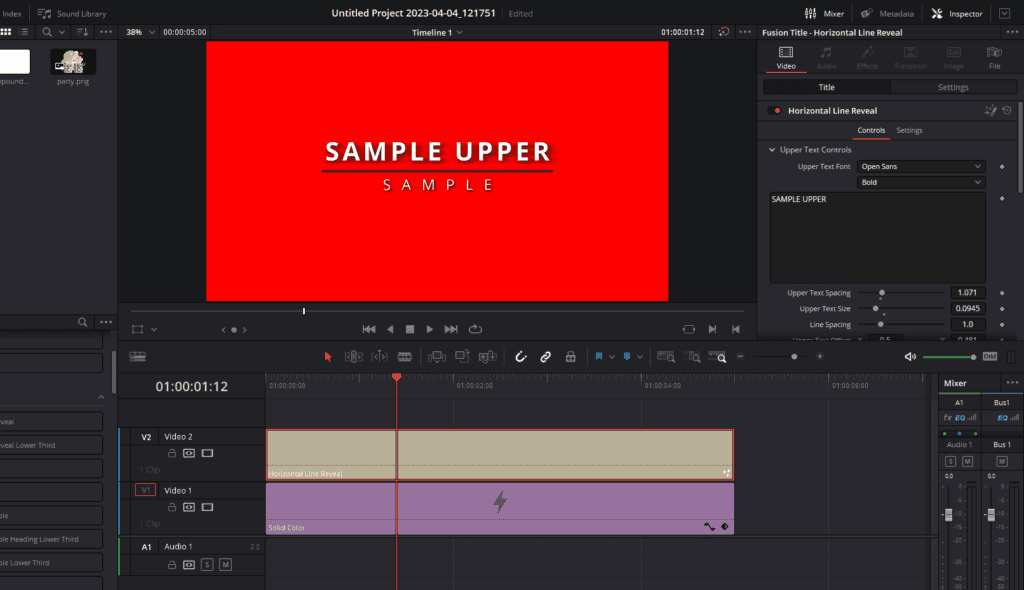
Step 5: Customize Drop Shadow Settings
With the “Black Shadow” shading element enabled, you can now customize the drop shadow settings for each text element:
- Softness: Adjust the X and Y values to control the blurriness of the shadow. Lower values create a sharper shadow, while higher values result in a softer, more diffused effect.
- Position: Modify the X and Y offset values to change the position of the shadow relative to the original text. Experiment with different positions to find the most visually appealing result.
- Glow: Adjust the glow setting to expand the shadow, making it pop out further. This can help your text stand out more, but be cautious not to overdo it.
Repeat these steps for each “Text+” node in the Fusion title to create and customize drop shadows for all text elements.
Step 6: Return to the Edit Page
Once you have finished customizing the drop shadows, click on the “Edit” button in the toolbar at the bottom to return to the Edit page and view the updated Fusion title in your timeline.
Adding and Customizing Drop Shadows to Multiple Text Elements in Davinci Resolve
In Davinci Resolve, you can easily add drop shadows to multiple text elements within a Fusion title.
Method 1: Using Shading on Individual Text Nodes in the Fusion Page
- In the inspector panel on the right, click on the wand-looking icon to jump to the Fusion page.
- Double-click on the node group representing the Fusion title (e.g., “Horizontal Line Reveal”). Locate and select the Text+ nodes representing different text elements in the title.
- Add the drop shadow effect as shading on each individual Text+ node, allowing you to customize the drop shadow for each text element separately.
Method 2: Using a Drop Shadow Node in the Fusion Page
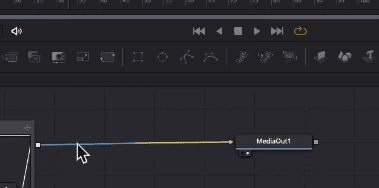
- On the Fusion page, select the node or node group that you want to apply the drop shadow to.
- Right-click on the line in front of the selected node or node group (it should glow blue), then navigate to Add Tool > Resolve FX Stylize > Drop Shadow.
- This creates a Drop Shadow node in the node graph, which you can customize by adjusting the shadow strength, blur, and distance.
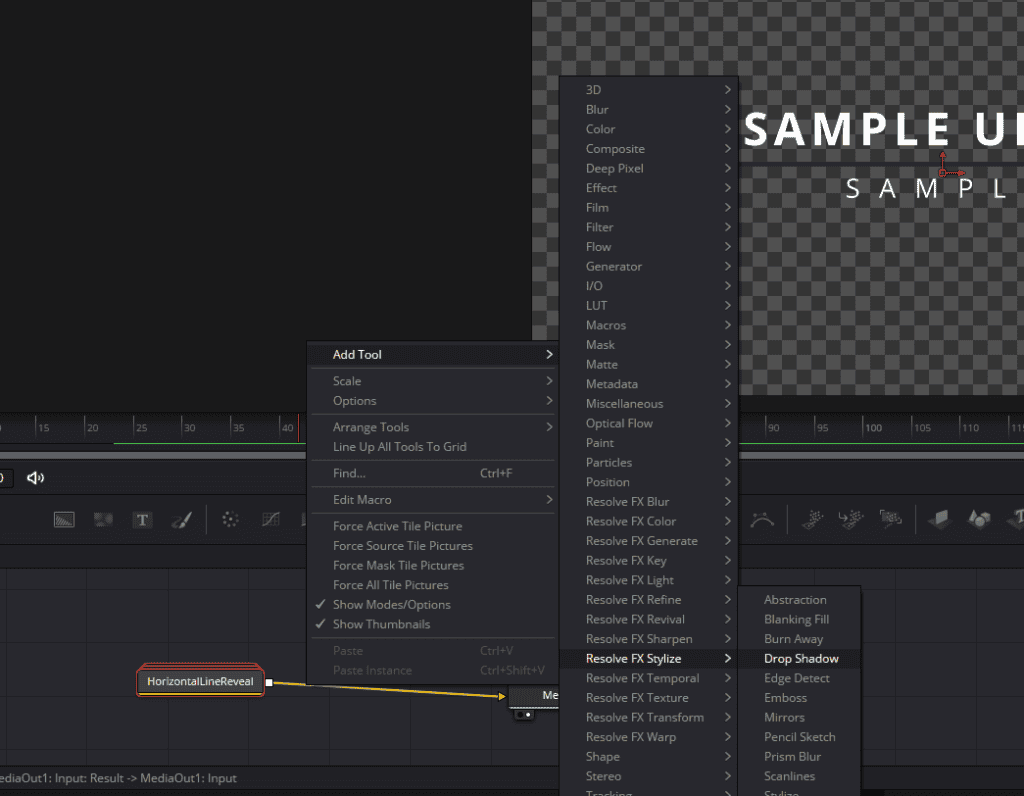
Note: Applying a drop shadow node to a node group will combine all elements within the group, so be aware that this method may not be suitable for every scenario. In some cases, you might want to reorganize the node graph to apply the drop shadow effect only to specific elements.
Method 3: Using ResolveFX Stylize Drop Shadow on the Edit Page
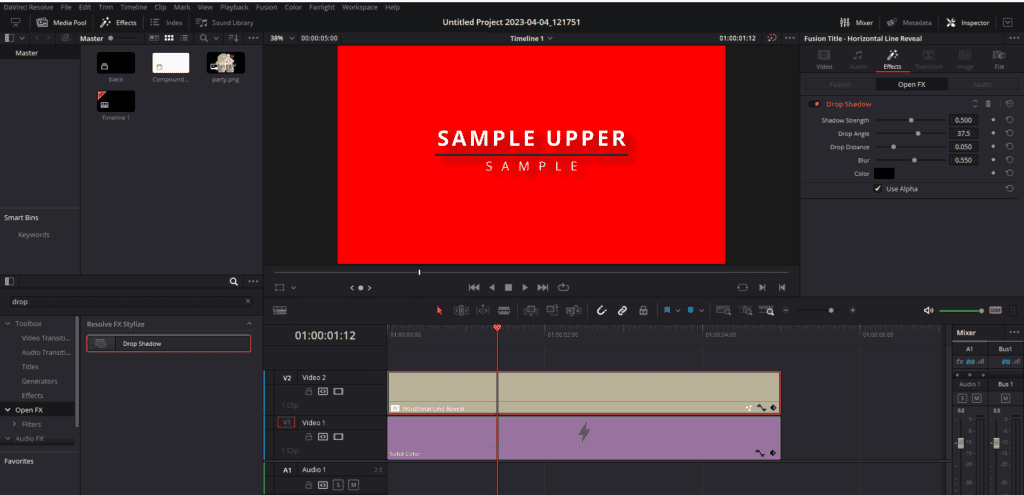
- On the Edit page, click on the fusion title with multiple text elements.
- Locate the Drop Shadow in the Effects.
- Drag and drop the effect onto the title.
- Customize the drop shadow by adjusting the shadow strength, blur, and distance in the Inspector panel.
Keep in mind that using the ResolveFX Stylize Drop Shadow on the Edit page applies the effect to all elements within the title. While this method is more straightforward, it may offer less control compared to applying the effect on individual nodes in the Fusion page.
Understanding Drop Shadows in Video Clips with DaVinci Resolve
When working with DaVinci Resolve, it’s essential to understand how drop shadows behave when applied to different types of media. While drop shadows can be added to logos, PNG images, or text, adding a drop shadow to a video clip can result in a different appearance.
Drop Shadows on Video Clips
When you add a drop shadow to a video clip, you’ll notice that it takes on the shape of the video clip itself, which is usually a rectangular box. This may be useful for creating a picture-in-picture effect, but it won’t provide the same level of customization as when applied to other media types like images or text.
Adjusting Drop Shadow Settings
Even though you can adjust the shadow strength and blur for a video clip’s drop shadow, the shape will always remain a box. Thus, it’s important to remember that applying a drop shadow to a video clip offers limited customization options.
Alternative Solutions
If you’re looking to add shadows to specific elements within a video clip, you would typically need to work with the individual elements during the video’s composition stage. For example, if you’re using a 3D modeling software like Blender, you can render the video clip with shadows applied to each element. However, once the video clip is complete, you’ll be limited to the box-shaped drop shadow in DaVinci Resolve.
Conclusion
In summary, drop shadows in DaVinci Resolve are best suited for use with logos, PNG images, and text. When applied to video clips, the drop shadow will take the form of a box, offering limited customization options.