In today’s world of digital cinematography and post-production, creating eye-catching visual effects is an essential aspect of telling compelling stories. One such effect that has been widely used by filmmakers and editors alike is lens distortion. The ability to manipulate the appearance of an image to create unique and creative results can take your video project to a whole new level.
In this article, we will explore two distinct methods for achieving the lens distortion effect in DaVinci Resolve, a powerful and versatile video editing software. Whether you are a seasoned professional or an aspiring editor, these techniques will provide you with the knowledge and tools to create visually stunning effects that will captivate your audience.
So, buckle up and get ready to add an extra touch of magic to your projects!
1. Creating the Lens Distortion Effect in DaVinci Resolve Using Prism Blur
Lens distortion effects can add a sense of depth and intrigue to your video projects. In this detailed guide, we will walk you through the process of creating a lens distortion effect in DaVinci Resolve, using two nodes and the Prism Blur, inspired by the techniques of acclaimed cinematographer Roger Deakins.
Step 1: Import and Select the Clip
- Launch DaVinci Resolve and navigate to the timeline.
- Import the clip you want to apply the lens distortion effect to and select it.
- For greater control over the intensity of the nodes, go to the Color tab of Davinci Resolve.
Step 2: Apply Tilt Shift Blur to a New Node
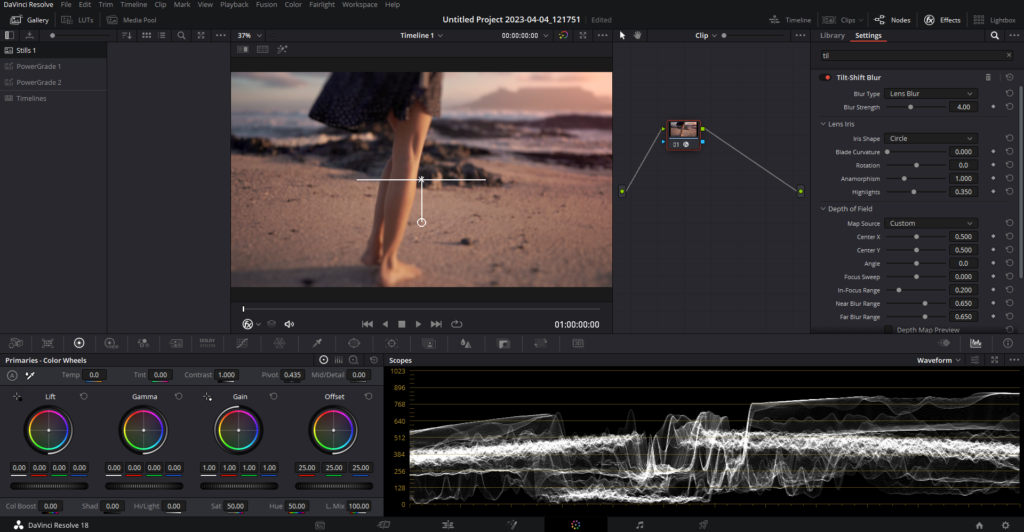
- Open the Effects library by clicking the Effects button in the top right corner and locate the Tilt-Shift Blur effect.
- Apply the Tilt-Shift Blur to a new node.
- Most of the default settings can be left unchanged, but make the following adjustments:
- Change the Iris Shape to “Triangle” for a more visually interesting lens distortion effect.
- Increase the Blade Curvature to 0.500 to round off the edges of the iris shape, making the blur softer and more organic.
- Increase the Anamorphism setting to its maximum value. This setting is typically associated with aspect ratios and anamorphic lenses, but in this case, it will give the blurred area a motion blur-like effect.
- Adjust the Depth of Field settings based on your image’s specific requirements. The Depth of Field controls where the tilt shift falls on your image, and the settings will vary depending on your subject and composition.
- Rotate the angle of the tilt shift blur to make it horizontal instead of vertical. This is necessary for creating the desired spherical blur effect in the next step.
Step 3: Preview the Depth Map
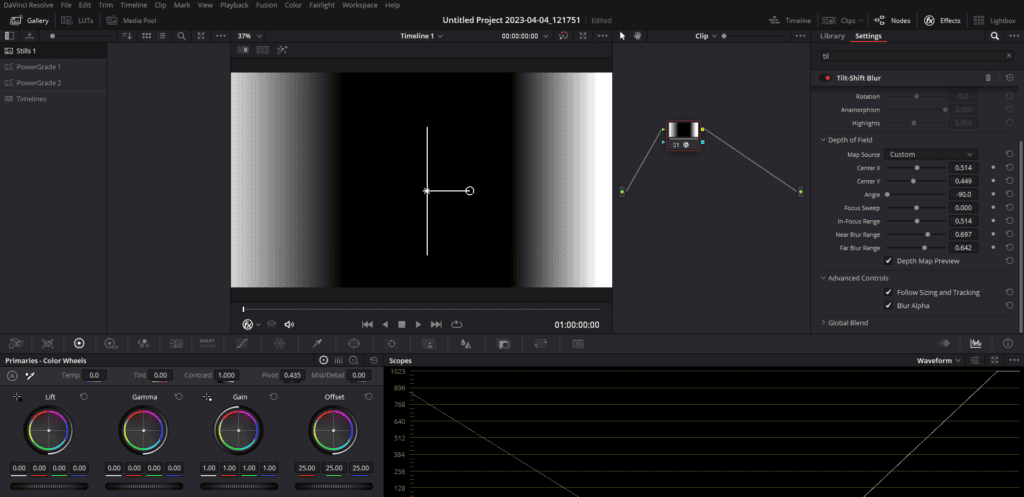
- If you have trouble seeing where the falloff is set, click on “Depth Map Preview” to visualize the effect’s placement.
- Adjust the Depth of Field settings as needed to fine-tune the effect.
Step 4: Create a Spherical Blur with a Second Node
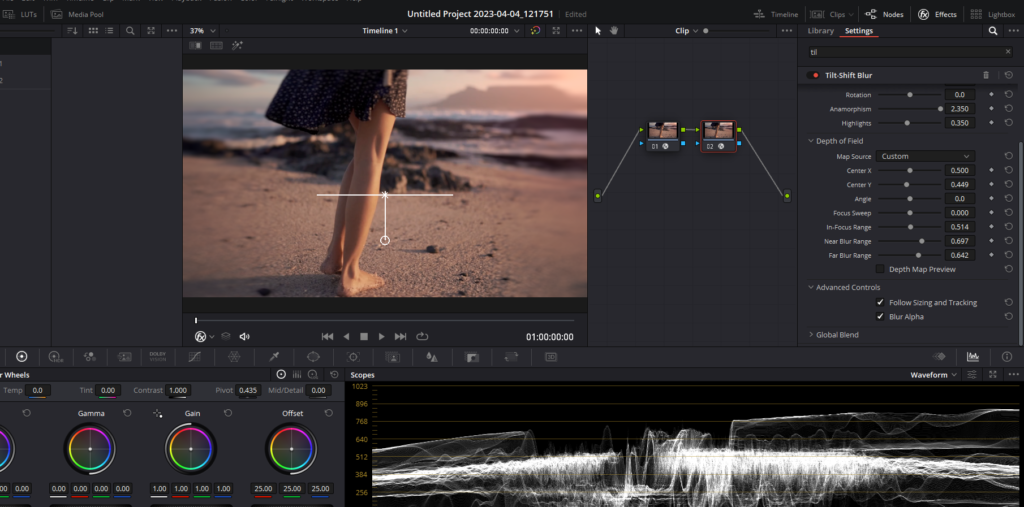
- Add a second node and apply the Tilt Shift Blur effect with the same settings as the first node.
- Position the center axis over the subject horizontally. This will create a spherical blur when combined with the first node, which more closely resembles the lens distortion effect.
Step 5: Add Prism Blur

- Create a new node and again go to the effects library. Apply the Prism Blur effect onto the new node.
- Adjust the settings to achieve the desired result:
- Decrease the Blur Strength to 0, as the two tilt-shift effects are already in place and provide sufficient blurring.
- Adjust the Aberration Distance and Strength according to your creative preferences. Aberration Distance controls the distance between the color channels, while Strength determines the intensity of the effect. These settings can be fine-tuned to achieve the desired level of chromatic aberration in your image.
- Set the Vignette Distance to around 0.300, or to your preference, to avoid an overpowering vignette effect. This setting controls the distance from the center of the image at which the vignette begins to appear.
Step 6: Apply Film Grain
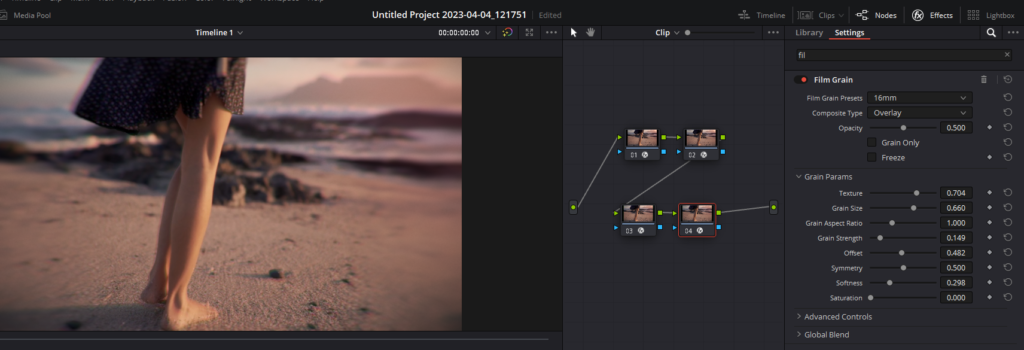
- To complete the effect, add a new node again to the effects library and drag and drop the Film Grain OFX on the new node. This will enhance the overall look and feel of the lens distortion effect, giving it a more cinematic and organic quality.
- Choose a film grain preset or customize the settings to match the look of your project.
While this method may not be an exact replica of the effect achieved through specialized lenses or optical modifications, it offers a close approximation for those without access to such equipment.
Step 7: Fine-tune the Effect
- Review your clip and assess the lens distortion effect. Make any necessary adjustments to the Tilt Shift Blur, Prism Blur, or film grain settings to achieve the desired look.
- Play around with the intensity and placement of the nodes to create unique variations of the effect, which can add depth and interest to different parts of your video project.
2. Creating a Lens Distortion Effect in DaVinci Resolve Using the Fusion Tab
Lens distortion effects can add depth, intrigue, and a unique aesthetic to your video projects. In this detailed guide, we will walk you through the process of creating a lens distortion effect in DaVinci Resolve using the Fusion tab, without needing the Studio version.
Step 1: Prepare the Clip
- Launch DaVinci Resolve and create a new project or open an existing one.
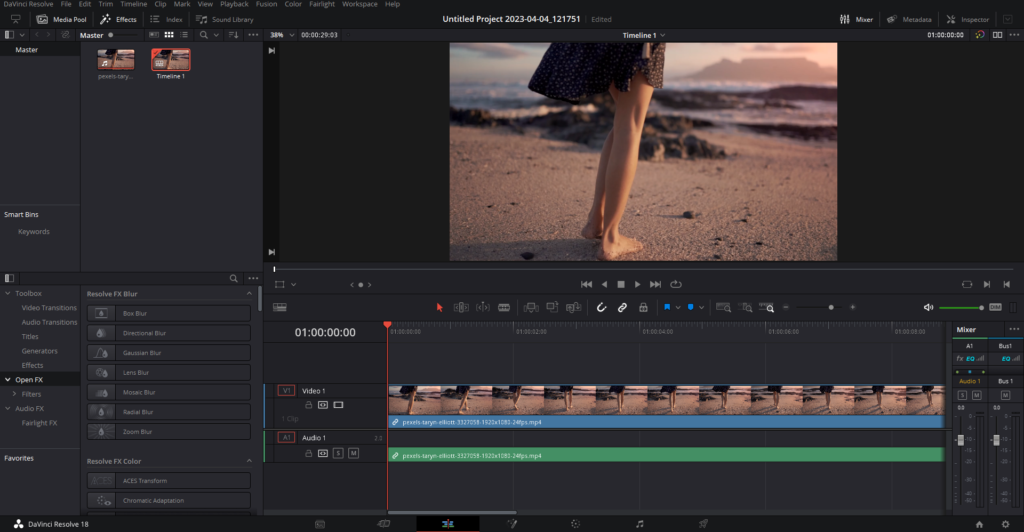
- Navigate to the Edit page using the toolbar at the bottom of the interface.
- Import the clip you want to apply the lens distortion effect to by right-clicking in the Media Pool and selecting “Import Media” or by dragging and dropping the clip directly into the Media Pool.
- Drag the clip from the Media Pool onto the timeline, and make sure it is selected by clicking on it once.
Step 2: Use the Fusion Tab
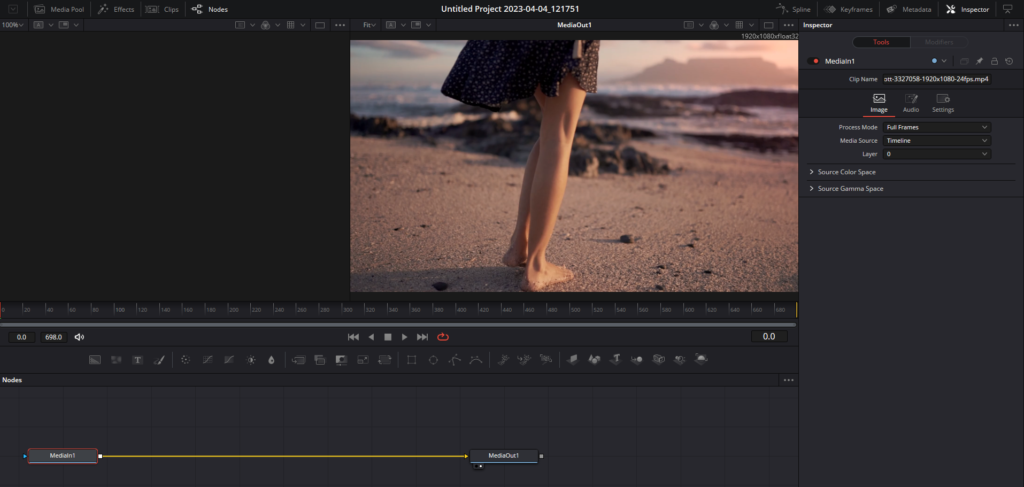
- With the clip selected on the timeline, click on the Fusion tab located at the bottom of the interface, next to the Edit tab. This will bring you to the Fusion page, where you can work with nodes to create visual effects.
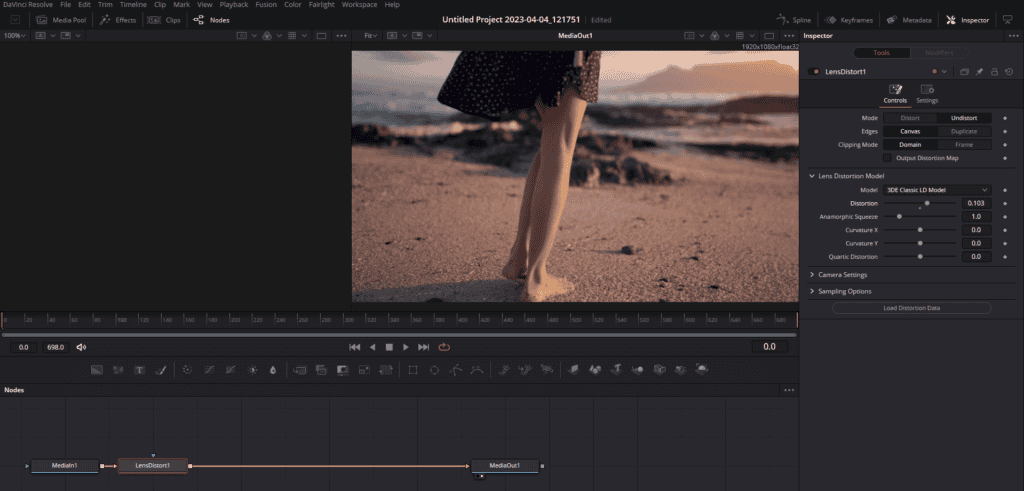
- In the Fusion page, you will see a node tree consisting of MediaIn1 and MediaOut1. MediaIn1 represents the input clip, while MediaOut1 represents the final output after the effects have been applied.
Step 3: Add and Configure the Lens Distortion Node
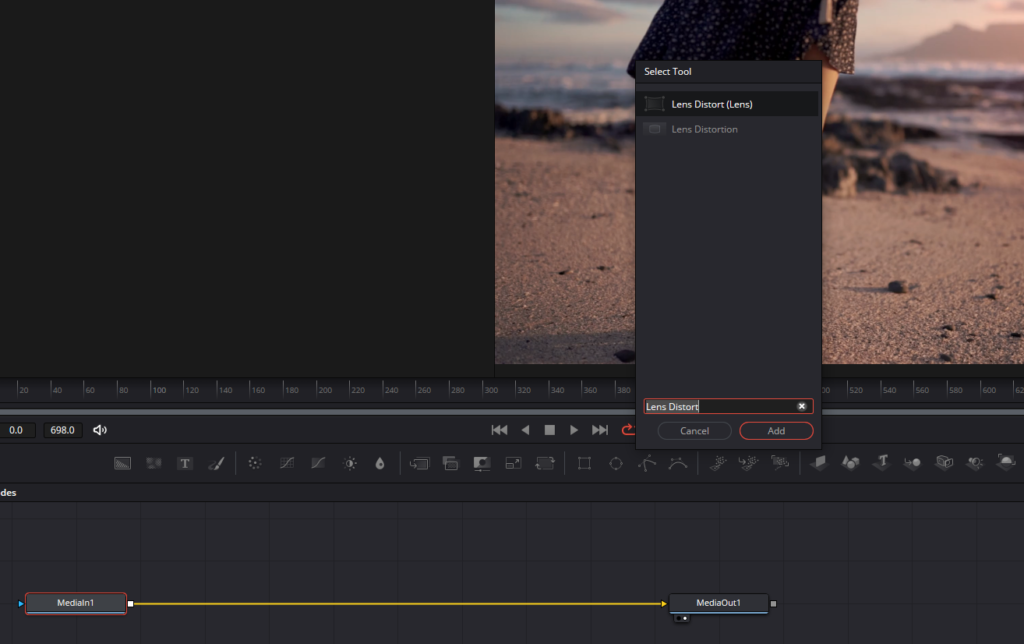
- Click on the MediaIn1 node to select it. Press Shift + Spacebar to open the “Select Tool” menu, which allows you to search for and add nodes to your node tree.
- Type “Lens Distort” in the search field and select the Lens Distort node from the list of results. Press Enter to add the node to your node tree, automatically connecting it between MediaIn1 and MediaOut1.
- With the Lens Distort node selected, navigate to the Inspector tab on the top right of the interface. Double-click on the Lens Distortion Model to expand its settings. Here, you will find various settings for the Lens Distortion effect, including Distortion, Squeeze, X and Y Curves, Aberration, and more.
- Adjust the Distortion setting to introduce the desired level of distortion to your clip. This setting warps the image, simulating the effect of a distorted lens.
- Modify the Anamorphic Squeeze setting to change the aspect ratio of the distortion. This can create a unique, stretched look, similar to that produced by an anamorphic lens.
- Experiment with the X and Y Curves settings to adjust the horizontal and vertical curvature of the distortion effect. These settings can create interesting and unusual visual effects, depending on the values chosen.
Additional Tips: Buying Vintage Lenses for On-Set Lens Distortion Effects
While creating lens distortion effects in post-production can produce impressive results, there’s something uniquely appealing about capturing these effects in-camera using vintage lenses. Here are some tips for purchasing and using vintage lenses to achieve on-set lens distortion effects:
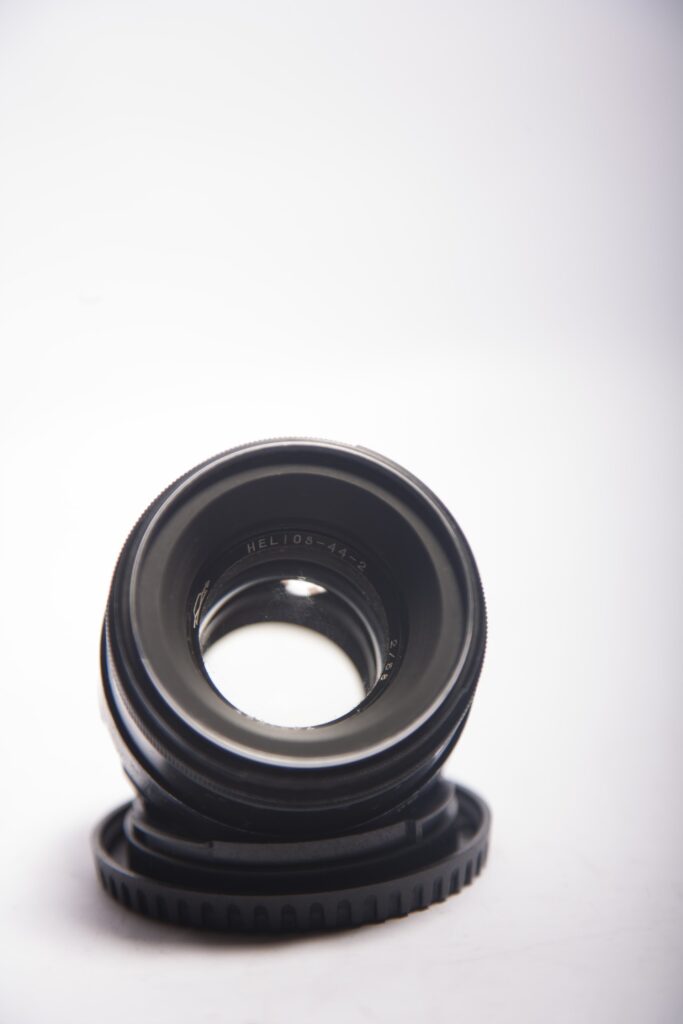
- Research popular vintage lenses: Some well-known vintage lenses, such as Helios 44-2 or Super Takumar 50mm f/1.4, are renowned for their unique distortion and bokeh effects. Research various vintage lenses to determine which ones are known for producing the desired aesthetic.
- Look for affordable options: Visit second-hand stores, flea markets, or online marketplaces like eBay and Craigslist to find affordable vintage lenses. Often, these lenses can be purchased at a fraction of the cost of modern lenses, making them an attractive option for those on a tight budget.
- Check the lens mount: When purchasing a vintage lens, make sure it has a compatible mount for your camera, or look for an adapter that allows you to use the lens with your camera. Adapters are widely available and can enable you to use a variety of vintage lenses with your camera system.
- Inspect the lens condition: When buying a vintage lens, thoroughly inspect its condition. Look for signs of fungus, haze, or scratches on the lens elements, as these can negatively impact image quality. While some minor imperfections may contribute to the unique character of the lens, significant damage may render the lens unusable.
- Combine vintage lenses with post-production techniques: If you’re looking for even more control over the final look of your footage, consider combining the use of vintage lenses with post-production techniques like those discussed earlier in this guide. This can give you the best of both worlds – the organic, in-camera lens distortion from a vintage lens, and the flexibility and precision of digital post-production tools.
We hope you found this information valuable and that it inspires you to experiment with these techniques in your own projects. We appreciate your interest and support, and we look forward to sharing more helpful tips and insights with you in the future. Happy filming!