Welcome back to FilmmakingElements.com. In today’s world of dynamic video editing, the RGB split effect has emerged as a popular technique for creating a distinct and captivating visual style. This effect, which separates the red, green, and blue color channels of an image and offsets them, has been widely used in music videos, advertisements, and even feature films. With the rise of powerful editing software like DaVinci Resolve, achieving this effect has never been more accessible.
In this article, we will guide you through three different methods to create the mesmerizing RGB split effect in DaVinci Resolve, providing you with the tools and knowledge to enhance your video projects with this captivating technique. Whether you’re a seasoned editor or just getting started, we’ve got you covered. Let’s dive in!
Method 1: Creating the RGB Split Effect on DaVinci Resolve’s Edit Page
The first method to create the RGB split effect in DaVinci Resolve focuses on utilizing the Edit page. In this method, we will explore how to apply the RGB split effect directly to your footage on the timeline, using the Prism Blur effect. Follow these steps to enhance your video project with this eye-catching technique.
1. Setting Up Your Workspace
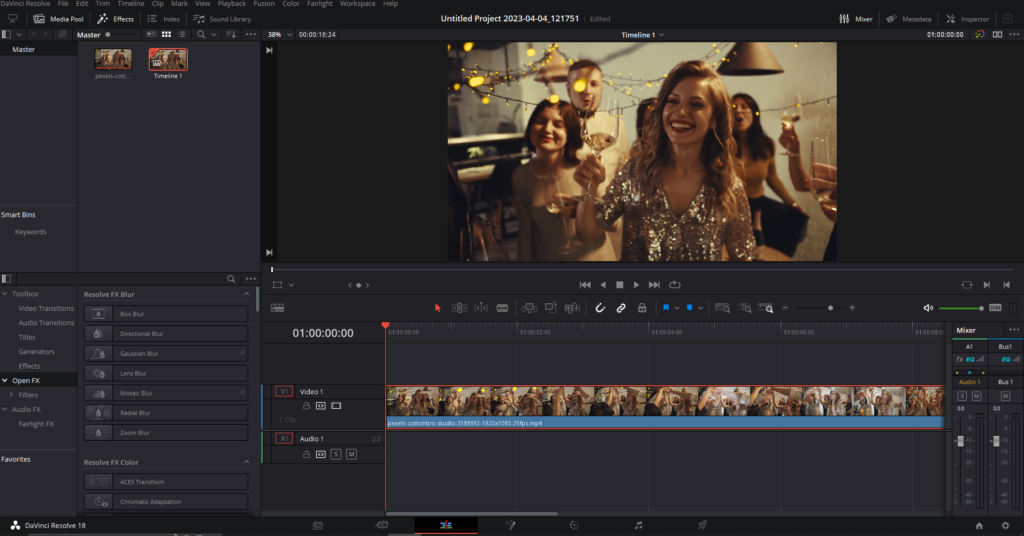
To get started, open DaVinci Resolve and navigate to the Edit tab. Prepare your timeline with clips. Remember that DaVinci Resolve allows you to apply effects directly to your footage or an adjustment clip, providing you with flexibility depending on your project’s needs.
2. Accessing the Effects Library
To apply the RGB split effect, open the Effects Library by clicking on the Effects button located in the top left corner of your workspace. Click on “Open FX” in the left pane and scroll down until you find the Prism Blur effect, which is the key to achieving the desired RGB split look.
3. Applying the Prism Blur Effect

Click on the Prism Blur effect and drag it onto your footage in the timeline. You will immediately notice a blurry RGB effect appearing on your footage. Although the overall footage might seem blurry, you can easily refine the effect to achieve the desired RGB split style.
4. Adjusting the Effect Settings
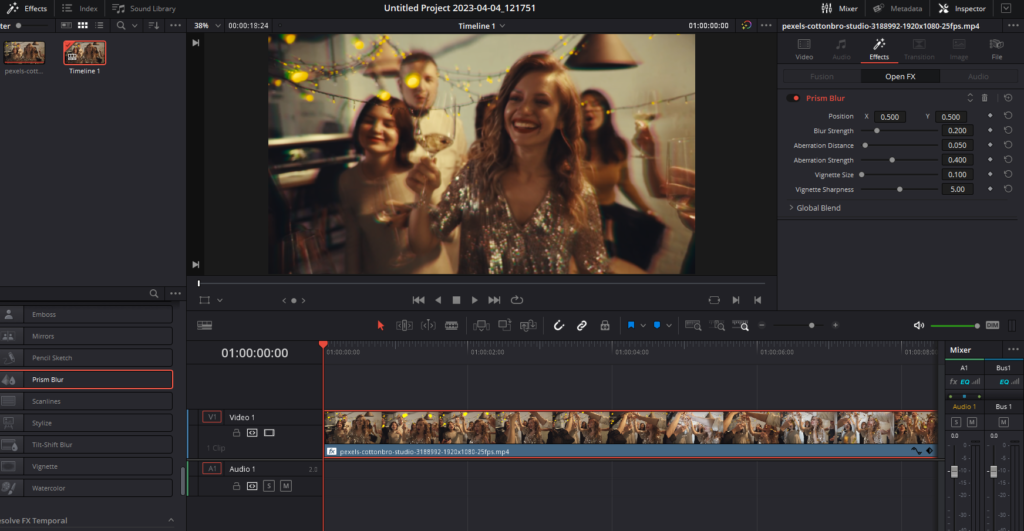
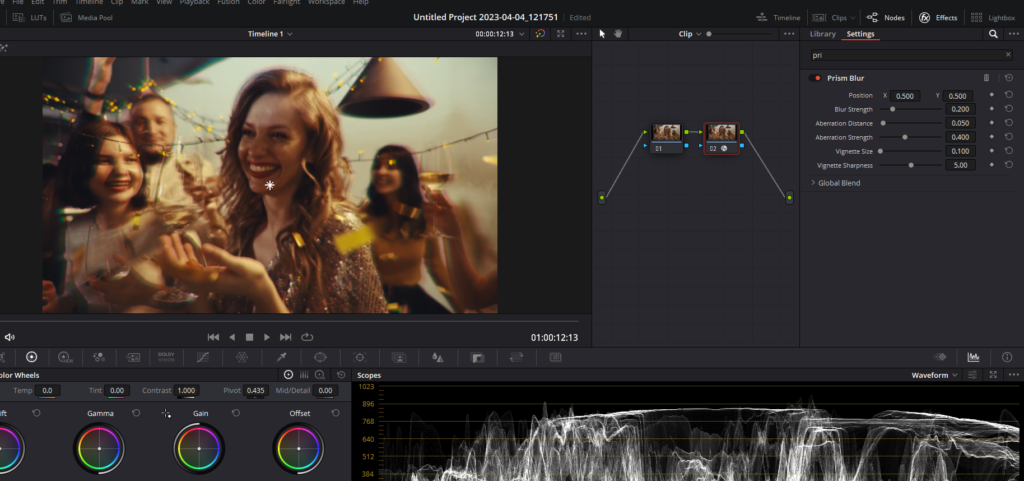
Click on your footage in the timeline, highlighting it. Then, open the Inspector in the top right corner and navigate to the Effects tab. If you don’t see the Prism Blur settings, click on “Prism Blur” to expand the settings underneath. First, change the “Blur Strength” by reducing it to zero, which eliminates any added blur and leaves you with a clean RGB effect.
5. Fine-Tuning the Effect
Two main settings control the appearance of the RGB split effect – “Aberration Distance” and “Aberration Strength.” Adjust the “Aberration Distance” to control the length of the red, green, and blue lines, extending or shortening them as desired. Next, modify the “Aberration Strength” to control the intensity of the aberration effect. Experiment with these settings to achieve the perfect RGB split look for your project.

6. Optional Adjustments
Vignette Size
The “Vignette Size” option adds a vignette to your footage, which can further enhance your project’s visual style. Although not directly related to the RGB split effect, you can adjust this setting if desired.
Position
Additionally, the “Position” setting allows you to control the center of the aberration. By default, the effect radiates from the center of your subject, but you can change the position to move it left, right, up, or down, depending on your creative vision. Double-click on the “Position” setting to revert it back to the default center position.
7. Previewing the Effect
After adjusting the settings to your liking, play your footage to see the results. The final product should display the captivating RGB split effect, with the aberration style adding depth and visual interest to your project.
Method 2: Creating the RGB Split Effect on DaVinci Resolve’s Color Page
By following this second method, you can create a stunning RGB split effect using DaVinci Resolve’s Color page. This approach allows for greater control and customization, providing the option to mask specific areas and keep your subject sharp while the RGB split effect surrounds them. With this detailed guide, you can master this technique and incorporate it into your projects, adding depth and visual interest to your work.
Step 1: Selecting the Right Footage
For this method, choose a piece of footage where you want to apply the RGB split effect while keeping your subject sharp and clean. This technique works well for music videos or projects where you want the aberration effect to surround your subject without affecting their clarity.
Step 2: Navigating to the Color Tab
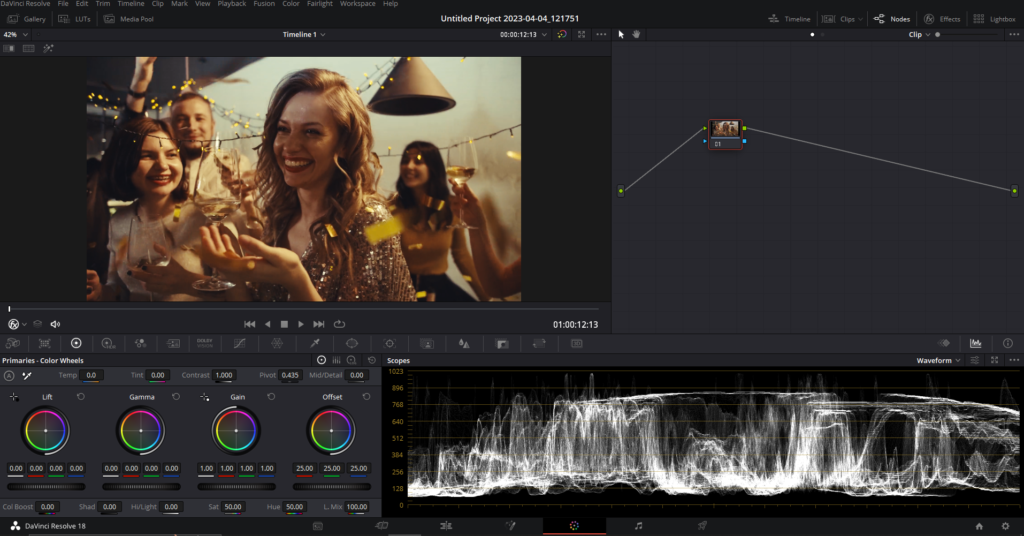
Highlight your chosen footage in the timeline, and then switch to the Color tab within DaVinci Resolve.
Step 3: Working with Nodes
Once in the Color tab, ensure that you’re working on the correct footage. Locate the Nodes section on the right side of your workspace. If the nodes aren’t visible, click on the word “Nodes” in the top right corner to activate them. Select the first node and use the keyboard shortcut “Alt + S” to create a second node. Then, click on the second node.
Step 4: Applying the Prism Blur Effect in the Color Tab
Open the “Effects” tab in the top right corner to access most of the same open effects within the Color tab. Scroll down and drag the Prism Blur effect onto the second node. You will see the same settings as in the Edit tab.
Step 5: Adjusting the Effect Settings
Reduce the blur, increase the aberration distance, and raise the strength of the effect. To control the position of the effect, use the small star within the preview window instead of the position controls. Drag it around to achieve the desired look.
Step 6: Masking with Power Windows
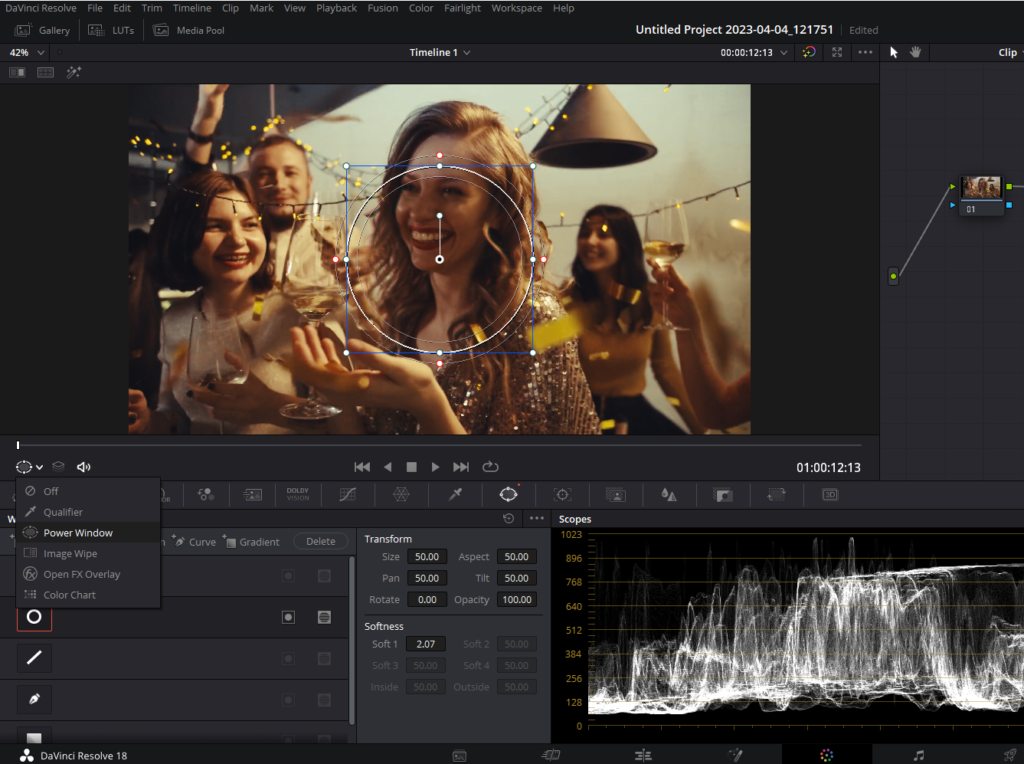
If you want to create a chromatic aberration type effect with RGB split, follow these steps. To clean up specific areas of your clip, select the second node and click on the Window icon in the toolbar at the bottom of your workspace. Choose a circle shape to create a power window. If you don’t see the controls on your preview, change the dropdown option in the bottom left corner of the preview screen from “Open FX Overlay” to “Power Window.”
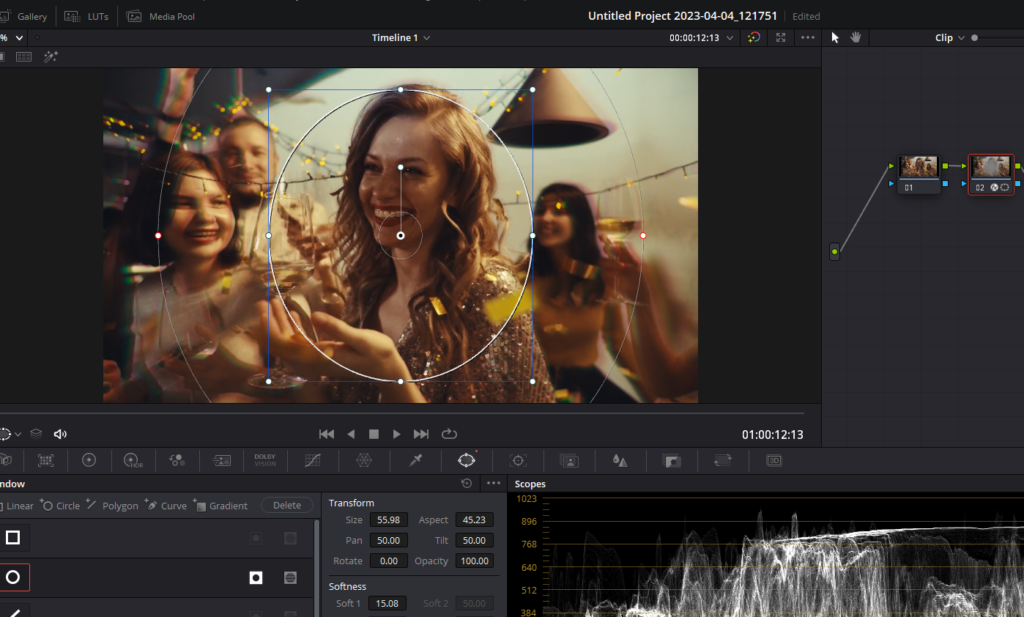
Step 7: Inverting the Power Window

By default, the area within the circle will have the aberration effect. To invert this, click on the Invert icon, in the window tab on the right of the circle mask you just created causing the effect to apply outside the circle instead. Position the circle over your subject and adjust the edges to create a smooth blend.
Step 8: Previewing the Effect
To preview the effect without the power window lines, change the dropdown option beneath the preview window from “Power Window” to “Off.” Play your footage to see the results, which should display a sharp subject with the RGB split effect surrounding them.
Step 9: Finalizing the Effect
Return to the Edit tab to review the final effect. The RGB split effect should now be applied to the selected footage, creating a visually appealing result with a sharp subject and the desired aberration effect surrounding them.
Method 3: Creating the RGB Split Effect on DaVinci Resolve’s Fusion Page
With this third method, you can create an RGB split effect using DaVinci Resolve’s Fusion page while also adding unique and creative touches to your video. By splitting and recombining the color channels, you gain control over each channel individually, allowing for a wide range of customization options.
Step 1: Adding Your Clip to the Timeline
Select the clip you want to adjust and drag it onto the timeline. Once your clip is in place, navigate to the Fusion page within DaVinci Resolve.
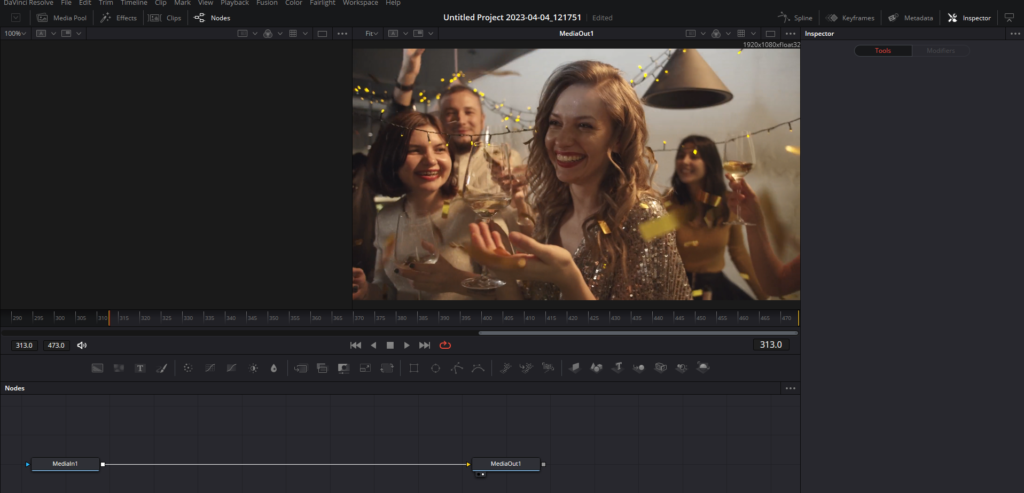
Step 2: Working with Channel Boolean Nodes
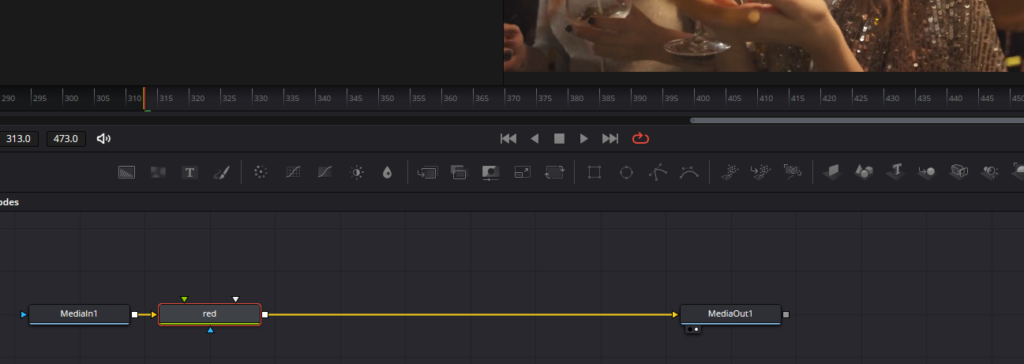
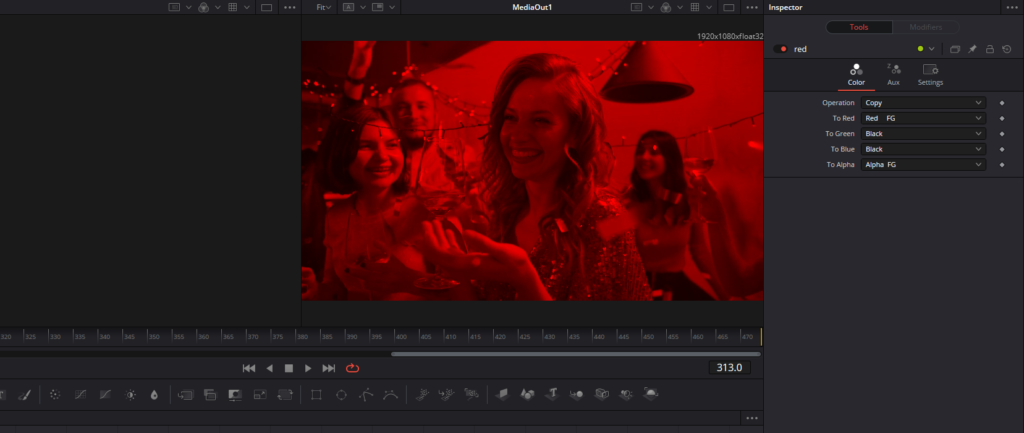
In the Fusion page, select the MediaIn1 node and press Shift + Space, and search Channel Booleans node, and click on Add. Select the Channel Booleans node, press F2, and rename it to “Red.” Click on the node and In the Inspector panel on the right of the viewer, change the “To Green” and “To Blue” values to “Black”. The video should now appear red.
Step 3: Creating Green and Blue Nodes
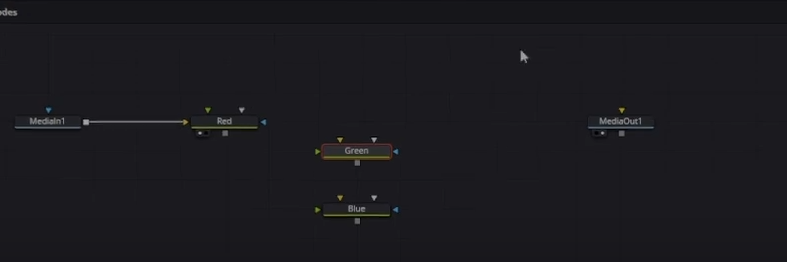
Add two more “Channel Booleans” nodes and rename them “Green” and “Blue.” Connect your MediaIn node to these nodes. For the Green node, change the red and blue values to black. For the Blue node, change the red and green values to black. You have now successfully split the color channels.
Step 4: Combining the Split Channels
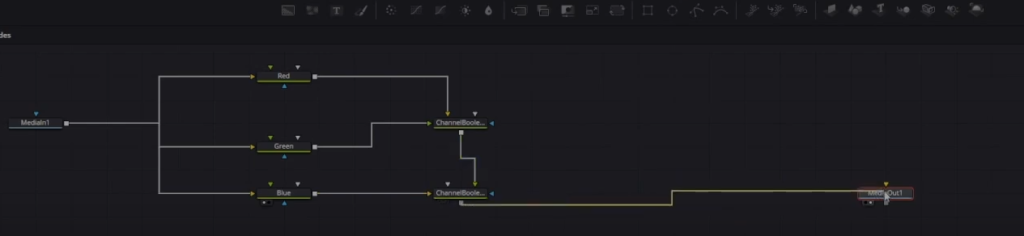
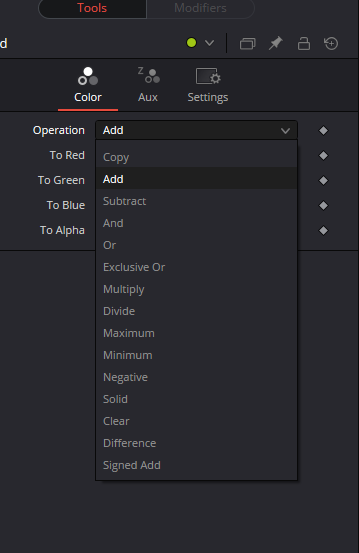
Add two more Boolean nodes and connect the output of the Red, Green, and Blue Boolean nodes into the two new Boolean nodes. Then, join them together and connect them to the MediaOut1 node. On the two new Boolean nodes, change the operation to “Add.” Although the output of the video may not appear different, this setup allows for more creative control.
Step 5: Modifying the Color Channels
To create a unique effect, select one of the Red, Green, or Blue Channel Boolean nodes that you want to affect. Press Shift + Space and add a Transform node.
Step 6: Adding a Perturb Modifier
With the Transform node selected, go to the Center position, right-click, and select Modify with> Perturb. Change the edges to “Mirror.” Now, navigate to the Modifiers tab and reduce the X and Y scale values to 0.05 or adjust them to your liking. Increase the speed to around 8.0 and adjust the wobble as desired. On playback, you will see the Red channel jumping around, creating a trippy effect.
Step 7: Creating a Color Bleed Effect
To emulate the color bleed effect commonly seen on VHS tapes, delete the Perturb modifier on the Transform node, reset the Center position, and use the Center X value to move the Red channel slightly to the right or left. You can add another Transform node to another channel and shift its position to enhance the effect.
Conclusion
In conclusion, DaVinci Resolve offers various ways to create an RGB split effect, each with its unique advantages and capabilities. By exploring these three methods, you can find the one that best suits your needs and workflow. From the Edit page to the Color page, and finally to the Fusion page, each method provides you with different levels of control and customization. As you experiment with these techniques, you’ll be able to create eye-catching effects for your video projects, such as music videos, gaming content, or any other creative endeavor.
We hope this article has been helpful in guiding you through the process of creating an RGB split effect in DaVinci Resolve. We appreciate you taking the time to read through the tutorial and wish you the best of luck in your future video editing projects. Thank you for joining us, and happy editing!