Welcome back to our blog at FilmmakingElements.com. In this post, we’re set to delve into a topic that’s essential for anyone aiming to gain more control over their audio tracks in post-production. We’re talking about how to keyframe your audio in DaVinci Resolve.
Keyframing your audio is an indispensable technique for anyone aiming for a professional-quality audio output. It allows you to adjust your audio’s volume with precision, controlling how it changes throughout the course of your track. This gives you the ability to increase the volume during the key parts of your film, or to quiet it down when needed, providing a balanced audio landscape that compliments your visual content.
Mastering Audio Adjustment Basics Before Audio Keyframing in DaVinci Resolve
Before venturing into the world of keyframes, it’s crucial to understand the art of adjusting audio in DaVinci Resolve. We have two main methods for adjusting audio levels at our disposal – adjusting audio on a per track basis and on a per clip basis.
1. A Comprehensive Look at Adjusting Audio on a Per Track Basis
In the realm of audio adjustments, tweaking audio on a per track basis translates into modifying the entirety of the audio output for a specific track. This method can be invaluable when aiming for a uniform volume across all clips within a specific track. Let’s delve deeper into this method with a step-by-step guide:
Step 1: Identifying the Track: The first step in this process involves identifying the track you wish to adjust. For instance, let’s consider Audio Track 1 on your project that houses various sound clips.
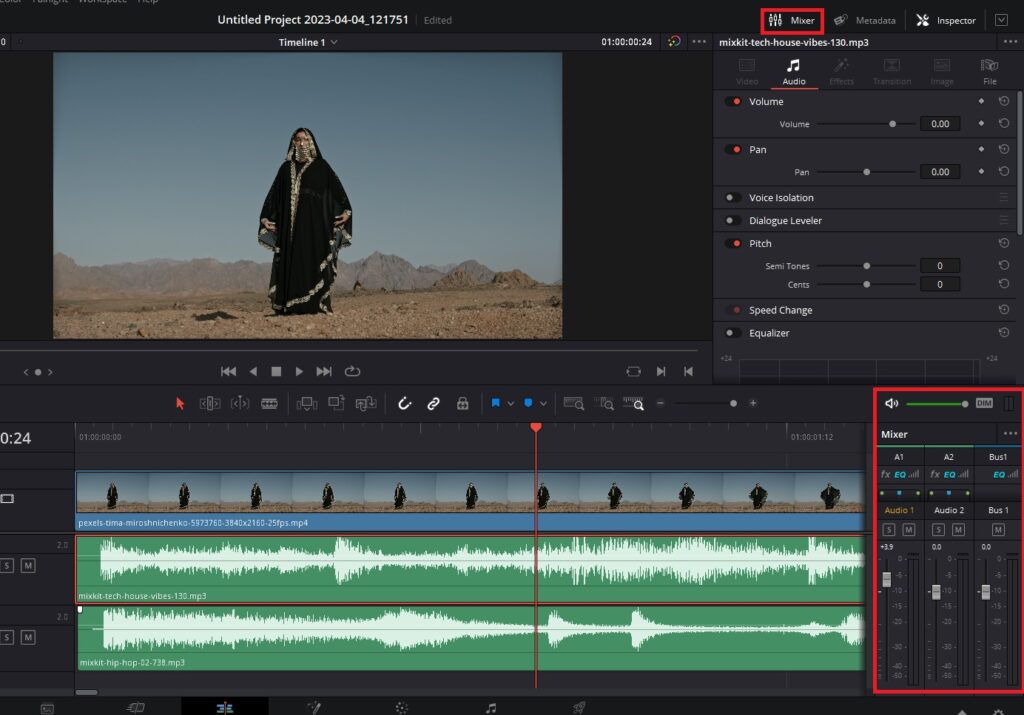
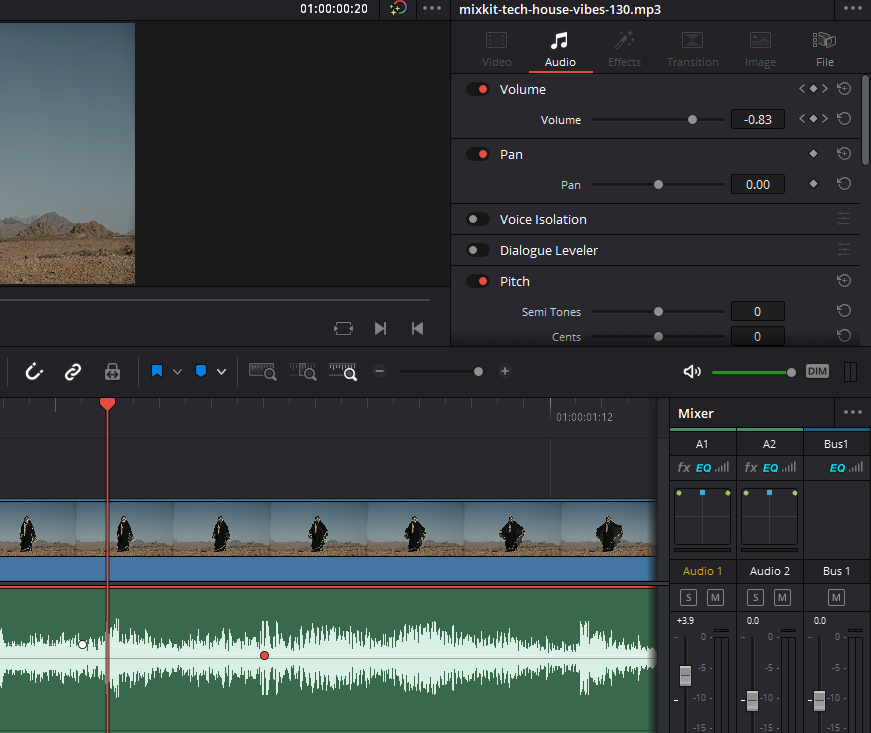
Step 2: Locating the Fader Control: Once you have identified the track, the next step involves clicking on the ‘Mixer’ button on the top right corner. This will open the fader controls on the right of the timeline. If you have selected Audio Track 1, look for the fader control labeled ‘A1’ in the ‘Mixer’ panel on the right.
Step 3: Adjusting the Volume: After locating the fader control, it’s time to adjust the volume. You can do this by moving the fader control upwards to increase the volume or downwards to decrease it. The key point to remember here is that this adjustment will impact every single clip within the chosen track, regardless of the individual volume levels of the clips.
2. Delving into Adjusting Audio on a Per Clip Basis
The method of adjusting audio on a per clip basis involves tweaking the audio of each clip individually, as opposed to affecting the entire track. This method offers you greater flexibility, enabling you to vary the audio levels across different clips for a more personalized touch. Let’s break down the process into simple steps:
Step 1: Choosing the Audio Clip: The process begins by hovering over the center of the audio clip you wish to adjust. You should see double arrows appearing on your screen.
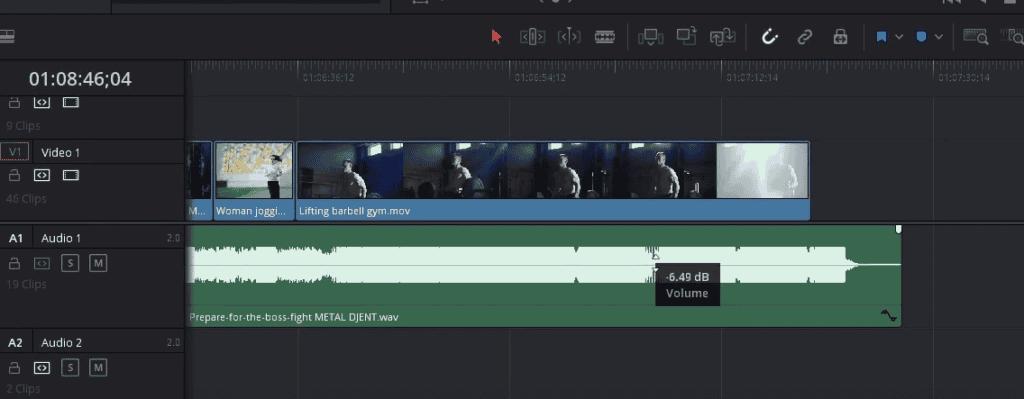
Step 2: Adjusting the Volume: After the double arrows appear, click and drag to adjust the volume of that particular clip. An upward movement increases the volume, while a downward movement decreases it.
Step 3: Alternative Adjustment Method: DaVinci Resolve also offers an alternative method to adjust the volume. You can select the audio clip, navigate to your inspector on the top-right corner, find the ‘Volume’ slider, adjust the volume from there.

Step 4: Adjusting Multiple Clips: If you wish to adjust the volume of multiple clips simultaneously, DaVinci Resolve has got you covered. You simply have to select all the clips you want to adjust by clicking and dragging to select them and head to the Inspector panel on the top-right and using the ‘Volume’ slider.
Implementing Keyframes To Audio In DaVinci Resolve: A Detailed Guide
After understanding the basic methods of adjusting audio levels, we now move on to a more advanced technique – adding keyframes. Keyframes offer dynamic control over audio levels, allowing you to adjust the volume at different points throughout a track.
Adding Keyframes in DaVinci Resolve
Adding keyframes to your audio track is a simple process in DaVinci Resolve. Here are the steps to do it:
Step 1: Adding the First Keyframe: Hover your mouse over the center line of the audio waveform on your selected clip. Hold down the “Alt” key and click. A point, or keyframe, should appear on the line.
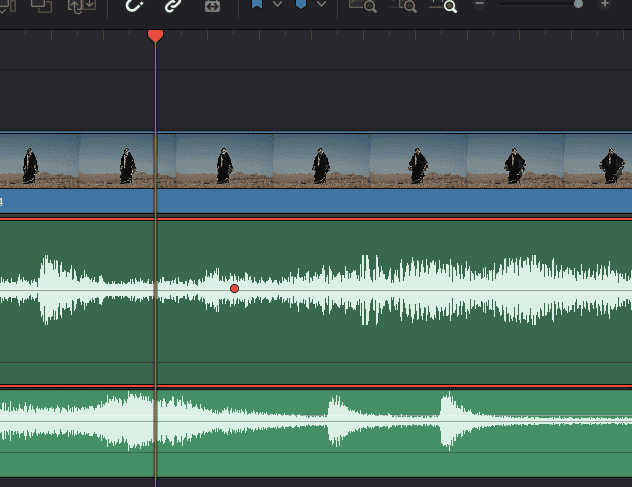
Step 2: Understanding the Importance of Multiple Keyframes: Keep in mind, a single keyframe won’t affect any changes to your audio. A keyframe essentially marks a point where a change begins or ends. So, to make any discernable adjustments, you’ll need at least two keyframes. To add a second keyframe, move to another point on the timeline, hold down “Alt”, and click again.
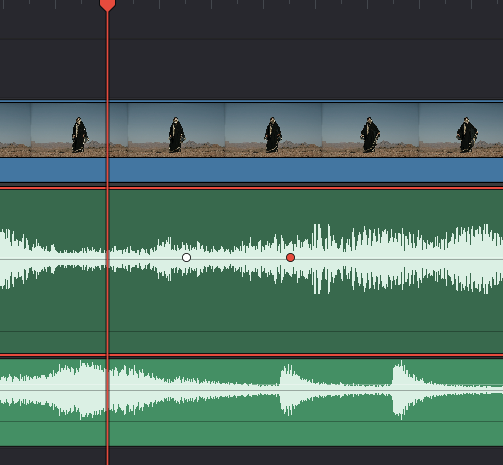
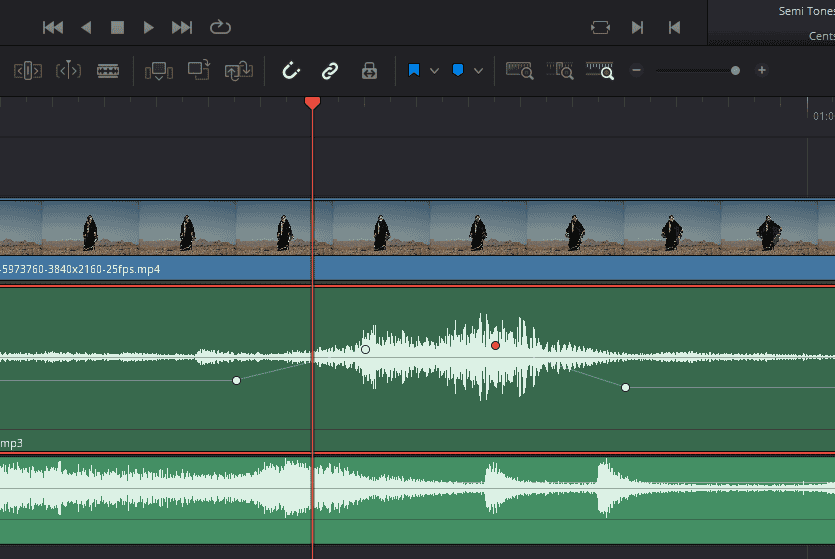
Step 3: Adjusting Volume with Keyframes: Once you’ve added two keyframes, you can begin to adjust the volume between them. Click and drag one keyframe down to decrease the volume, or up to increase it.
Step 4: Adding More Keyframes: If you want to create a more complex volume change, you can add additional keyframes. Hold down “Alt”, click to add a third keyframe, and adjust the volume level as desired. This can allow your audio to go from loud, to soft, back to loud again, creating a dynamic audio experience for your viewers.
The beauty of keyframes lies in their simplicity and versatility. By adding keyframes and adjusting the volume between them, you have precise control over your audio levels, enabling you to create a professional, high-quality audio track to accompany your visuals.
Applying Audio Keyframes in Practical Scenarios: Balancing Dialogue and Background Music
Having explored the technical aspect of keyframes, let’s now apply this knowledge in a practical, real-world scenario – balancing the dialogue and background music in a video project. This could be any project, like a short film, a commercial, a vlog, or a podcast.
Scenario: A Video Project with Dialogue and Background Music
Imagine you’re working on a video that has both dialogue and background music. While the music adds a certain ambience and mood to the project, it should not overshadow the dialogue. The audience should be able to hear the spoken words clearly. The challenge is to strike a balance between enhancing the mood with music and ensuring the dialogue’s clarity. This is where keyframes come into play.
Step 1: Identifying Background Music Start and End Points: Keep the dialogue on the different track and background music on the other. Begin by pinpointing where the dialogue starts and ends. This is important because these points will be crucial for setting up your keyframes. We will be lowering our background music when the dialogue comes with the use of keyframing audio.
Step 2: Adding Initial Keyframes: With the points identified on the background music track, hold down the “Alt” key and click on the track at the start and end of the dialogue to create your first two keyframes.
Step 3: Adding Additional Keyframes: Next, you’ll want the music volume to increase again once the dialogue ends. So add another keyframe towards the end of the dialogue and one more at the point where you want the volume to start rising again.
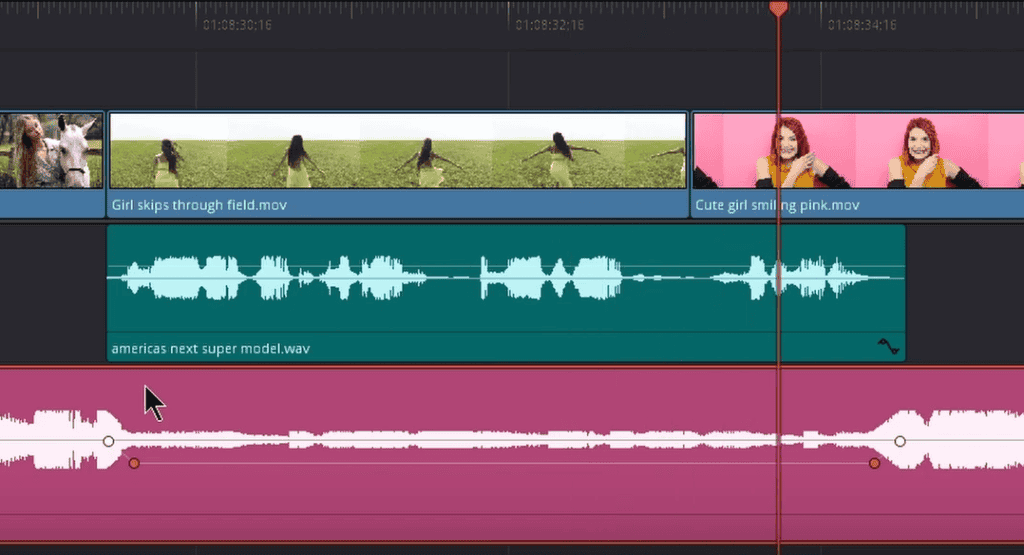
Step 4: Adjusting Keyframes: Now that you have four keyframes (two at the start and end of the dialogue, and two marking where you want the music to get louder again), grab the section in the middle of these keyframes and drag it down to lower the music volume during the dialogue. Adjust to a level where the dialogue can be heard clearly over the music.
Step 5: Fine-tuning Transitions: After the initial adjustment, if the transition from the dialogue to the louder music feels too abrupt, you can modify it. Simply grab the keyframes marking the end of the dialogue and the point where the music starts getting louder and stretch them apart to make the transition smoother.
Step 6: Replicating for Other Sections: Repeat this process for any other parts of your project where dialogue needs to be heard over the background music. Add keyframes at the start and end of the dialogue, adjust the music volume, and fine-tune the transitions as necessary.
Enhancing Dialogue with Rising Background Music: A Practical Keyframes Application
In many video projects, there may be instances where you want the background music to gradually increase in volume while dialogue is ongoing, perhaps leading up to a climactic scene or the end of the video. Here’s how you can achieve this effect using keyframes in DaVinci Resolve.
Scenario: Dialogue with Rising Background Music
Let’s consider a generic scenario where you have dialogue and a music track that needs to rise in volume towards the end of the video, perhaps leading up to a logo outro or a dramatic scene.
Step 1: Adjusting Overall Music Volume: Initially, you might find that the music volume is overpowering the dialogue. The first step is to adjust the overall volume of the music track. You can do this either directly on the track or using the inspector, whichever method you prefer. This step ensures the dialogue is clearly audible over the music.
Step 2: Identifying Rise Point: The next step is to identify where you want the music volume to start rising. This point could coincide with a dramatic moment in the video or the start of the logo outro.
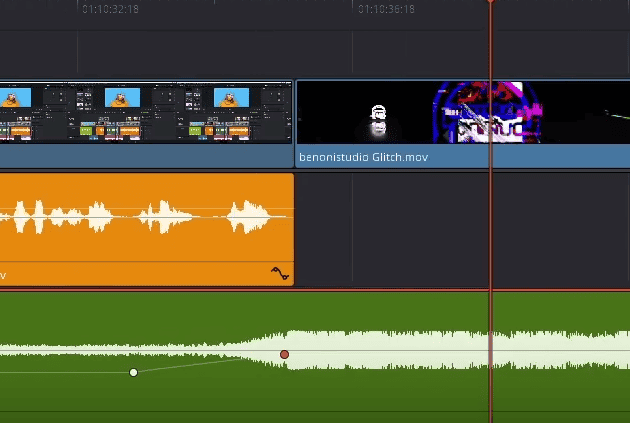
Step 3: Adding Keyframes: Once you’ve identified the point where the volume should start increasing, hold down the “Alt” key and click on the track at this point to add a keyframe. Add another keyframe at the point where the dialogue ends.
Step 4: Adjusting Volume Rise with Keyframes: Now, grab the second keyframe (the one at the end of the dialogue) and pull it upwards to increase the music volume. Depending on the desired effect, you might want to increase the volume to around minus 9 or minus 10 decibels. With these two keyframes in place, your music volume will gradually increase while the dialogue is ongoing.
Additional Techniques for Keyframe Editing in DaVinci Resolve: Inspector and Fairlight
While we’ve focused primarily on the direct manipulation of keyframes on audio tracks, DaVinci Resolve offers a wealth of other tools and interfaces to enhance your control over audio levels. Two notable examples include the Inspector tool and the Fairlight workspace. Both offer unique perspectives and controls for managing keyframes, catering to a broad range of workflow preferences and project requirements.
Adding and Managing Keyframes via the Inspector
The Inspector tool in DaVinci Resolve is a versatile interface, providing detailed insights and control over your selected media. The following steps illustrate how to add and adjust keyframes through the Inspector.
Step 1: Open the Inspector: Begin by selecting the audio track you want to adjust. Once selected, open the Inspector window. This can be found in the top right corner of the DaVinci Resolve interface.
Step 2: Adding Keyframes: With the Inspector open and your track selected, find the ‘Volume’ slider. You will see a diamond shaped button on the right of it that is your keyframe button. Click on this button to add your first keyframe. Move your playhead to another point in your timeline where you want the volume change to occur, adjust the Volume slider and it will automatically add a second keyframe.
Step 3: Manipulate Keyframes: Now that your keyframes are in place, you can adjust the volume levels between them. To do this, grab and move the keyframes up or down within the Inspector’s audio panel, thereby changing the volume of that segment.
Using the Inspector for keyframe manipulation allows for detailed adjustments, providing an alternative to modifying the audio track directly.
Utilizing Keyframes in the Fairlight Workspace
Fairlight is DaVinci Resolve’s dedicated audio post-production workspace, providing powerful tools and features for advanced audio editing. Here’s how you can manage keyframes within the Fairlight environment.
Step 1: Accessing Fairlight: To navigate to the Fairlight workspace, simply click on the “Fairlight” tab located at the bottom of the DaVinci Resolve interface.
Step 2: Adding Keyframes in Fairlight: Once in Fairlight, you can add keyframes in a similar manner to the main Edit page. Hold down the “Alt” key and click on your audio track at the desired points to create keyframes.
Step 3: Deleting Keyframes: If you need to delete a keyframe in Fairlight, it’s as simple as clicking on the keyframe and pressing the “delete” key. This allows you to maintain total control over your keyframe placements and make adjustments as needed.
The Fairlight workspace offers a more focused and feature-rich environment for audio editing and provides additional tools for precise manipulation of keyframes.
Now that you’re equipped with the knowledge to master audio with keyframes in DaVinci Resolve, it’s time to bring your audio editing skills to new heights. All the best on your creative journey!