
Hi, I’m Salik, the author of FilmmakingElements.com. I have been a filmmaker for over 10 years. I am also a certified DaVinci Resolve Trainer and I have used DaVinci Resolve for many of my projects. We’re diving into the world of audio editing with a focus on the powerful voice changer feature in DaVinci Resolve. Using the pitch audio effect, you can effortlessly transform your voice to sound like an animated character or give it a more intimidating and unrecognizable tone. This fun and creative tool can add depth and diversity to your video projects, and we’re here to show you how it works.
Voice Changer on the Edit Page in DaVinci Resolve
For an enhanced audio editing experience, we recommend using a good pair of headphones while working with DaVinci Resolve. In this section, we’ll guide you through using the voice change feature on the edit page and demonstrate how to apply the effect on a specific clip.
Applying Voice Change to a Specific Clip
- Open DaVinci Resolve and navigate to the Edit tab.
- Locate the clip you want to apply the voice change effect to and make sure it’s on your timeline.
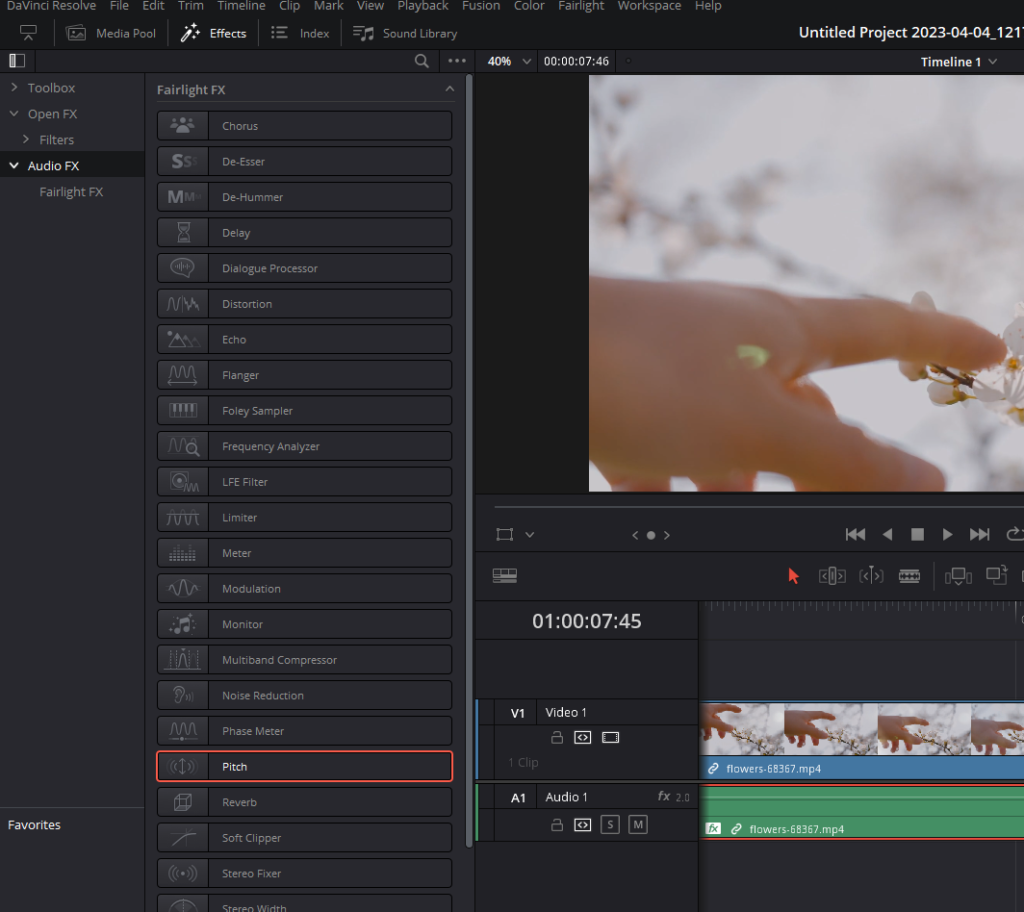
- Open the Effects by clicking on it from the top left corner.
- In the Audio FX, navigate to Fairlight FX and find the Pitch effect.
- Click and drag the Pitch effect onto the desired clip. This will apply the effect only to the specific clip, not the entire track.
Once you’ve applied the Pitch effect to a clip, DaVinci Resolve will display the effect window. From here, you can adjust the settings and fine-tune the audio transformation as needed.
Adding Voice Changer to Tracks in DaVinci Resolve’s Fairlight Tab
In this section, we’ll show you how to apply Voice Changer to entire tracks in DaVinci Resolve’s Fairlight tab, creating high and low pitched voices for added depth in your audio. This step-by-step guide will help you navigate the Fairlight interface and successfully apply the desired pitch effects.
Accessing the Fairlight Tab
- In DaVinci Resolve, click on the musical note icons located towards the bottom of the interface. This will open the Fairlight tab.
Organizing Audio Clips on Different Tracks
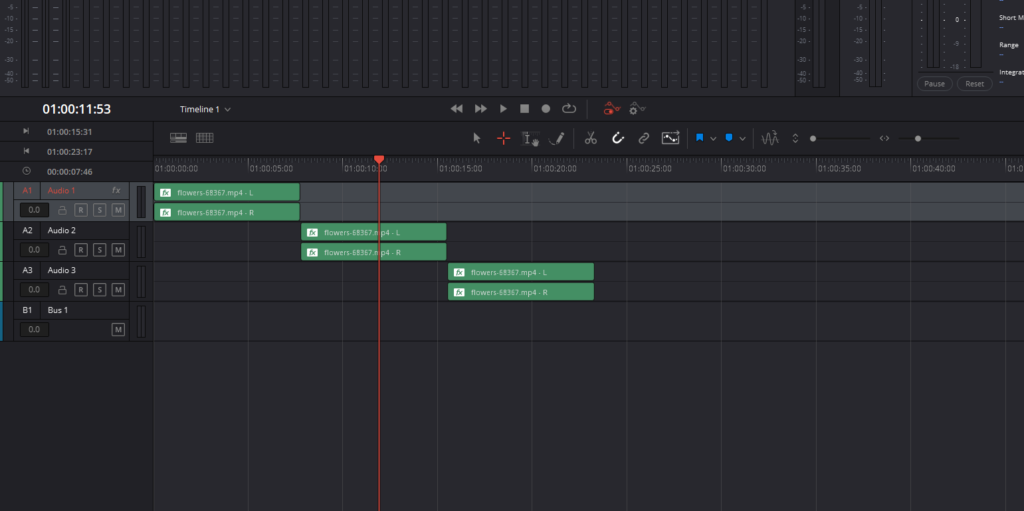
Once you’re in the Fairlight tab, keep your audio clips organized into different tracks. For example, you can do this:
- Track 1 contains the normal voice from the intro.
- Track 2 features the high-pitched voices.
- Track 3 houses the low-pitched voices.
Applying Pitch Effects to a Track
To add a pitch effect to an entire track, follow these steps:
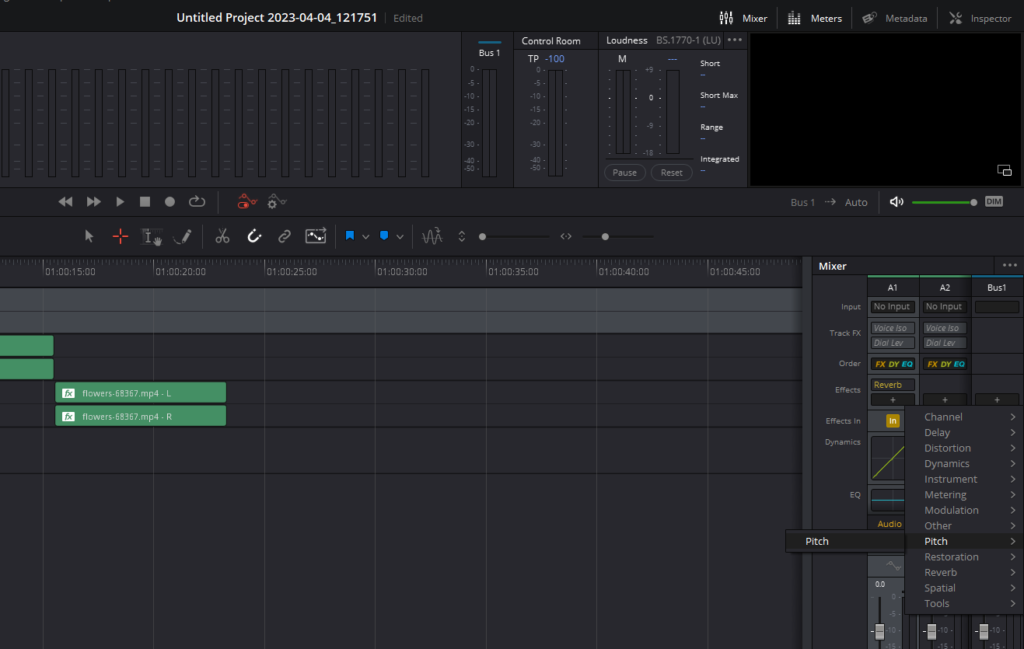
- Open the Mixer by clicking on the mixer icon at the top right corner of the Fairlight tab.
- Locate the track you want to add the effect to. For example, we’ll use track 2 (high-pitched voice).
- In “Mixer” under “Effects” on the track, click the “+” icon. If you don’t see the “Effects” option, click the three-dot menu icon and make sure “Effects” is checked.
- Scroll through the available effects and select Pitch.
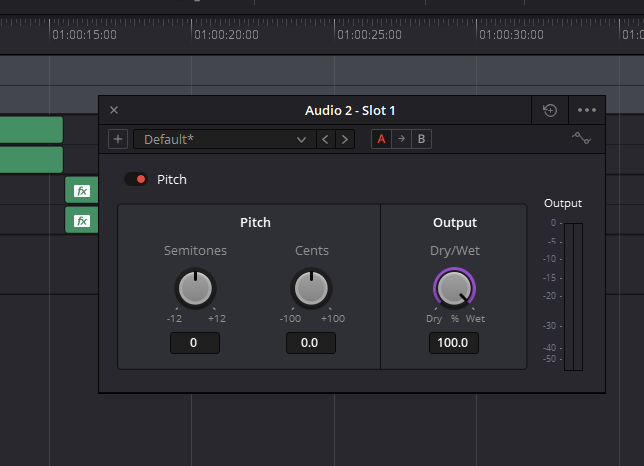
Exploring the Pitch Window in DaVinci Resolve
In this section, we’ll introduce you to the pitch window in DaVinci Resolve and explain how to change the pitch of your voice without affecting the speed of your audio. With this powerful feature, you can easily experiment with different voice tones without the need to speed up or slow down your clips.
Navigating the Pitch Window
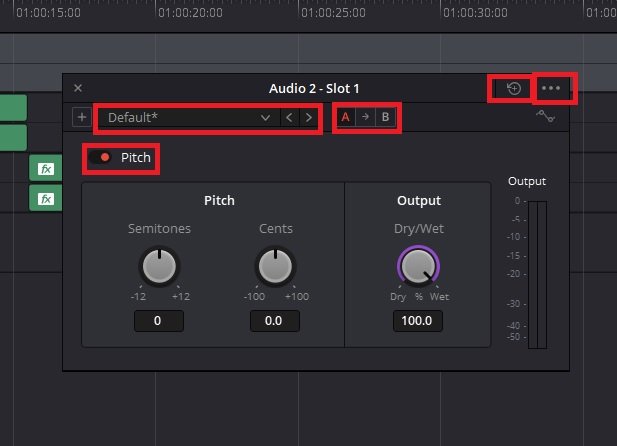
The pitch window offers a variety of options to help you customize your audio effects:
- Reset Button: Resets your settings to their default values.
- Lock Plug-In Window & Preset Manager: Allows you to lock the window and manage your presets.
- Add Preset: Save your preferred settings as a preset for future use.
- Cycle Presets: Navigate through your saved presets using the two buttons next to the preset dropdown.
- A and B Buttons: Use these buttons to switch between two different settings, allowing you to compare and choose your preferred effect.
- Pitch Toggle: The red/orange button turns the pitch effect on and off.
Mastering Voice Changer Effects in DaVinci Resolve
In this section, we will delve into the various pitch adjustment options available in Pitch Window of DaVinci Resolve, allowing you to use the voice changer feature effectively and create precise audio effects for your video projects.
Voice Changer Pitch Adjustment Options
- Semitones: Using the voice changer in DaVinci Resolve, you can manipulate semitones to create a significant shift in pitch. A semitone represents a half-step change in pitch, and with the semitones knob, you can make coarse adjustments of up to 12 semitones or 12 half-steps in either direction from the original pitch.
- Cents: To achieve even more refined pitch adjustments, the voice changer in DaVinci Resolve offers a cents knob. This feature allows you to modify the pitch in hundredths of a semitone, providing greater precision when fine-tuning your audio.
- Wet/Dry Mix: The wet/dry mix determines the amount of the voice changer effect applied to your audio clip or track. By adjusting the wet/dry mix, you can control the intensity of the pitch effect, creating a more subtle or more pronounced change as desired.
- Output Meter: When using the voice changer feature in DaVinci Resolve, the output meter displays the audio levels after the pitch effect has been applied, ensuring that your audio remains within an acceptable range.
Creating High Pitch Voice Effects in DaVinci Resolve
In this sub-topic, we will walk you through the steps to create a high pitch voice effect using the voice changer feature in DaVinci Resolve’s Fairlight. One great example of where this effect can be used is in the creation of character voices for animated films, video games, or other multimedia projects. By adjusting the pitch of the voice actor’s recordings, you can bring to life a wide array of unique characters, such as fairies, talking animals, or whimsical creatures. This high-pitched effect can also be employed in podcasts or radio dramas to create interesting and engaging soundscapes that captivate the audience’s attention and imagination.
Adjusting the High Pitch Voice
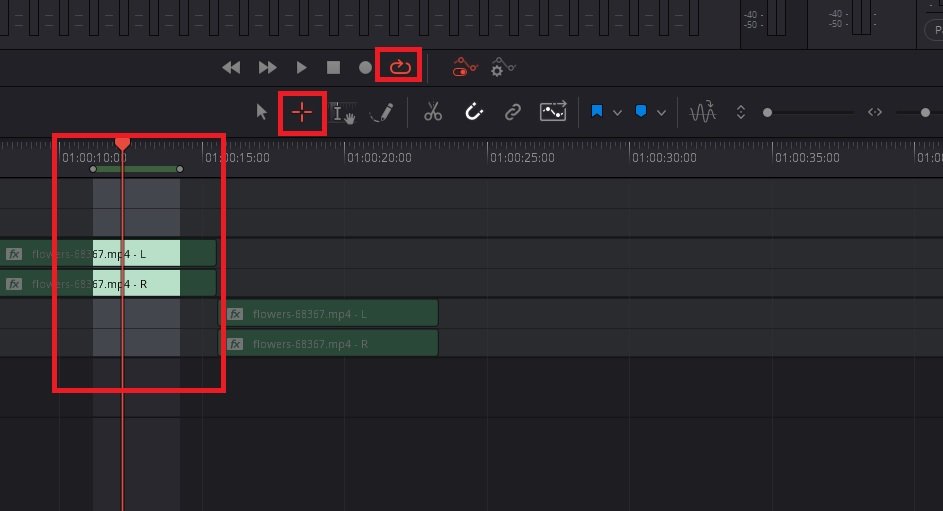
- Select the range of your audio track and loop it to play continuously.
- By clicking and dragging on the clip you can select a range. Make sure the target looking icon is orange to make sure Range tool is turned on.
- Turn on the pitch effect and play the audio clip.
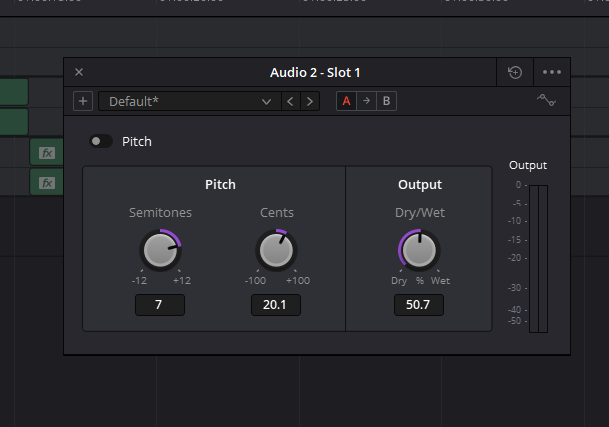
- Observe the semitones knob, which serves as the coarse adjustment. Dragging the knob to the left will deepen the voice, while dragging it to the right will make the voice more high-pitched.
- Leave the semitones at eight and adjust the cents knob to see if there’s any noticeable difference.
- Turn off the semitones and focus on the cents knob. Double-click the semitones knob to reset it and play with the cents knob while playing the clip.
- Notice that the cents adjustment is much smaller and can help fine-tune the pitch of a high-pitched voice.
Creating Alien-like or Ghost Voice Effects in DaVinci Resolve
In this sub-topic, we will explore how to create an alien-like voice effect by adjusting the wet-dry mix after using the voice changer feature in DaVinci Resolve’s Fairlight.
Adjusting the Wet-Dry Mix for an Alien or Ghost Voice Effect
- After raising the pitch of the voice using semitones, focus on the wet-dry mix knob.
- Loop the audio clip and gradually drop the wet-dry mix down while the clip plays.
- Observe how the sound changes as you adjust the mix. At around 50% mix, you will notice an interesting blend of the original voice and the high-pitched effect, resulting in an alien or ghost like voice.
Creating a Low-Pitched Voice Effect in DaVinci Resolve
In this sub-topic, we will explore how to create a low-pitched, more intimidating voice effect using DaVinci Resolve’s Fairlight audio editing tools. This effect can be useful for disguising voices or adding a sense of mystery or depth to your audio projects. Follow the steps below to create a low-pitched voice effect in DaVinci Resolve.
Adjusting the Pitch for a Low-Pitched Voice
- Start by selecting the audio track you want to modify. For example, we will work on track three.
- Click on the Effects tab, and then click the plus icon to add an effect. Scroll down and select the “Pitch” effect.
- With the pitch effect window open, turn your semi-tones to the left for a low-pitch effect.
- Play the clip and start adjusting the pitch settings to achieve a low-pitched, intimidating voice. Experiment with the semitones and cents knobs to find the perfect balance.
- Once you are satisfied with the result, you can fine-tune the effect using the wet-dry mix knob. This will allow you to blend the original voice with the low-pitched effect, creating a unique and interesting sound.
By using the pitch effect in DaVinci Resolve’s Fairlight, you can transform an ordinary voice into a low-pitched, creepy, and mysterious character voice.
Blending the Original Voice with the Low-Pitched Effect
Adjusting the wet-dry mix when creating a low-pitched voice effect in DaVinci Resolve’s Fairlight audio editing tools. The wet-dry mix is a valuable tool for blending the original voice with the pitch-adjusted effect, ensuring that the final result sounds both natural and intriguing.
Fine-tuning the Low-Pitched Voice Effect with Wet-Dry Mix
- After achieving the desired low-pitched voice effect using the pitch settings, it’s time to adjust the wet-dry mix to find the perfect balance between the original voice and the effect.
- Play the clip and gradually reduce the wet-dry mix level. Listen carefully to how the mix affects the overall sound. As you lower the mix, the original voice will become more prominent, while the low-pitched effect will be less noticeable.
- Be cautious not to lower the wet-dry mix too much, as this may reveal too much of the original voice, making it easier to identify the speaker. The goal is to find a balance that maintains the low-pitched effect while blending it seamlessly with the original voice.
By adjusting the wet-dry mix, you can create a unique and interesting low-pitched voice effect that still retains some of the original voice’s characteristics. This can be especially useful when trying to disguise a voice or create a more mysterious and captivating sound for your project.
In conclusion, DaVinci Resolve offers an easy and effective solution for creating unique and captivating voice effects through its voice changer tools. With the powerful features available in Fairlight, you can effortlessly transform and enhance your audio projects to suit your creative vision.
We hope this article has provided valuable insights and guidance on how to utilize the pitch and wet-dry mix adjustments in DaVinci Resolve’s Fairlight audio editing tools. By following these steps, you’ll be well on your way to creating a range of voice effects, from subtle to dramatic, that will add depth and intrigue to your projects.
- Also Read- Davinci Resolve Not Recording Audio: 9 Fixes
- Also Read- Reverb In Davinci Resolve: Learn In 1 Minute
- Also Read- DaVinci Resolve ECHO Audio Effect: 2 Ways