
Hello fellow filmmakers, and welcome back to FilmmakingElelements.com, in this article, we are teaching how to create reverb effect in Davinci Resolve.
Creating Reverb Effect In Davinci Resolve
Understanding Reverb and Its Uses
Reverb, or reverberation, is an audio effect that simulates the natural echo of sound in different spaces, like a spacious gym or a small room. By adjusting reverb levels, you can create a more immersive and realistic audio experience for your audience.
Prepping Your Audio
Before we dive into creating reverb effects, it’s essential to have a clean and clear audio track to work with. Reducing background noise is crucial, and one way to achieve this is by using acoustic blankets in your recording space. A good-quality microphone, like the Blue Yeti, can also help capture crisp audio.
Setting Up Your Workspace:
In order to create a productive workspace in DaVinci Resolve for applying reverb effects, start by importing your audio track into the timeline. To guarantee that you can hear even the most subtle changes in your audio, always use high-quality headphones.
Navigating to the Fairlight Tab and Mixer Panel
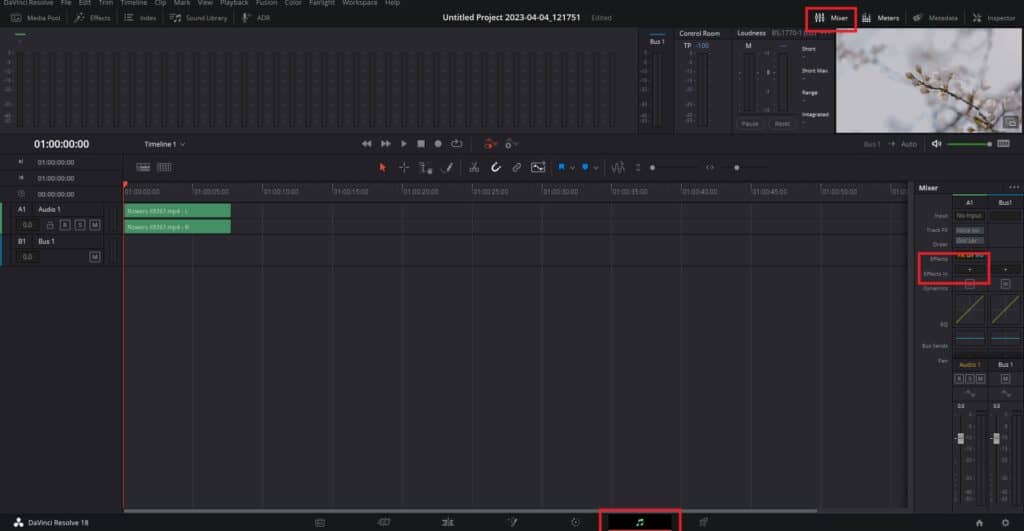
To access the Fairlight tab, click on the musical notes icon at the bottom of the screen. This tab is essential for working with audio in DaVinci Resolve. To ensure your mixer is open and displaying the effects panel, click on the “Mixer” tab at the top of the screen. The mixer allows you to make precise adjustments to your audio track.

Applying Reverb Effects to a Track
Reverb effects can be added to an entire track or just a specific clip. This tutorial will focus on adding reverb to an entire track. Follow these steps:
- In the Mixer panel go to the Effectsoptionl, click on the “+” icon.
- Navigate to “Reverb” > “Fairlight.”
- Select “Reverb” to open the Fairlight Effects window.
Exploring the Fairlight Effects Window
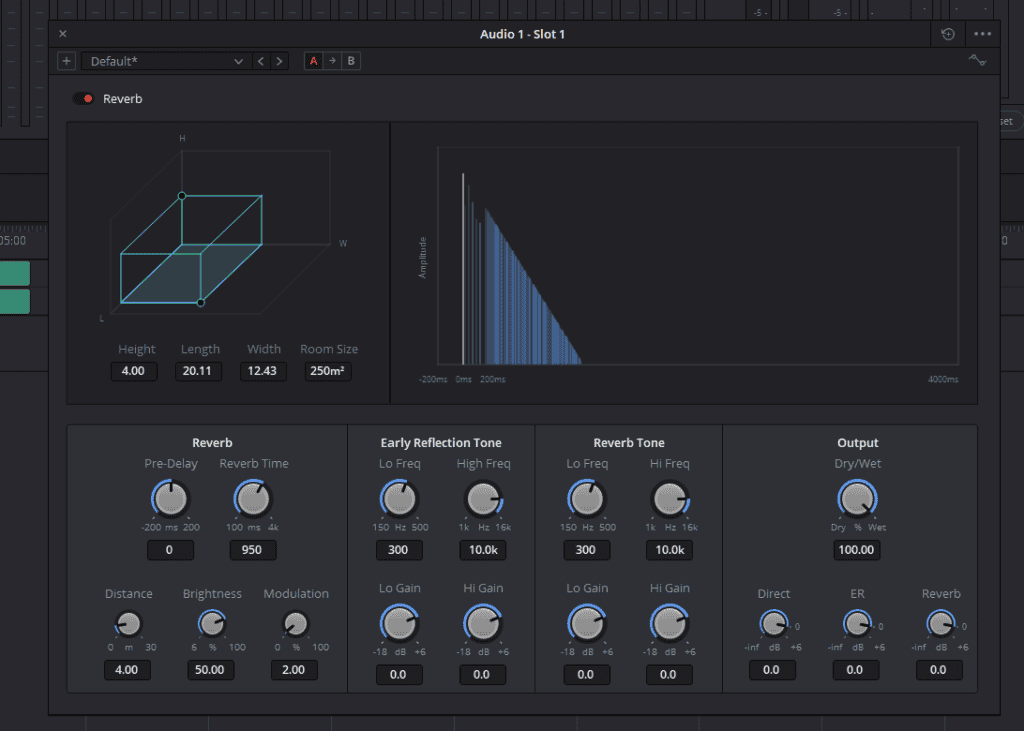
The Fairlight Effects window in DaVinci Resolve is a powerful audio tool that provides a plethora of settings for controlling and fine-tuning reverb in your audio projects. In this comprehensive guide, we will dive deep into each section of the Fairlight Effects window and explore the multitude of parameters that can be adjusted to achieve the desired reverb effect.
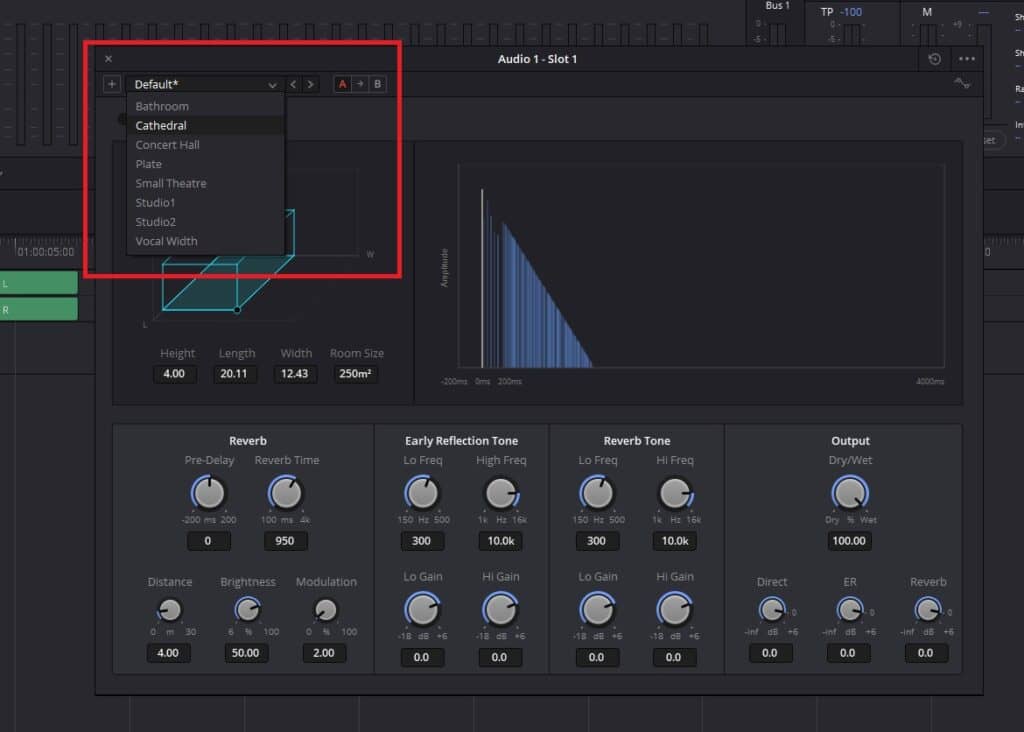
- Presets and Controls
The presets and controls section is located at the top of the Fairlight Effects window. This area allows users to quickly access and select from a variety of preset reverb settings, catering to different audio scenarios and environments. The presets serve as a starting point for users to further refine the reverb effect, ensuring efficiency and consistency in their workflow.
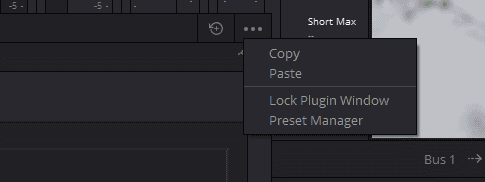
In addition to the presets, this section also features various controls for managing the plugin window and reverb effect. These controls include:
- Reset: Resets the settings to their default values, allowing users to start from scratch or revert any unwanted changes.
- Lock: Locks the plugin window to prevent accidental changes to the settings.
- Toggle: Enables or disables the reverb effect, making it easy to compare the original audio with the modified version.
- Room Size
The room size control is a graphical representation that allows users to visualize and adjust the dimensions of the virtual room in which the reverb is being created. By manipulating the size of the room, users can achieve different sound characteristics, such as a small, intimate space or a large, open hall.
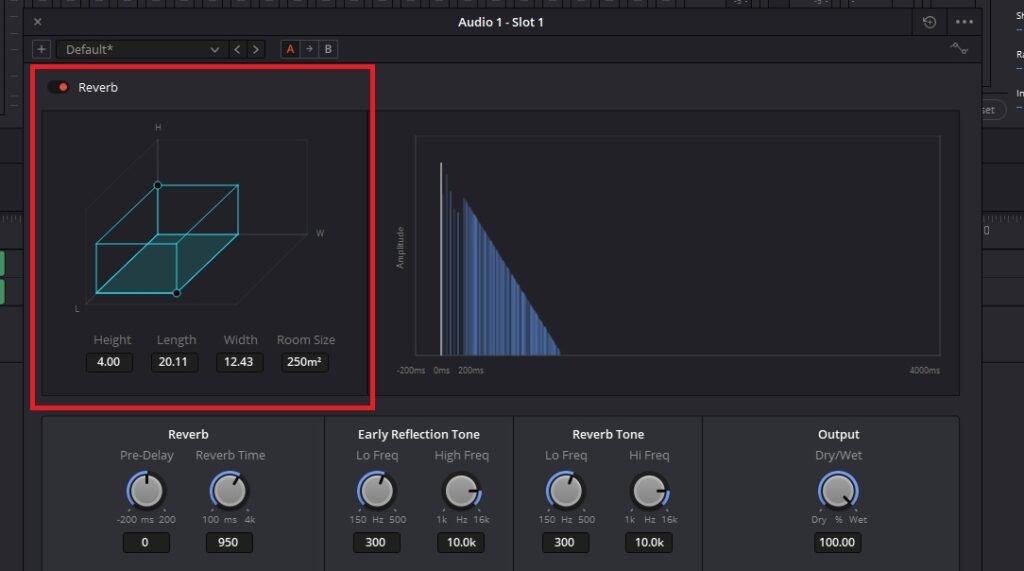
Using the available presets will automatically set the room size according to the selected environment, but users can also manually adjust the room dimensions to achieve a custom sound. This level of control is essential for matching the reverb effect with the specific ambiance and atmosphere of the scene or project.
- Reverb Decay
The reverb decay graph provides a visual representation of how the reverb effect fades over time. By adjusting parameters like pre-delay and reverb time, users can alter the shape of the decay curve, resulting in different sound characteristics.
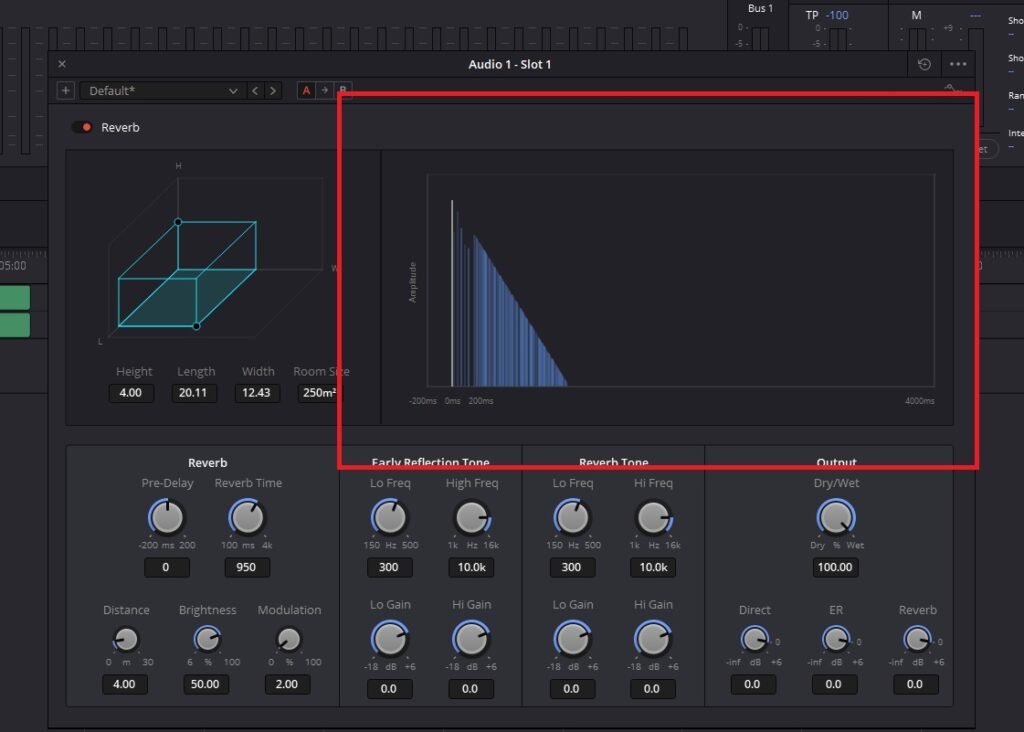
For example, a shorter pre-delay and reverb time will create a tighter, more focused reverb effect, while a longer pre-delay and reverb time will result in a more spacious and lingering sound. Understanding how these parameters interact with the decay curve is crucial for crafting a reverb effect that complements the audio material.
- Reverb Parameters
The Reverb section contains several parameters that allow users to fine-tune the reverb effect to suit their specific needs. These parameters include:
- Pre-delay: Determines when the first reverb reflection begins, effectively controlling the gap between the direct sound and the onset of the reverb effect.
- Reverb time: Sets the duration of the reverb effect, dictating how long the sound lingers before fading away.
- Distance: Affects the perceived distance between the virtual sound source and the listener by modifying the pre-delay and early reflections of the reverb effect.
- Brightness: Shapes the reverb decay by controlling the balance of low and high frequencies. Higher values result in a more even decay across all frequencies, while lower values shorten the decay time for higher frequencies, creating a darker, more muted sound.
- Modulation: Adds a random low-frequency phase to the tapping point of the early reflection processing, creating a sense of movement and depth in the reverb effect.
- Early Reflections and Reverb Tone
The Early Reflection Tone and Reverb Tone sections offer options for adjusting the low and high frequencies, as well as the gain for each area. By manipulating these settings, users can shape the tone of the reverb effect, its early reflections, and the tail of the reverb, resulting in a sound that complements the original audio material and enhances the overall mix.
- Controlling Output and Mix Levels
The Output section of the Fairlight Effects window provides several parameters that enable users to control the final mix of the reverb effect, ensuring that it blends seamlessly with the original audio material. These parameters include:
- Wet/dry mix: Balances the level of the original (dry) signal with the reverberated (wet) signal. A higher wet mix will result in a more pronounced reverb effect, while a lower wet mix will yield a subtler effect that retains more of the original audio characteristics.
- Direct: Adjusts the amount of the direct signal present in the final mix, enabling users to control the prominence of the unprocessed audio in relation to the reverb effect.
- Early Reflection (ER) level: Dictates the level of early reflections in the final mix, allowing users to achieve a sense of depth and space without overpowering the audio material with reverb.
- Reverb level: Determines the overall amount of reverb in the final mix, providing control over the intensity of the effect and its contribution to the overall audio landscape.
- Putting It All Together
Understanding the various sections and parameters in the Fairlight Effects window is crucial for effectively utilizing the powerful reverb capabilities offered by DaVinci Resolve. By exploring and experimenting with the different settings, users can craft a custom reverb effect that enhances their audio projects and contributes to the overall storytelling process.
To achieve the best results, users should approach reverb as a creative tool that can add depth, atmosphere, and emotion to their audio material. By carefully considering the unique characteristics of each audio source and the desired effect on the listener, users can apply the reverb effect strategically and skillfully.
Ending a Song Seamlessly in DaVinci Resolve Using Reverb
When editing a project in DaVinci Resolve, finding the perfect song is only half the battle. Sometimes, the song’s length does not fit the project’s requirements, leading to abrupt or awkward endings. In this detailed guide, we will demonstrate how to end a song anywhere in DaVinci Resolve using reverb, ensuring your edit sounds smooth and polished. Let’s get started!
Step 1: Identify the Desired Song End Point
When working on a project in DaVinci Resolve, it is crucial to find the ideal spot to end the song. For example, the song continues for too long, so we want to cut it off at the right moment. After putting on headphones and listening to the session, we decide to end the song right after the bridge shot.
Step 2: Assess the Current Ending and Consider Alternatives
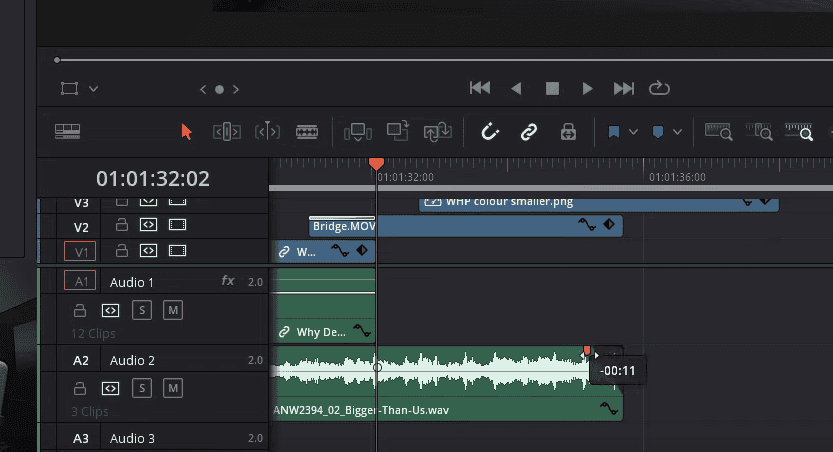
After dragging the audio to the desired end point, we listen to the resulting edit. The ending is quite abrupt, so we consider adding a fade to improve the transition. However, we want to achieve a more natural song ending, so we opt to use reverb instead.
Step 3: Duplicate the Track and Create a Compound Clip

First, click on the track and hold Alt while dragging it down to duplicate it. Position the duplicated track directly below the original. Then, locate the peak in the waveform where the snare and kick drums occur simultaneously. Cut the duplicated clip at this point using Ctrl + Backslash (\) on the keyboard and delete the rest of the clip.
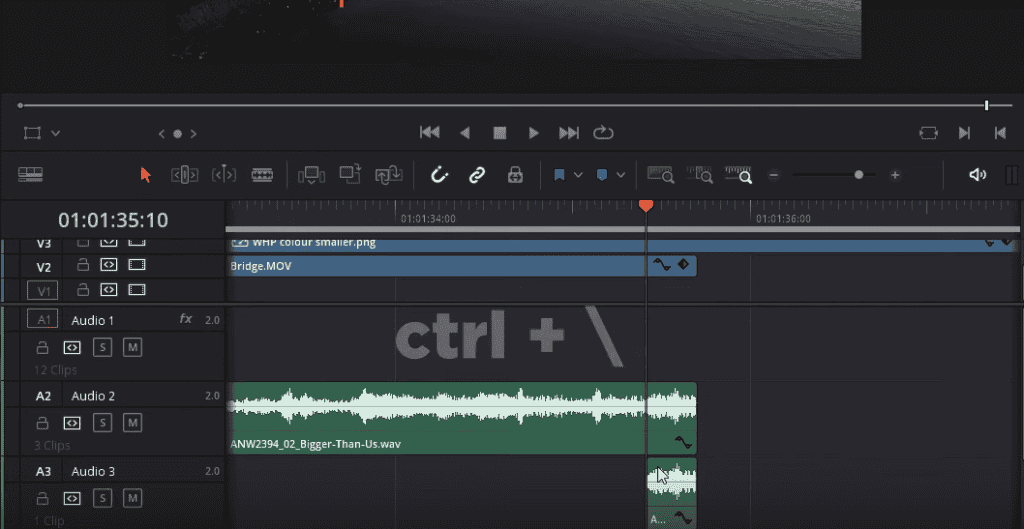
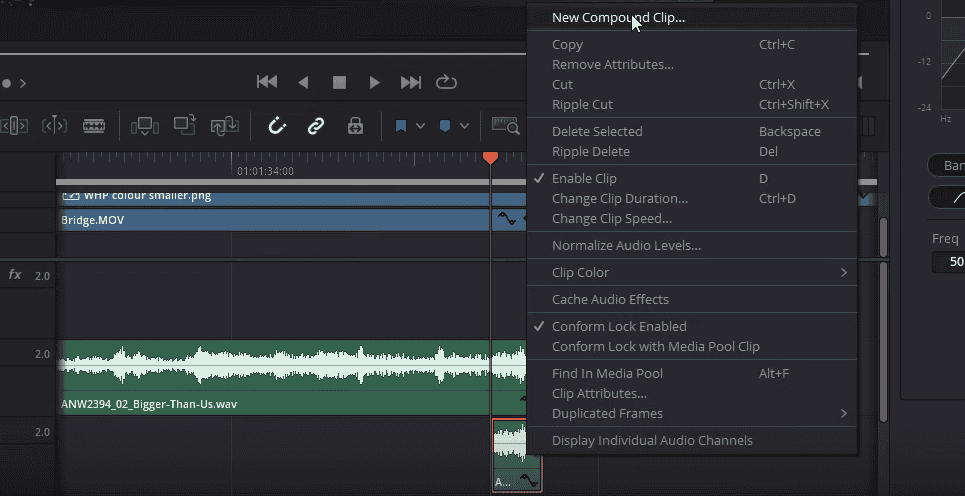
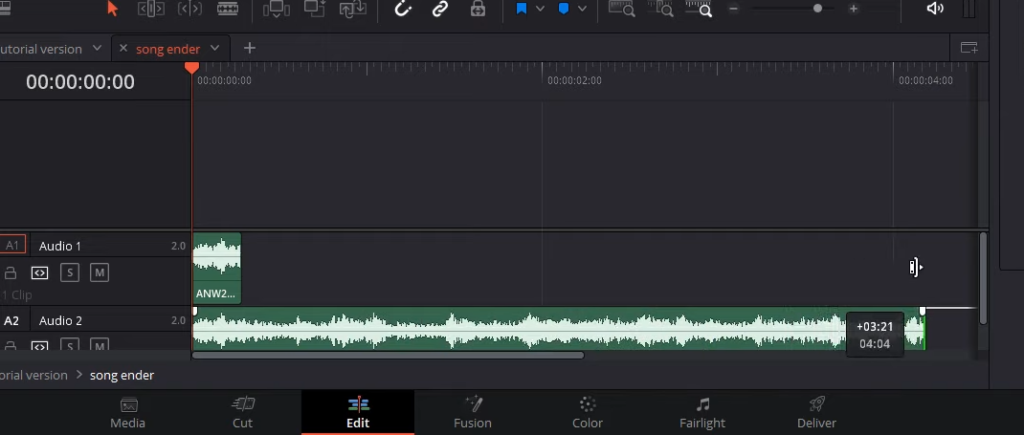
Next, right-click on the remaining clip and create a new compound clip, naming it as desired. Right-click on the compound clip and select “Open in Timeline.” Inside the compound clip, duplicate the clip once more by holding Alt and dragging it down. Extend the bottom part of the clip and mute it. Return to the main clip.
Step 4: Add Reverb and Customize Settings
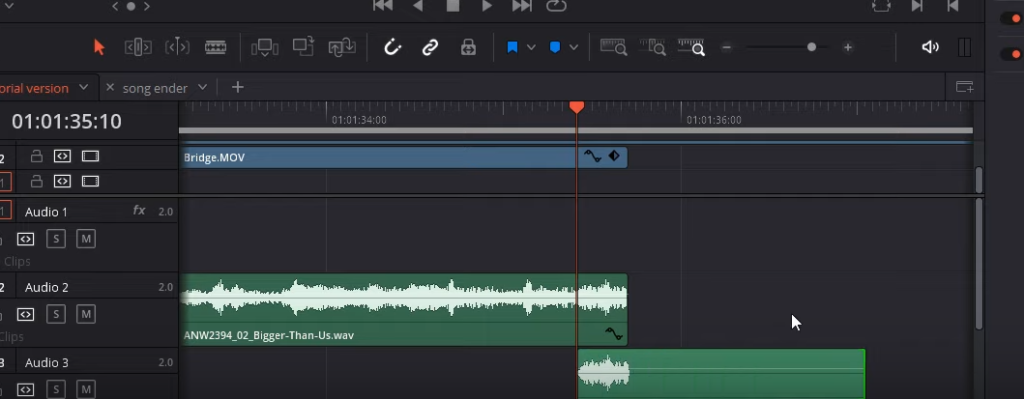
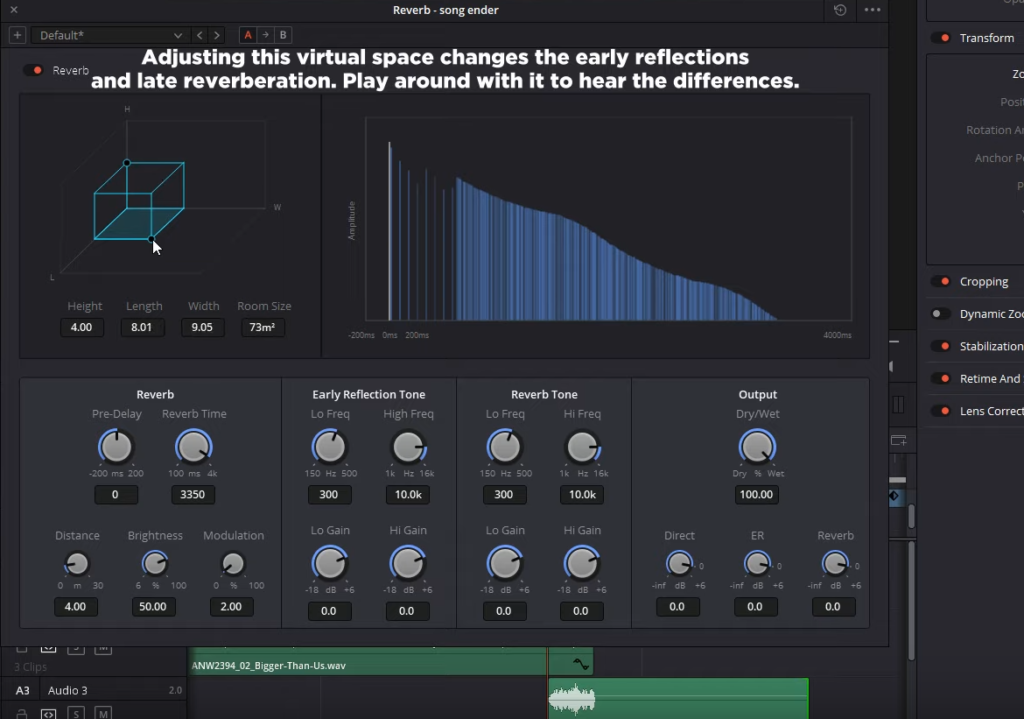
While back on the original timeline, extend the compound clip. By extending the clip, we can now add reverb to create a satisfying and echoey ending. To do this, navigate to the Effects panel by clicking on it from top left corner of Davinci Resolve and under Audio FX select “Reverb,” dragging it onto the clip. In the controls, increase the reverb time significantly and reduce the room size to around 70 meters squared or as desired.
Step 5: Fine-Tune the Reverb
To further refine the reverb effect, click on the clip and navigate to the reverb settings. Adjust the high and low frequencies to emphasize the kick drum while reducing any unwanted high-end frequencies. Additionally, modify the output settings to achieve the desired balance between the dry and wet signals. For example, a 75% mix between the two signals works well, but this can be adjusted according to personal preference.
Step 6: Listen and Adjust as Needed
After fine-tuning the reverb settings, listen to the edited audio to assess the improvements. The reverb should provide a much smoother and more natural song ending compared to the initial abrupt cut. If necessary, make further adjustments to the reverb settings until the desired effect is achieved.
We would like to express our heartfelt gratitude to you, our valued readers, for taking the time to read this article on using reverb in DaVinci Resolve. We hope this guide has provided you with the insights and techniques necessary to elevate your audio editing skills and create truly professional-sounding song endings. Your dedication to learning and improving your craft is commendable, and we are honored to be part of your journey.