
As filmmakers and content creators, we know that audio quality can make or break a project. Background noise and other distractions can take away from the overall experience, leaving your audience disengaged. That’s where DaVinci Resolve Voice Isolation comes in. In this blog post, we’ll explore how this innovative tool can improve your audio editing workflow and elevate your projects.
Voice Isolation is an AI-powered plug-in that can remove loud, undesirable sounds from existing voice recordings. This effect utilizes AI to provide models that let you completely remove undesired sounds, even in challenging environments. The AI model is trained for any type of human voice, male or female, young or old, so you can get incredible results that isolate dialogue from background sounds in a recording.
It can remove everything from air conditioning or fans to extremely loud sounds like a jackhammer, restaurant background noise, or music playing at the same time that the subject is speaking.
Despite its advanced capabilities, Voice Isolation is remarkably user-friendly and accessible to filmmakers of all skill levels.
Overview of Voice Isolation In Davinci Resolve
Voice Isolation is a “near-time” plug-in, meaning that it can be used on track audio in real-time, but not on live audio input. It can be used on any mono or stereo (or multi-mono) audio track but is not supported on greater-than-stereo tracks.
One crucial aspect to note about Voice Isolation is that it’s specifically designed for isolating human voices, which means it won’t work on other types of sounds. With this tool, you can bid farewell to hours of manual noise reduction and enjoy a seamless, efficient audio editing experience.
DaVinci Resolve Voice Isolation can be applied from various pages within the software, including the cut, edit, and Fairlight pages. For simplicity, we recommend using the edit page, as it offers an intuitive interface and quick access to the tool. To help you get started, let’s walk through a few practical examples of how Voice Isolation can be applied in real-life situations:
- Eliminating background noise in interviews: If you’re recording an interview in a noisy environment, Voice Isolation can help you focus on the speaker’s voice and minimize unwanted noise.
- Enhancing dialogue clarity in films: When recording dialogue for a film or video project, Voice Isolation can ensure that your actors’ voices remain clear and distinct, even amidst a busy soundscape.
- Improving voiceover quality: For voiceover artists or content creators, Voice Isolation can help create a professional sound by removing ambient noise and distractions.

Enhancing Your Vlogs with DaVinci Resolve Voice Isolation
As vloggers and content creators, we know that the quality of our audio can significantly impact the viewer’s experience. Background noise can be distracting and make it difficult for your audience to focus on your message. That’s where DaVinci Resolve Voice Isolation comes to the rescue. In this blog post, we’ll discuss how this powerful tool can enhance your vlogs by reducing background noise and improving overall audio quality.
Imagine recording a vlog in a bustling city or a windy outdoor setting. The resulting audio may have a considerable amount of background noise that takes away from the clarity of your voice. With DaVinci Resolve Voice Isolation, you can easily eliminate that noise and make your voice the center of attention.
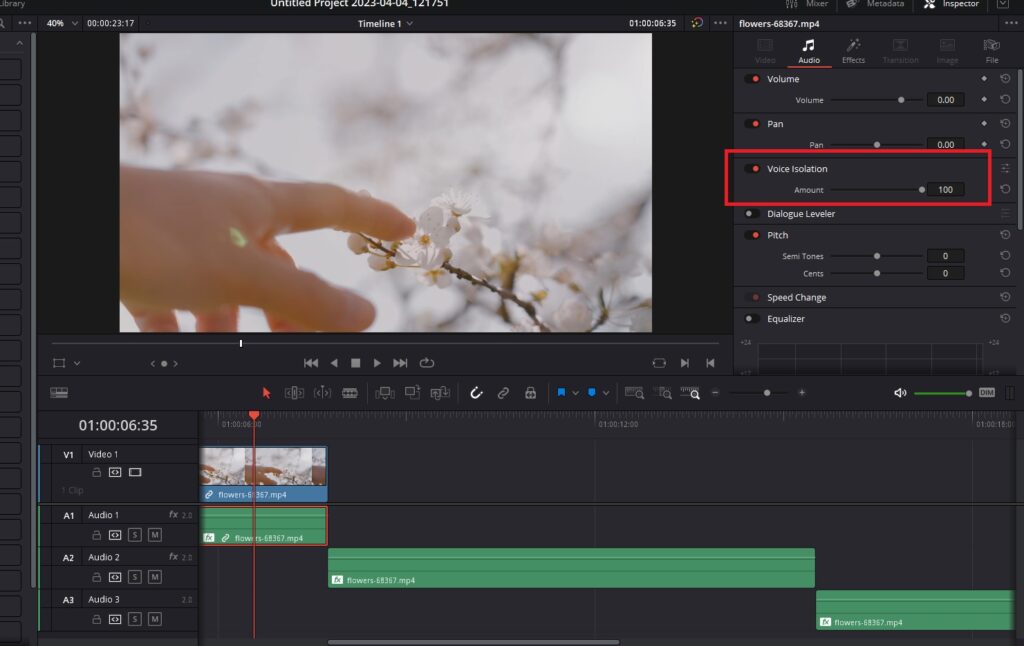
- Open your DaVinci Resolve project and select the audio clip you’d like to enhance.
- Navigate to the inspector in the top right-hand corner of the screen.
- Click on the audio tab within the inspector.
- Locate the Voice Isolation feature and toggle the switch on to activate it.
- Adjust the slider to control the intensity of the noise reduction. Higher values provide greater noise reduction, while lower values maintain a more natural balance between voice clarity and ambient noise.
- Preview the audio to ensure that the desired level of noise reduction has been achieved. Adjust the slider as needed to fine-tune the results.
- Continue editing your project as desired, knowing that your audio quality has been significantly improved with DaVinci Resolve Voice Isolation.
For a more natural sound that still maintains some ambient noise, try setting the slider to a lower value, like 20. This will reduce the background noise without making it seem like you’re walking around in complete silence.
Applying Voice Isolation To The Entire Track
Another helpful feature of Voice Isolation is the ability to apply it to an entire audio track. This is useful if you’ve recorded all your audio from a single source and want to apply the same noise reduction settings across multiple clips. By toggling the feature on for the entire track, you can save time and streamline your editing workflow. Follow the steps below to apply it on the entire track.
- Divide your audio tracks such that you have the dialogues in one Audio Track.
- You keep the music and other sound effects on another audio track (For example, Audio Track 2)
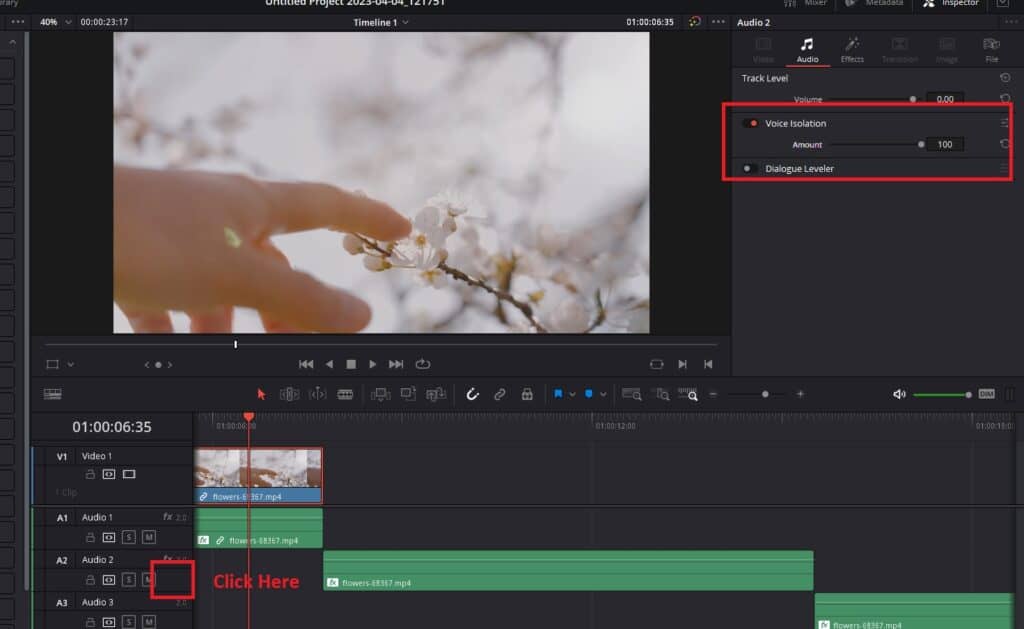
- Instead of selecting a clip, click on the empty space near the “M” button.
- Make sure it’s the track where you want to apply the voice isolation.
- Click on the Inspector button in the top right corner.
- Go to the “Audio” section.
- There you will find the Voice Isolation.
- The Voice Isolation plug-in has a few essential controls that you’ll need to adjust to achieve the desired level of noise reduction. The “Amount” control lets you adjust the amount of voice isolation processing applied to the audio track. By adjusting the slider, you can fine-tune the level of noise reduction to achieve the right balance between voice clarity and ambient sound.
Dialogue Leveler In Davinci Resolve
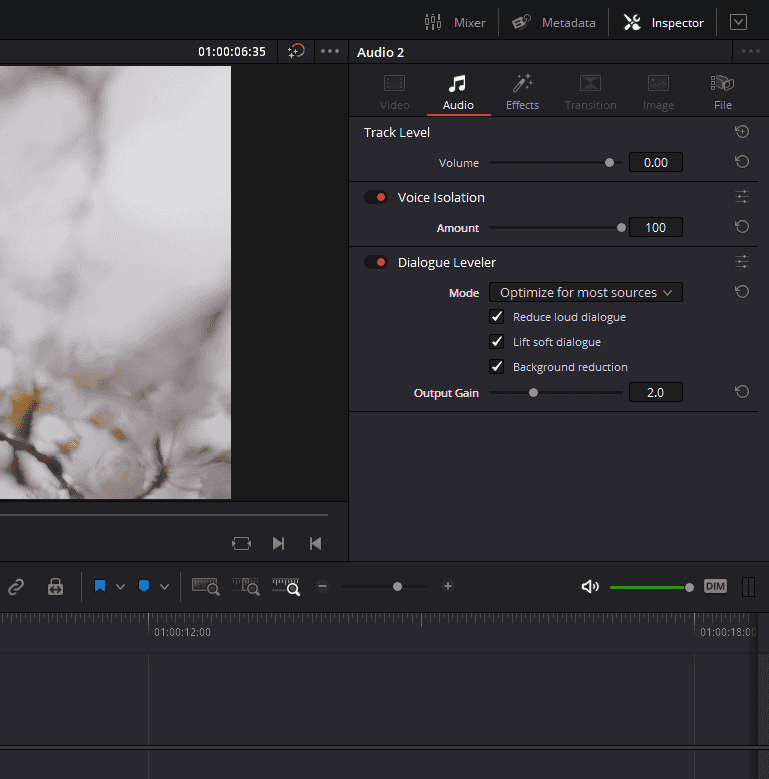
There is one more feature below the Voice Isolation feature in Davinci Resolve, using these together can help you produce good audio quality for your content. The Dialogue Leveler analyzes source material to detect dialogue and then “ride down” louder areas and “lift up” softer areas, while lowering background sounds that are not dialogue.
It works without typical dynamics processor “pumping” or other obvious side effects, and produces results similar to detailed manual clip gain adjustments or carefully “riding” the track with fader automation. Dialogue Leveler can often “fix and mix” a recording with a single boom mic where one character is closer than another or turns away from the mic at times, and level it out so that the original relative dynamics are preserved while increasing intelligibility and average level.
Dialogue Leveler can be used on track audio in real-time, but not on live audio input. It can be used on any mono or stereo (or multi-mono) audio track, but is not supported on greater-than-stereo tracks. The Dialogue Leveler plug-in has several controls that allow you to adjust the processing to achieve the desired level of noise reduction and clarity.
Conclusion
By using Voice Isolation and Dialogue Leveler together, you can achieve clear and consistent audio quality throughout your video. Voice Isolation can remove unwanted sounds and isolate dialogue, while Dialogue Leveler can even out the volume and boost intelligibility. When used together, these plug-ins can produce high-quality audio that engages and immerses your audience.
We hope this deep dive into DaVinci Resolve Voice Isolation and Dialogue Leveler has been informative and helpful. By leveraging these powerful plug-ins, you can achieve clearer and more professional-sounding audio in your video projects. We appreciate you taking the time to read this article, and we hope it has inspired you to explore these features further.
- Also Read- Davinci Resolve Voice Changer: Very Easy
- Also Read- Davinci Resolve Not Recording Audio: 9 Fixes
- Also Read- Reverb In Davinci Resolve: Learn In 1 Minute