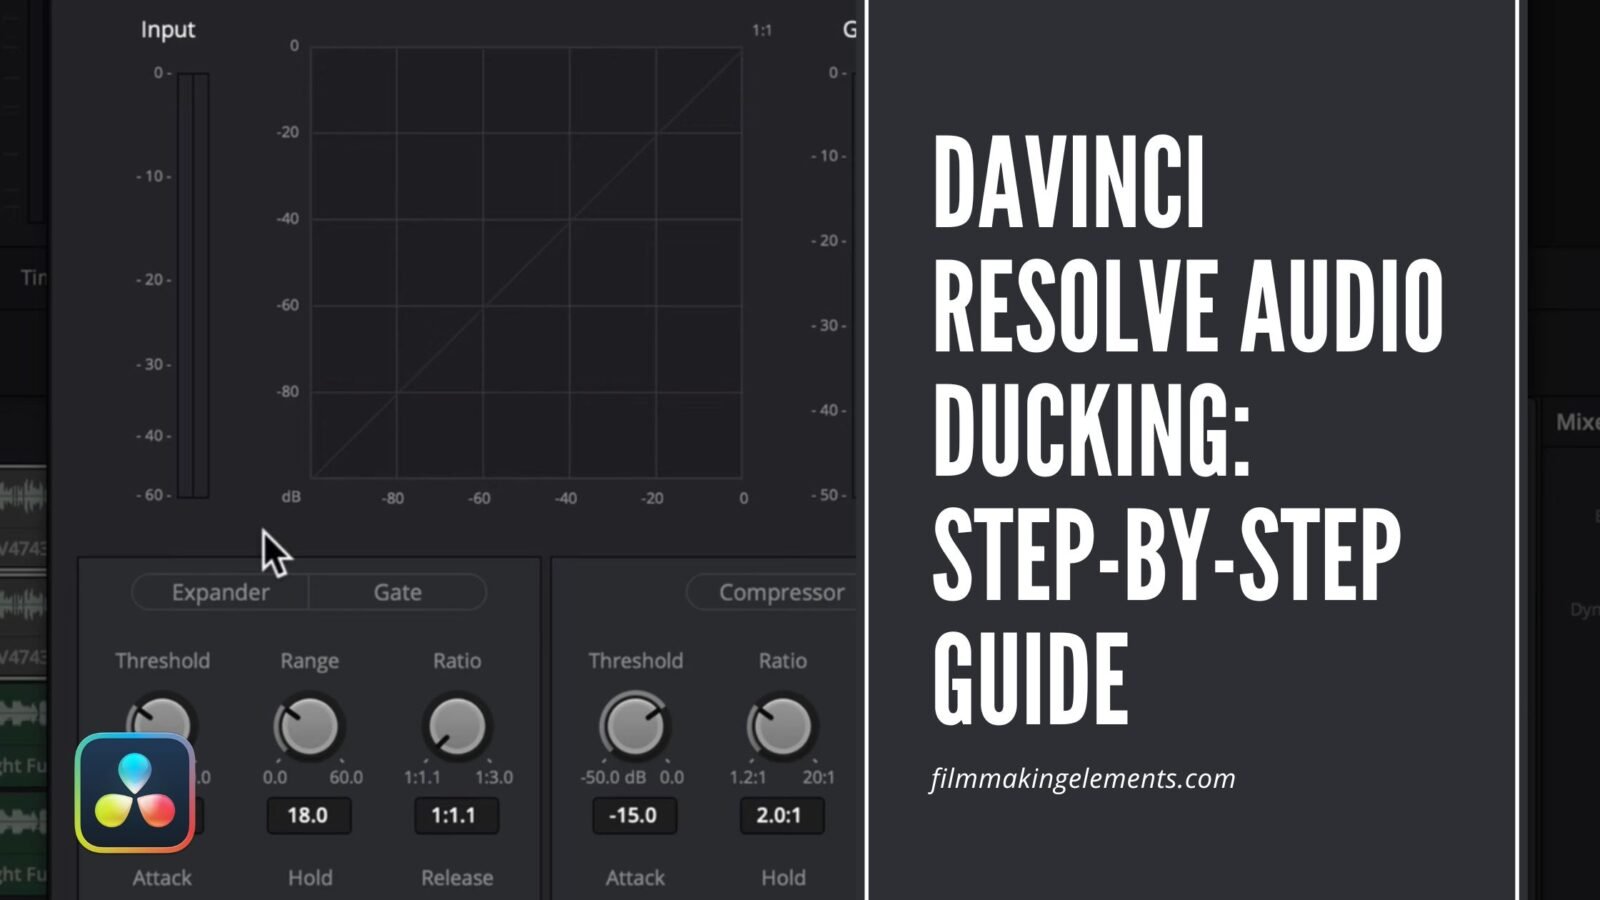
Welcome back to FilmmakingElements.com. In this article, we are going to shed light on a crucial technique known as audio ducking, especially focusing on its application within DaVinci Resolve.
Audio ducking might be a new term to some, so let’s start by unpacking what it means. In essence, audio ducking refers to the process of temporarily reducing the volume of a background music track while a voiceover or dialogue is being delivered.
Once the dialogue concludes, the volume of the music track is then restored to its original level. The intention behind this technique is to ensure that the dialogue is clearly audible to the listener, without completely muting the accompanying music.
You might be wondering if this process is complicated or time-consuming, requiring extensive keyframing or other technical manipulations.
The good news is, with DaVinci Resolve, the process of audio ducking can be automated. This significantly simplifies the workflow, freeing up time and energy that can be devoted to other aspects of your project.
Preparing Audio Tracks for Audio Ducking in DaVinci Resolve
Audio ducking is a vital technique in audio editing, ensuring a harmonious blend between spoken dialogues and background music in your video projects. In this part, we will walk you through a step-by-step process to prepare your audio tracks for audio ducking in DaVinci Resolve.
Step 1: Set up Your Project
Begin with a project in DaVinci Resolve. For example, you have two distinct audio tracks: a video clip of a person talking, and a background music track. On the Edit page of Davinci Resolve, put the track with the person talking on Audio Track 1 and the background music on Audio Track 2.
Step 2: Normalize Audio Levels of the Music Track
Given that music tracks are typically pre-edited and remastered, normalizing audio levels can be an efficient way to ensure they sound good alongside the dialogues. To do this:
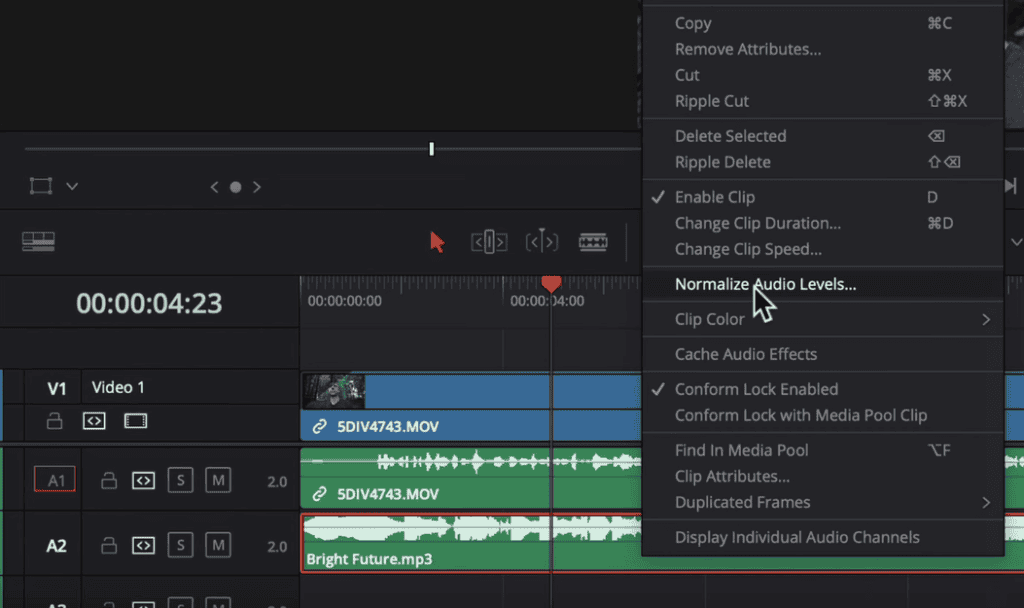
- Right-click on the music track or the background track (Audio Track 2) and select ‘Normalize Audio Levels.’
- Opt for ‘True Peak’ in the Normalization Mode drop-down menu.
- Set the Target Level to around seven or eight.
- Hit ‘Normalize.’
This process will automatically adjust your audio levels to an optimal state.
Step 3: Adjust Audio Levels of the Dialogue Track
The next important task is to balance the audio track of the spoken dialogues (Audio Track 1). This involves:
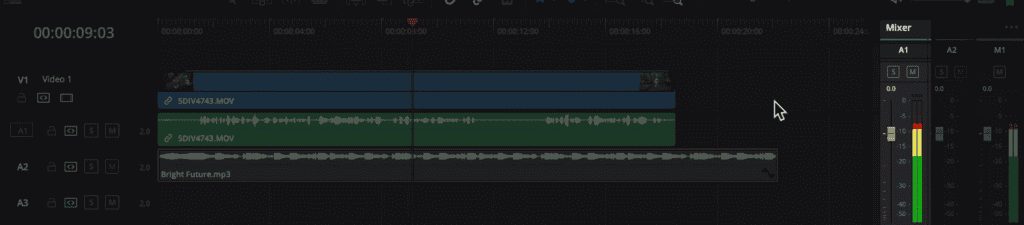
- Opening the mixer on the edit page (if it’s not visible, click on the Mixer icon at the top-right corner).
- Muting the music track temporarily, by clicking on the ‘M’ button on the Audio Track 2, enabling you to focus on the dialogue track.
- Playing and checking that the levels of the dialogue track fall within the -10 dB range.
Step 4: Review and Adjust Audio Levels
At this point, play your clip to test the audio levels of the dialogue track. If the audio levels seem a bit high, you can:
- Open the Inspector tool in the top-right corner.
- In the Volume slider, drop back the levels just a bit.
- Now, you can turn the music track back on by clicking on the ‘M’ button again.
Setting Up Audio Ducking in DaVinci Resolve’s Fairlight Tab
Once the preparation stage for your audio tracks is complete, the next step involves setting up the audio ducking feature in DaVinci Resolve. In this part of the tutorial, we move over to the Fairlight tab, a specialized environment within DaVinci Resolve designed specifically for audio post-production.
Step 1: Locate Your Audio Tracks
Firstly, navigate to the Fairlight tab by clicking on the icon which looks like a music note at the bottom of the Davinci Resolve. Within it, you should see your audio tracks in the same order just like on the Edit page.
Step 2: Adjust the Track Size
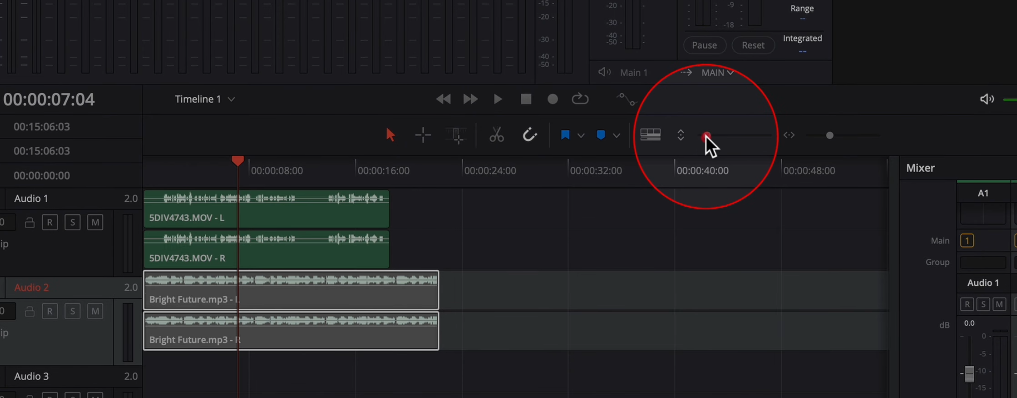
For better visualization and to see the waveforms more clearly, adjust the size of your tracks. You can do this by clicking on the Zoom slider above the timeline.
Step 3: Set Up Audio Ducking
The goal here is to make DaVinci Resolve ‘understand’ when to lower the volume of the music track, in response to the dialogue. To achieve this, we need to take the signal from the dialogue track and send it to the music track.
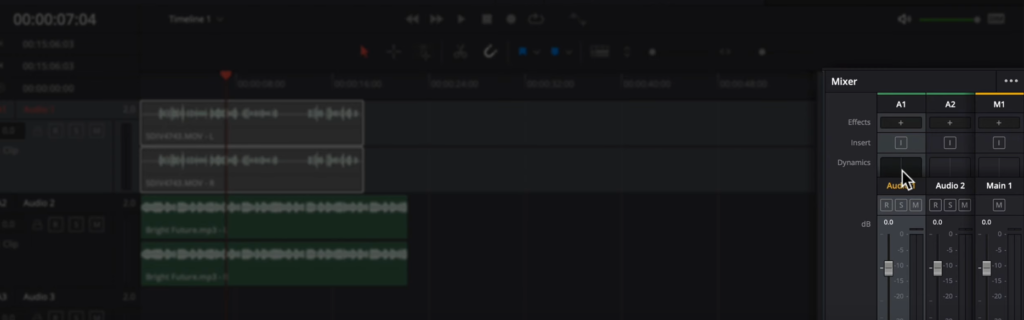
Step 4: Open the Mixer
Next, open the Mixer by clicking on the mixer button at the top-right of the screen.
Step 5: Open Dynamics
Under ‘Audio Track 1’ in the mixer on the right, you need to access the ‘Dynamics’ option. If it isn’t immediately visible, you can make adjustments to view it:
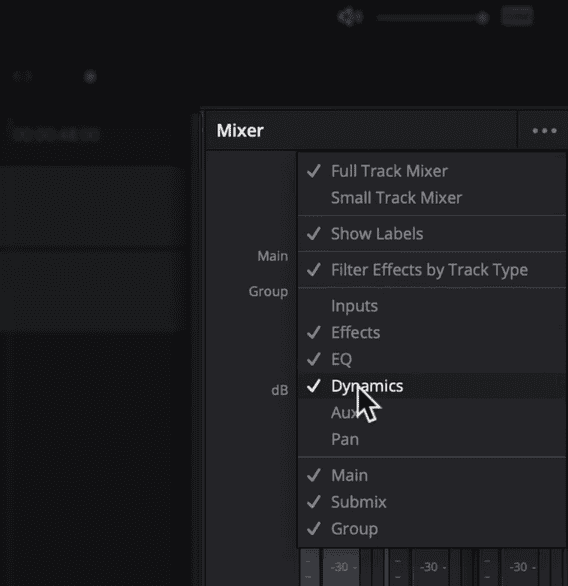
- Expand your window if possible.
- Go to the three dots icon, which allows you to toggle the visibility of different elements.
- Temporarily turn off some elements, like ‘EQ,’ to make ‘Dynamics’ visible.
Once located, double-click on ‘Dynamics.’ This action will open up the dynamics settings for ‘Audio Track 1.’ The configurations within this section will determine how DaVinci Resolve handles the audio ducking process.
Perfecting Audio Ducking in DaVinci Resolve: In-depth Guide for Fine-Tuning
Following the initial setup of the audio tracks in DaVinci Resolve, you’ll need to fine-tune your settings to achieve optimal audio ducking. This meticulous phase involves navigating the dynamics settings and adjusting various parameters to create a pleasing and balanced soundscape. This part of the blog provides an in-depth, step-by-step guide on implementing audio ducking efficiently in DaVinci Resolve.
Step 1: Setting Up the Dynamics for Dialogue and Music Tracks
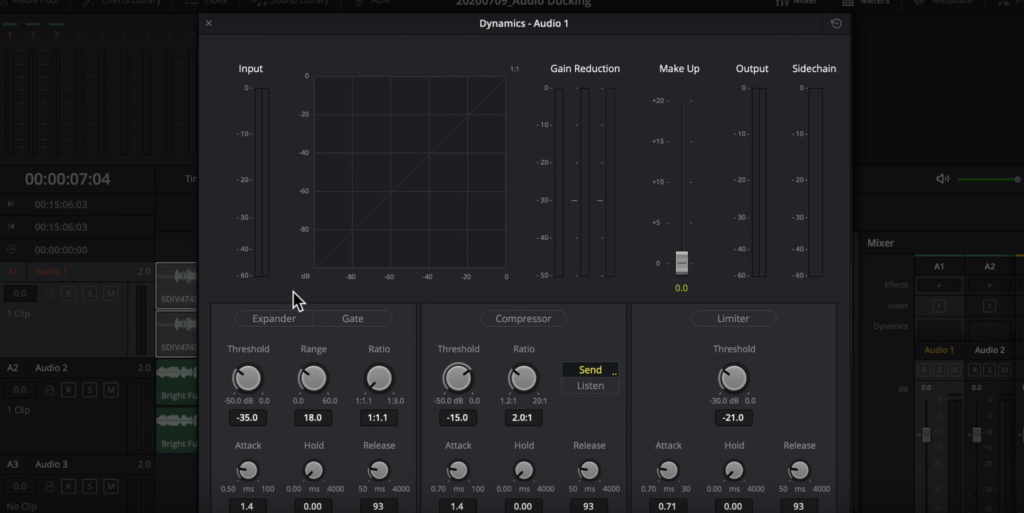
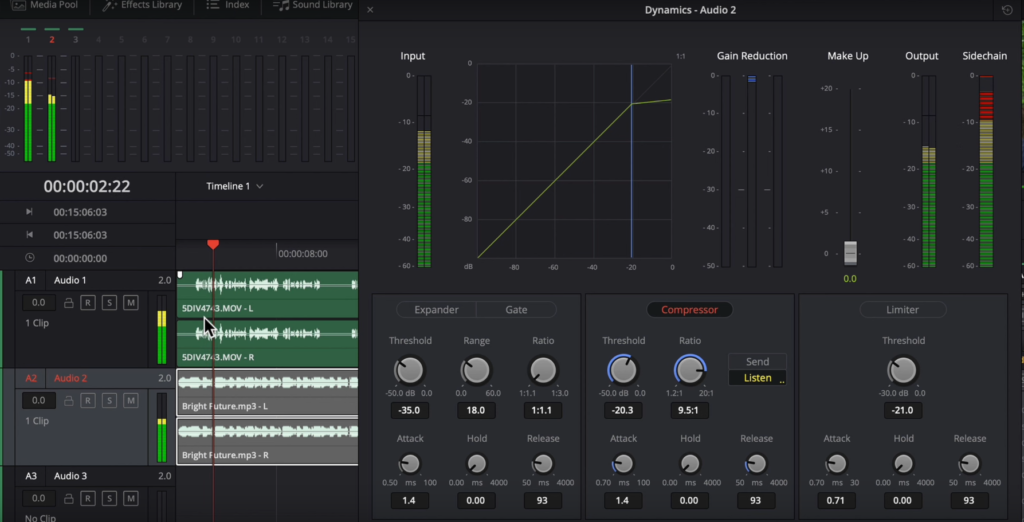
- Identify the Correct Audio Track: In a project involving multiple audio tracks, it’s essential to ascertain you’re adjusting the right track at each stage. You can confirm this by checking the label at the top of the dynamics settings. Confirm that the title of the Dynamic window says Audio 1.
- Utilize the ‘Send’ Button: In the dynamics settings of your dialogue track (labeled as ‘Audio 1’), navigate to the ‘Compressor’ section and activate the ‘Send’ button. This action sends the signal from the dialogue track to the side chain, allowing it to be used on the music track.
- Access the Dynamics for the Music Track: Next, open the dynamics for your music track (‘Audio 2’). Keep the Dynamics window open and select the second track, which brings up the dynamics settings for ‘Audio 2’.
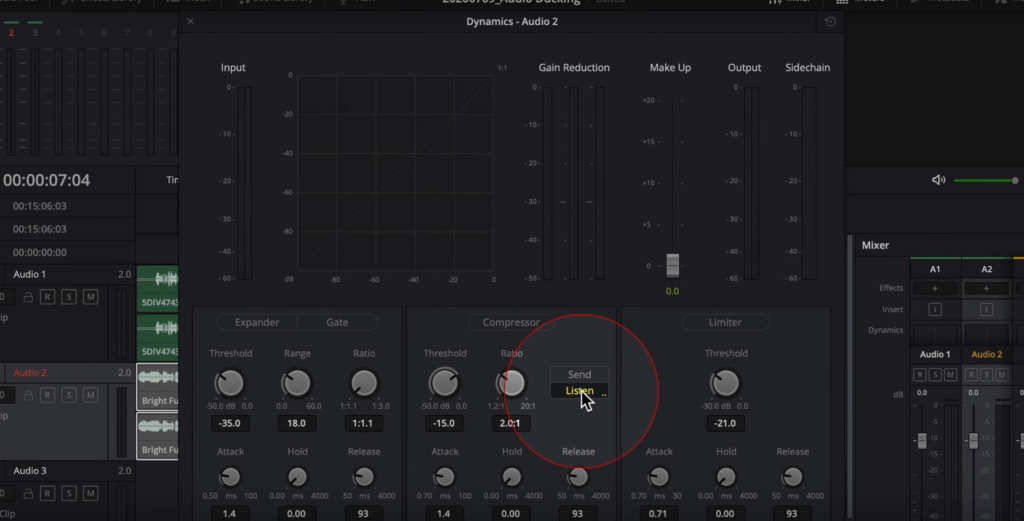
Step 2: Configuring the Compressor and Adjusting the Threshold
- Activate the ‘Listen’ Button: In the Compressor section of the music track’s dynamics settings, activate the ‘Listen’ button. This step allows DaVinci Resolve to perceive and respond to the signal from the dialogue track (Audio Track 1).
- Turn on the Compressor: Now turn on the Compressor in the music track’s settings (Audio Track 2) by clicking on the ‘Compressor’ button. This step is vital as the compressor signals to DaVinci Resolve when and by how much to lower the music volume, thereby establishing an optimal balance between the dialogue and the music.
- Adjust the Threshold: The threshold parameter in the compressor determines the decibel level at which the compressor initiates volume reduction. Suppose the dialogue track’s volume is around -10dB; the music track’s volume should be significantly lower. As such, a threshold of -20dB can serve as an excellent initial setting. Keep in mind that the exact threshold level depends on the specific requirements of your project.
Step 3: Fine-Tuning the Compressor’s Ratio
- Set the Ratio: The ‘Ratio’ setting of the compressor determines the extent of volume reduction. A higher ratio would lead to a significant volume reduction, ensuring the dialogue stands out, while a lower ratio might yield a more subtle effect.
- Play and Listen: Start playing your project from the beginning and listen attentively to the mix. Take note of whether the gain reduction is working and how smooth the transition between dialogue and music is. If the audio sounds choppy, you may need to adjust your settings.
Step 4: Adjusting the Compressor’s Attack, Hold, and Release Parameters
- Attack: The ‘Attack’ setting determines how quickly the compressor responds once it gets a signal from the dialogue track. Most of the time, the default setting suffices, but you can experiment with this setting to see if it improves your mix.
- Hold: The ‘Hold’ parameter specifies how long the compressor should remain active after the dialogue has stopped. A setting around 1-2 seconds often works well, but you may need to adjust this depending on the pacing of your dialogue and music.
- Release: The ‘Release’ setting indicates how long it takes for the music to return to its normal volume once the dialogue stops. A slower release (around 2-3 seconds) can provide a more natural-sounding transition, but as always, the exact setting will depend on the context of your project.
- Fine-Tune: Play through your project again and fine-tune these settings based on how smoothly the dialogue and music blend together.
Audio ducking is both a science and an art form. While the steps listed above provide a solid foundation for implementing audio ducking in DaVinci Resolve, always trust your ears and adjust settings as necessary to achieve the best possible mix for your project.