
Greetings, film aficionados! Here at FilmmakingElements.com, we aim to provide you with insightful tutorials and techniques to elevate your craft. In today’s article, we are eager to guide you through three distinct methods of implementing the Kaleidoscope effect in Davinci Resolve. These techniques are not only effortless but also incredibly time-efficient.
The applicability of this effect largely depends on your unique filmmaking style. However, if you find yourself frequently working on music videos, or simply searching for an engaging visual component for your musical score, this technique can significantly enhance your project. The Kaleidoscope effect can add an unexpected twist to your videos, making them memorable and visually appealing.
Method 1- Kaleidoscope Effect on the Edit Page of Davinci Resolve
The Kaleidoscope effect can impart a mesmerizing and unique aesthetic to your videos. This section delves into the first method of creating this stunning effect using the Edit page of DaVinci Resolve. You won’t need any additional third-party plugins or expensive tools. All you require is a dynamic video clip with plenty of movement and color.
Step 1: Setting Up Your DaVinci Resolve Workspace
Start by launching DaVinci Resolve on your system. Once it opens, navigate to the Edit page. This workspace is where the majority of your editing tasks will take place.
Step 2: Importing Your Desired Clip
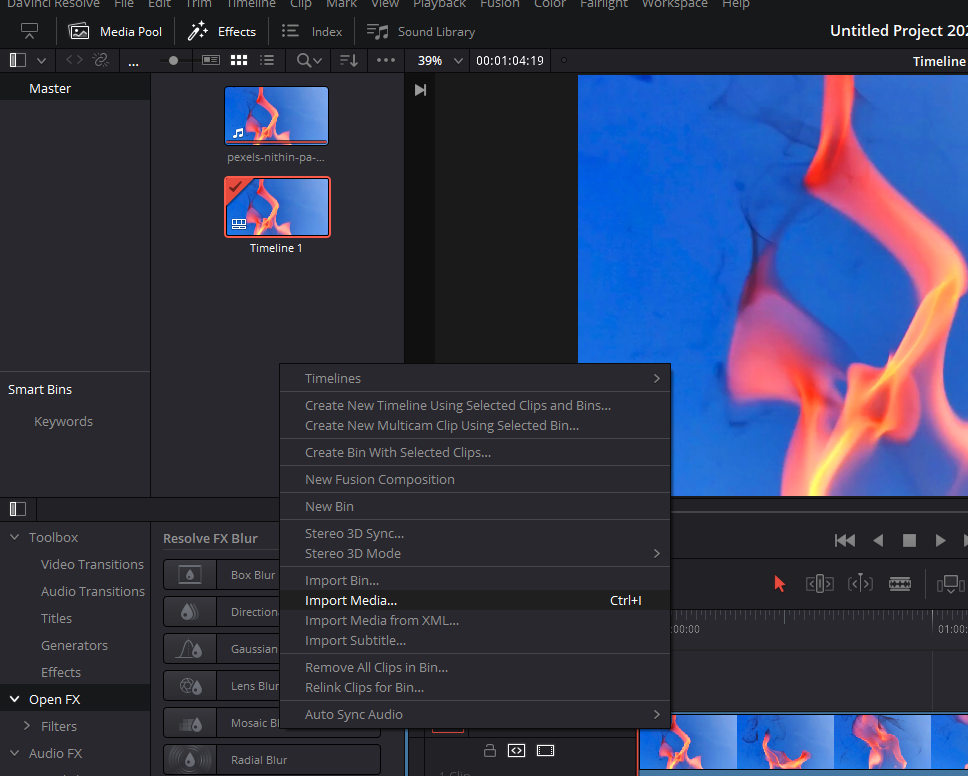
For the second step, you need to import your chosen footage into the media pool, which is the area where all your media files for the current project are stored. To import, simply right-click inside the media pool and select ‘Import Media.’ Then, browse and choose your desired video file from your computer’s storage.
Step 3: Adding Your Footage to the Timeline
Once your clip is successfully imported into the media pool, it’s time to place it on the timeline. To do this, drag and drop the clip from the media pool onto the timeline at the bottom of the screen. This clip now forms the canvas on which we will build our Kaleidoscope effect.
Step 4: Applying the Mirrors Effect
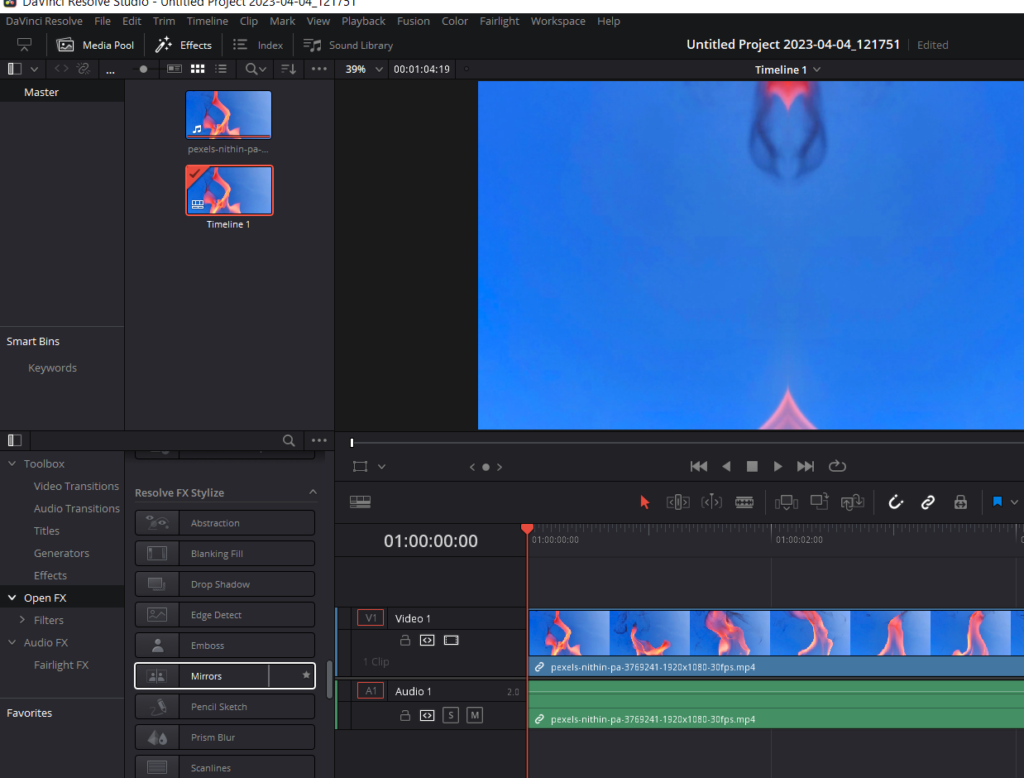
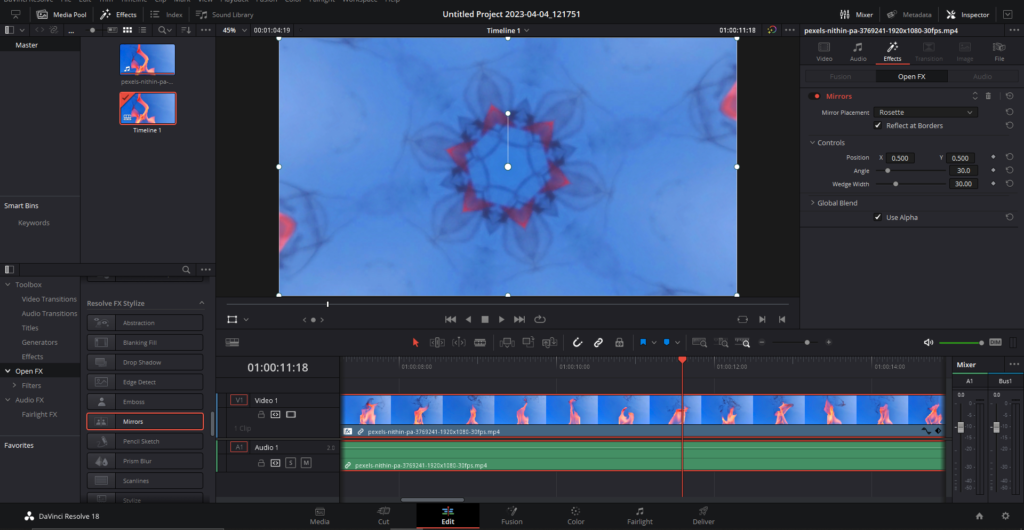
Next, we need to apply the Mirrors effect from the Effects Library. Locate the ‘Effects’ button at the top left of your screen and click on it to open the Effects Library. Scroll down until you find the ‘Resolve FX Stylize’ section. Within this category, you’ll see the ‘Mirrors’ effect. Simply drag this effect and drop it onto the clip in your timeline.
Step 5: Adjusting the Mirror Settings for the Kaleidoscope Effect
At first, the ‘Mirrors’ effect merely duplicates your footage, creating a mirror image from left to right. To morph this into a rosette or Kaleidoscope effect, further manipulation is required.
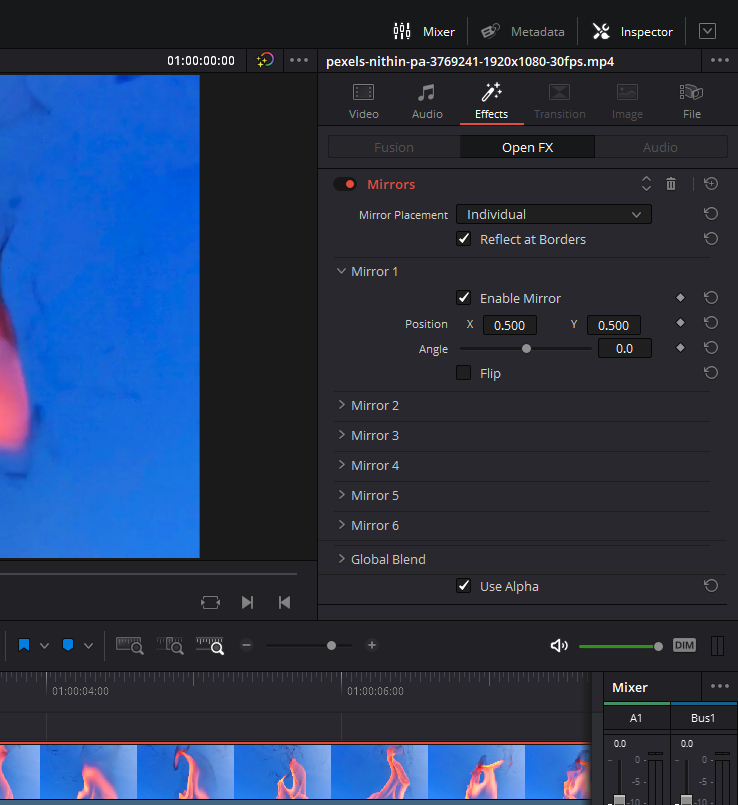
Select your clip in the timeline by clicking on it, then click on the Inspector panel in the top right corner of your DaVinci Resolve interface. Click on the Effects tab, and look for ‘Mirrors.’ If it appears minimized, simply click on ‘Mirrors’ to display all the settings available.
Step 6: Changing the Mirror Placement
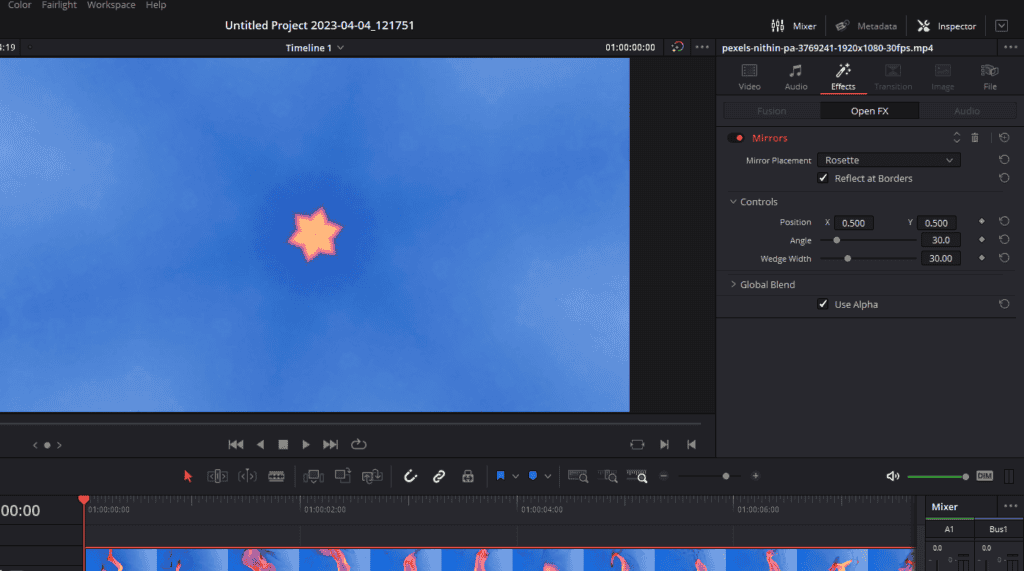
Within the settings, locate ‘Mirror Placement.’ It is set to ‘Individual’ by default. Change this setting by clicking on the dropdown menu and selecting ‘Rosette.’ This action will transform your mirrored effect into a rosette or kaleidoscope pattern.
Step 7: Customizing the Rosette Effect
With the basic kaleidoscope effect in place, it’s time to personalize it according to your aesthetic preferences or project’s needs. You’ll notice several control options, such as ‘Position,’ ‘Angle,’ and ‘Wedge Width.’ Each of these can be fine-tuned to alter the reflections of the Kaleidoscope effect, allowing you to create a unique and visually captivating result.
Step 8: Experimenting with the Kaleidoscope Effect
Now that you understand the basics, apply this effect to other clips and observe the transformation. Use different clips with various colors and movements to see how each clip interacts with the effect. Play with the settings until you achieve the desired look.
Method 2- Kaleidoscope Effect on the Fusion Page of Davinci Resolve
DaVinci Resolve provides multiple ways to produce stunning effects, and the Kaleidoscope effect is no exception. While the first method we explored used the Edit page, our second approach uses DaVinci Resolve’s Fusion page. Fusion is a node-based compositing tool within DaVinci Resolve, offering more advanced and detailed customization options. Let’s learn how to implement the Kaleidoscope effect on the Fusion page.
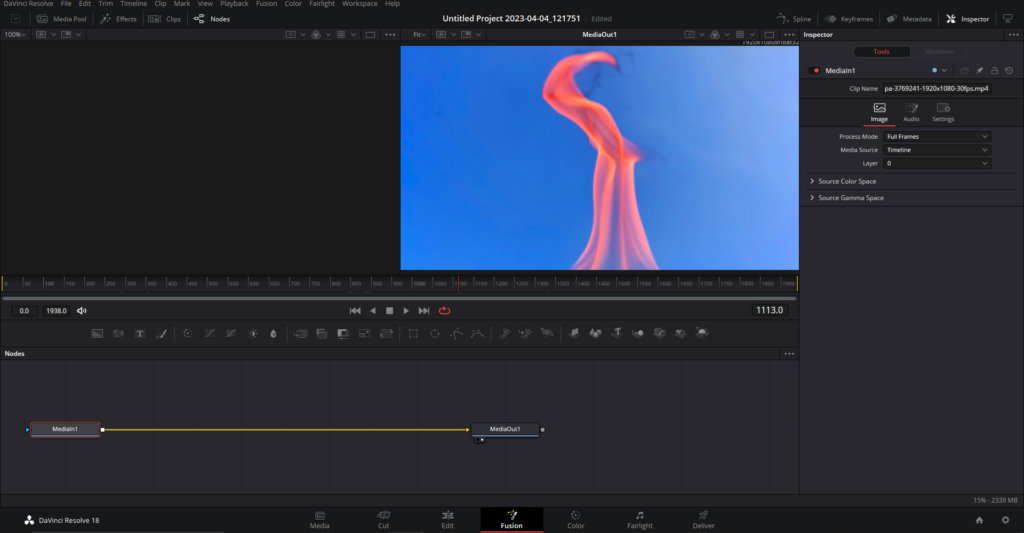
Step 1: Selecting Your Video Clip and Entering Fusion
Begin by selecting the video clip you want to apply the Kaleidoscope effect to. With your video clip chosen, navigate to the Fusion page by clicking the ‘Fusion’ tab located at the bottom of your DaVinci Resolve interface.
Step 2: Adding a Transform Node
Within Fusion, your next task is to add a Transform node to your node tree. The node tree is the graphical representation of the operations and effects applied to your footage. To add a Transform node, click on the ‘MediaIn1’ node and hit ‘Shift + Space’, this will open the tool search window. In the search type ‘Transform.’ Select the ‘Transform (Xf)’ and click on Add.
Step 3: Adjusting the Transform and Edges Settings
With the Transform node added, select it and navigate to the Inspector panel in the top-right corner. Here, you’ll find an essential setting: ‘Edges’. Change the ‘Edges’ setting from the default ‘Canvas’ option to ‘Mirror’. This action will prepare the clip for the Kaleidoscope effect by mirroring the edges of the video. But you won’t see a change as if now.
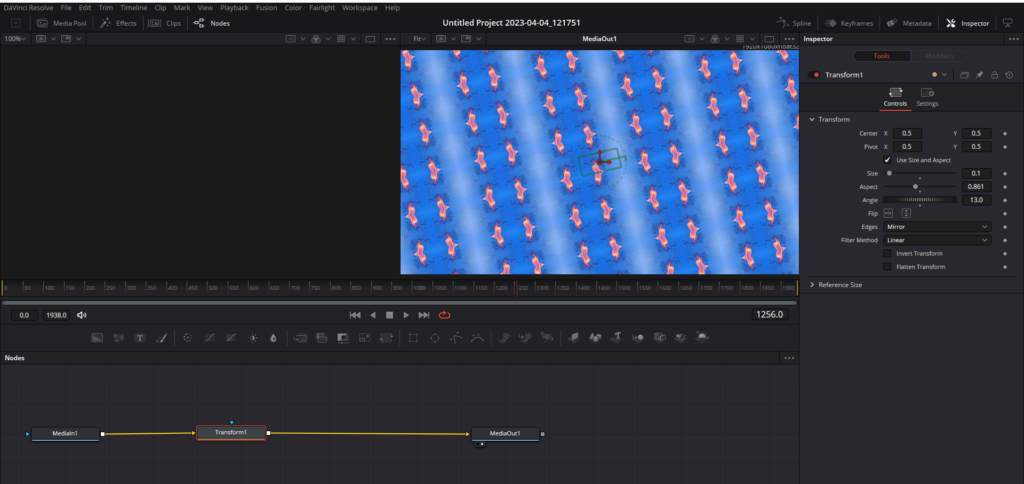
Step 4: Resizing and Rotating the Mirrored Footage
Next, start resizing your mirrored footage by using the ‘Size’ parameter under the Transform settings. As you reduce the size (moving the slider to the left), more mirrored images appear, enhancing the Kaleidoscope effect. Adjust the size according to your preference.
You can also alter the ‘Angle’ parameter to rotate your mirrored footage slightly, giving it a more dynamic and intriguing look. After adjusting the size and angle, play the video to review the changes.
Method 3- Kaleidoscope Effect on the Fusion Page of Davinci Resolve Using The Mirror Node
In addition to the previous method, DaVinci Resolve’s Fusion page offers another effective approach to generating the Kaleidoscope effect. This method enables you to achieve a truly mesmerizing Kaleidoscope feel to your videos. Let’s explore the steps to master this technique.
Step 1: Add the ‘Mirrors’ Node
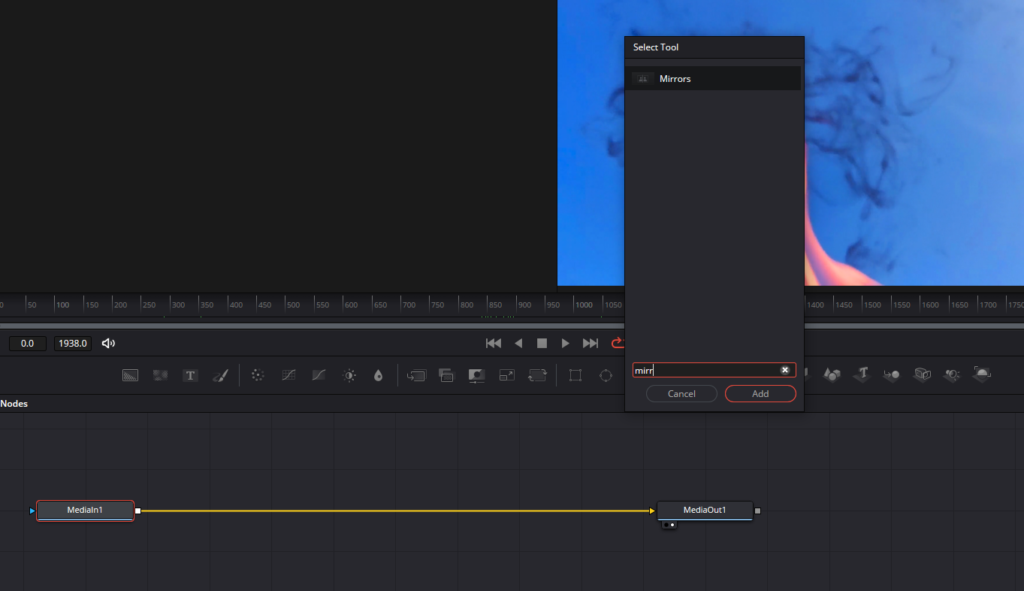
Start by selecting the ‘MediaIn 1’ node in your Fusion page’s node tree. Hit ‘Shift + Spacebar’ to open the tool menu and type in ‘Mirrors’ to find the ‘Mirrors’ node. Add this node to your node tree.
Step 2: Adjust the ‘Mirror Placement’ Setting
With the ‘Mirrors’ node selected, navigate to the Inspector panel, find the ‘Mirror Placement’ setting under the ‘Mirrors1’ tab, and change it to ‘Kaleidoscope’. This adjustment will give your video a genuine Kaleidoscope look.
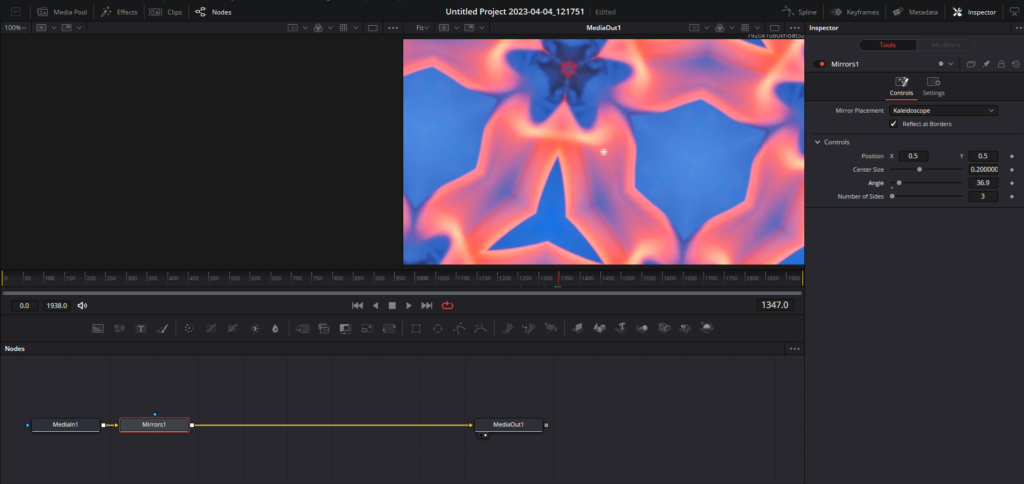
Step 3: Customize Position, Size, and Angle
At this point, you can tweak the position, center size, and angle settings of the mirror effect. Changing the ‘Position X’ and ‘Y’ values can significantly alter the appearance of your effect. Similarly, adjusting the size can increase or decrease the number of reflections. Lastly, altering the angle can give your footage a dynamic rotation.
Step 4: Add Keyframes for Dynamic Changes
Dynamic changes in the mirror effect make your Kaleidoscope effect come to life. This dynamism can be achieved by adding keyframes to the size and angle parameters, allowing your effect to change over time in accordance with your preferences.
- Adding the First Keyframe: Begin at the frame where you want the change in the effect to start. With the ‘Mirrors’ node selected in the node tree, go to the Inspector panel. Next to the ‘ Center Size’ and ‘Angle’ parameters, you’ll notice small diamond icons. Click on these icons to add the first keyframe for each parameter. These diamond icons will light up, indicating that a keyframe has been placed at the current frame of your video.
- Adding Subsequent Keyframes: Once the first keyframes are in place, move your playhead to the next position where you want to modify the size or angle of the Kaleidoscope effect. Simply make your desired changes to the ‘Center Size’ and ‘Angle’ parameters. DaVinci Resolve will automatically place a new keyframe at this frame of your video for the adjusted parameter.
- Observing the Keyframes in Action: After setting your keyframes, hit ‘Play’ on your timeline. You’ll observe that the Kaleidoscope effect dynamically changes in size and angle as your video plays, precisely as dictated by your keyframes.
This process allows you to create a video where the Kaleidoscope effect evolves over time, adding an extra level of sophistication to your video project. Keyframes provide a level of control that can make your effect feel more integrated with the movement and rhythm of your video, rather than being a static, unchanging overlay. Experimenting with different keyframe placements can lead to unique and unexpected results, opening new avenues of creativity in your video editing process.
Step 5: Apply the Kaleidoscope Effect to Specific Subjects
This method also allows you to apply the Kaleidoscope effect to a specific subject in your video. To do this, select your video clip in the node tree and add another ‘Mirrors’ node. Change the ‘Mirror Placement’ to ‘Kaleidoscope’ as before. Then, using the ‘Position’ controller (a small diamond in the center of the preview window), you can place the effect on your desired subject.
And there you have it – three distinct methods to create the fascinating Kaleidoscope effect in DaVinci Resolve, ready to add a unique spin to your next video project. Happy editing!