
Hi, I’m Salik, the author of FilmmakingElements.com. I have been a filmmaker for over 10 years. I am also a certified DaVinci Resolve Trainer and I have used DaVinci Resolve for many of my projects. In the fast-paced world of video editing, achieving smooth and professional-looking footage is crucial for any creative project. One of the most sought-after effects in this domain is the “Locked On” stabilization, which gives the impression of a steady and fixed camera even in the most dynamic of scenes.
Davinci Resolve, the powerful and versatile video editing software, offers multiple ways to achieve this effect, making it an indispensable tool for editors and content creators alike.
In this article, we will explore two different ways for creating the Locked On stabilization effect in Davinci Resolve, allowing you to choose the approach that best suits your workflow and project requirements. Get ready to unlock the full potential of your footage and elevate your video production game to new heights.
1. Locked On Stabilization Effect using Planar Tracker in DaVinci Resolve
The locked-on stabilization effect is a popular technique that provides a smooth, stable appearance to your footage, adding a touch of professionalism to your videos. In this detailed guide, we will show you how to create the locked-on stabilization effect using the Planar Tracker in DaVinci Resolve.
Step 1: Importing footage and navigating to the Fusion tab
Begin by opening your project in DaVinci Resolve and importing the footage you want to apply the effect to. Place the footage on the timeline, and then navigate to the Fusion tab. Fusion is DaVinci Resolve’s powerful node-based compositing tool, which will be used to create the locked-on stabilization effect.
Step 2: Adding the Planar Tracker node
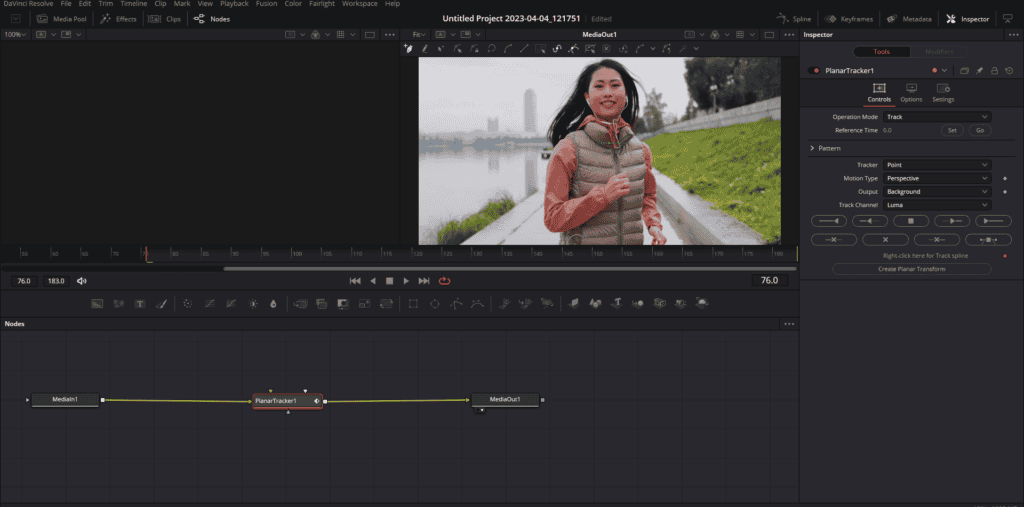
With MediaIn1 selected in the Fusion node tree, press Shift + Spacebar to bring up the search tool. This tool allows you to search for and add nodes to your project quickly. Type in “PLANAR” and select Planar Tracker from the list that appears. Click on Add to insert the Planar Tracker into your node tree. The Planar Tracker is a versatile tool that can track and match movement in your footage.
Step 3: Setting the Reference Time
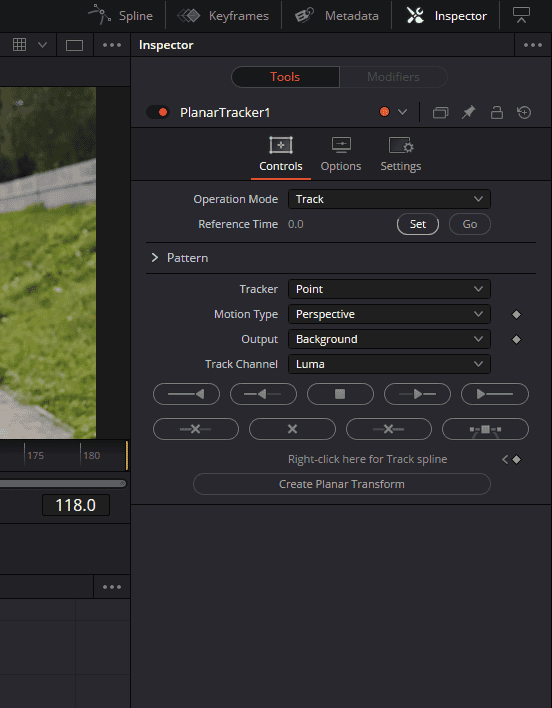
Move the playhead to the middle of the clip. Click on the Set button in front of the Reference Time in the Planar Tracker controls on the right of the viewer. The Reference Time is a point in your footage that the tracker will use as a basis for tracking movement throughout the clip. Setting the Reference Time in the middle of the clip ensures that the tracking data is evenly distributed and can help improve the accuracy of the stabilization effect.
Step 4: Configuring the Planar Tracker settings
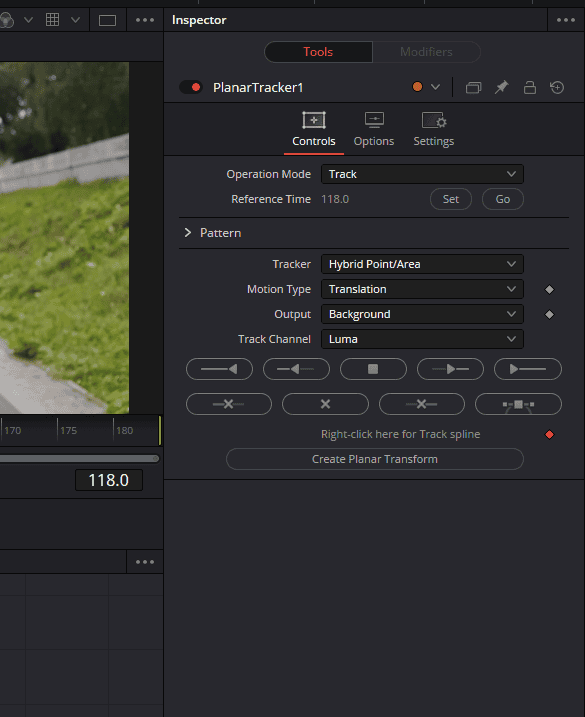
Change the Tracker setting in the Planar Tracker controls from Point to Hybrid Point/Area. The Hybrid Point/Area setting combines the benefits of point tracking and area tracking, providing a more accurate and robust tracking solution. Next, set the Motion Type to Translation. This setting ensures that the tracker only considers translational motion, which is the most common type of motion in locked-on stabilization scenarios.
Step 5: Selecting the subject to track
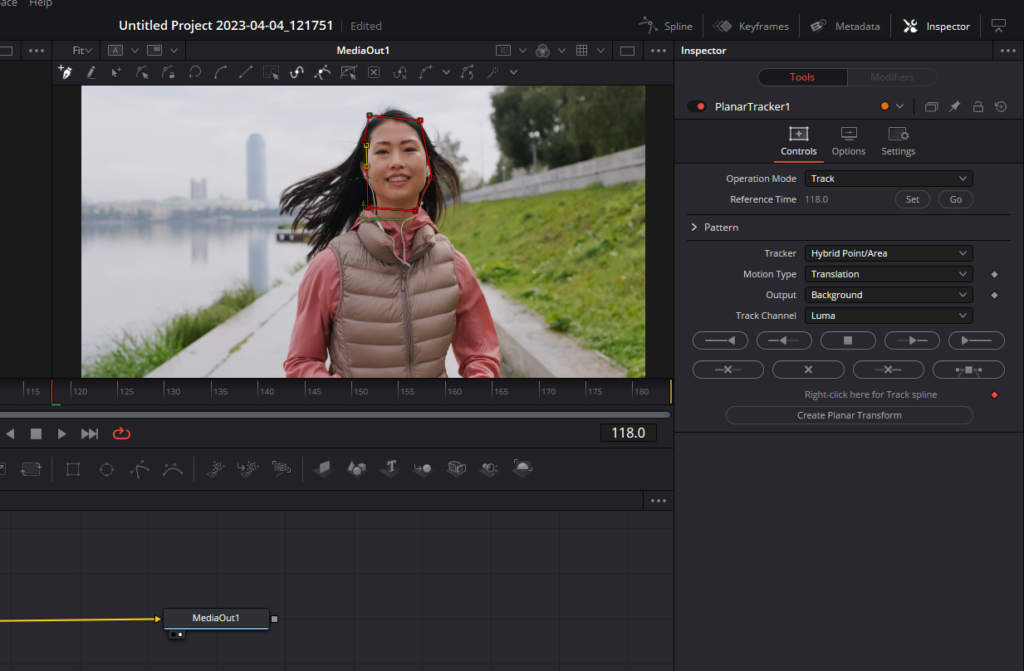
Draw a box around the subject you want to track in the viewer. The selection doesn’t have to be perfect, as DaVinci Resolve’s smart tracking system will compensate for any inaccuracies. The Planar Tracker will analyze the selected area and generate tracking data based on the movement of the subject throughout the clip.
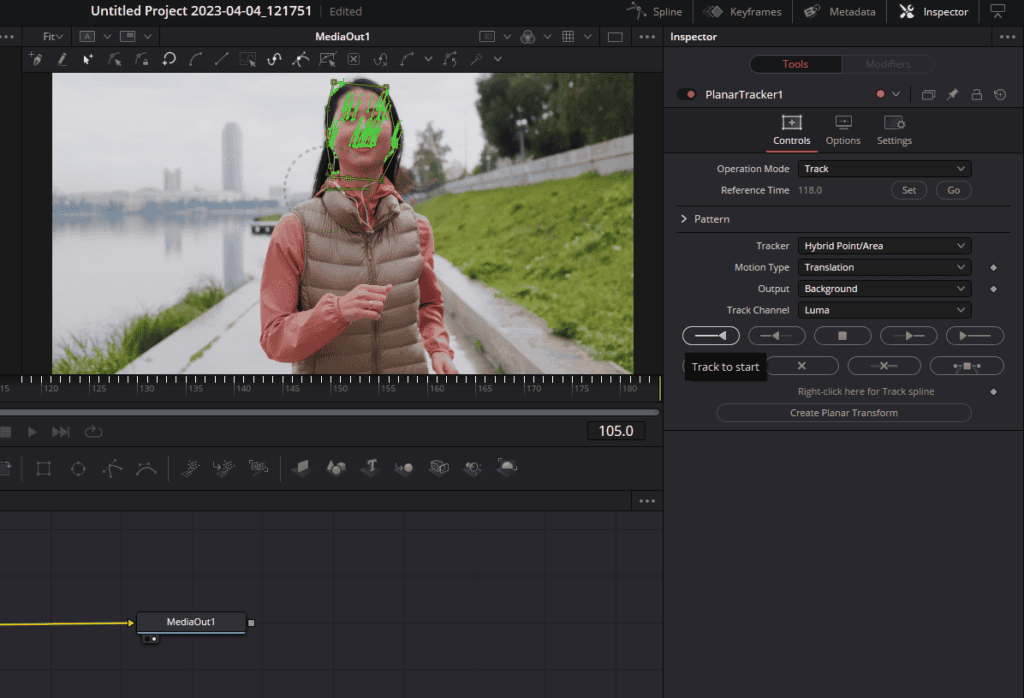
Step 6: Tracking the subject
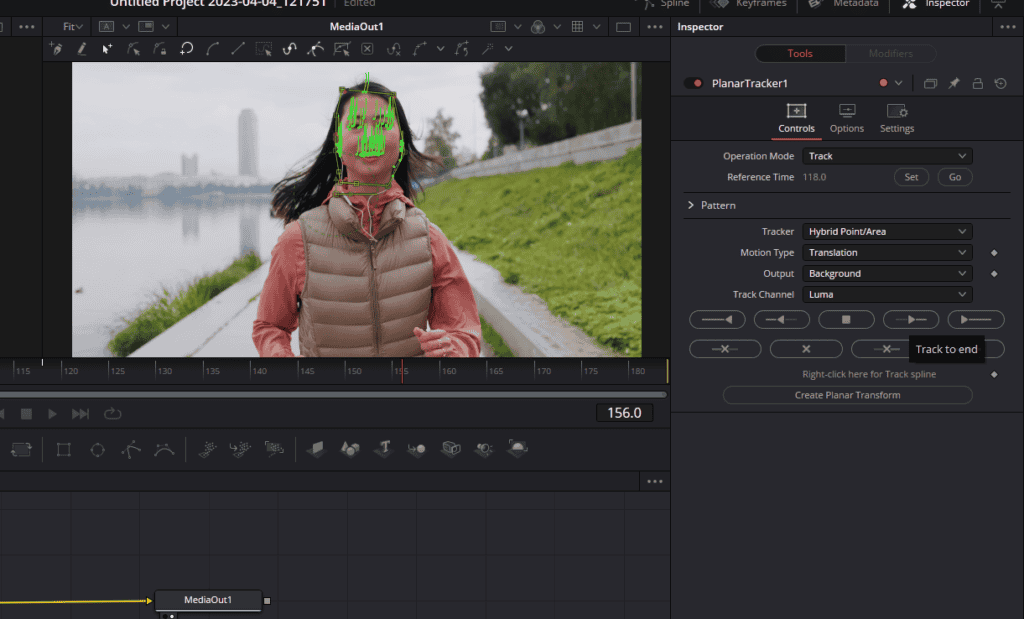
With the subject selected, click on the Track to End button (arrow point to right with a line) in the Planar Tracker controls, and DaVinci Resolve will begin tracking the subject forward from the Reference Time. Once it reaches the end of the clip, click on Track to Start (arrow point to left with a line) to track the subject in reverse, from the Reference Time to the beginning of the clip. This two-pass tracking process ensures that the tracker has accurate data for the entire duration of the clip.
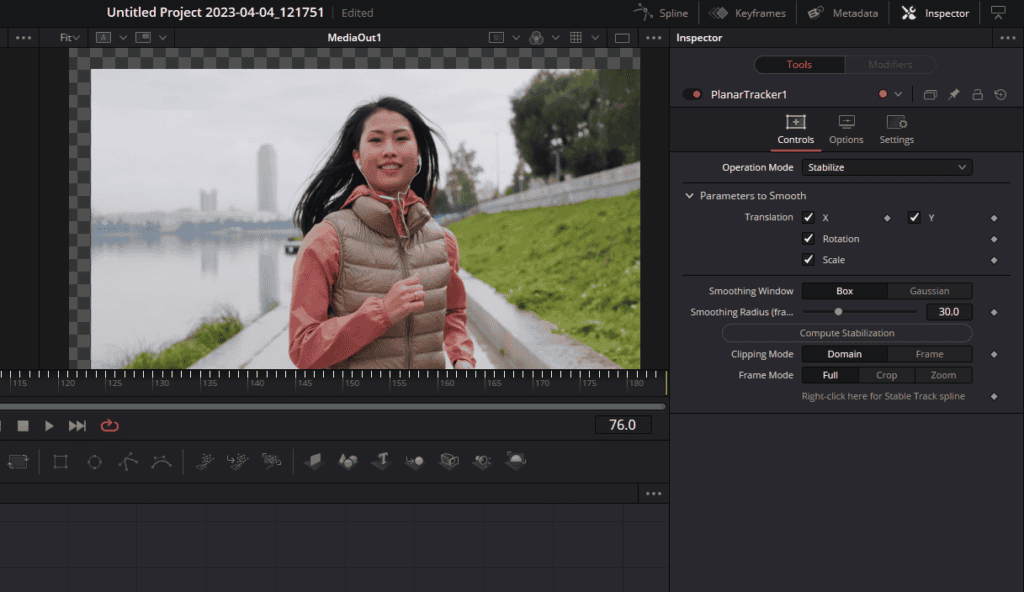
Step 7: Changing the Operation Mode to Stabilize
After tracking is complete, change the Operation Mode in the Planar Tracker controls from Track to Stabilize. In Stabilize mode, the Planar Tracker uses the generated tracking data to counteract any movement in the footage, resulting in a smooth, locked-on appearance.
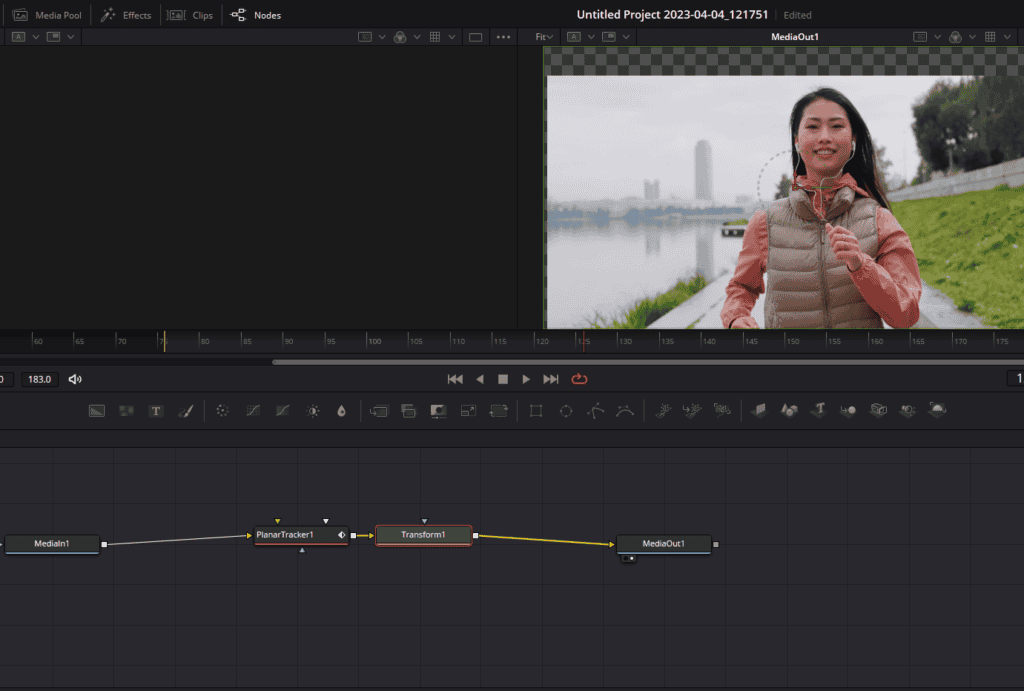
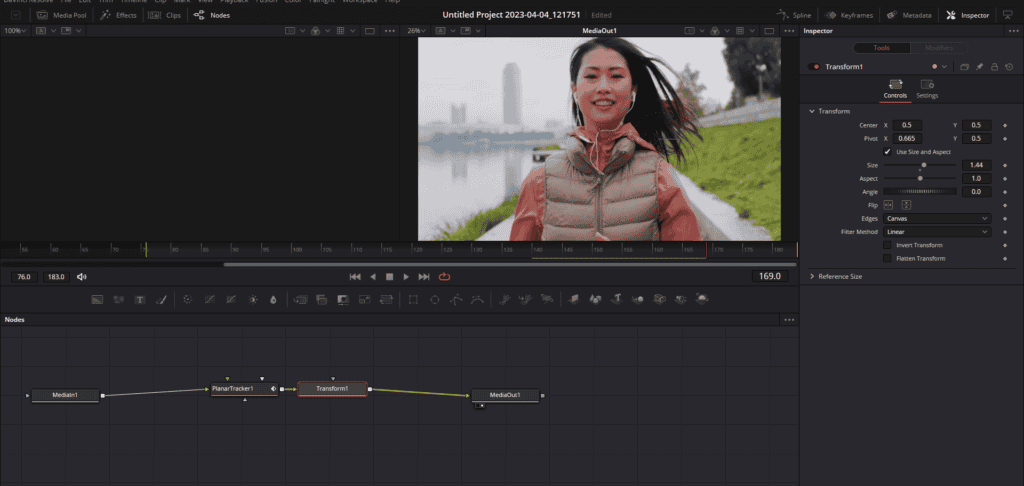
Step 8: Adding a Transform node to remove blank spaces
At this point, you may notice blank spaces around the edges of your footage due to the stabilization. To fix this, make sure the Planar Tracker node is selected, press Shift + Spacebar, and type in “Transform” to add a Transform node to your node tree. The Transform node allows you to make adjustments to the scale, position, and rotation of your footage, which will be used to remove any blank spaces caused by the stabilization process.
Step 9: Adjusting the Size parameter in the Transform node
Locate the point in your clip with the most blank space and adjust the Size parameter in the Transform node to zoom in and remove the empty area. Be careful not to zoom in too much, as this may cause a loss of quality in your footage. The goal is to find a balance between removing blank spaces and maintaining the quality of your footage.
Step 10: Reviewing the clip for additional blank spaces
As you scroll through the clip, you may notice additional blank spaces appearing at different points in the footage. Make a note of these instances, as they will be addressed in the next step.
Step 11: Adjusting the Pivot settings in the Transform node
If necessary, adjust the Pivot settings in the Transform node to reposition your subject in the frame. The Pivot settings control the center point of any transformations made to the footage. By adjusting the Pivot settings, you can ensure that your subject remains centered throughout the clip while eliminating any remaining blank spaces.
Step 12: Final review and completion of the locked-on stabilization effect
Once you have adjusted the Size and Pivot settings in the Transform node, review your clip to ensure there are no more blank spaces and that the locked-on stabilization effect is working as intended. You may need to make additional adjustments to the Transform node settings to fine-tune the effect. However, once you are satisfied with the results, you have successfully created the locked-on stabilization effect in DaVinci Resolve using the Planar Tracker.
2. Creating the Locked On Stabilization Effect using the Tracker and Transform Nodes in DaVinci Resolve
In this detailed guide, we will explore an alternative method to create the locked on stabilization effect in DaVinci Resolve using the Tracker and Transform nodes. This method provides similar results to the first method but follows a slightly different approach.
Step 1: Preparing the footage for the Locked On Stabilization Effect
When creating the locked on stabilization effect, it is recommended to use footage with a resolution of 4K or higher. This is because the effect requires zooming in on the image, which can result in a loss of resolution. Additionally, try to record the video at a high shutter speed to minimize motion blur. With these considerations in mind, import your footage into DaVinci Resolve and place it on the timeline.
Step 2: Navigating to the Fusion module
To create the locked on stabilization effect, navigate to the Fusion module in DaVinci Resolve by clicking on the magic wand icon. Fusion is a powerful node-based compositing tool that will be used to apply the effect to your footage.
Step 3: Adding the Tracker node
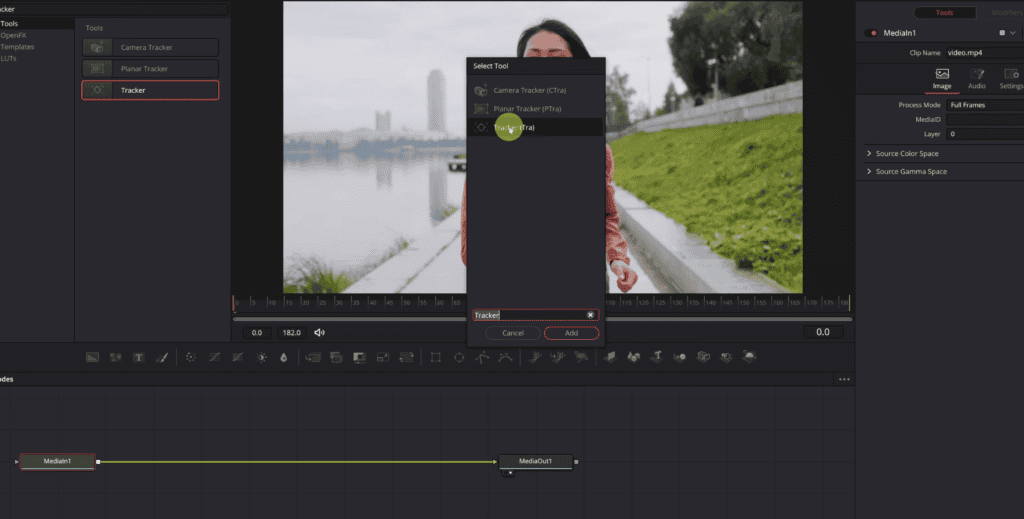
Select the MediaIn1 node in the fusion node tree and press Shift+ Space to bring up the search window, and type “Tracker” to find and add the effect. With the Tracker node connected, a green box will appear over the viewer, indicating that the effect is ready to be applied.
Step 4: Configuring the Tracker settings
Click on the Tracker node and in the viewer, drag the upper left corner of the green box to the area you want to track in the footage, such as the subject’s face, a headset they are wearing, or another object. For better tracking results, select a high-contrast area like the nose, which will follow the same movement as the face.
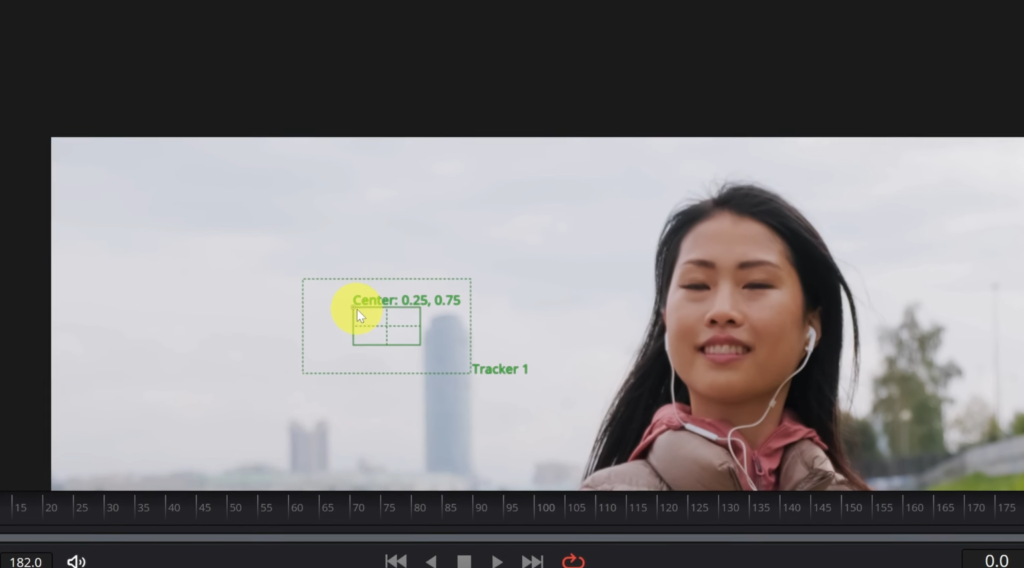
Adjust the larger rectangle surrounding the tracking area to include the entire face. This secondary area follows the movement of the subject, but with less intensity than the primary tracking area. Position the playhead at frame zero (the beginning of the video) and configure the Adaptive Mode setting to “Best Match” for improved tracking results in Tracker settings on the right of the viewer.

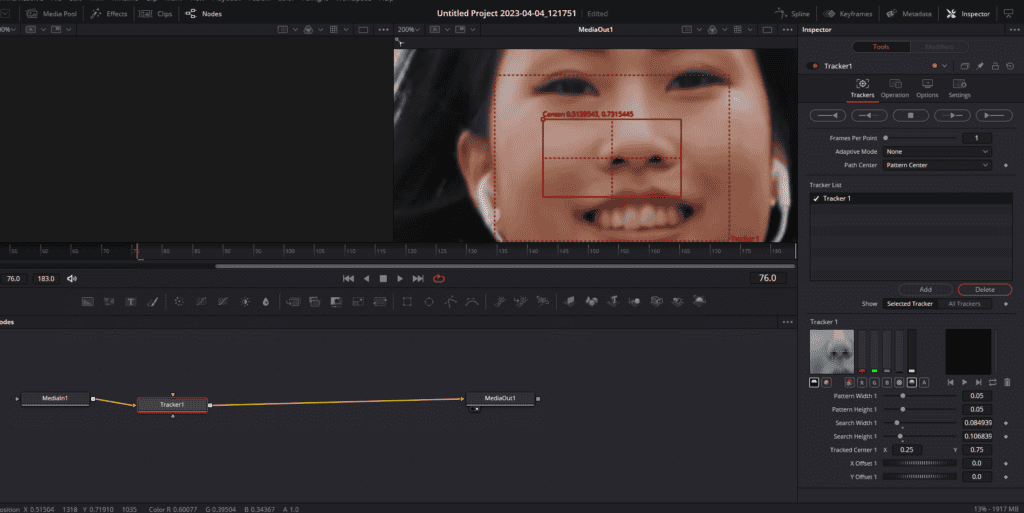
Step 5: Generating tracking data
Click on the arrow point right with a line (Track Forward) icon to start tracking the movement of the subject in the footage. DaVinci Resolve will analyze the motion and generate tracking data that will be used to create the locked on stabilization effect. Wait for the software to complete the tracking process, a dailogue box will appear, press OK.
Step 6: Configuring the Tracker operation mode

In the Tracker node settings, go to the Operation section and select “Match Move” as the operation mode. This setting will use the generated tracking data to counteract the movement in the footage, creating a stable, locked-on appearance.
Step 7: Removing the edges of the frame
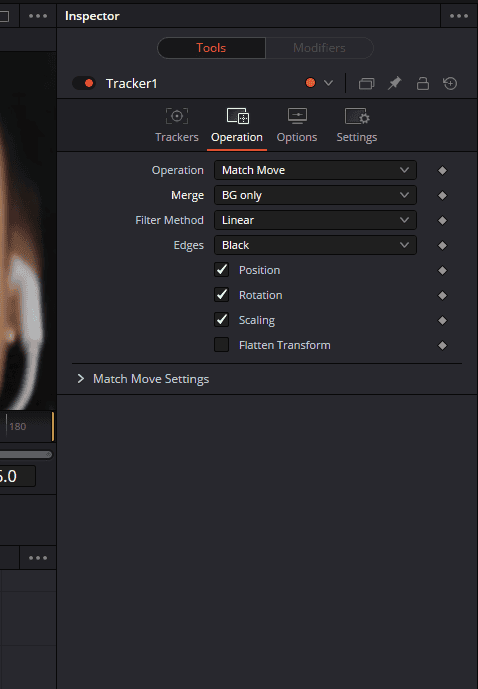
To eliminate the empty areas that appear around the edges of the frame due to the stabilization effect, first select “BG Only” in the Merge drop down menu below the operation menu of the Tracker node settings. Next, go to the Effects panel and search for the Transform effect. Connect the Transform node to the Tracker node and the MediaOut1 node, ensuring that it is correctly connected.
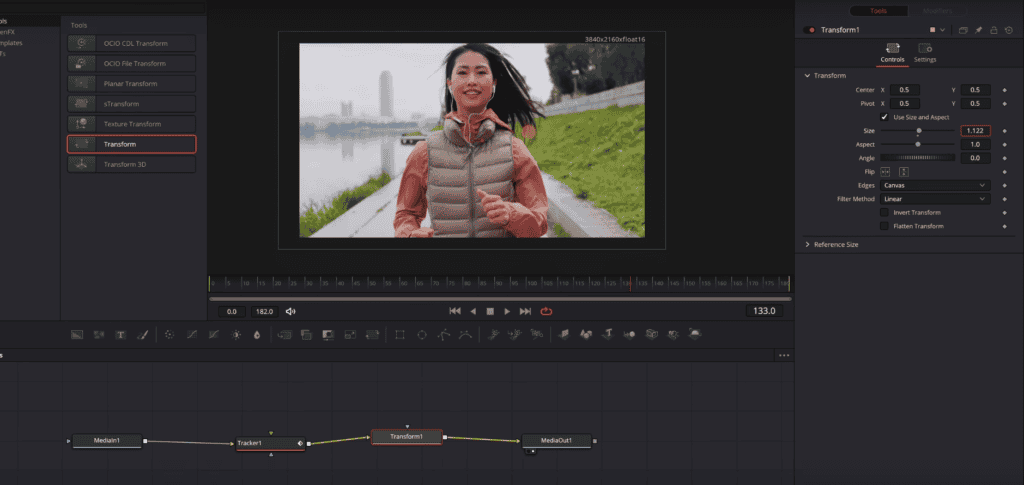
Step 8: Adjusting the Transform node settings
In the Transform node settings, increase the Size parameter to zoom in on the footage, removing the empty areas around the edges. This is why using high-resolution footage is essential for this effect, as zooming in on lower-resolution footage can result in a loss of quality. Play the video to check if the empty areas have been removed. If necessary, make further adjustments to the Size parameter to eliminate any remaining gaps.
Step 9: Adjusting the position of the footage
If increasing the size of the footage results in a loss of image quality, you can also adjust the position of the footage on the Y-axis to remove the empty areas. By moving the footage downward, you can maintain the image quality while still achieving the desired locked on stabilization effect.
Step 10: Finalizing the Locked On Stabilization Effect
With the Transform node adjustments complete, play the video to ensure the locked on stabilization effect has been successfully applied, and that there are no remaining empty areas or other issues. If needed, make any final tweaks to the Tracker and Transform node settings to achieve the desired result.
Conclusion
The “Locked On” stabilization effect is one such technique that adds a level of professionalism to your videos, creating the illusion of a steady and fixed camera in even the most dynamic of scenes. DaVinci Resolve, with its powerful tools and versatile features, provides multiple ways to achieve this sought-after effect, making it an indispensable tool for editors and content creators alike.
In this article, we have explored two different methods for creating the Locked On stabilization effect in DaVinci Resolve, enabling you to choose the approach that best suits your workflow and project requirements.
The first method utilizes the Planar Tracker to generate tracking data and apply stabilization, while the second method employs the Tracker and Transform nodes to achieve a similar result. By mastering both techniques, you will be able to unlock the full potential of your footage and elevate your video production game to new heights.
Invest time in learning and perfecting these methods, and you will soon be able to create high-quality, engaging content that stands out and captivates your audience. With practice and dedication, you will become adept at using both techniques, allowing you to tackle any project with confidence and create stunning, stabilized footage that leaves a lasting impression.