Hi, I’m Salik, the author of FilmmakingElements.com. I have been a filmmaker for over 10 years. I am also a certified DaVinci Resolve Trainer and I have used DaVinci Resolve for many of my projects. DaVinci Resolve is a powerful video editing software that has taken the creative world by storm. From color grading to seamless visual effects, it offers an extensive suite of tools to help filmmakers and content creators bring their visions to life. Among the many captivating features it offers, creating eerie demon or ghost voices is a particularly intriguing one. These spine-chilling sound effects can elevate your horror films, haunted documentaries, or even Halloween-themed projects to new heights of spookiness.
In this article, we will explore two different techniques to create haunting demon or ghost voices in DaVinci Resolve. Whether you’re a seasoned pro or a budding enthusiast, these methods will help you add an extra layer of eeriness to your audio tracks. So, get ready to dive into the world of spectral sounds and unleash your inner audio alchemist as we demystify these spine-tingling effects in DaVinci Resolve.
1. Altering Pitch for Demon/Ghost Vocal Effects
In this method, we’ll delve into the details of creating demon or ghost voices in DaVinci Resolve, using a straightforward approach to adjusting pitch. By the end of this tutorial, you’ll be well-equipped to experiment with your audio and conjure up some truly chilling vocal effects.
Step 1: Import Your Clip and Set Up Your Timeline
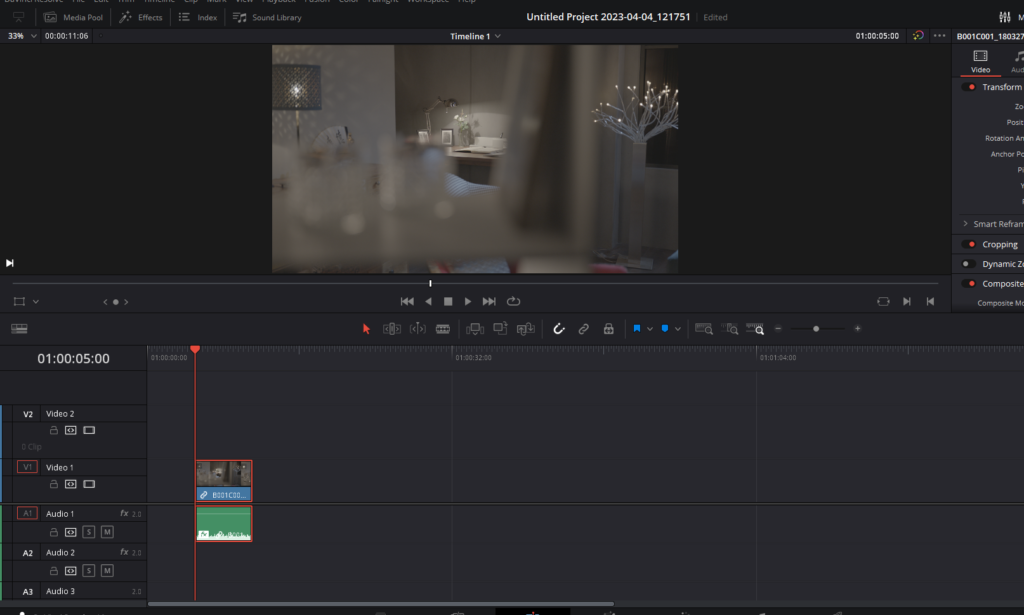
To get started, open DaVinci Resolve and import the clip you wish to manipulate. Drag the clip into the timeline area at the bottom of the screen. This is where you’ll perform the bulk of your editing. If you’re working with a continuous audio clip, any effects applied will affect the entire clip. To isolate specific sections for individual treatment, use the “blade” tool to create separate segments. Press “B” to use blade tool and cut the section of the clip where you want your voice to sound like a demon.
Step 2: Adjust the Audio Level (Optional)
If you wish to increase the volume of your audio, click on the “Mixer” button in the top right corner, simply look Audio track number in which your audio is which you wish to change, and click on the vertical volume line on the right of your timeline within the Mixer section of the timeline and drag it upwards. Be mindful not to raise the volume too much, as doing so may cause distortion or discomfort for your audience.
Step 3: Access the Effects Library
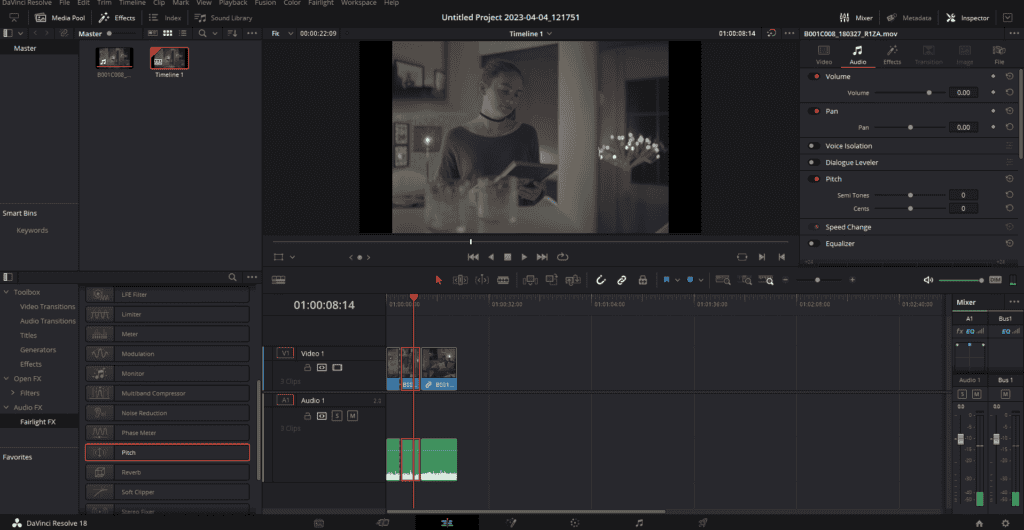
To begin altering the pitch of your audio, navigate to the “Effects” located in the upper left corner of the screen. Click on the Effects button to display a list of available audio and video effects. For this tutorial, we will be focusing on the audio effects found within the Fairlight FX category.
Step 4: Apply the Pitch Effect
In the Fairlight FX section, locate the “Pitch” effect. This effect is available in the free version of DaVinci Resolve, making it accessible to all users. Click and drag the Pitch effect onto your audio clip in the timeline. A dialogue box will appear, close this for now, this will apply the effect to your clip, although no changes will be noticeable until you adjust the settings.
Step 5: Fine-Tune the Pitch Settings
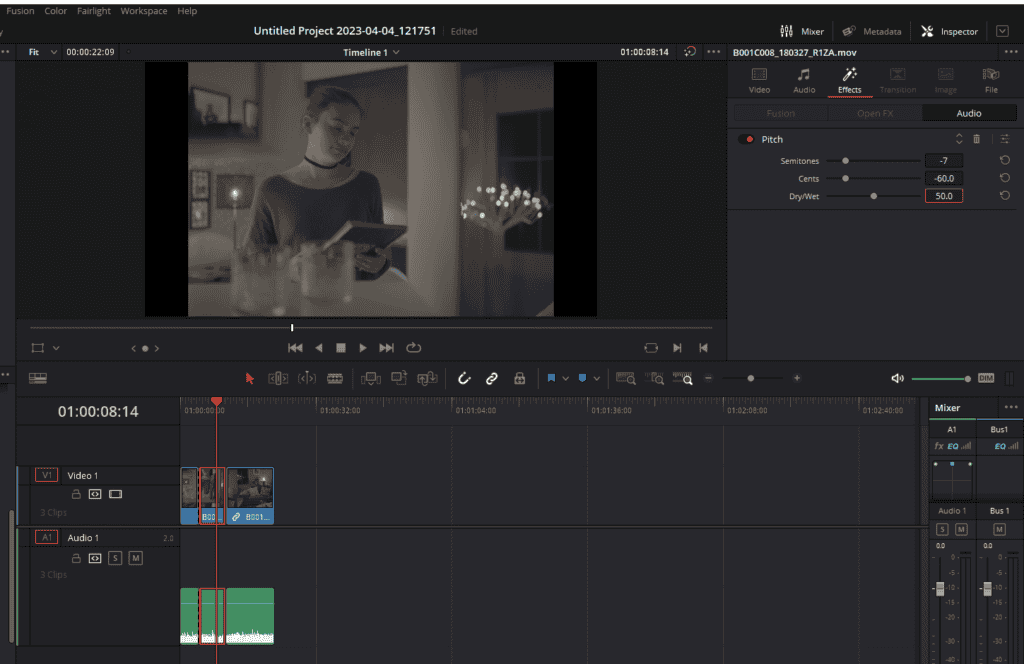
To modify the pitch settings, click on the audio portion of your clip to highlight it. Navigate to the Inspector panel, located in the upper right corner of the screen. Click on Effects>Audio in the inspector panel while your audio is selected in the timeline.
Experiment with the pitch settings to achieve your desired demonic or ghostly voice. A suggested starting point is to set the values of Semitones to -7, Cents to -60, and Dry/Wet to 50. These settings can be adjusted to suit your preferences, enabling you to create a wide variety of supernatural vocal effects.
Step 6: Preview and Adjust Your Audio
With the new pitch settings applied, play back your audio clip to preview the transformation. If necessary, make further adjustments to the pitch settings until you are satisfied with the results. Congratulations, you have successfully created a demon or ghost voice using DaVinci Resolve!
2. Creating Ghost Voice Effects with Layered Audio Editing
The ghost voice effect is a captivating audio manipulation technique that can add a mysterious and haunting ambiance to your project. Although DaVinci Resolve is capable of creating this effect, it is worth noting that standalone digital audio workstations (DAWs) like Reaper or Adobe Audition can achieve the same result with greater ease.
This is due to the non-destructive nature of DaVinci Resolve’s audio effects, as well as the platform’s lack of a straightforward method for adding silence to an audio clip. Nevertheless, by utilizing audio layers and following the steps outlined below, you can create an intriguing ghost voice effect within DaVinci Resolve.
Step 1: Enable Layered Audio Editing
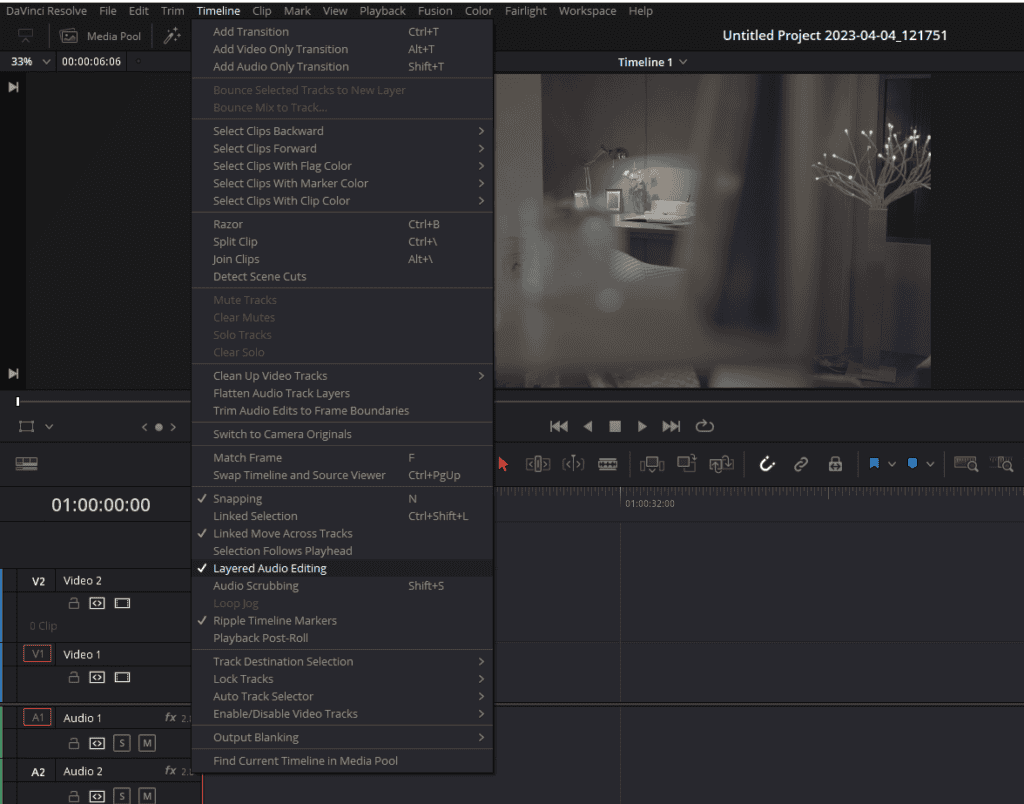
To begin, open DaVinci Resolve and navigate to the top menu. Select Timeline, and then click on Layered Audio Editing. This will prepare your workspace for the upcoming steps.
Step 2: Add Silence to the Beginning of the Clip
Place your playhead at the start of the clip you want to apply the ghost voice effect to. Hold down Shift and press the right arrow key on your keyboard five times, moving the playhead forward by five seconds. Next, move your clip so that it starts at the playhead’s new position. This will create a five-second gap at the beginning of your timeline, allowing you to add silence to the clip.
Step 3: Add Silence in the Fairlight Page
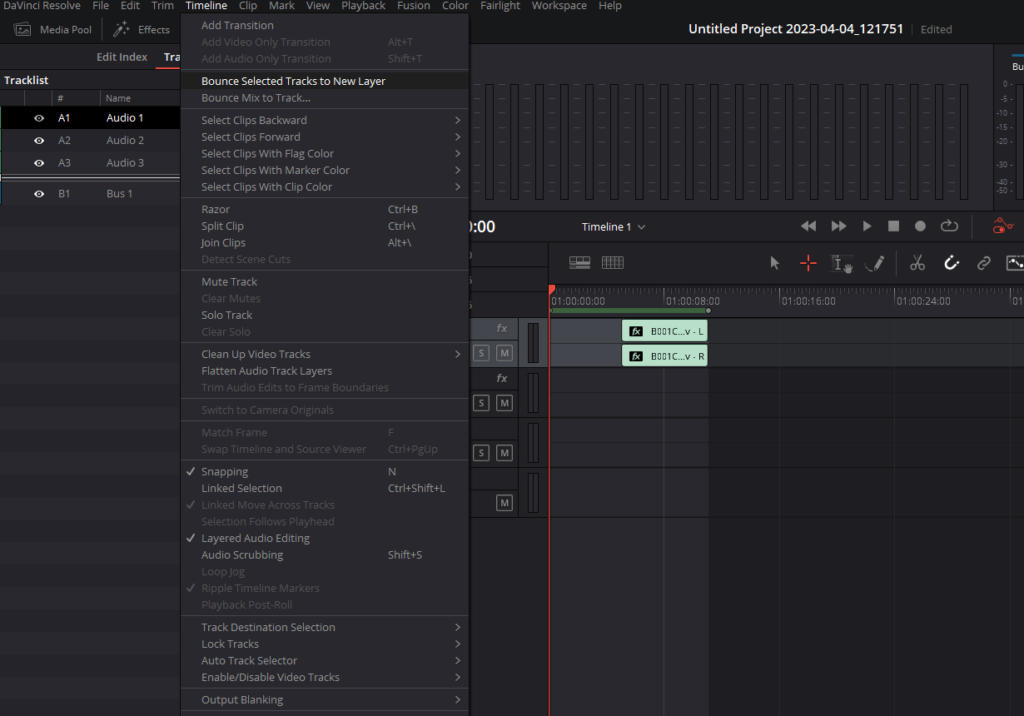
Head to the Fairlight page in DaVinci Resolve to add silence to your clip. Set an in-point (Press I) at the beginning of the blank section of your timeline, and an out-point (Press O) at the end of the clip you want to apply the effect to. Select the audio track containing your clip, go to the Timeline menu, and click on Bounce Selected Tracks to New Layer. This will create an audio clip with five seconds of silence, followed by your original dialogue.
Step 4: Reverse the Audio Clip
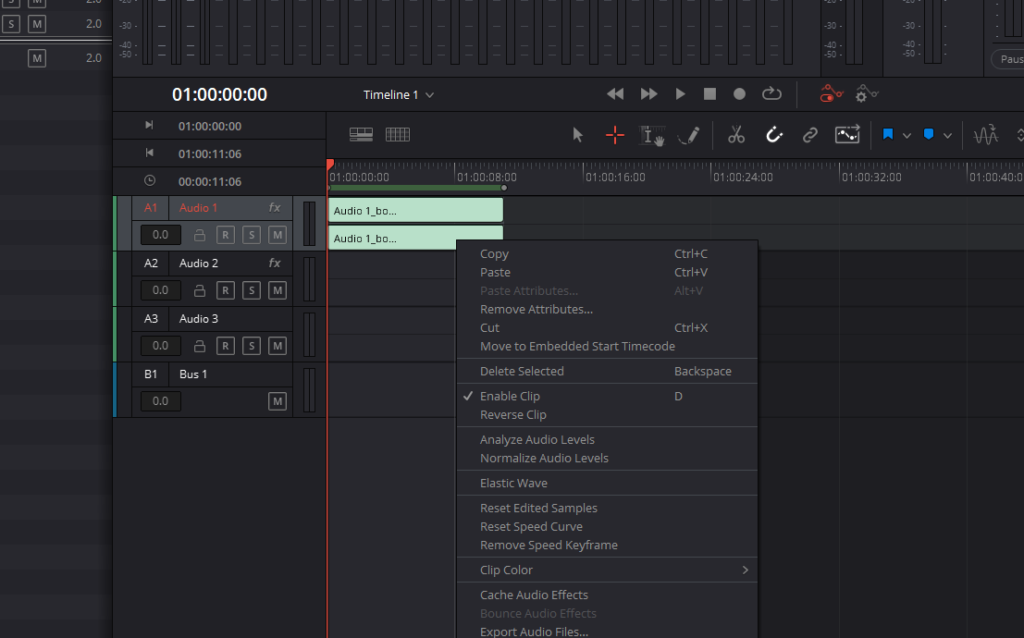
Right-click on the audio clip and select Reverse Clip. Set in and out-points at either end of the clip, select the audio track, go to the Timeline menu, and choose Bounce Selected Tracks to New Layer.
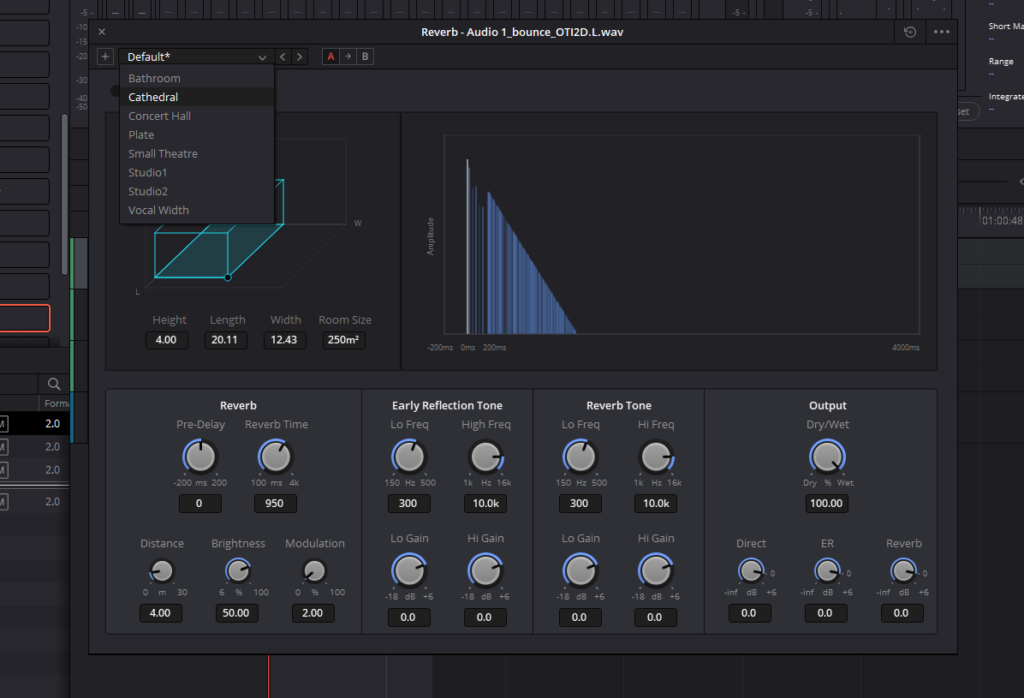
Step 5: Apply Reverb
Open the Effects by clicking on it from the top left corner and locate the reverb plugin. Drag the plugin onto your audio clip and adjust the settings according to your preference or choose a preset, such as the Cathedral preset. Once you’ve applied the reverb, bounce the selected tracks to a new layer once more from the Timeline menu on top.
Step 6: Reverse the Clip Again
Select your audio clip, right-click, and choose Reverse Clip again. At this stage, your audio will feature the desired ghost voice effect, with reverb fading in at the beginning and the words playing correctly. However, the dialogue may be difficult to understand.
Step 7: Mix Original and Reversed Audio Clips
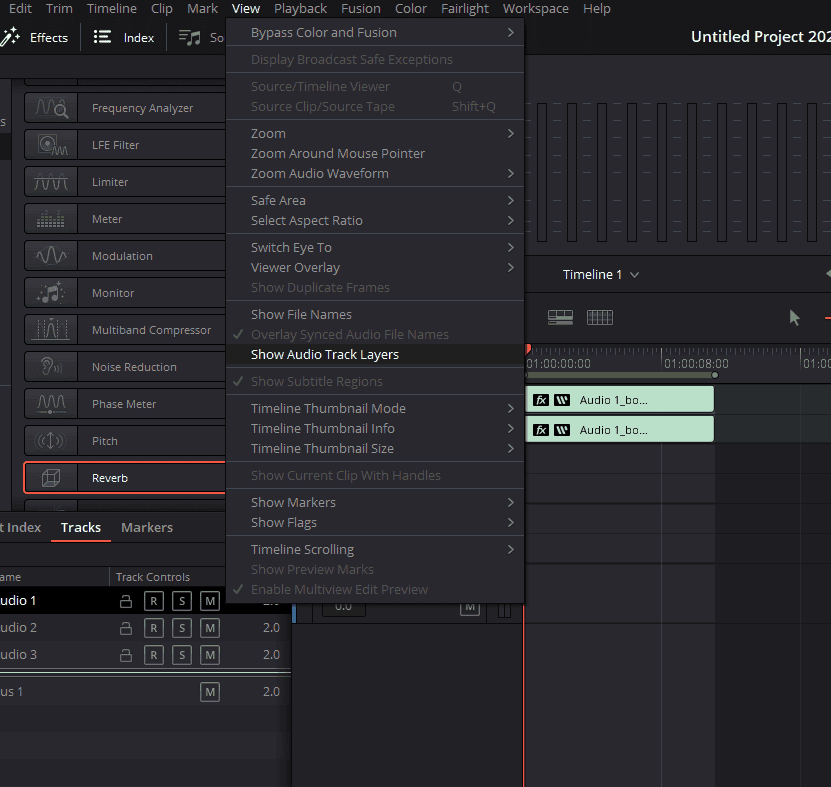
To improve the clarity of the dialogue, move the original audio clip to a new track and mix it with the reversed reverb clip. Click on View in the top menu and select Show Audio Track Layers. Identify the bottom layer, which contains your original take, select it, hold down Shift, and drag it onto a new track.
Step 8: Align and Adjust Audio Levels
Align the reverse reverb clip with the original audio clip, and experiment with the levels of each until you achieve a satisfactory mix. The final result should be a captivating ghost voice effect that enhances your project’s eerie atmosphere.
While creating the ghost voice effect in DaVinci Resolve may not be the most straightforward process, it can be an enjoyable and rewarding experience. By following these steps and experimenting with audio layers, you can generate a unique and haunting auditory experience for your audience.
Thank you for taking the time to read our article on creating demon and ghost voice effects in DaVinci Resolve. We hope that you found this information both useful and inspiring, and that you can apply these techniques to elevate your audio editing skills. As you continue to explore the world of audio manipulation, remember to experiment and have fun while creating these eerie effects. Your creativity is boundless, and we look forward to hearing the haunting masterpieces you create using DaVinci Resolve. Happy editing!
- Also Read- 8 Best Music Video Effects In Davinci Resolve
- Also Read- Davinci Resolve Voice Isolation: Step By Step Guide
- Also Read- Davinci Resolve Voice Changer: Very Easy