Welcome back to our filmmaking enthusiasts at FilmmakingElements.com! If you’re looking to elevate your post-production game, especially in terms of visual effects, you’re in for a treat.
In today’s segment, we dive into the power of the luma keyer tool within DaVinci Resolve. This handy tool can be a game-changer for those scenes where the sky doesn’t quite capture the mood you’re going for. Whether it’s to transform a dull, cloudy day into a picturesque sunset or to bring in some dramatic storm clouds into an otherwise clear sky, the luma keyer is your best bet.
So, how exactly do you use the luma keyer to achieve these effects? Stay tuned as we guide you through the steps to seamlessly replace the sky and bring your vision to life.
Luma Keyer in DaVinci Resolve (Step 1)
Entering the fascinating realm of video editing can sometimes feel like navigating a labyrinth. But don’t fret! Today, we’re demystifying the initial stages of using the Luma Keyer in DaVinci Resolve, ensuring that you can follow along with ease and confidence.
1. Setting the Stage: Download and Install
- If you haven’t already, download DaVinci Resolve, a free but incredibly powerful video editing software.
- Once installed, open the program and create a new project.
2. Making Your Selections: Clips and Elements
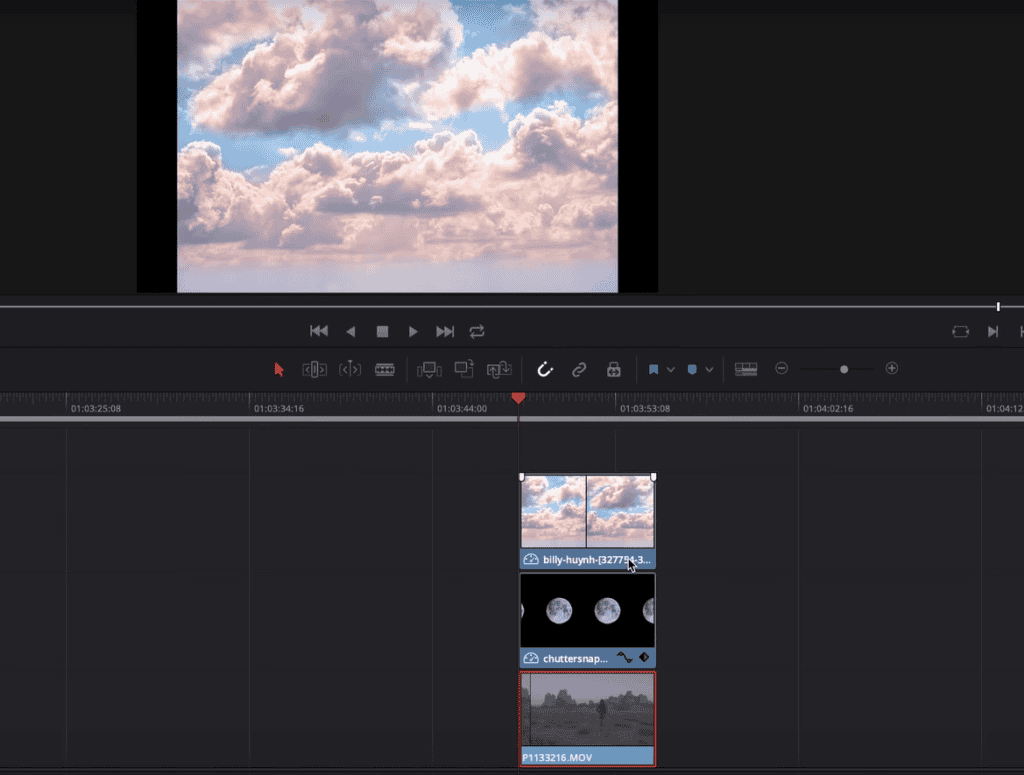
- Foreground Clip: This is your main video or image. Think of it as the star of your show. Before integrating it, put this clip on video track 1, ensure:
- It’s color-corrected.
- Any additional enhancements or tweaks are completed.
- Background Clip: This will serve as your setting or backdrop. For beginners, a photo is a great place to start, but as you grow confident:
- Consider using dynamic backgrounds like videos or time-lapses.
- Experiment with different visuals that suit your project’s theme.
- Additional Visual Elements: Want to spruce up your composition? Add something fun! For this walkthrough, I’m adding a moon. But whether it’s stars, a bird, or even a spaceship – the sky’s the limit.
3. Organizing: Laying Down the Foundations
- In the DaVinci Resolve timeline, drag and place your selected clips.
- Ensure:
- Each clip is ‘activated’ (visible on the timeline).
- They’re stacked or layered on top of each other in the order you want them to appear.
- They are of equal lengths. If one is longer or shorter, adjust them by trimming or expanding as required.
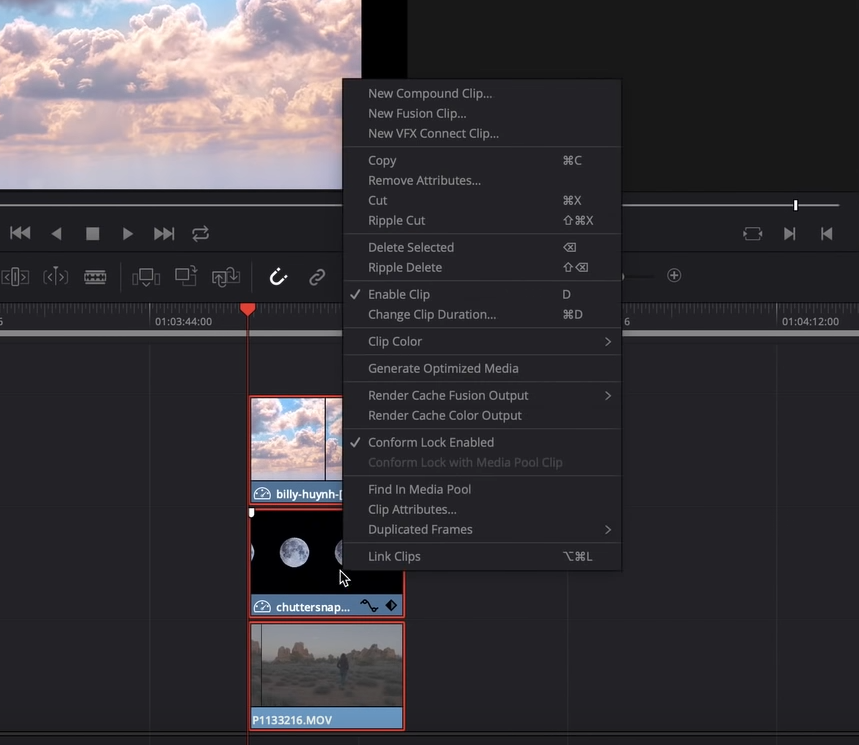
- Once you’re satisfied with the placement, hold down the ‘Command’ key (or ‘Ctrl’ key for Windows users) on your keyboard.
- While holding, click each of your clips to select them all simultaneously.
- Then, right-click on the selected clips. From the dropdown menu, choose ‘New Fusion Clip’. This action combines your clips into one unified clip, simplifying your next editing steps.
4. Diving into Fusion: Where Magic Happens
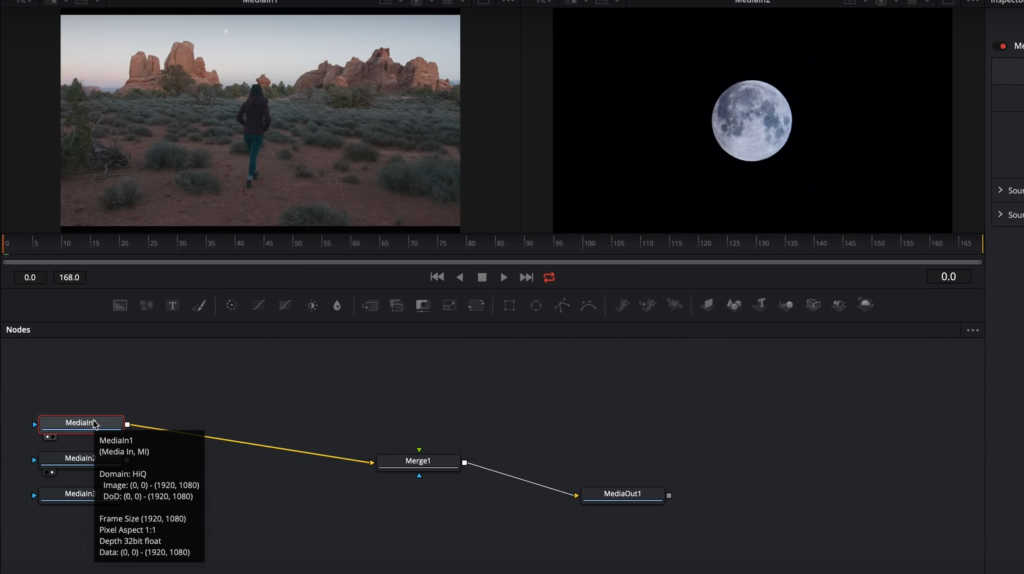
- With your new Fusion clip selected in the timeline, locate and click on the ‘Fusion’ button, usually situated at the bottom of the DaVinci Resolve interface.
- This will transition you to the Fusion workspace, and you’ll notice that your clips are now automatically layered.
That concludes our initial stages. You’ve successfully set the scene for using the Luma Keyer.
Organizing Your Workspace in DaVinci Resolve: Step 2 with Luma Keyer
Crafting a seamless video composition often begins with a clean and organized workspace. As we continue our deep dive into using the Luma Keyer in DaVinci Resolve, our second step focuses on tidying up your Fusion interface for optimal productivity. Let’s guide you through the process:
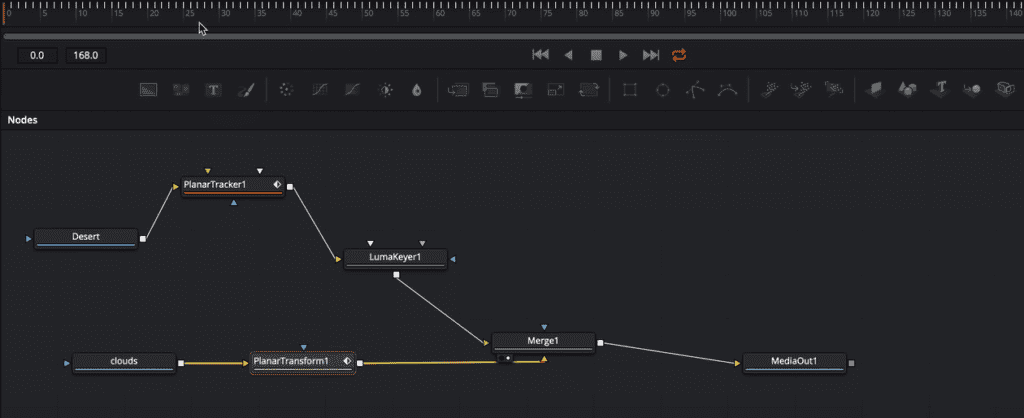
1. Streamlining Nodes: Less is More
- Start by looking for any extraneous nodes in your Fusion workspace, such as the ‘merge node’. Just keep your ‘Merge1’ node connected to ‘MediaIn1’ and ‘MediaOut1’ node and remove other connections.
2. Node Positioning: Aligning Your View
- Click on ‘MediaIn1’, drag it to a convenient spot in your workspace.
- To view this node’s content, simply select the node and then press the ‘1’ key. This action will display the node’s content in ‘Viewer Number One’.
- Remember, there are two viewers:
- Viewer Number One: Displayed using the ‘1’ key.
- Viewer Number Two: If you want to view a different node here, select the node and press ‘2’.
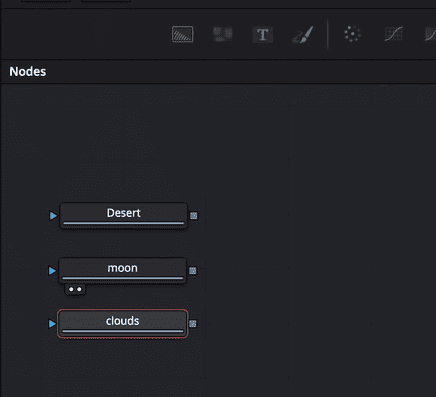
3. Renaming Nodes: Clarity is Key
- For easy reference later, it’s crucial to name your nodes accurately.
- On a Mac, to rename a node:
- Select the node you want to rename.
- Right-click on the node, and select ‘Rename’.
- A renaming box will appear. Type in your desired name.
- For our example:
- The node that acts like the foreground layer, name it accordingly. For example, the node with the desert scene is aptly renamed to ‘Desert’.
- The one showcasing the moon becomes ‘Moon’.
- And if you have a node with cloud imagery, go ahead and name it ‘Clouds’.
Blending Scenes Seamlessly with Luma Keyer in DaVinci Resolve: Step 3
In the world of video editing, the real magic often happens when you combine different scenes to create a cohesive visual narrative. For our next step in mastering the Luma Keyer in DaVinci Resolve, we’ll explore how to effectively layer and blend your shots. Let’s dive in:
1. Understanding Merge Nodes: Layering Basics
- Merge Nodes: If you’re a newcomer to DaVinci Resolve, it’s vital to understand that merge nodes are used to combine different layers. Imagine them as the ‘glue’ that holds multiple visuals together.
- Color Codes: Hover your mouse over the arrows of the merge node. You’ll observe:
- Yellow Arrow: This represents the background layer.
- Green Arrow: This corresponds to the foreground layer.
- For our tutorial, we aim to have the ‘Clouds’ as our background, and the ‘Desert’ shot prominently displayed in the foreground.
2. Previewing Your Merge: Seeing the Blend
- With your merge node selected (Merge1), press the ‘2’ key. This displays the merged output, showing the desert scene layered atop the clouds.
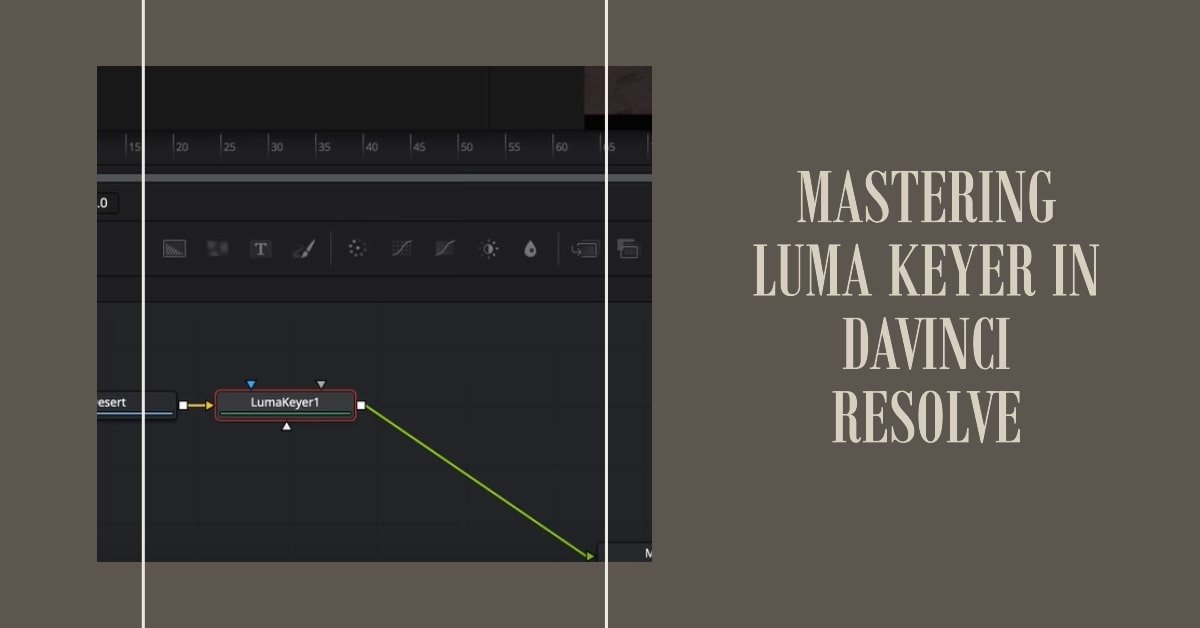
3. Integrating Luma Keyer: Crafting the Perfect Sky
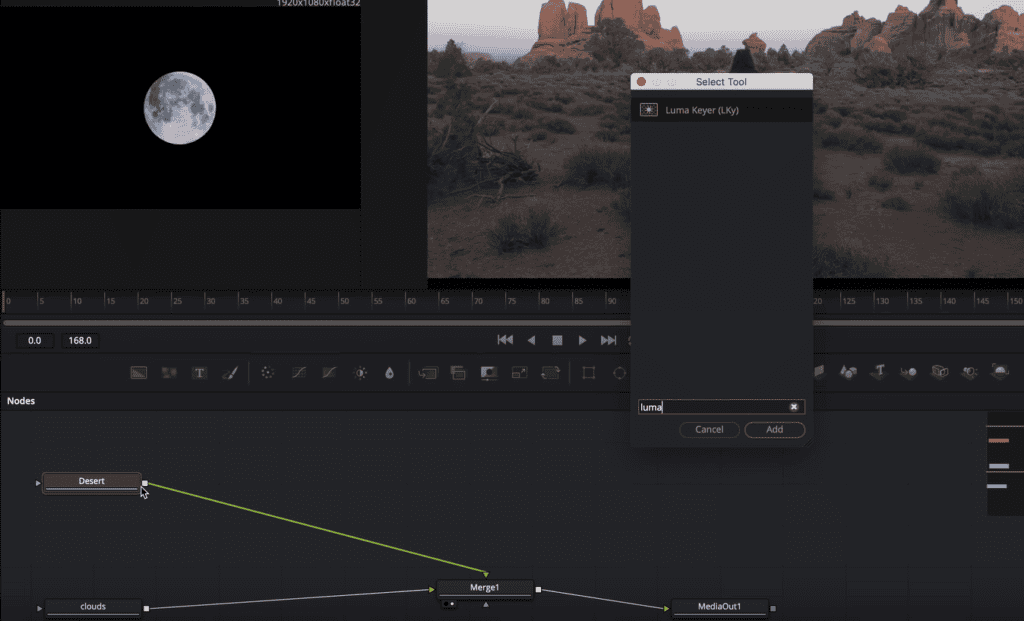
- To add the Luma Keyer:
- Select your ‘Foreground’ node.
- Hold ‘Shift’ and press the ‘Spacebar’.
- In the search bar that pops up, type ‘Luma Keyer’ and select it.
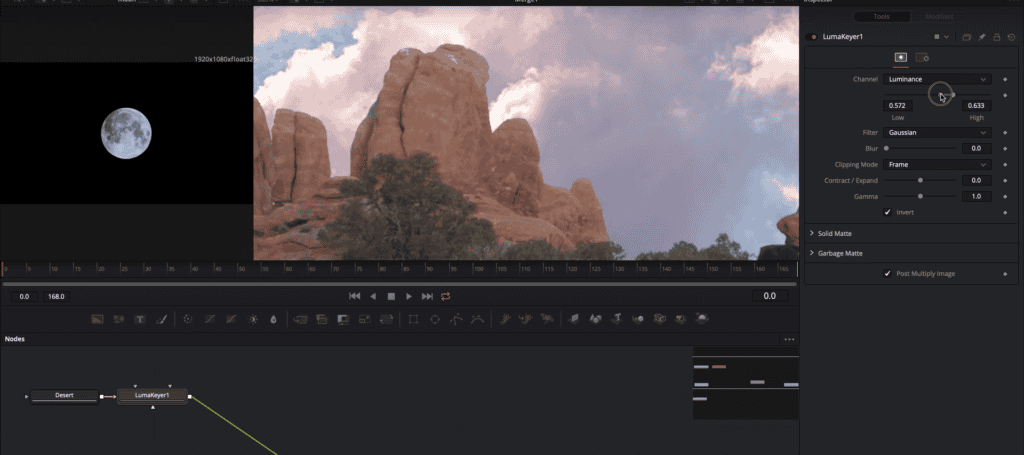
- Upon adding, the default effect might seem stark. However, we have the tools to refine it:
- Go to the ‘Inspector’ panel on the right while the Luma Keyer node is selected and click on ‘Invert’.
- Play with the ‘low’ and ‘high’ sliders. Move them up or down to achieve a seamless blend, replacing the desert’s sky with the cloud background. Caution: Excessive adjustments might disrupt your video’s integrity. Aim for a balanced blend.
- Fine-tuning: Zoom in to observe the edges. A slight blur can sometimes enhance the blending effect, making the transition between scenes smoother.
Enhancing Realism with Motion Tracking: Step 4 in Using Luma Keyer
Adding a new sky or background is impressive, but making it move in sync with the rest of your footage brings your visuals to life. In this next step, we’ll delve into the captivating world of motion tracking in DaVinci Resolve to enhance the realism of our composite. Let’s jump in:
1. The Power of Motion Tracking
- Motion tracking, in simple terms, allows your video to maintain consistent movement throughout. For sky replacements or similar tasks when using Luma Keyer, this is what distinguishes amateur edits from polished, professional ones.
2. Implementing the Planner Tracker
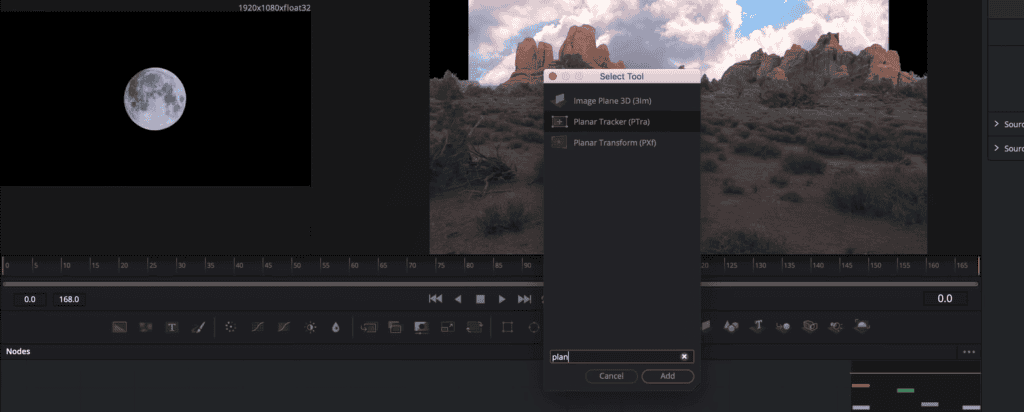
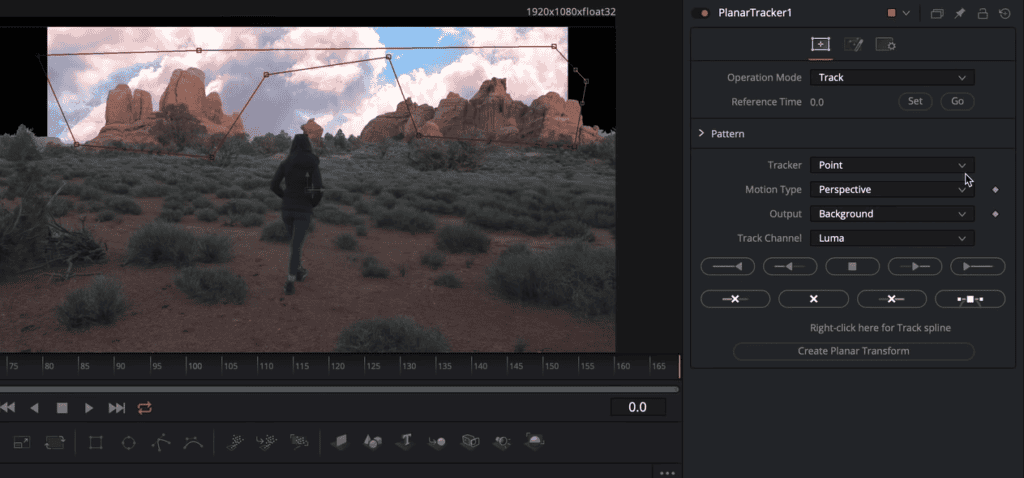
- Setting it up:
- Start by selecting your ‘Foreground’ node.
- Hold down ‘Shift’ and press ‘Spacebar’.
- Type in “planner tracker” and hit ‘Enter’. This action will seamlessly insert the tracker node between your existing nodes.
- Tracking the Motion:
- Begin at the start of your clip.
- Select a consistent area in the viewer (a portion of the desert, for instance) that you wish the tracker to follow. Be mindful of elements you want to avoid, like people or moving objects.
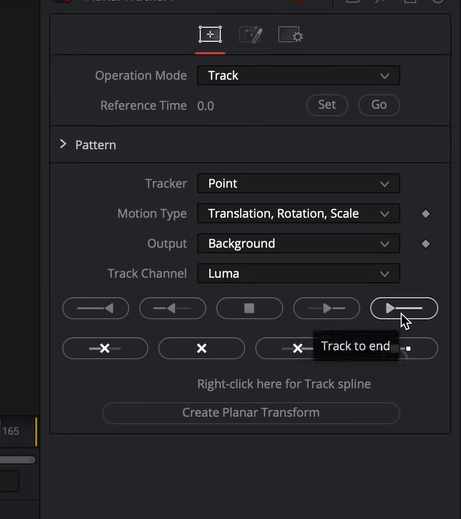
- Ensure the ‘Motion Type’ settings are on ‘translation, rotation, scale’. This ensures comprehensive tracking across different motion types.
- Set the reference frame to the first frame of your composite.
- Click the arrow that initiates tracking (Arrow pointing right side with a vertical line). This command prompts the software to monitor the selected area throughout the clip, capturing its motion.
- Refining the Data:
- After tracking, click on ‘create planar transform’. This action generates a new node containing the tracked motion data.
3. Harnessing the Tracked Data:
- With the motion data now available, you can ensure that any additions or changes to your composite will align perfectly with the original clip’s movement. Essentially, whatever motion occurs in the ‘Foreground’ clip can now be replicated in other layers, ensuring a natural, cohesive look.
Achieving a Perfect Sky Replacement in DaVinci Resolve: Step 5 with Luma Keyer
Every masterpiece is crafted with attention to detail. After setting the stage with motion tracking, our next endeavor in using the Luma Keyer in DaVinci Resolve is to perfectly integrate our new sky. Let’s dive deeper:
1. Integrating the Clouds
- Remember our ‘floating’ cloud problem? It’s time to anchor them.
- Click on the ‘Planar Transform’ node you’ve created.
- Use the ‘Shift’ key and drag the Planar Transform node, connecting line to attach it to the cloud node. Now, the clouds will move harmoniously with the desert scene.
2. Addressing the Canvas Issue
- However, an issue arises – our cloud canvas doesn’t fill the screen, leaving black spaces.
- Navigate to the start of your clip.
- Select the ‘Clouds’ node, press ‘Shift + Spacebar’ and search for ‘Transform’.
- Adjust the size of the clouds. It’s key to tweak the aspect ratio, squashing it a bit. This gives depth, mimicking the real-life sky.
- Play the clip, ensuring the background is fully covered and appears natural.
- If you want to add any other elements, just repeat the process.
Mastering the Final Touches with Color Correction
With your scenes perfectly merged and all elements in place, it’s now time to weave everything together with the magic wand of color correction. By adjusting the color tones of your composite, you can create a seamless blend that transforms your visual from good to exceptional. Let’s dive into the art of color correction in DaVinci Resolve:
1. The Importance of Color Correction
- While motion tracking and sky replacements enhance the structure of your composite, it’s color correction that brings out its soul. Properly adjusted colors can add depth, realism, and mood to your scenes.
2. Initiating Color Correction
- If you’re aiming for quick fixes, applying a LUT can be an option. However, for precise results:
- Navigate to each of your layers or node flows, whether it’s the ‘Cloud’, ‘Desert’, or ‘Moon’ layer.
- Select a node from the layer where you want to apply the correction.
- Press ‘Shift + Spacebar’ and type in “color corrector”. This will provide you with tools to adjust the colors of that specific layer.
3. Fine-tuning Each Layer
- With the color correction tool at your disposal:
- Adjust settings like contrast to add depth or drama.
- Lift the colors if the scene seems too dark, especially useful for elements like the sky.
- Lower the gain for elements that might seem too bright or overpowering, like an overly radiant cloud layer.
- Remember, each adjustment should be made keeping the overall scene in mind.
4. Harmonizing Colors for Cohesiveness
- The objective is to ensure each layer or element complements the others:
- Grade each clip individually, preparing every photo or video to match the dominant theme or scene of your composite.
- For instance, if your core scene is a sunlit desert, you might want to adjust the hues of your sky or the moon to fit that warm, golden ambiance.
The world of video editing is a vast canvas where technology meets artistry. Through this article, we’ve journeyed through the intricate steps of using the Luma Keyer in DaVinci Resolve. Thank you for joining us on this exploration. We hope it has been both enlightening and inspiring. Here’s to crafting many mesmerizing visuals and telling compelling stories through your art. Until next time, happy editing!