Hi, I’m Salik, the author of FilmmakingElements.com. I have been a filmmaker for over 10 years. I am also a certified DaVinci Resolve Trainer and I have used DaVinci Resolve for many of my projects. In this article, we are teaching How To Do Mask Tracking In Davinci Resolve.
The mask tracking feature in DaVinci Resolve is a game-changer for filmmakers. It provides unmatched precision and allows you to make selective color adjustments and other tweaks that would be difficult, if not impossible, to achieve with other software. The robust tracking capabilities of DaVinci Resolve make it an indispensable tool for your filmmaking toolbox.
1. Masking and Tracking: Precision Editing in DaVinci Resolve’s Color Page
Step 1: Importing Your Clip and Accessing Masking Options
Begin by importing the clip you want to mask and track in the edit tab of Davinci Resolve. Place it on the timeline and then move to the color page. In the color page, locate the Windows tab (the icon looks like a circle with 4 dots), where you’ll find various masking options. Select the pen tool, as it allows for the creation of custom shapes.
Step 2: Drawing Your Mask
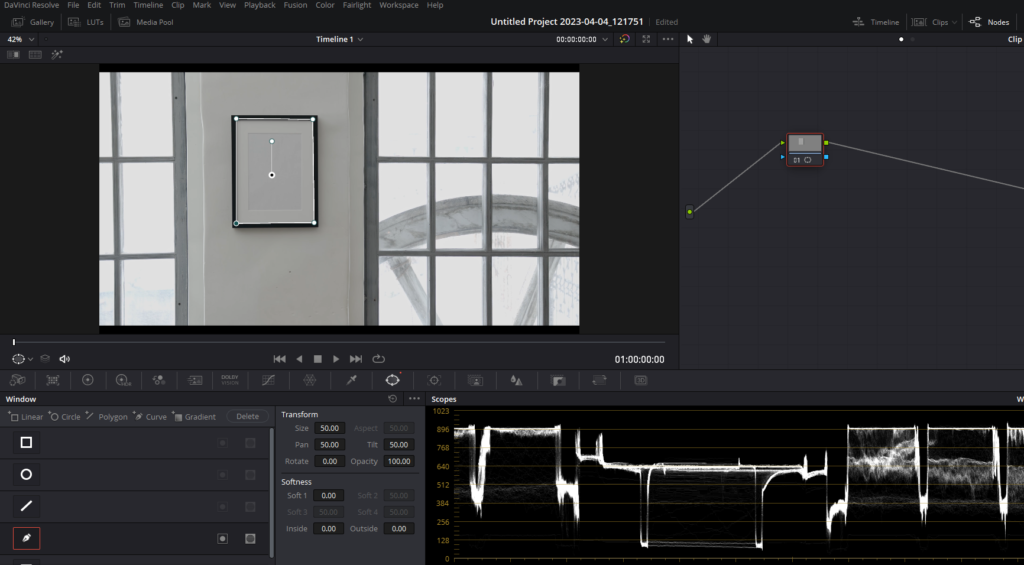
Zoom in on your footage using the scroll wheel, and pan around by holding down the middle mouse button in the viewer. To add points to your mask, click with the left mouse button and begin tracing the object you want to isolate. If you make a mistake, click on the point with your middle mouse button to remove it.
Step 3: Adjusting the Mask Properties
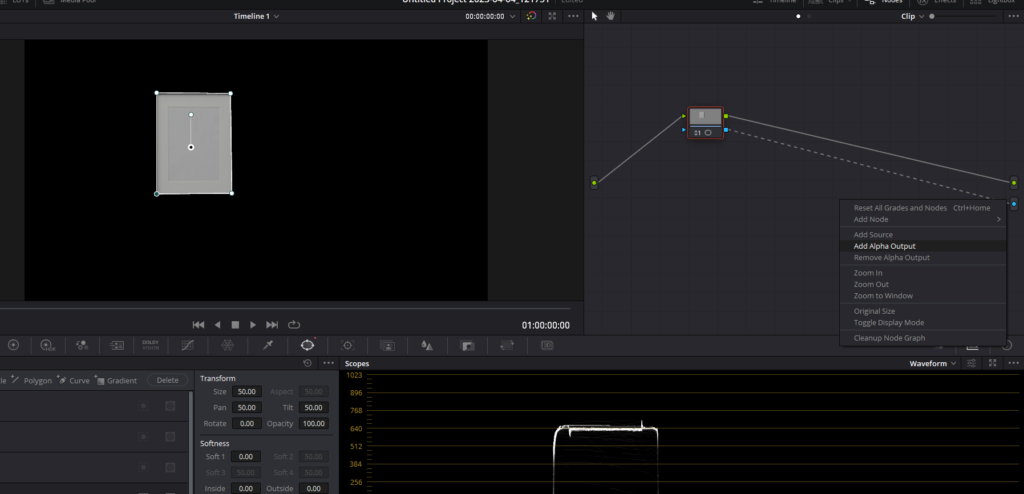
Once you’ve traced the object, you can remove everything but the selected area. In the node section, right-click and choose “Add Alpha Output.” This will create a blue circle in the end of the node area, and connect the blue square on the node in which you created the mask to the blue circle. This isolates the masked area.
You can further refine the mask by softening its edges or adjusting the softness of individual points. If you want to remove the masked object instead, click the “Invert” button in the pen tool section, leaving the surrounding area visible.
Step 4: Addressing Mask Drifting Issues
The main challenge with masking is that the mask may drift and fail to track the object as the clip plays. In the next section, we’ll explore how to use DaVinci Resolve’s tracking features to ensure that your mask stays in place throughout the clip.
Mask Tracking In Davinci Resolve
Mask tracking is an essential skill for filmmakers and video editors who want to isolate or remove specific objects within a video clip. DaVinci Resolve offers powerful tools to help you achieve precise mask tracking and refine your masks for the best possible results. In this blog post, we’ll take a deep dive into mask tracking and fine-tuning techniques in DaVinci Resolve, guiding you through the process step by step.
Step 1: Tackling Mask Drifting with DaVinci Resolve’s Tracking Features
One common issue with masking is that the mask may drift and fail to track the object as the clip plays. To resolve this, DaVinci Resolve offers a comprehensive set of tracking features to ensure that your mask stays in place throughout the clip.
Step 2: Exploring Tracking Options in DaVinci Resolve
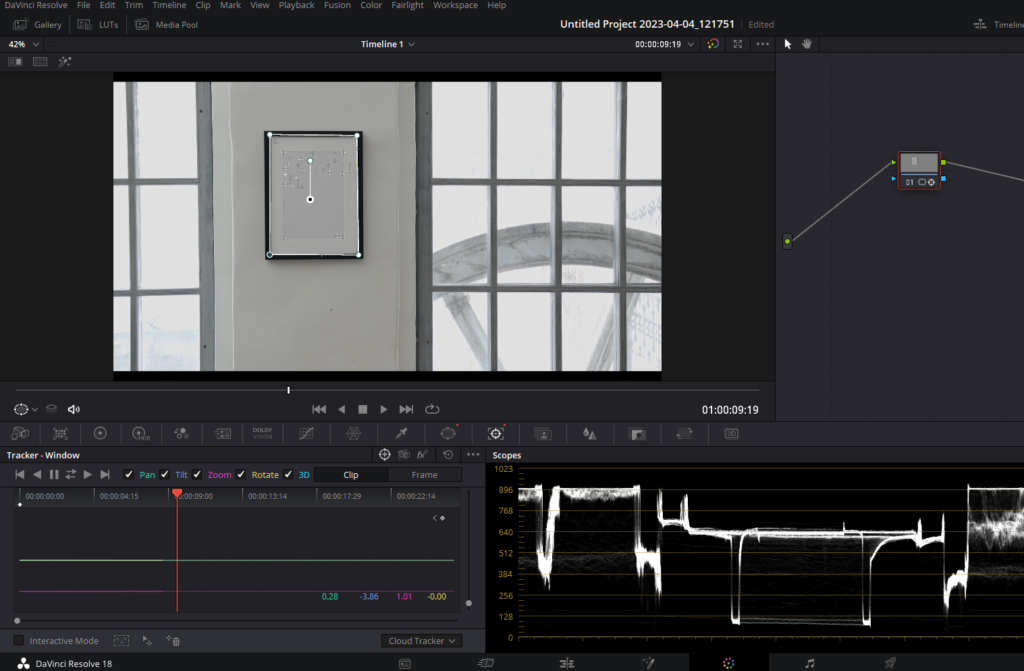
To enable the tracker, click on the target-looking icon. DaVinci Resolve provides several directional tracking options, including pan, tilt, zoom, rotate, and 3D. You can choose to track a specific axis or disable tracking for a certain axis by simply deselecting the corresponding option.
To start tracking your mask, click the “Track Forward” button. If you begin tracking in the middle of your clip, you can also use the “Track Backwards” option to cover the portions you initially missed. Once the tracking process is complete, you’ll see that the mask sticks to the object in your footage.
Step 3: Fine-Tuning Your Mask on a Frame-by-Frame Basis
Sometimes, you may need to make adjustments to your mask due to drifting or other issues. In such cases, from the top right corner of the Tracker section, switch the setting from “Clip” to “Frame.” The “Clip” setting applies adjustments globally, while the “Frame” setting allows you to modify the mask on a frame-by-frame basis.
With the “Frame” setting selected, you can add or remove points, adjust the position of existing points, and even change the shape of the mask for each individual frame. You can do this frame by frame using the arrow keys or roughly correct using the playhead wherever the mask drifts aways. This level of precision ensures that your mask remains accurate throughout the clip, even if the object you’re tracking undergoes changes in movement, shape, or lighting.
Step 4: Refining Your Mask with Extra Points and Curve Handles
To further improve the precision of your mask, consider adding extra points to its outline. Click on the mask and adjust its shape as needed. You can also use curve handles to shape your mask more accurately. To modify only one side of the curve without affecting the other, hold down the Control button while adjusting the curve handle.
DaVinci Resolve also offers additional tools to help you refine your masks. For instance, you can soften the edges of your mask by adjusting the softness slider in the Windows tab. This creates a more natural-looking blend between the masked object and the rest of the scene. Additionally, you can invert the mask, which removes the masked object and leaves the surrounding area visible.
Combining and Tracking Multiple Masks in DaVinci Resolve
Adding Multiple Masks to Your Clip
In some cases, you may want to apply multiple masks to a single clip. DaVinci Resolve makes it easy to combine several masks and manage their tracking data independently.

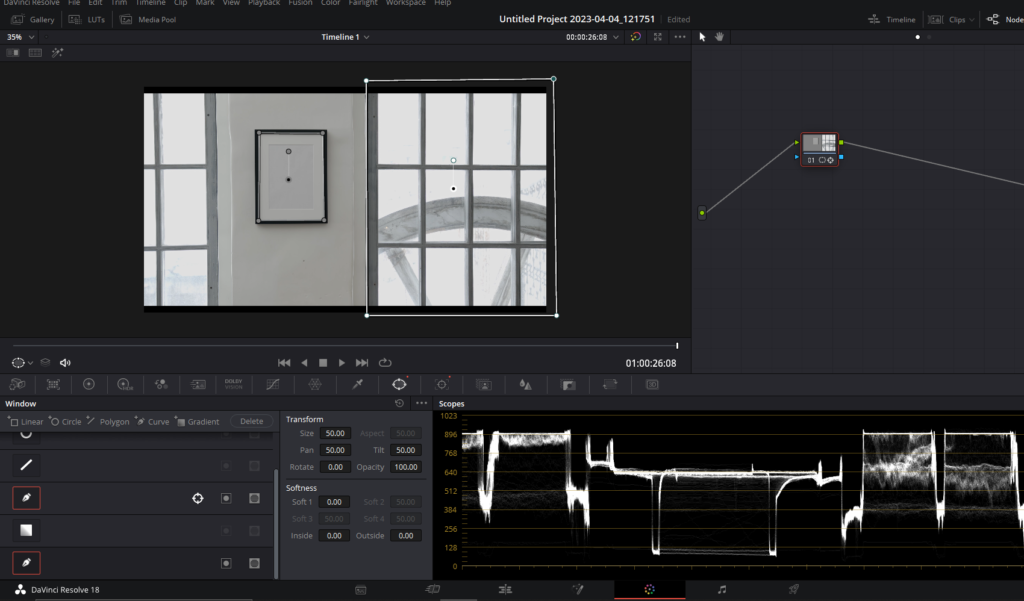
- Go to the Windows tab, and locate the mask options with a plus sign. Select the mask shape you want to add (e.g., curve) to create a new mask on your clip. The original mask will be dimmed to indicate that it is not currently selected.
- Create your new mask by tracing the desired object, and then invert it by clicking the button to the right of the invert mask button. This allows you to combine both masks and have them inverted simultaneously.
Tracking Each Mask Independently
It’s essential to note that the masks on the same node won’t share the same tracking data. As a result, you’ll need to track each mask independently to ensure they stay in place throughout the clip.
- Select the new mask and go to the tracking tab, as you did previously for the first mask.
- Track the new mask forward or backward, depending on your starting point within the clip. Now, both masks will have their own tracking data, ensuring they stick to their respective objects.
Using Masks for Different Color Grading Effects
If you want each mask to affect the footage differently in terms of color grading, the method described above won’t be suitable. In such cases, you’ll need to create separate nodes for each mask and apply the desired color grading adjustments independently. This provides greater control over how each masked area contributes to the overall look and feel of your video.
Congratulations on mastering mask tracking and fine-tuning techniques in DaVinci Resolve! You’ve now acquired valuable skills that will significantly enhance your video editing and filmmaking projects. With the ability to create, combine, and track multiple masks, you can manipulate your footage in various ways to achieve stunning visual effects and precise color grading adjustments. We’re excited to see how you’ll utilize these techniques to elevate your work and create captivating content. Keep up the great work, and happy editing!