
Hi, I’m Salik, the author of FilmmakingElements.com. I have been a filmmaker for over 10 years. I am also a certified DaVinci Resolve Trainer and I have used DaVinci Resolve for many of my projects. Today, we’re diving into the world of video editing with a special focus on enhancing your projects using text effects. In this comprehensive article, we will explore the 7 Best Text Effects in DaVinci Resolve that can truly elevate your videos and make them stand out.
7 Best Text Effects in Davinci Resolve
1. Video Within Text in Davinci Resolve
This dynamic effect allows you to display a video inside your text, creating a captivating visual experience for your audience. Here’s a detailed, step-by-step guide on how to achieve this effect in DaVinci Resolve:
Step 1: Import Your Video First, import the video you want to use. Drag the video to the timeline and place it on a higher video track (e.g., Video Track 2), leaving a free track just below the video clip (Video Track 1).
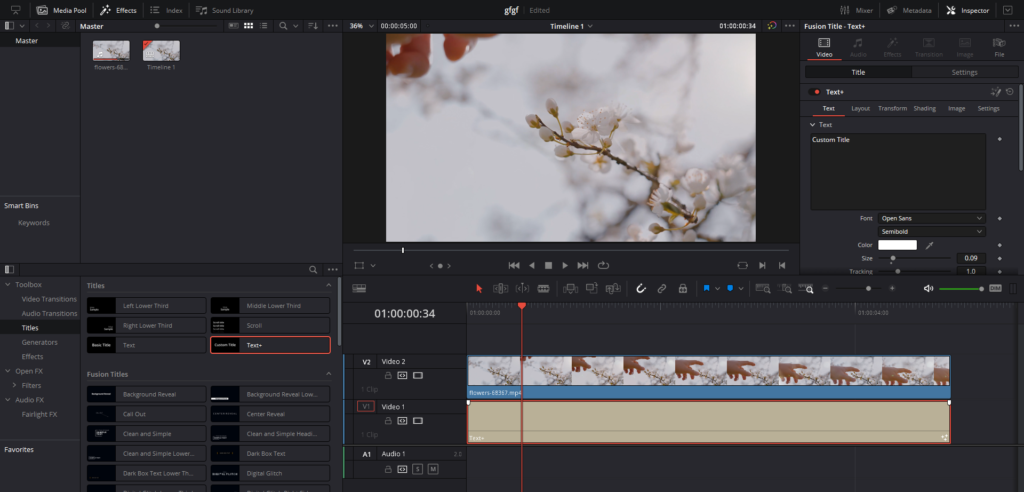
Step 2: Add Text Effect In Video Track 1, add a text effect by navigating to the Effects Library in the upper left corner of the interface. Click on the Toolbox menu, then on Titles. From the list of available options, choose “Text+” effect, and drag it to the timeline on Video Track 1, directly below your video.
Step 3: Adjust Text Clip Duration Ensure that the text clip’s duration matches that of the video. Click on the edge of the text clip and drag it to match the video’s length.
Step 4: Temporarily disable the upper video track (Video Track 2) by clicking on the film-looking icon next to it. This allows you to visualize your text without the video overlay. With the text clip selected, navigate to the Inspector menu in the upper right corner of the interface of Davinci Resolve. Type your desired text (e.g., “city”) into the “Text” field. Choose a thick font from the Font dropdown menu, as this will make the video inside the letters more visible. Adjust the font size using the Size slider so that the letters occupy most of the screen.
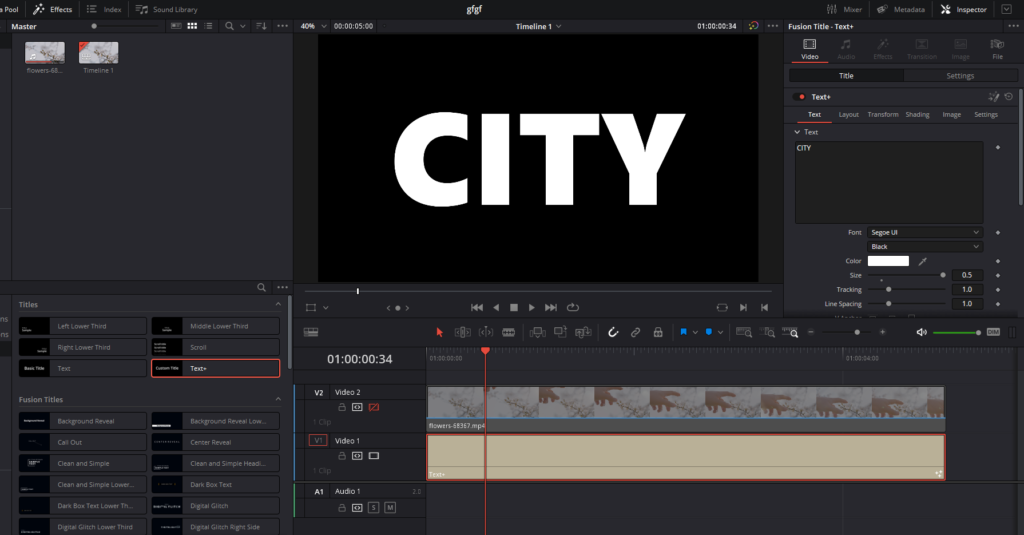
Step 5: Set Text Color Ensure that the text color is set to completely white. Do not modify it, as this is crucial for the effect to work properly.
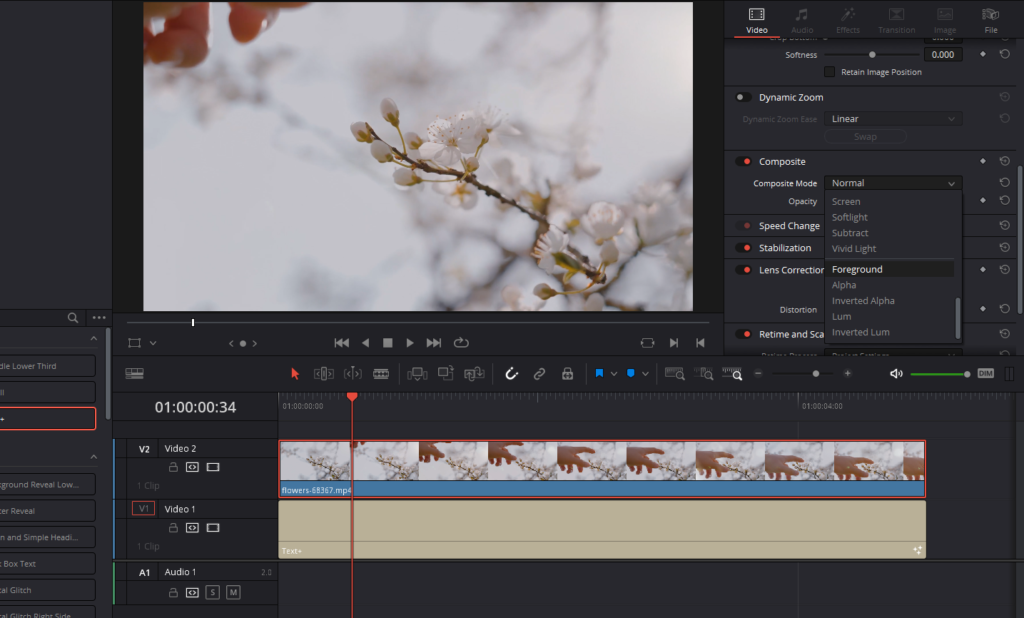
Step 6: Reactivate Video Track 2 by clicking on the film-looking icon again. Then, select the video clip in the timeline. In the Inspector menu, go to the “Composite” section and click on the “Composite Mode” dropdown menu. Scroll down and select “Foreground.”
Step 7: Change Text Clip Composite Mode Next, select the text clip in Video Track 1. In the Inspector menu, switch from the “Text” to the “Settings” tab. Locate the “Composite Mode” dropdown menu, scroll down, and select “Alpha.”
Step 8: Adjust Video Position Lastly, adjust the position of the video within the text. With the video clip selected, use the “Transform” controls in the Inspector menu to change the position, rotation, or scale of the video as needed. This ensures that the video is optimally visible within the text.
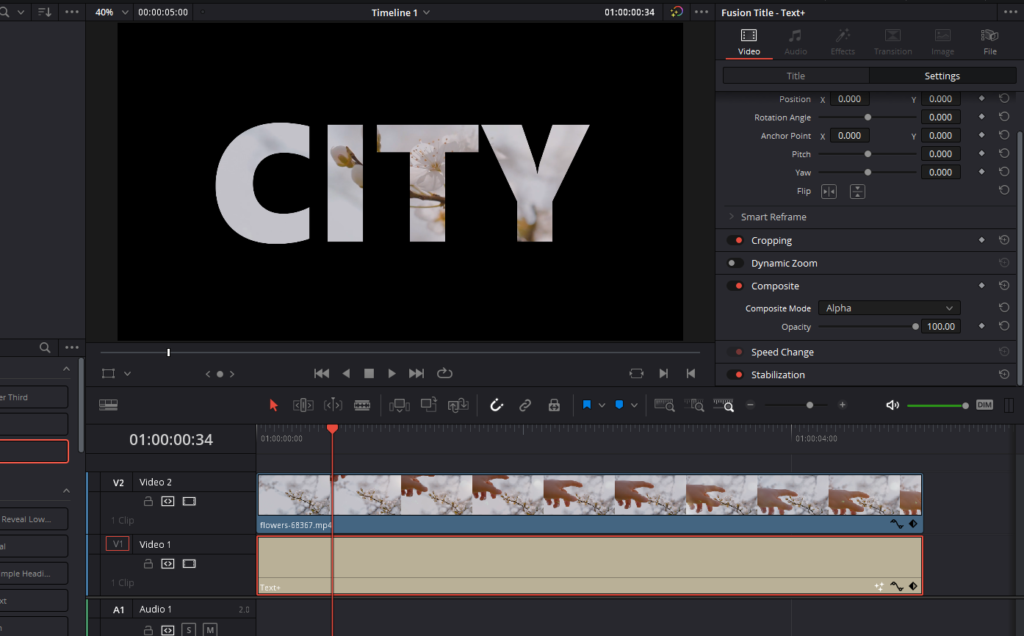
Now, you have successfully created the Video Within Text effect in DaVinci Resolve!
2. Text with Glitch Effect in Davinci Resolve
In our previous section, we covered the Video Within Text effect in DaVinci Resolve. Now, we’re moving on to our next text effect: Text with Glitch Effect. This effect adds a digital glitch to your text, creating a visually intriguing and dynamic look. Let’s dive into the process of achieving this effect in DaVinci Resolve:
Step 1: Add Text Clip to the Timeline First, add a text clip to the timeline by navigating to the Effects menu located in the upper left corner, clicking on the Toolbox section, and selecting Titles. Choose either “Text” or “Text+” and drag it onto the timeline.
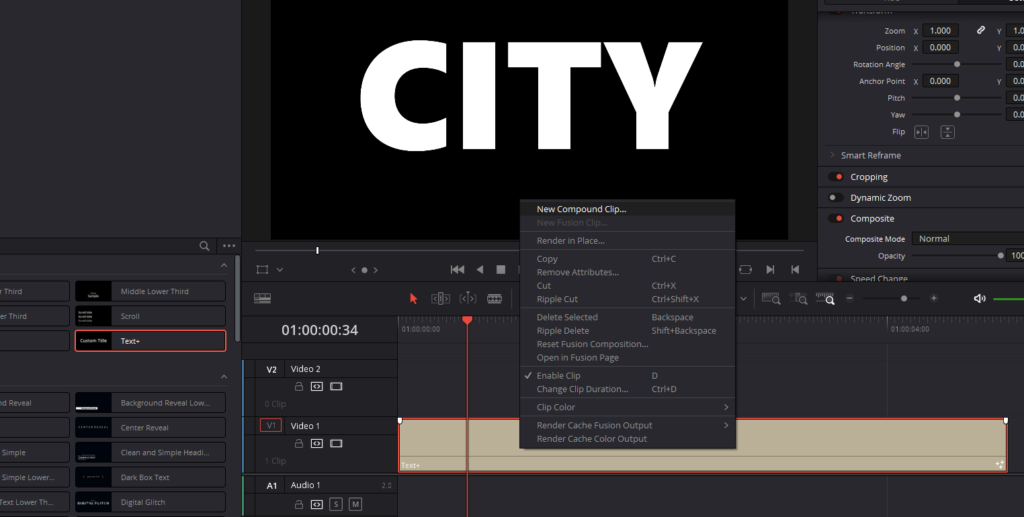
Step 2: To apply the Glitch Effect to your text, you’ll need to create a Compound Clip. Right-click on the text clip in the timeline and select the “New Compound Clip” option. This will convert your text clip into a single, editable unit.
Step 3: Apply the Digital Glitch Effect Now that you have a Compound Clip, go back to the Effects menu in the upper left corner, open the Toolbox section, in Effects. Look for the Fusion Effects section and locate the “Digital Glitch” effect. Click and drag the Digital Glitch effect onto your Compound Clip in the timeline.
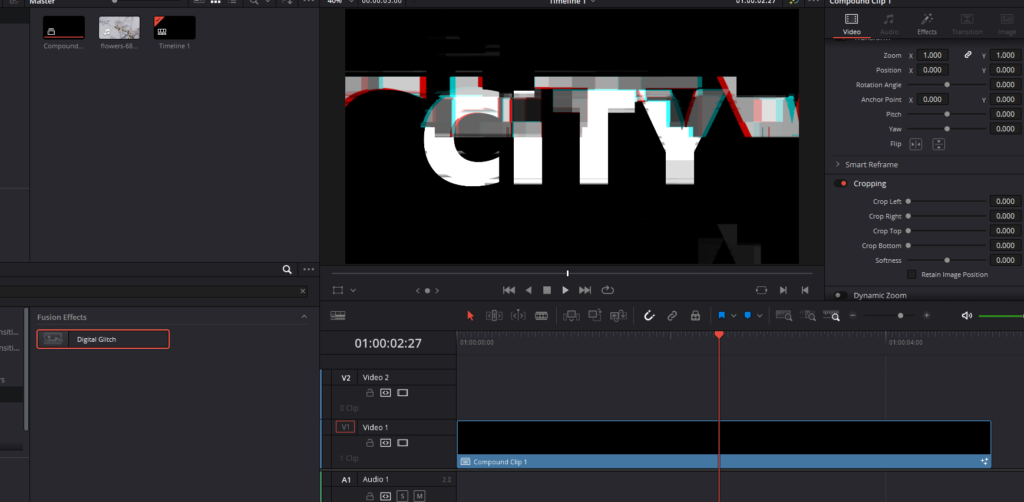
With these steps, you have successfully applied the Text with Glitch Effect in DaVinci Resolve. This effect adds an eye-catching, dynamic element to your text, perfect for conveying a sense of disruption or technological flair.
3. Typewriter Effect in Davinci Resolve
Step 1: Navigate to the Effects menu in the upper left corner, click on the Toolbox section, and select Titles. Choose the “Text+” effect and drag it onto your timeline.
Step 2: With the Text+ clip in your timeline, click on it to select it and then access the Inspector menu. Within the Text+ Effect menu, you can configure and customize your text (font, size, color, etc.) to your liking.
Step 3: Once you’re satisfied with your customized text, it’s time to create the typewriter animation. In the Inspector menu, locate the “Write On” option with a horizontal bar. Move the playhead to the first frame of the text clip, and decrease the “End” value to 0.0. Create a keyframe by clicking on the small diamond icon next to the “End” value.
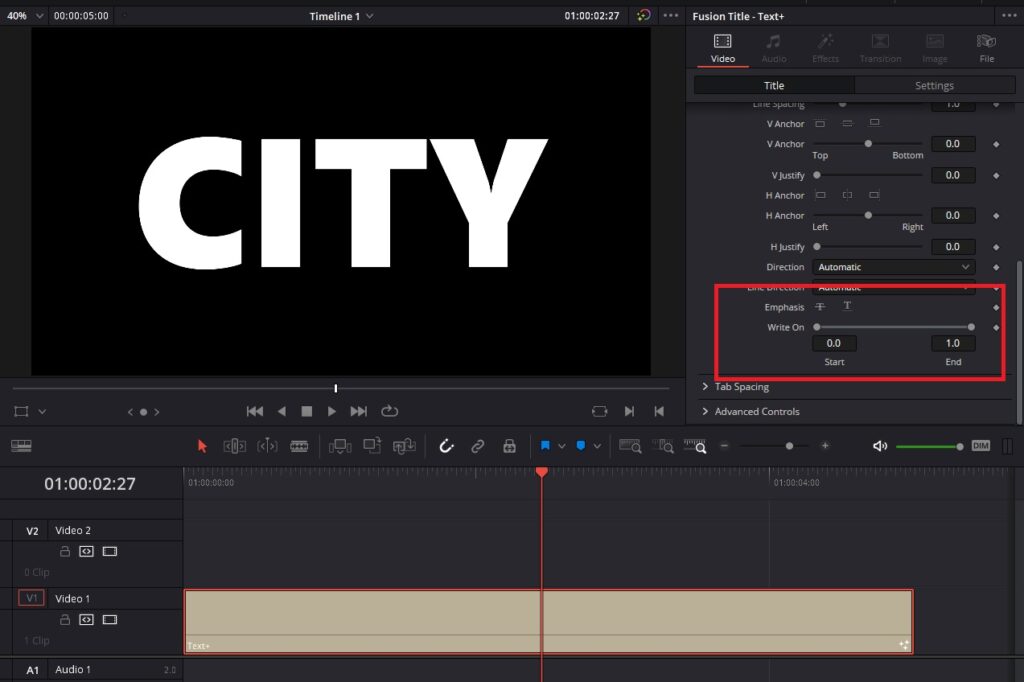
Step 4: Decide where you want the typewriter effect to end and move the playhead to that specific frame. Increase the “End” value to 1.0. This will complete the typewriter animation, revealing each letter sequentially as if typed on a typewriter.
With these steps, you have successfully created the Typewriter Effect in DaVinci Resolve. This nostalgic effect adds a unique and engaging element to your text, perfect for storytelling or evoking a sense of the past.
For an In-Depth Version of this method, read this article: Typewriter Effect Davinci Resolve: Step By Step Guide
4. Neon Text Effect in Davinci Resolve
Follow these steps to create the Neon Text Effect:
Step 1: While on the video selected in the edit page of Davinci Resolve, go to the Fusion Module Click on the magic wand icon to access at the bottom to access the Fusion module in DaVinci Resolve.
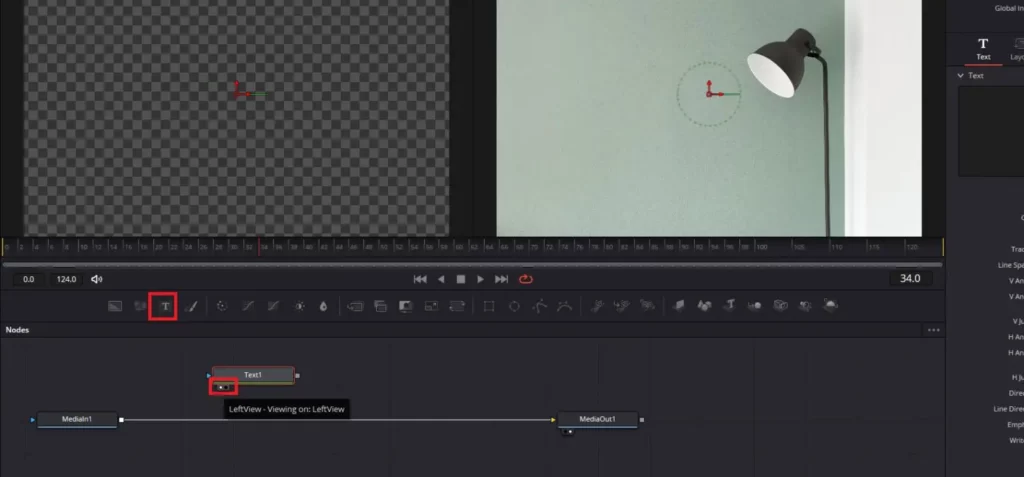
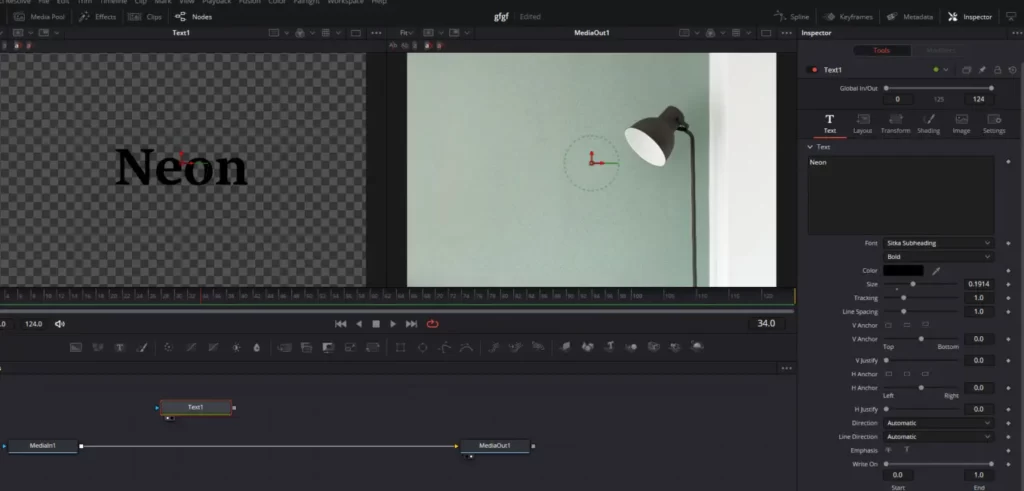
Step 2: Click in the empty space in the node graph so that you deselect if any node is selected. Press Shift + Space and search for Text+ and select it. Alternatively you can add Text Node Click on the Text+ icon to add a text node. To view the text in the left viewer, activate the small circle on the left in the text node. Create your title by selecting the text node and customizing it in the Inspector panel. Choose a striking font, adjust the size, and change the color to black (for when neon lights are off).
Step 3: Click on the square of the text node and connect it’s square to the square of MediaIn1, this will make the Merge1 node.
Step 4: Right-click on the text node and click on copy. Click in the empty space and right-click and select paste to create a duplicate. Connect the new text node to the square of the Merge1 node.
Step 5: While the second text node selected, choose a striking color for your neon light. While on it, press “Control + Space” (or “Command + Space” for Mac users) to access the effects browser. Look for the Glow effect, select it, and click “Add”. A Glow1 node will appear below the text node, but don’t modify it.
Step 6: Add Additional Glow Nodes, Click on the Glow1 node, press “Control + Space” (or “Command + Space” for Mac users), and add another Glow effect. A Glow2 node will appear. Select it and go to the Inspector panel. Increase the “Glow Size” option to 50 to create brightness around the edges of the letters.
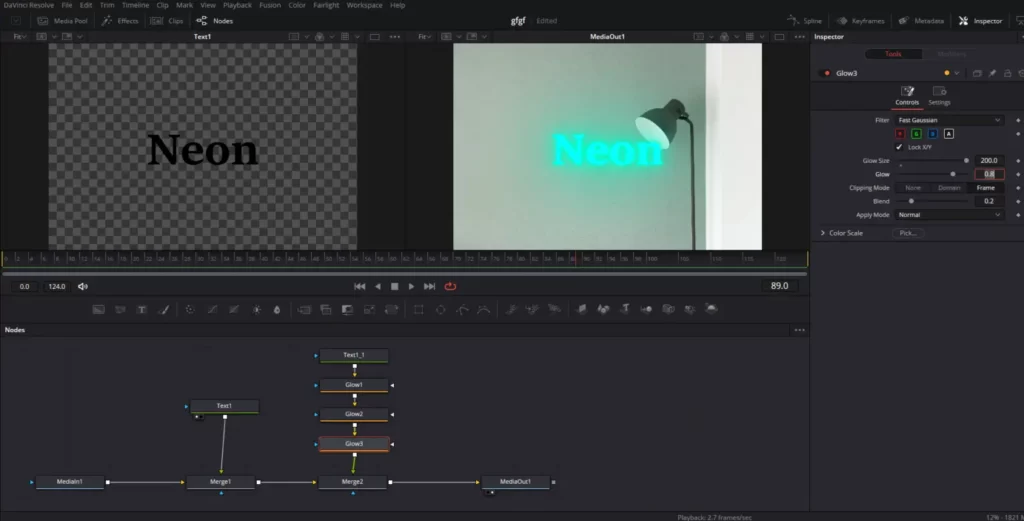
Step 7: Create Final Glow Node, Click on the Glow2 node, press “Control + Space” (or “Command + Space” for Mac users), and add a third Glow effect. A Glow3 node will appear. Select it and increase the “Glow Size” parameter to a value between 150 and 200 to illuminate a larger area.
Step 8: Adjust Intensity and Add Flicker Effect If you want to adjust the intensity of the neon light, modify the “Blend” parameter. To add the flicker effect, create keyframes in the “Blend” option in the Merge2 node settings menu. Alternate between values of 0 and 100 for the Blend parameter to create a flickering neon light effect.
With these steps, you’ve successfully created the Neon Text Effect in DaVinci Resolve. This captivating effect adds a vibrant and retro touch to your text, perfect for various projects and themes.
For an In-Depth Version of this method, read this article: Create Neon Text In Davinci Resolve: 2 Ways
5. Cinematic Text Effect in Davinci Resolve
Follow these steps to create the Cinematic Text Effect:
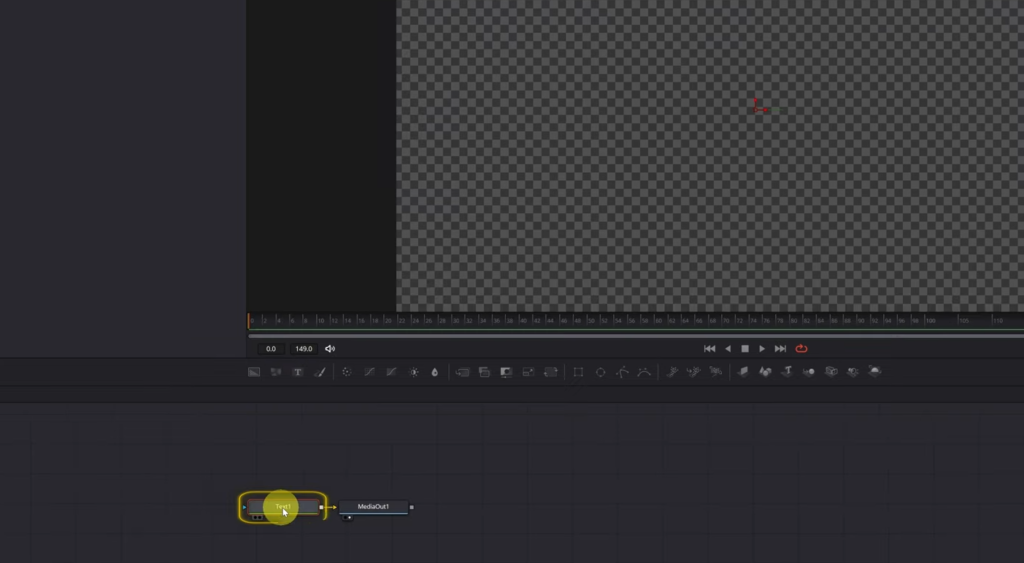
Step 1: Access the Fusion Module Navigate to the DaVinci Resolve Fusion module and create a Text+ node by clicking on the icon. Alternatively you can click in the empty space in the node graph so that you deselect if any node is selected. Press Shift + Space and search for Text+ and select it.
Step 2: Position yourself at the first frame (frame 0), and open the Inspector menu to customize your text. Modify the font, color, and text to your liking.
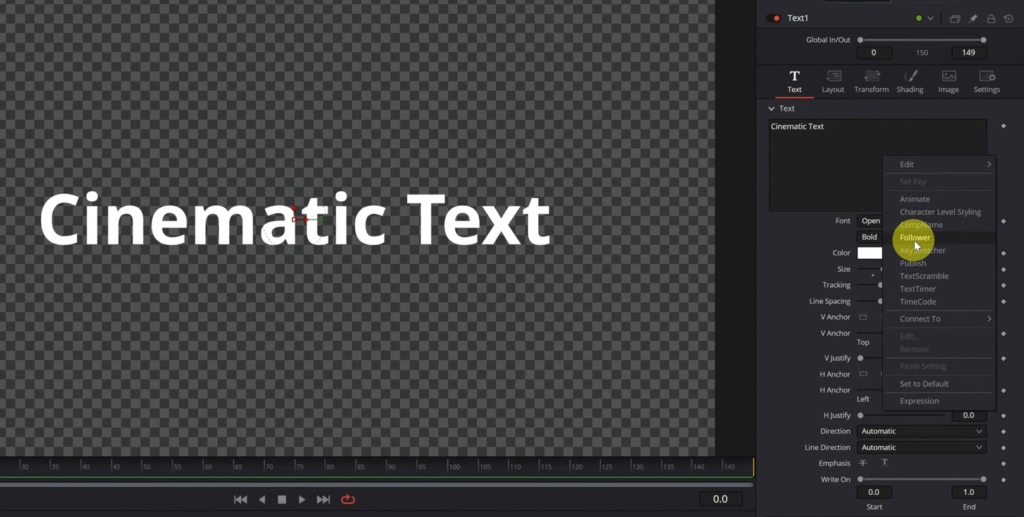
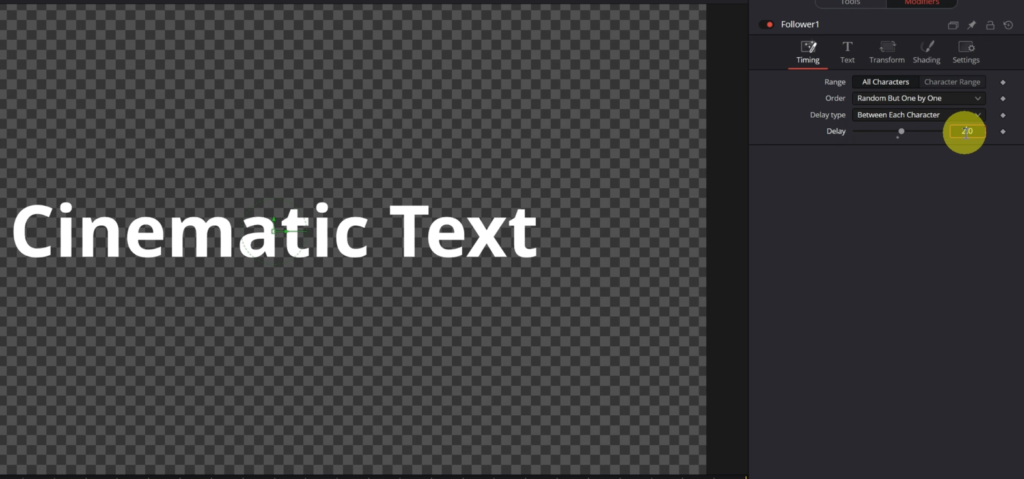
Step 3: Right-click on the square containing your text and select the “Follower” option. This will add the Follower modifier to your text.
Step 4: Open the Modifiers tab and change the “Order” option from “Automatic” to “Random But One By One.” Increase the “Delay” value to 2.0.
Step 5: Open the “Shading” menu and scroll down to locate the “Softness” tab. Click on the arrow to expand the tab, then create keyframes for both the X and Y values by clicking on the little diamonds. Increase both X and Y values to the maximum (20.0) to create a blur effect on your text.
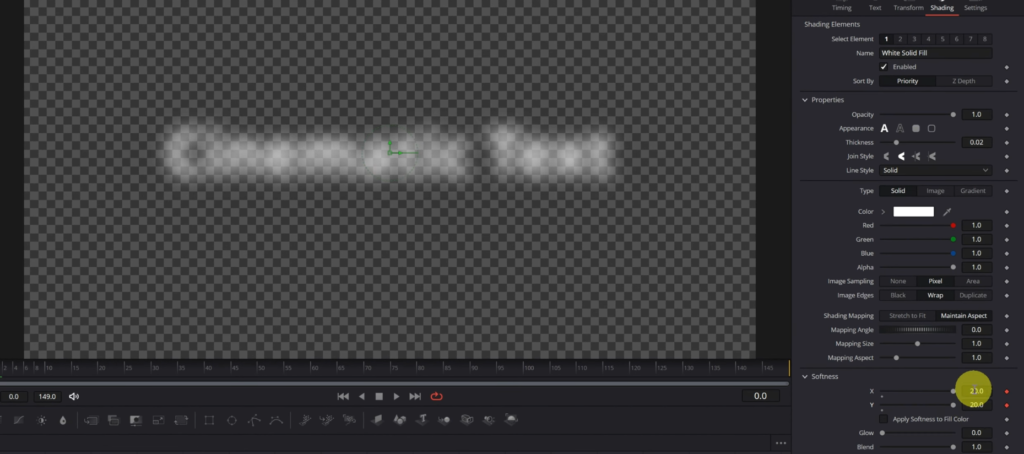
Step 6: Animate the Focus Move to the frame where you want the text to fully come into focus and the animation to end. To finish the effect, decrease the X and Y values to the minimum. The keyframe will be created automatically.
6. Handwriting Effect
To create the Handwriting Effect in DaVinci Resolve, follow these detailed steps:
Step 1: Enter the Fusion Module
- Launch DaVinci Resolve and open the project you want to work on.
- Select the clip you want the handwriting effect on.
- Enter the Fusion module by clicking on the Fusion tab located at the bottom of the screen.
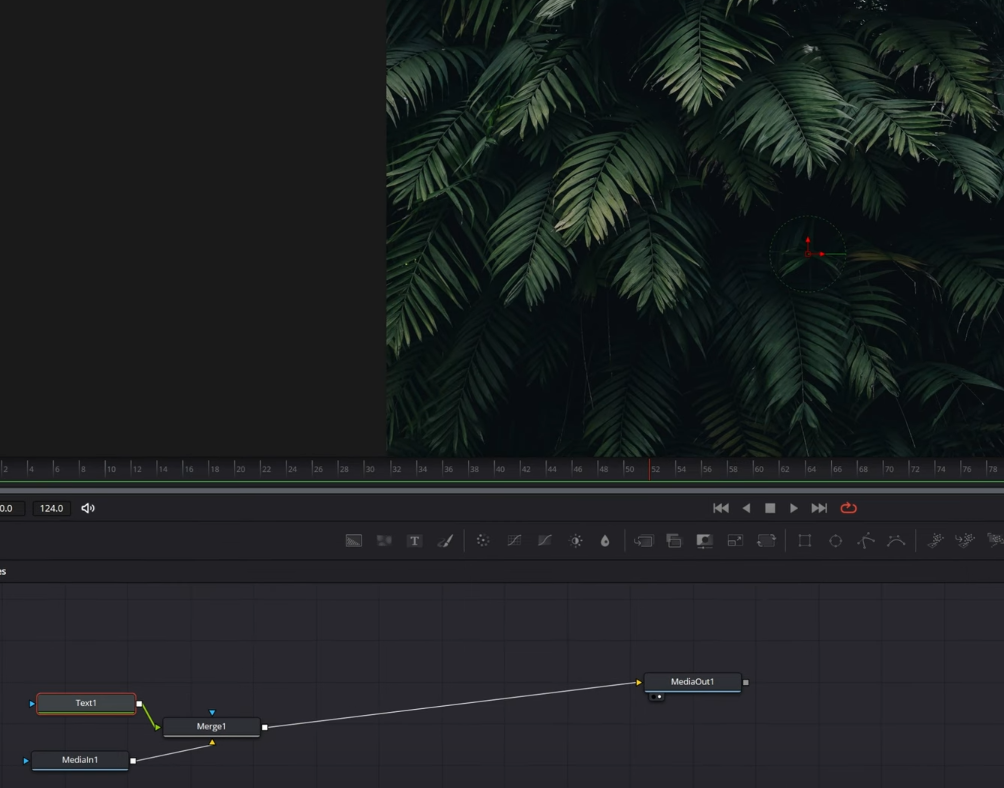
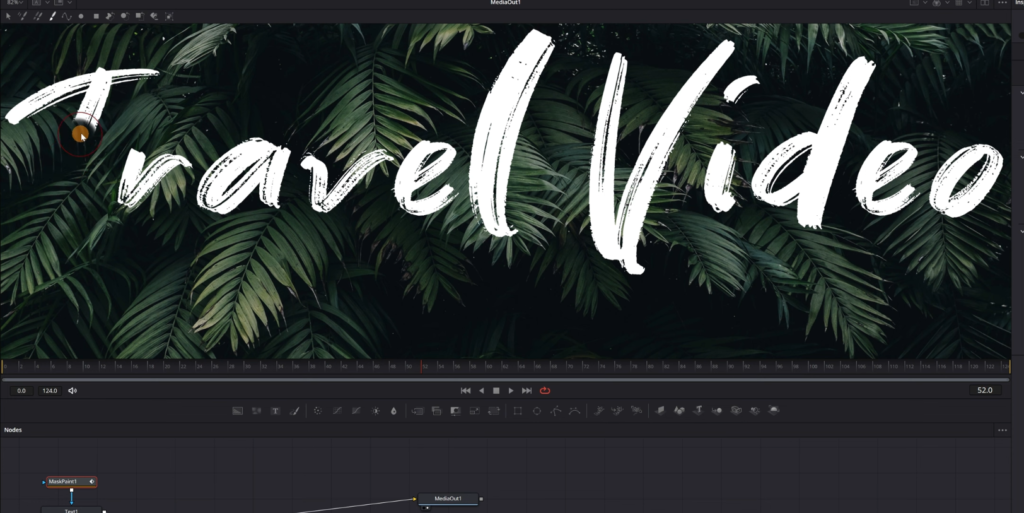
- Select the Median 1 node in the node editor and then click on the Text+ icon to add a new Text+ node.
Step 2: Customize Your Text
- With the Text+ node selected, go to the Inspector menu located in the upper right corner of the screen.
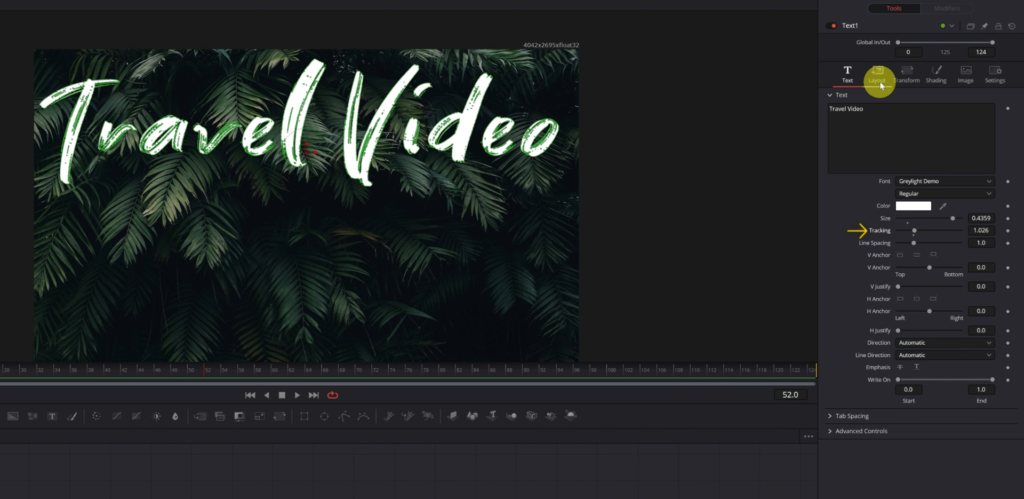
- Type the text you want to create the handwriting effect for, and choose a font that complements the handwriting effect.
- Adjust the size of the text using the Size slider, and change its position using the X and Y sliders in the Layout tab.
- Increase the tracking value in the Text tab to add some space between the letters for a more natural handwriting appearance.
Step 3: Add the Mask Paint Effect
- In the node editor, select the Text 1 node.
- Go to the Effects menu located in the upper left corner of the screen.
- Locate the Mask Paint effect in the list of available effects, and double-click it to automatically connect it to the Text 1 node.
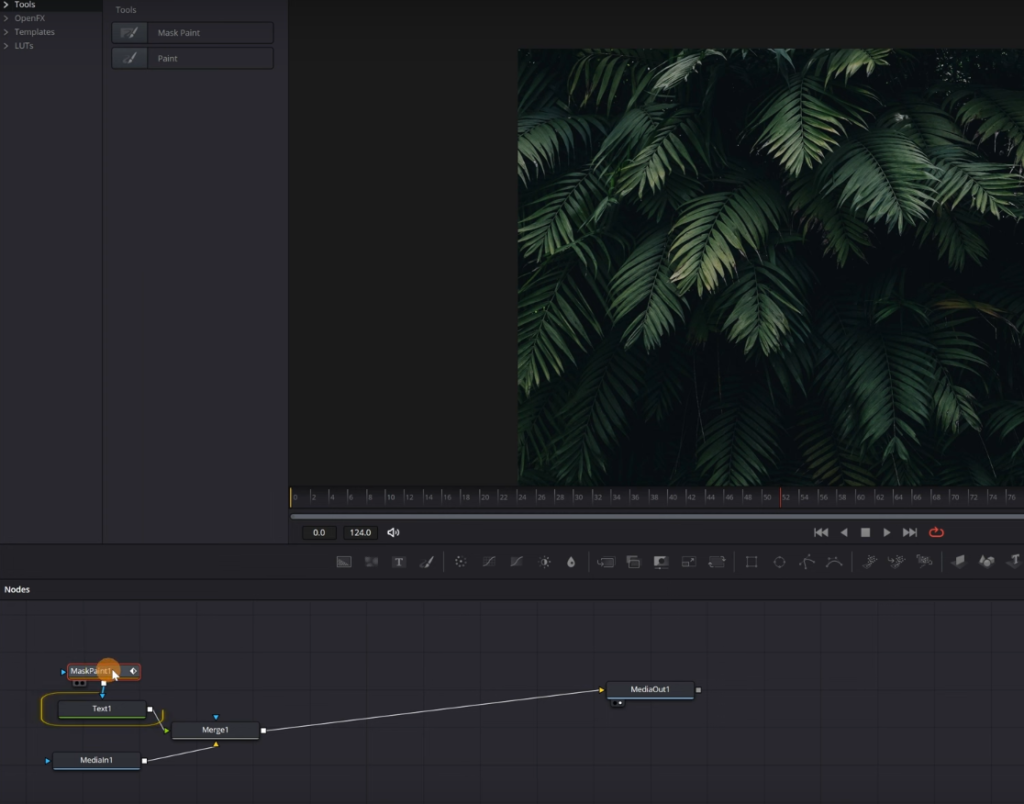
Step 4: Configure the Mask Paint Effect
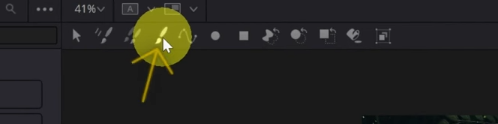
- Select the Mask Paint node in the node editor, and click on the brush icon located in the toolbar at the top of the screen above the viewer.
- The text will disappear from the viewer. To make it visible again, go to the Mask tab in the Inspector menu and activate the Invert checkbox.
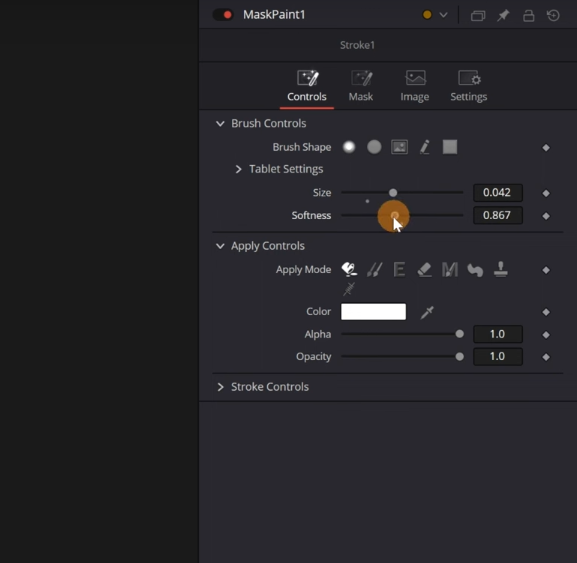
- Click on the Controls tab, and expand the Brush Controls options.
- Adjust the size and softness of the brush to match the stroke width of the text. Lower the softness value to around 0.1 for a more defined stroke.
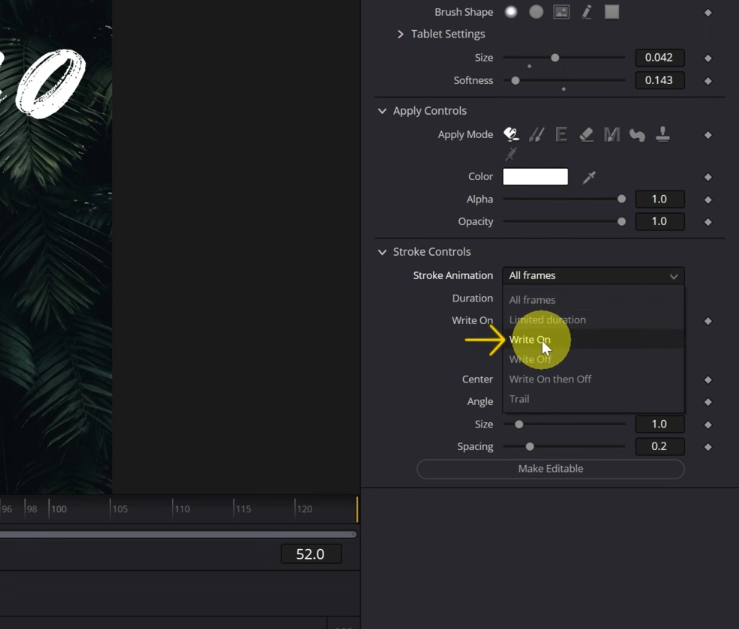
- Expand the Stroke Controls options, and change the Stroke Animation setting to “Write On.”
Step 5: Create the Handwriting Effect
- Zoom in on the viewer by pressing the Control (or Command on a Mac) key and scrolling the mouse wheel.
- Reposition the text in the viewer for better visibility while creating the handwriting effect.
- Place the mouse cursor over the first letter of the text, press and hold the left mouse button, and trace the text as if writing by hand. Make sure not to release the mouse button until you’ve traced the entire text.
Step 6: Adjust the Animation
- After completing the handwriting effect, deactivate the Invert checkbox in the Mask tab to reveal the drawn text.
- If the text doesn’t appear correctly, you’ll need to adjust the duration of the animation using the keyframes panel.
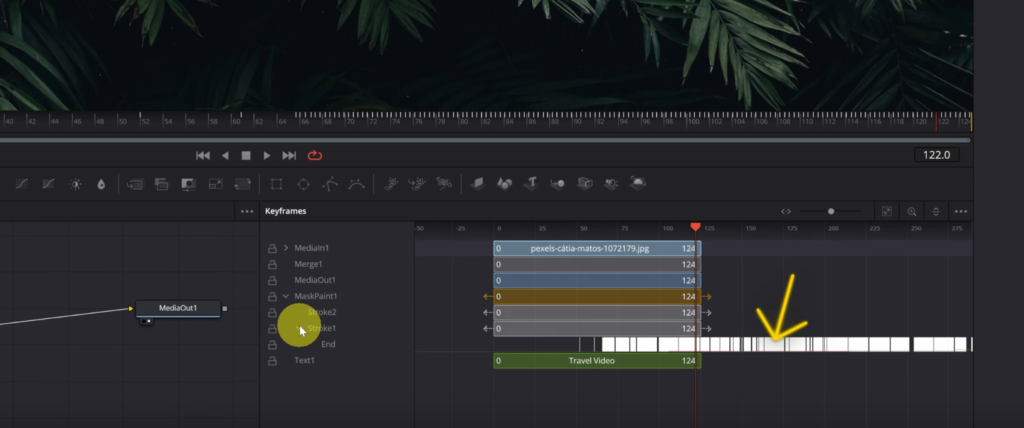
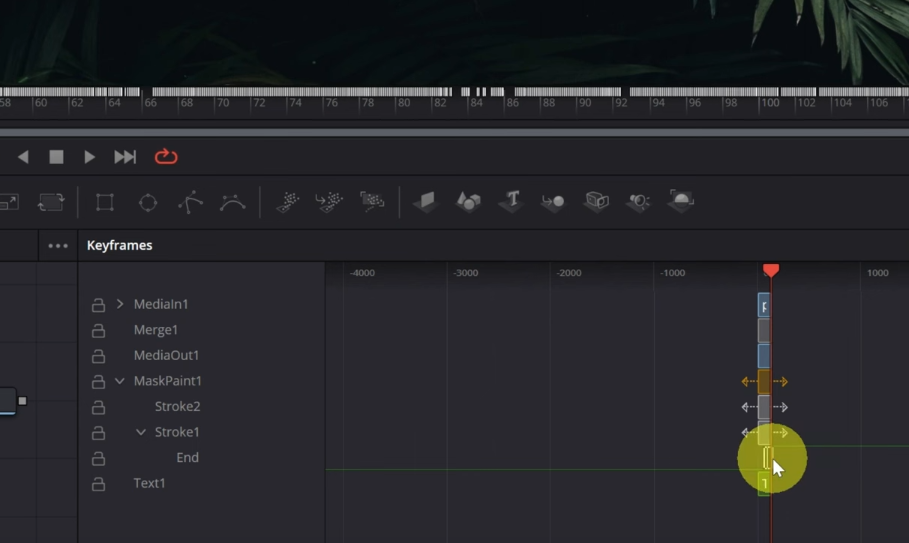
- Activate the keyframes panel by clicking on the keyframe icon located in the toolbar at the top right of the screen.
- Expand the Mask Paint 1 and Stroke 1 options in the keyframes panel to reveal the animation keyframes.
- Click and drag the keyframes to adjust the duration of the animation, ensuring that the entire text appears as desired.
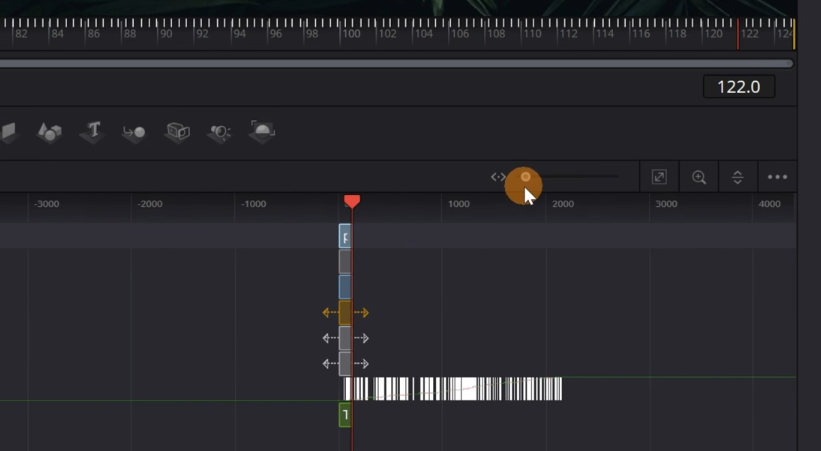
- By doing this, we’ll be able to view the animation keyframes, represented by white rectangles. However, due to the sheer number of keyframes, they don’t all fit in the panel. To resolve this, click and drag the horizontal slider on the top to the left to zoom out until all the keyframes are visible.
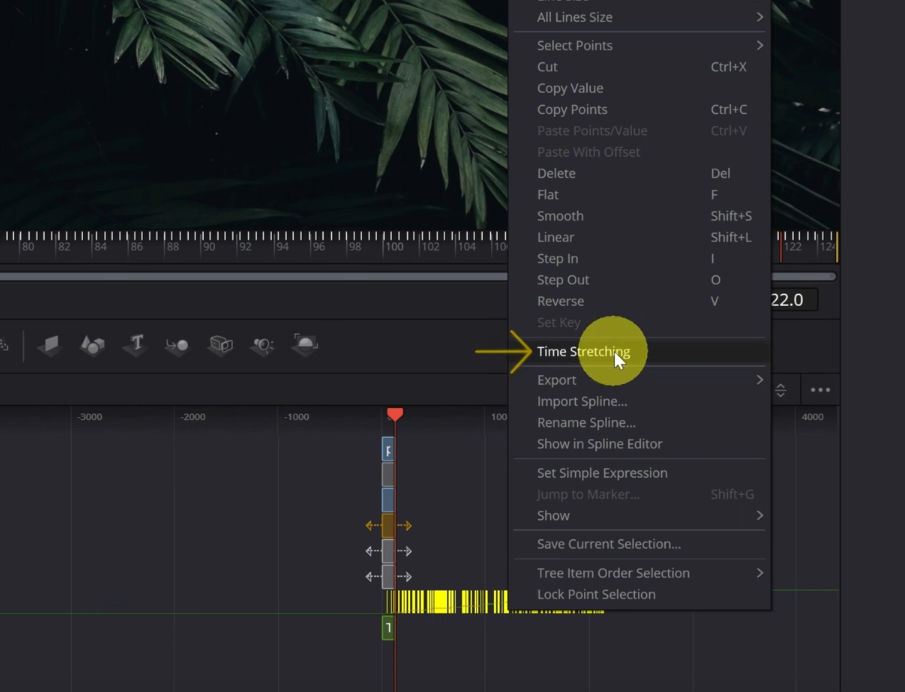
- With all the keyframes in view, select them all, and they will turn yellow. Right-click on the selected keyframes and choose the “time stretching” option. Next, click on the right edge of the keyframes and drag it to the left. This action will decrease the duration of the animation, ensuring it appears complete in the video.
7. Mirror Text Effect
Follow these detailed steps to create the mirror text effect in DaVinci Resolve:
Step 1: Duplicate the Text Node
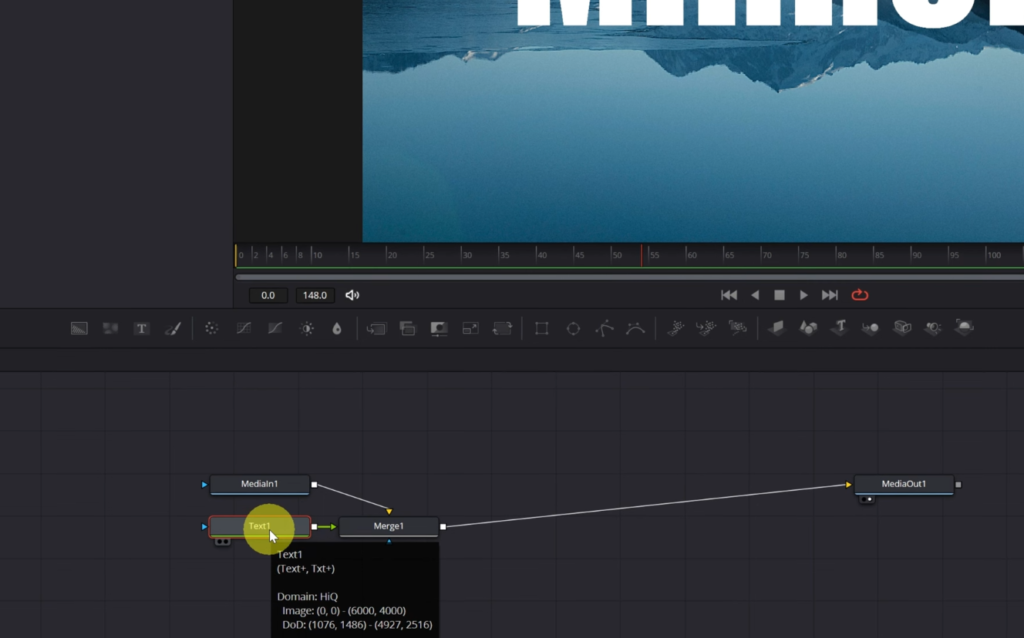
- Inside the Fusion module, with the text node already created, duplicate the text node to create the mirror effect by right-clicking on the text node, then selecting copy and paste anywhere in the empty space of the node editor.
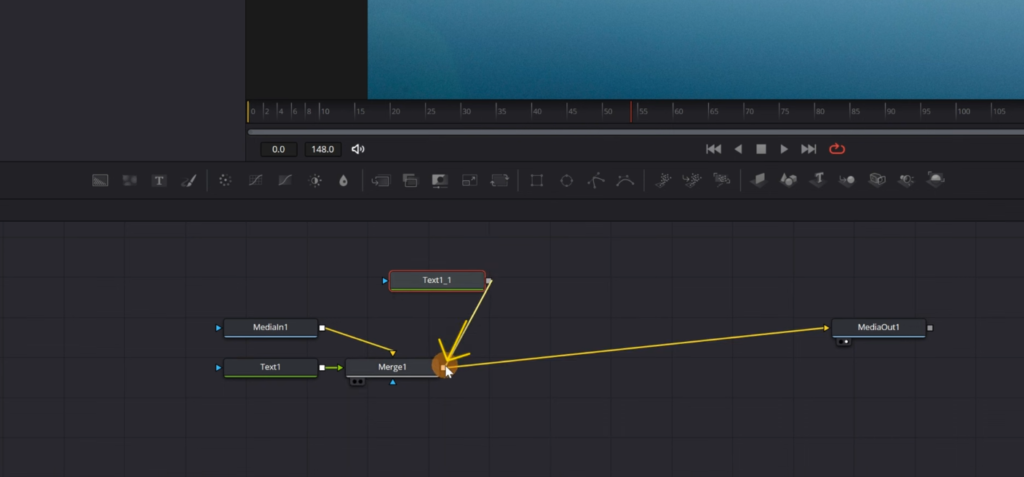
- Connect the new text1_1 node to the Merge1 node by clicking the small square and connecting it to the other square, which will automatically create a Merge2 node.
Step 2: Flip the Text Vertically
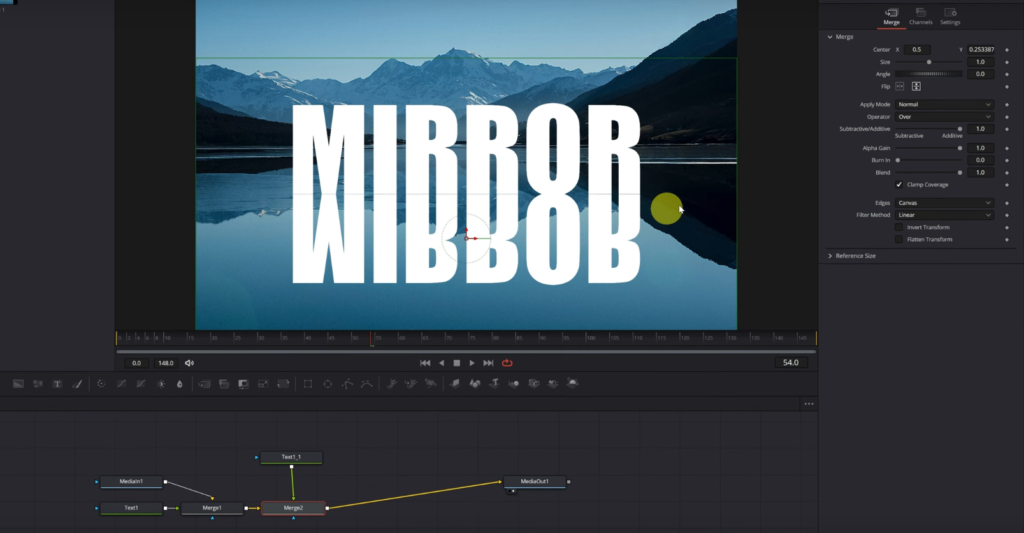
- Click on the merge2 node, then navigate to the Inspector menu.
- In the Flip option, click on the icon to flip the text vertically, creating an inverted version of the original text.
- Adjust the position of the inverted text using the red arrow in the viewer. Move the text downward, and decide whether to leave a small space or join the letters completely.
Step 3: Adjust the Opacity
- To give the appearance of a reflection, go to the Settings tab in the Inspector menu and reduce the opacity of the mirrored text.
- Adjust the Blend option to your desired value, such as 60%, to create a more realistic reflection effect.
Step 4: Modify the Shape of the Reflection Letters
- Click on the node with the mirrored text, then open the Transform menu in the Inspector.
- Expand the Shear section, and modify the curvature on the X-axis to create a more dynamic mirror effect.
Step 5: Add a Gradient to the Reflection
- With the mirrored text node selected, add a rectangular mask by clicking on the square-shaped mask icon from the toolbar above the node graph.
- Move the mask downward to cover the lower part of the mirrored text, which will make the bottom portion of the reflection disappear.
- Increase the Soft Edge value in the Inspector menu to create a gradient effect that suits your preferences.
Thank you for reading our article on the “7 Best Text Effects in DaVinci Resolve”! We hope you found these techniques useful and inspiring for your future video projects. DaVinci Resolve is an incredibly powerful tool for video editing, and by mastering these text effects, you can enhance your creations and make them stand out. Don’t forget to experiment with different styles and combinations to find the perfect look for your projects. Once again, thank you for your support, and happy editing!