As a filmmaker, you’re always on the lookout for new techniques to improve your editing skills and make your videos stand out. In this blog post, we continue our exploration of text tracking in DaVinci Resolve. In this section, we’ll guide you through setting up your timeline correctly for seamless text tracking.
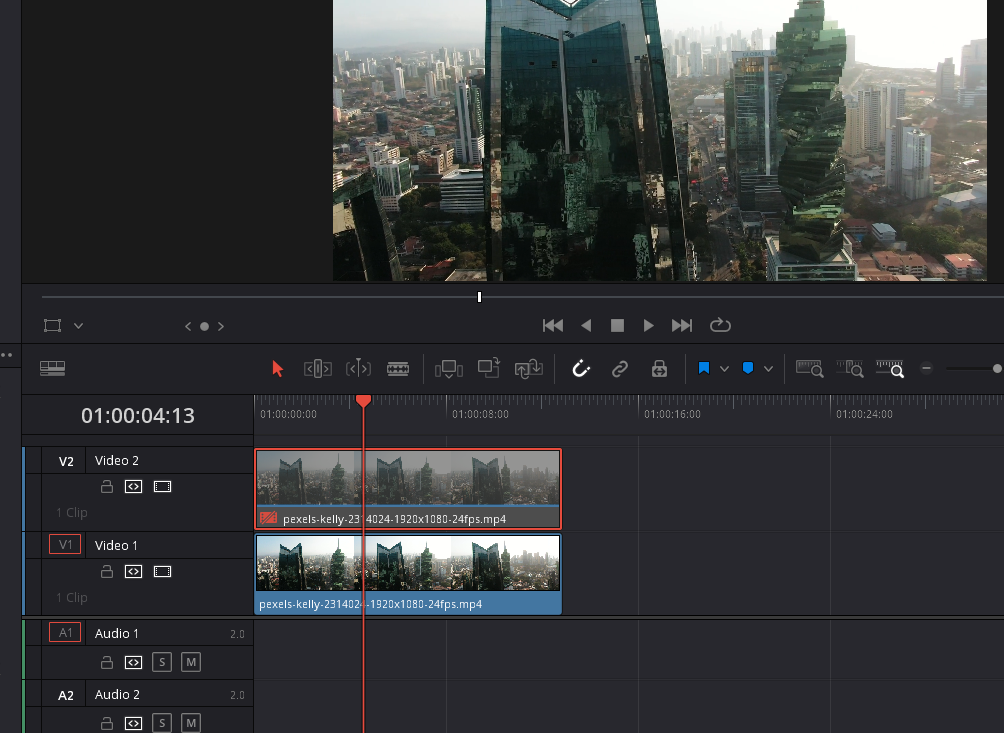
- Begin by importing your clip into the timeline on the edit page of DaVinci Resolve.
- Duplicate the clip by holding down the Alt key and clicking and dragging the clip above the original to create two copies.
- Turn off the visibility of the second video layer. This step is crucial for a specific reason, which we will explain later in the blog post.
Step 2: Enter Fusion With your timeline set up, you’re ready to dive into Fusion. Don’t worry, we’ll guide you through the process step by step, ensuring you feel confident in mastering text tracking in DaVinci Resolve.
Tracking Text In Davinci Resolve
Utilizing the Camera Tracker for Effective Text Tracking in DaVinci Resolve
Step 1: Set Up Fusion Workspace In Fusion, you’ll see your MediaIn1 and MediaOut1 nodes. The first step is to add the Camera Tracker to enhance your text tracking capabilities.
Step 2: Add the Camera Tracker
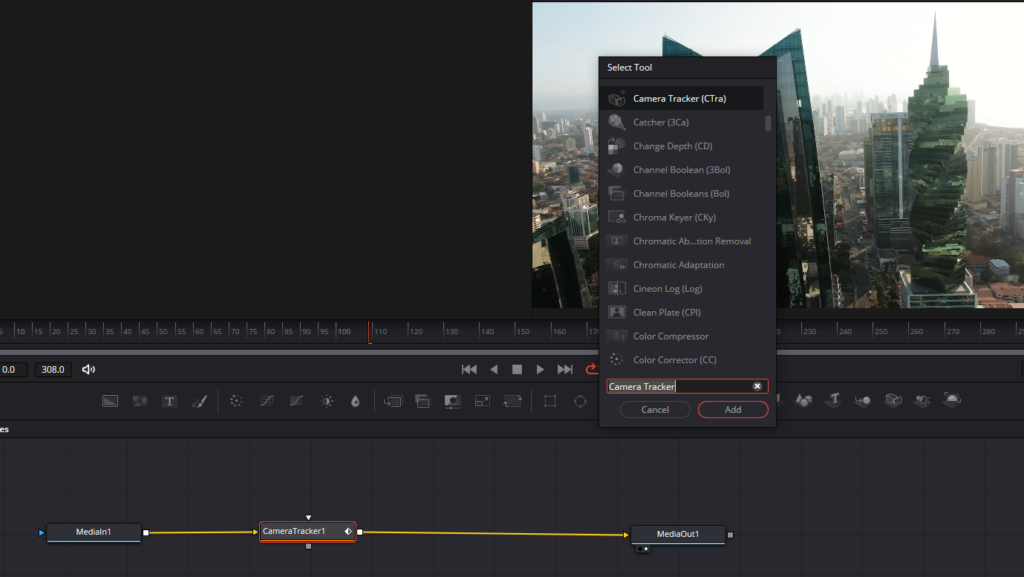
- Press Ctrl + Spacebar to bring up the Select Tools menu, a convenient search bar to find the tools you need.
- Type “camera” in the search bar and locate the Camera Tracker in the results.
- Click on it and hit “Add” to insert the Camera Tracker into your node tree, which represents the flow of your visual effects.
- Ensure the Camera Tracker is connected properly to your nodes by checking the lines connecting them in the node tree.
Step 3: Configure Camera Tracker Settings
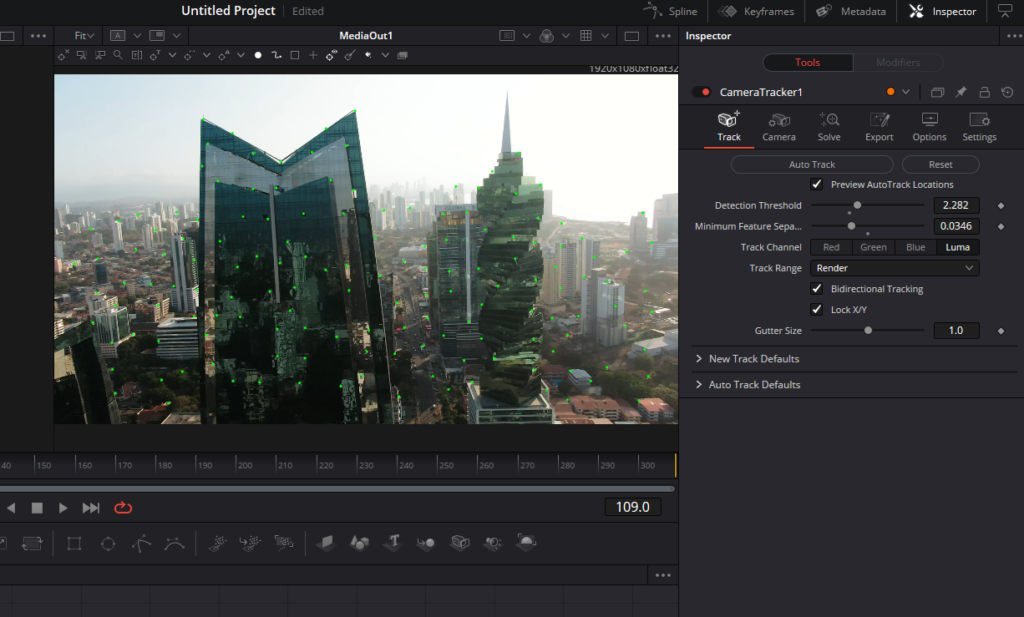
- With the Camera Tracker selected, go to the Inspector tab on the right-hand side of the screen to access and modify its properties.
- Check “Preview Auto Track Locations” to see the tracker points on your footage and “Enable Bidirectional Tracking” to allow the tracker to work forwards and backwards in your clip.
- Adjust “Minimum Feature Separation” to add more tracking points. For instance, change the default value from 0.5 to 4 to increase the number of points the tracker will use to analyze the footage.
- Slightly increase the “Detection Threshold” to improve tracking accuracy. This setting determines the sensitivity of the tracker when detecting features in your footage.
Step 4: Run Auto Track
- Click “Auto Track” and allow the tracker to work its magic. The Camera Tracker will analyze your footage and generate tracking points based on the settings you’ve configured.
- Depending on the length and complexity of your clip, this process may take some time. It’s a good opportunity to take a break and return once it’s completed.
- Once the tracking process is finished, you’ll see the tracking points on your footage, indicating that the Camera Tracker has successfully analyzed the motion in your clip.
By following these steps, you’ll be well-equipped to utilize the Camera Tracker for effective text tracking in DaVinci Resolve.
Refining and Solving Your Text Tracking Points in DaVinci Resolve
Step 1: Move to the Solve Menu Once Resolve has finished tracking your footage, navigate to the “Solve” menu within the Camera Tracker settings.
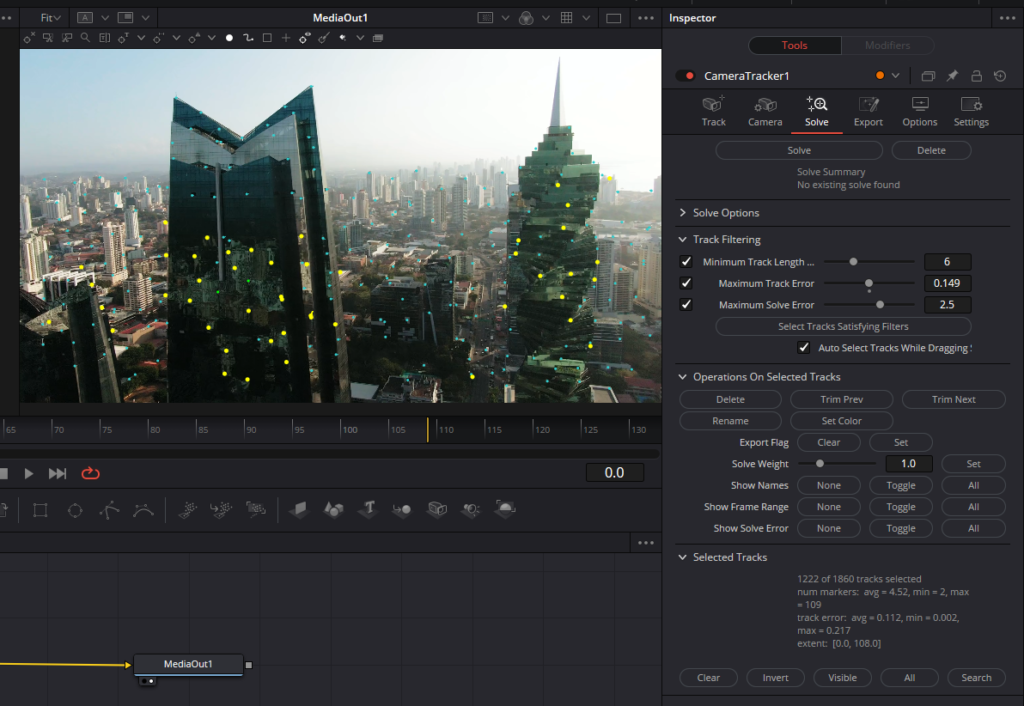
Step 2: Refine Tracking Points
- Observe the total number of tracking points generated. A substantial amount of points indicates a more thorough analysis of your footage.
- Some tracking points may not be accurate or useful, so it’s essential to eliminate them. Reduce the “Maximum Track Error” value slightly to refine the selection without deleting too much valuable tracking data.
- Click “Delete” to remove the less accurate tracking points. After refining, you should see a reduced total number of points.
Step 3: Solve the Camera Tracker
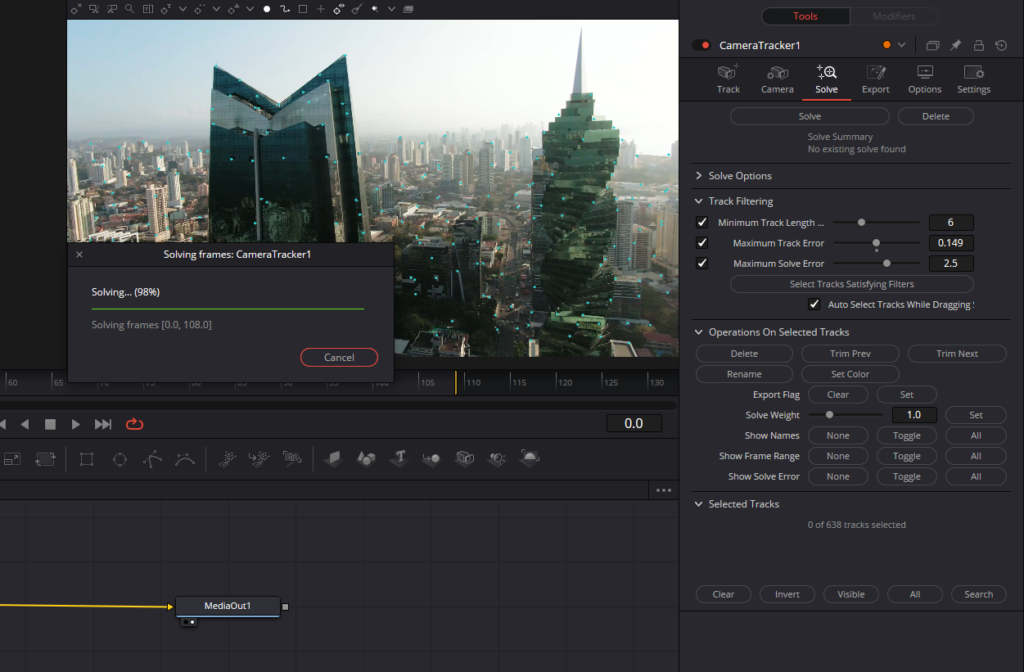
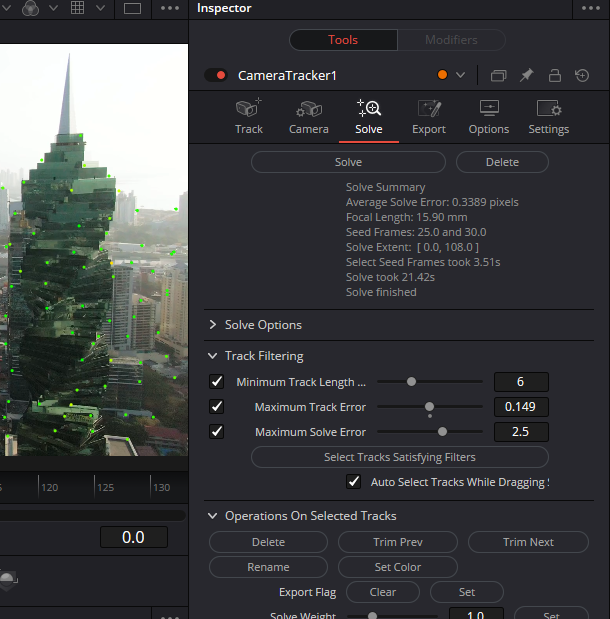
- Click the “Solve” button, allowing DaVinci Resolve to process the tracking points and determine the camera’s movement.
- Once completed, you’ll see an “Average Solve Error” value. Aim for a value under 1 to ensure accurate tracking. A lower value, such as 0.62, indicates a reliable result.
Step 4: Improve Tracking Point Visibility
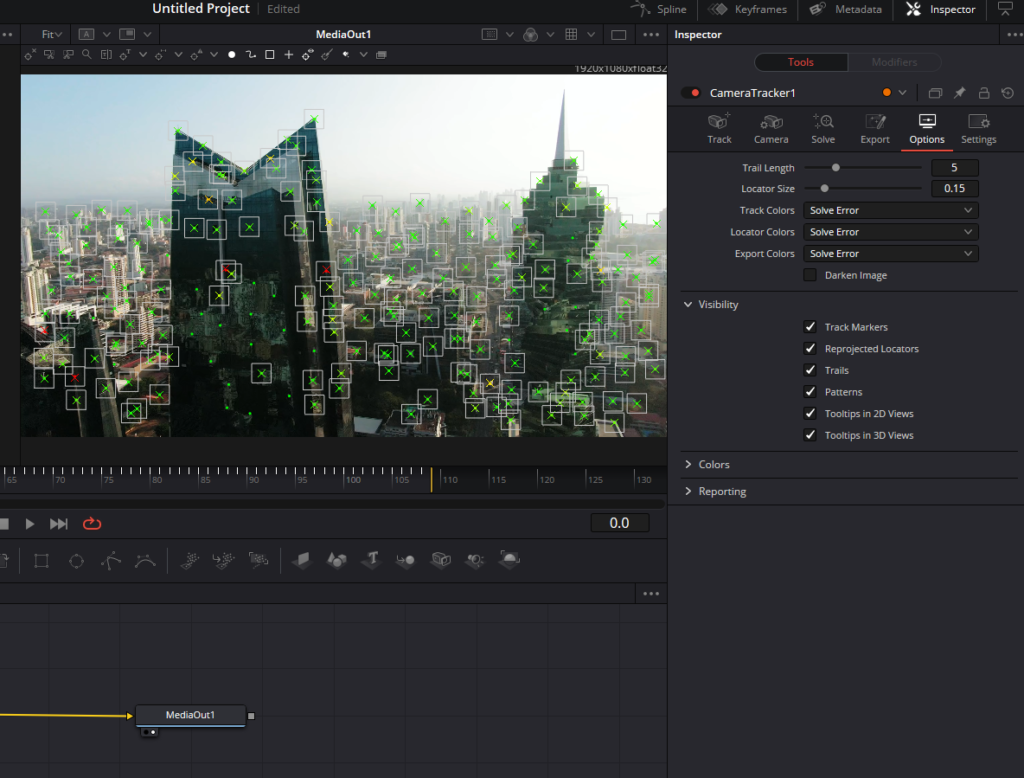
- If you find it challenging to see the tracking points on your footage, go to the “Options” tab within the Camera Tracker settings.
- Under “Visibility,” check “Reprojected Locators” and “Patterns.” This will make the tracking points easier to see, helping you evaluate and refine your text tracking in DaVinci Resolve.
Exporting Tracking Data and Preparing the Scene for Text Tracking in DaVinci Resolve
Step 1: Configure Export Settings
- In the Camera Tracker settings, go to the “Export” tab.
- Click the dropdown menu under “3D Scene Transform” and change “Aligned” to “Unaligned.”
Step 2: Select Tracking Points for Text
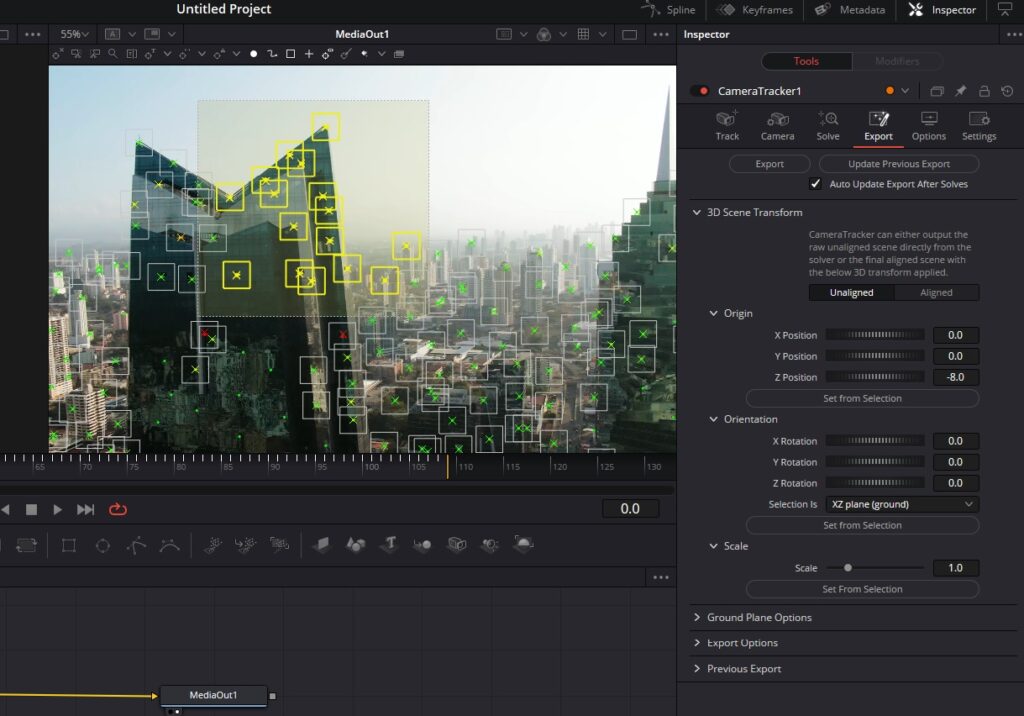
- Identify the points in your footage where you want your 3D text or object to be attached.
- Click and drag to highlight the desired points, and zoom in if necessary to ensure accurate selection.
- Use the Ctrl key and click to select or deselect points as needed.
Step 3: Set the Origin
- With the desired points selected, click on “Origin” and then “Set from Selection.” This action sets the origin point for the imported 3D text or object, ensuring it sticks to the selected location.
- Return to the “3D Scene Transform” dropdown menu and change “Unaligned” back to “Aligned.”
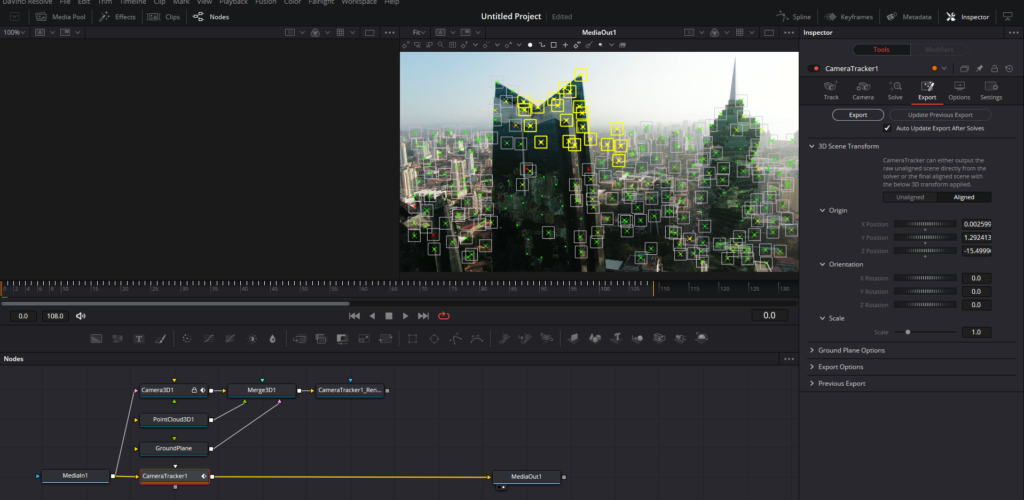
- Click “Export” to generate the necessary nodes for your 3D text or object.
Step 4: Clean Up Nodes and Connect Outputs
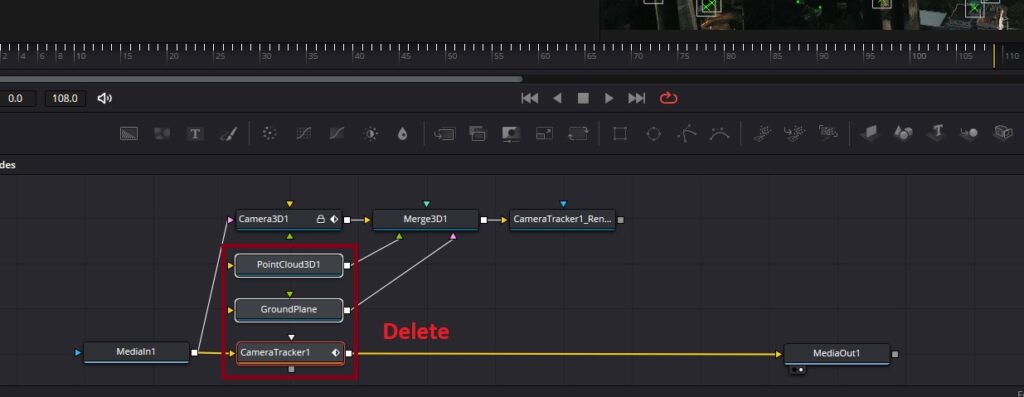
- Delete the “Point Cloud 3D” and “Ground Plane” nodes, as they are not needed for this process.
- Remove the “Camera Tracker” node which has automatically been created infront of “MediaIn1” node, as all tracking data has been transferred to the “Camera 3D” node.
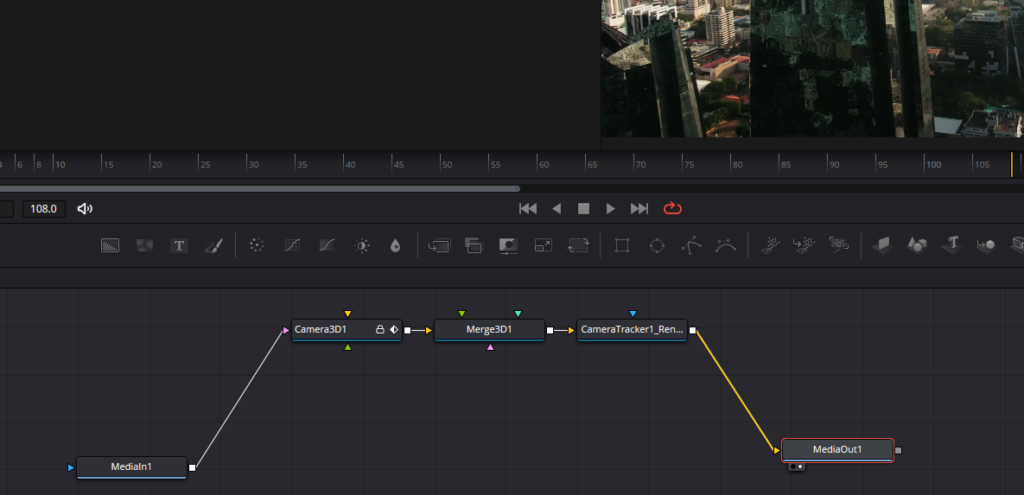
- Connect the output of the “CameraTracker1_Renderer.Output ” node to your “MediaOut1” node to complete the process.
Adding and Positioning 3D Text in DaVinci Resolve
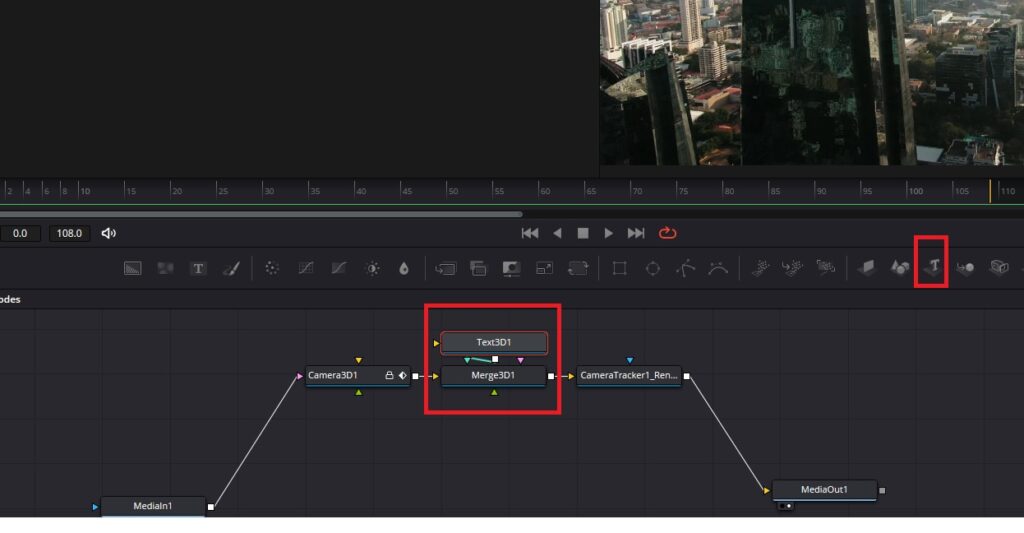
Step 1: Add a 3D Text Node
- In the Fusion interface, locate the toolbar and select the “Text3D” node.
- Connect the “Text3D” node to the “Merge3D” node.
- Enter your desired text and choose a font that suits your project.
Step 2: Adjust the Text Size
- If the text size is too large, scale it down to an appropriate size.
Step 3: Position and Rotate the Text
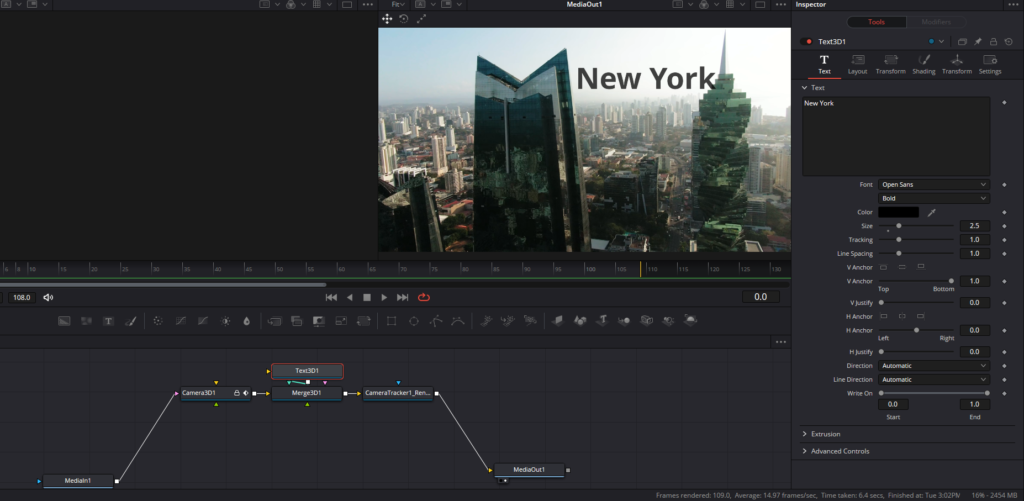
- In the “Transform” tab, use the X and Y axis sliders to position the text as needed.
- Avoid using the Z axis for positioning, as it may disrupt the tracking data. Instead, use the “Scale” option to adjust the size.
- Adjust the rotation of the text using the X, Y, and Z axis sliders. Note that using the Z axis for rotation will not impact the tracking data.
Step 4: Adjust the Text Shading
- In the “Shading” tab, fine-tune the text appearance by adjusting the opacity. Lowering the opacity to around 90% can create a more natural look.
After completing these steps, your text will be effectively tracked and positioned in your video project, resulting in a professional and polished final product.
Making Text Appear Behind Objects in DaVinci Resolve Using Masking and Tracking Techniques
In this comprehensive tutorial, we will dive into the step-by-step process of making text appear behind objects within a video using DaVinci Resolve. We will explore two methods, one employing manual masking and keyframing in the Fusion tab, and the other using the auto-tracking mask feature in the Color tab.
Method 1: Fusion Tab – Manual Masking and Keyframing
Step 1: Create a Merge Node
- In the Fusion tab, connect the output of the “MediaIn” node to the “CameraTracker” node.
- This connection will create a “Merge” node.
- Keep in mind that the text may temporarily disappear during this process.
Step 2: Draw a Polygon Mask
- Select the “Polygon” mask tool from the toolbar.
- Drag the mask below the “Merge” node and connect it.
- Carefully trace the outline of the object (in this case, the tower) that you want your text to appear behind.
Step 3: Keyframe and Adjust the Mask
- Navigate through the clip, frame by frame, adjusting the mask’s position and shape to ensure it remains accurately positioned around the object.
- This process can be time-consuming, as it requires manual keyframing and adjustment for each frame.
Method 2: Color Tab – Auto-Tracking Mask
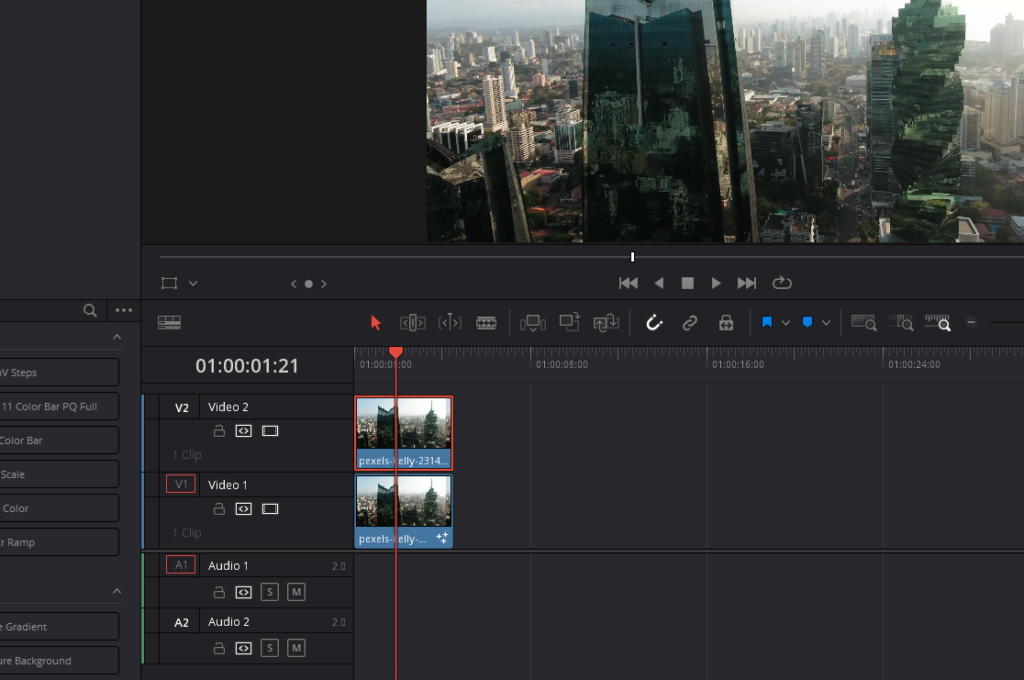
Step 1: Enable the Duplicate Layer
- Return to the “Edit” tab and enable the duplicate layer created at the beginning of the project.
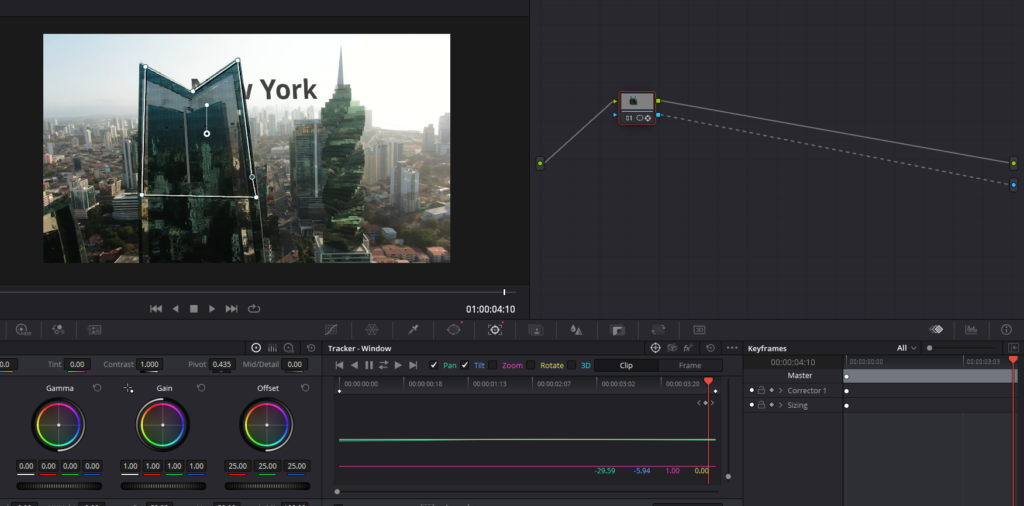
Step 2: Create a Mask in the Color Tab
- Go to the “Color” tab, which offers an auto-track mask feature.
- Click on the “Windows” tab and select the “Pen” tool.
- Zoom in and draw a mask around the object. Be as precise as possible to achieve the best results.
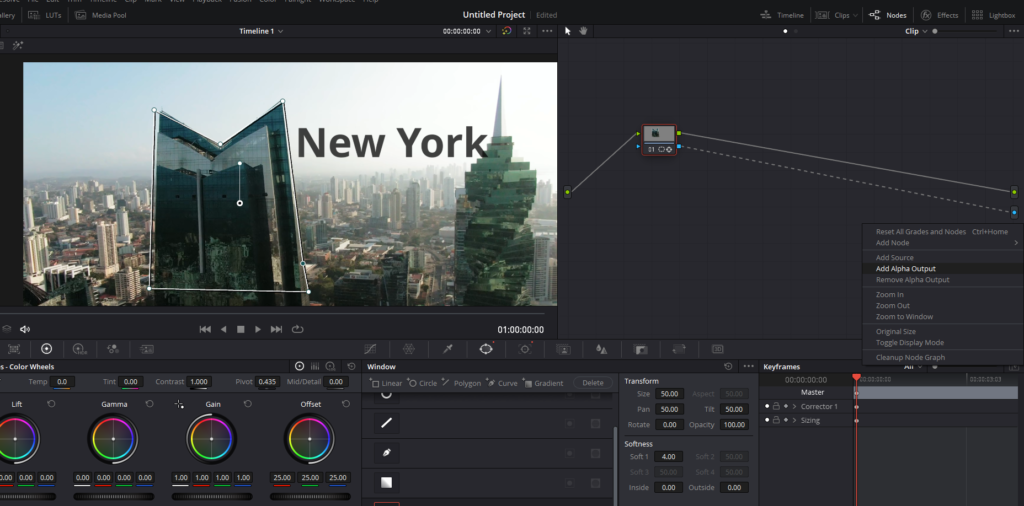
Step 3: Add Alpha Output and Connect Nodes
- In the node graph, right-click and select “Add Alpha Output.”
- Connect the alpha outputs together.
Step 4: Track and Fine-Tune the Mask
- Go to the “Trackers” tab and click “Track Forward” to track the mask to the object.
- If you started tracking midway through the clip, click “Track Backward” to track the mask in the opposite direction.
- Fine-tune the mask by clicking “Frame” and checking that the mask remains accurately positioned around the object throughout the clip.
Step 5: Add Softness to the Mask
- If desired, add some softness to the mask to create a less harsh edge.
You can create a professional and seamless effect of text appearing behind objects in your video projects using DaVinci Resolve. While manual masking and keyframing in the Fusion tab can be time-consuming, the auto-tracking mask feature in the Color tab offers a more efficient approach for many users.
Conclusion
That’s it, we appreciate you taking the time to read our in-depth article on Tracking Text in DaVinci Resolve: Step By Step Guide.
We hope this guide has provided you with valuable insights and practical techniques to elevate your video editing projects using DaVinci Resolve. By mastering the art of tracking text and manipulating objects in your footage, you can create dynamic and visually captivating content that stands out from the competition.
Remember to experiment with different methods, practice your skills, and continue learning to stay ahead in the ever-evolving world of filmmaking. Once again, thank you for choosing our blog as your trusted resource, and happy editing!