Hi, I’m Salik, the author of FilmmakingElements.com. I have been a filmmaker for over 10 years. I am also a certified DaVinci Resolve Trainer and I have used DaVinci Resolve for many of my projects. In the world of digital filmmaking, emulating the classic aesthetics of analog film has become a popular trend. For many, the magic of celluloid’s distinct visual characteristics still holds a certain allure, and digital post-production tools have made it easier than ever to capture that essence in a modern workflow.
Among the myriad of plugins available for color grading and film emulation, two names stand out in the DaVinci Resolve ecosystem: Dehancer and FilmConvert. Both tools promise to deliver an authentic film look with ease, but which one truly reigns supreme?
In this article, we’ll delve into an in-depth comparison of Dehancer and FilmConvert, examining the features, capabilities, and performance of each plugin within DaVinci Resolve. We’ll explore their unique approaches to film emulation, dissect their color grading tools, and evaluate their overall usability and efficiency.
By the end of this comprehensive showdown, you’ll have a clear understanding of which plugin best suits your needs and can help you achieve that coveted film look for your next project.
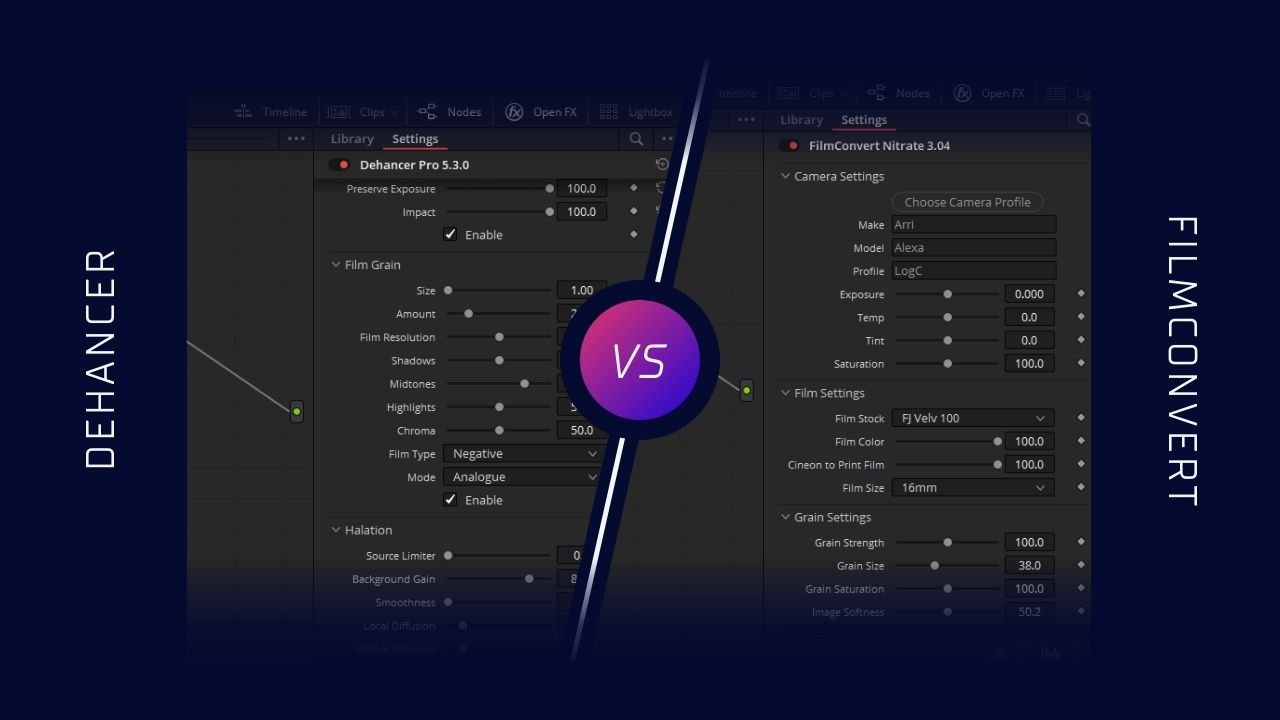
Dehancer vs FilmConvert
FilmConvert and Dehancer are two powerful film emulation plugins that have gained considerable popularity among DaVinci Resolve users.
Dehancer adopts a more analog-focused approach to film emulation, emphasizing the importance of negative film as raw data that requires further interpretation. The plugin acknowledges the inherent limitations of direct scanning methods and strives to reproduce the true film colors through an optical printing process.
Dehancer’s co-founders (Nailya Safarova, Denis Svinarchuk and Pavel Kosenko) have spent years perfecting their analog development and printing processes to create a reliable sampling method for stable results, which is not achievable through direct negative scanning. Dehancer in total has around 63 film stocks which you can use for look development.
On the other hand, FilmConvert’s Nitrate plugin has been a go-to option for many editors, DITs, and colorists for a decade. It offers a user-friendly interface and generates a cinematic image with just a few clicks. The plugin includes 19 specific film stock emulations and dozens of camera-specific film emulation response profiles.
FilmConvert is continuously working to add new features and improvements to Nitrate, ensuring compatibility with new cameras and shooting profiles. However, FilmConvert does not disclose how they profiled these film stocks.
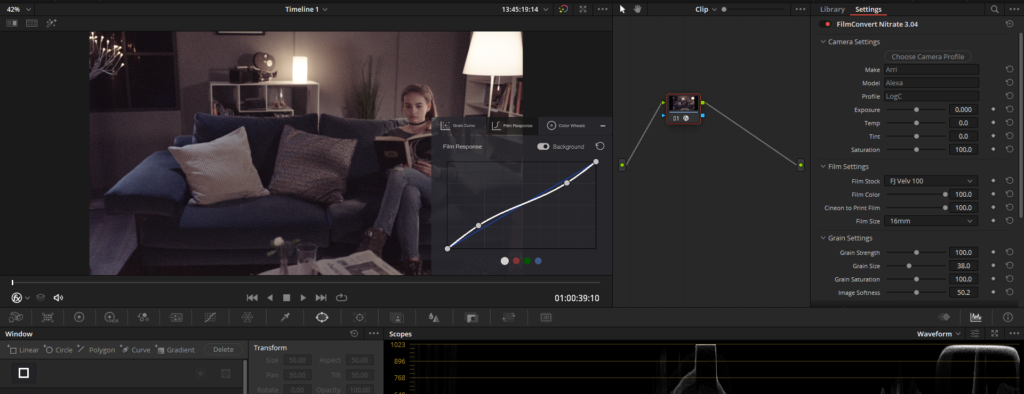
Nitrate, an advanced version of FilmConvert, offers an improved interface and onscreen controls in the preview window for a more intuitive and immersive grading experience. The full-screen interface allows you to closely examine your footage and make precise adjustments, ensuring that you achieve the desired look for your project.
Dehancer vs FilmConvert: Workflow Differences in DaVinci Resolve
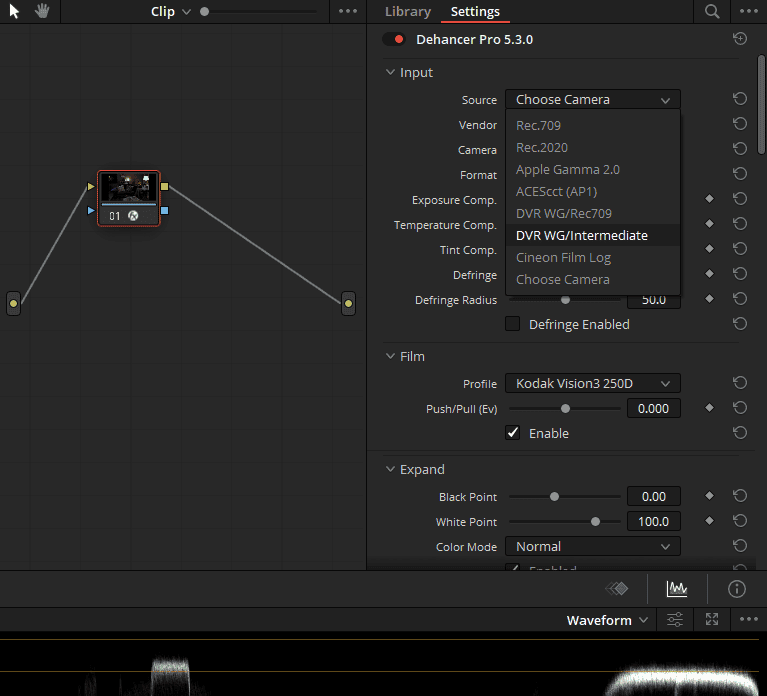
Dehancer Workflow: Dehancer is designed to be placed at the end of the processing chain, with additional color correction nodes and local masks applied before it. This plugin is treated as a virtual film, allowing for better integration with the overall grading process. Dehancer supports multiple color spaces and gamma, including ACES and DaVinci Wide Gamut, enabling more versatile grading options. To use Dehancer effectively, it’s essential to select the correct input settings, camera profiles, and source parameters.
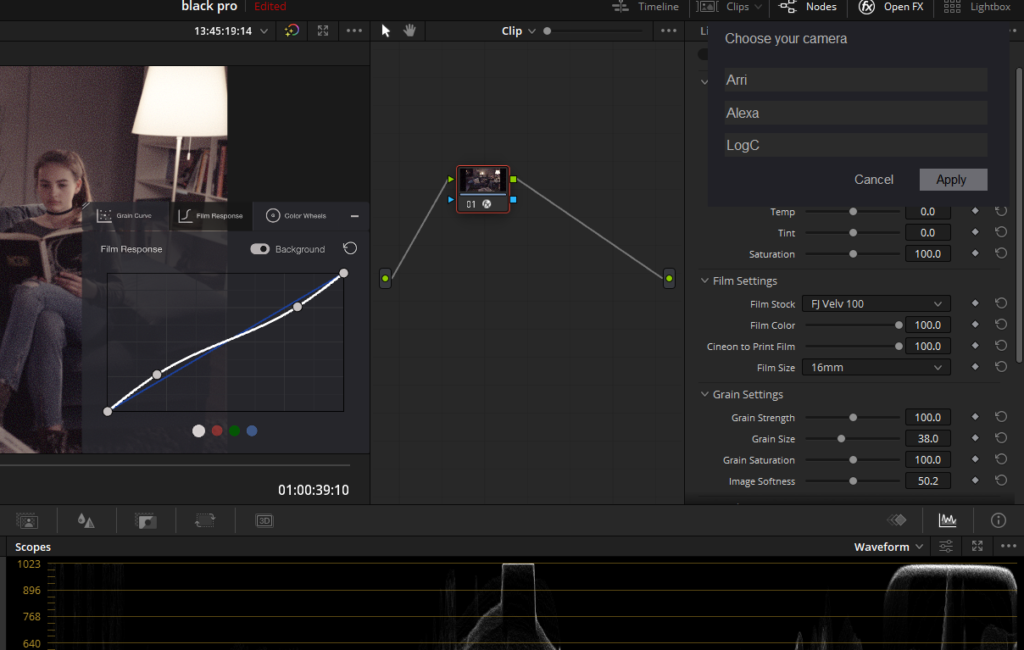
FilmConvert Workflow: FilmConvert is a node-based OFX plugin that is more straightforward to apply in DaVinci Resolve. You simply drag and drop it onto a node and select the color space of your footage. However, FilmConvert does not support ACES or DaVinci Wide Gamut workflows. Instead, it relies on over 100 camera and shooting profile specific packs for accurate film stock emulation. These packs are individually crafted to ensure precise color response for each camera’s sensor. Selecting the correct camera pack and shooting profile is crucial for achieving accurate film emulation with FilmConvert.

The only problem with FilmConvert is that to use any camera profile as Input Color Space, you have to download the camera pack from their website, and these camera packs are large in size.
In summary, Dehancer offers a more complex and versatile workflow that supports ACES and DaVinci Wide Gamut, providing a broader range of grading possibilities. FilmConvert, on the other hand, is a more straightforward
Dehancer Vs FilmConvert: Film Profiles
Both Dehancer and FilmConvert aim to provide a genuine film look to digital footage by offering a variety of film profiles. However, there are some differences in the range of profiles and the quality of the results provided by each plugin.
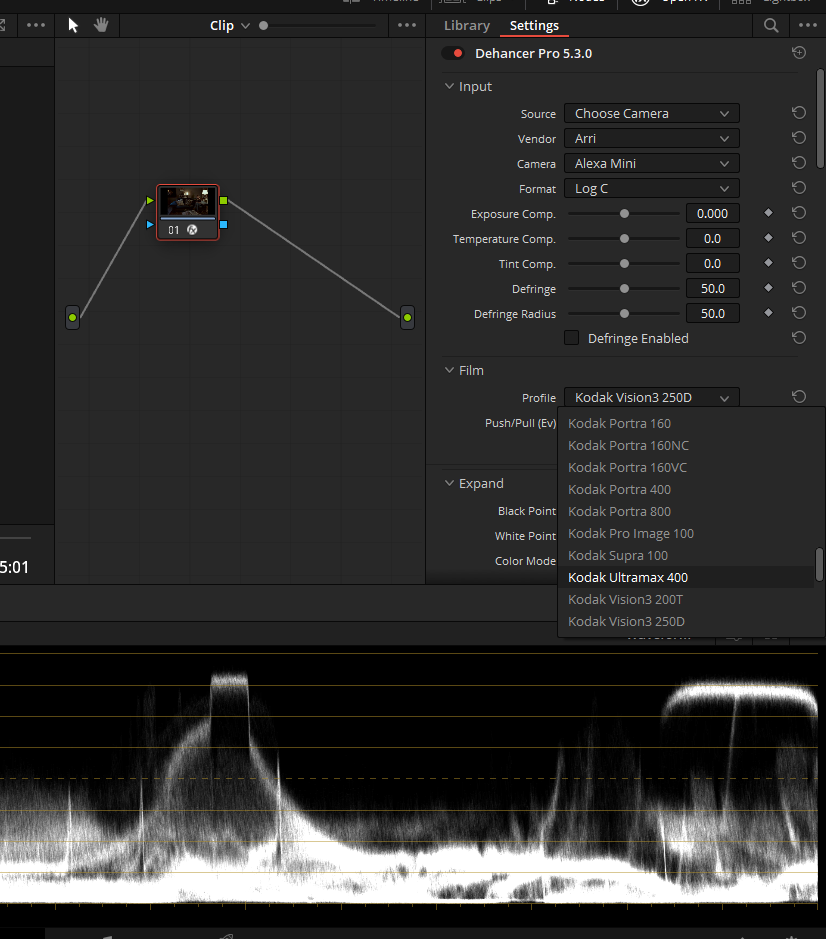
Dehancer offers a more extensive list of film profiles, with options ranging from motion picture films, color negative films, color positive films, black & white films, instant films, exotic films, and cross-processed films. This provides users with a wide variety of choices to experiment with and find the perfect look for their projects.
FilmConvert, on the other hand, has a more limited selection of 19 film stocks, including color negative, color positive, black & white, and Polaroid. While both Dehancer and FilmConvert offer a range of film profiles for users to choose from, Dehancer seems to have an edge in terms of the number of film stocks and the quality of the results. The wide array of film profiles offered by Dehancer allows users to experiment and achieve the desired look more easily.

In terms of reference and ease of use, both plugins provide a simple interface for users to browse through film profiles and apply them to their footage. Dehancer’s “Push/Pull” feature allows users to control the exposure and density of the film stock to further enhance the final outcome.


Dehancer Vs FilmConvert: Color Correction Tools
Both Dehancer and FilmConvert provide users with color correction tools to enhance their footage and achieve a more cinematic look. While both plugins offer similar tools, there are some differences in their features and approaches to color correction.
Dehancer’s Input Corrections: Dehancer’s input corrections are designed to quickly compensate for technical issues in the source material. The plugin offers the following tools:
- Exposure Comp: This setting is used to correct exposure errors in the source material. It is a technical correction applied before any Dehancer effects, providing better results than adjusting exposure with conventional DaVinci tools.
- Temperature Comp and Tint Comp: These settings work similarly to adjust the temperature and tint of the source material, providing technical corrections to improve the overall look.
- Defringe: This tool helps to deal with chromatic aberrations visible at the edges, which may interfere with some Dehancer effects, such as Halation and Bloom.
FilmConvert’s Color Corrector Section: FilmConvert offers a more straightforward approach to color correction with the following tools:
- Exposure Slider: This slider adjusts the exposure of the footage.
- Temp Slider: This slider adjusts the color temperature of the footage.
- Tint Slider: This slider adjusts the tint of the footage.
- Saturation Slider: This slider allows users to saturate or de-saturate the image.
- Levels Sliders: These sliders help set the clipping point for black and white, and where the midpoint grey lies.
Dehancer Vs FilmConvert: Film Grain
Both Dehancer and FilmConvert offer advanced film grain simulation tools that go beyond simply overlaying grain on top of an image. They integrate the grain into the footage based on color and brightness characteristics, creating a more authentic film-like appearance.
Dehancer Film Grain:
- Offers two film types (Negative and Positive) and two processing modes (Analogue and Digital).
- Allows users to adjust grain Size, Amount, Shadows, Midtones, Highlights, Film Resolution, and Chroma to fine-tune the effect.
FilmConvert Film Grain:
- Utilizes a complex density-based grain algorithm that calculates and integrates grain based on the underlying colors.
- Models grain response for each film stock to reproduce the true grain characteristics of each stock.
Both Dehancer and FilmConvert provide sophisticated film grain tools, but Dehancer’s parameters offer more customization options, including Film Resolution and Chroma adjustments. Dehancer’s grain simulation also accounts for the grain’s relationship to image sharpness, making it even more lifelike. On the other hand, FilmConvert’s density-based grain algorithm models the grain response for each film stock, ensuring accurate representation of the chosen stock’s grain characteristics.
Dehancer Vs FilmConvert: Exporting LUTs
Dehancer’s LUT Generator:The LUT Generator provides an option to export color-contrast solutions as LUTs in two quality options: Small (17x17x17) and Normal (33x33x33). The Small LUT is typically sufficient for on-stage preview tasks and reduces processing load. If visible artifacts are encountered, the Normal setting can be used as a workaround. The Disable Input Transform option allows users to exclude the effect of Input settings from the generated LUT, making it universally applicable to any source and color science.
FilmConvert’s LUT Export: FilmConvert enables users to export an initial grade as a LUT, which can be loaded onto a monitor or in-camera when shooting on location. The exported LUT can be applied to external monitors, allowing the director and cinematographer to visualize the final look and check exposure during shooting.
LUTs from both Dehancer and FilmConvert can be used for on-set monitoring, allowing filmmakers to preview and maintain a consistent look throughout the production process. The primary difference between the two plugins is that, in addition to the Small (17x17x17) and Normal (33x33x33) LUT sizes offered by Dehancer, FilmConvert can also export LUTs in a higher quality option of 64x64x64. This extra level of precision may be beneficial for users requiring greater color accuracy and detail in their LUTs.
Dehancer vs FilmConvert: Extra Features
Dehancer offers a range of extra features that are not found in FilmConvert, providing a more comprehensive film emulation experience for users.
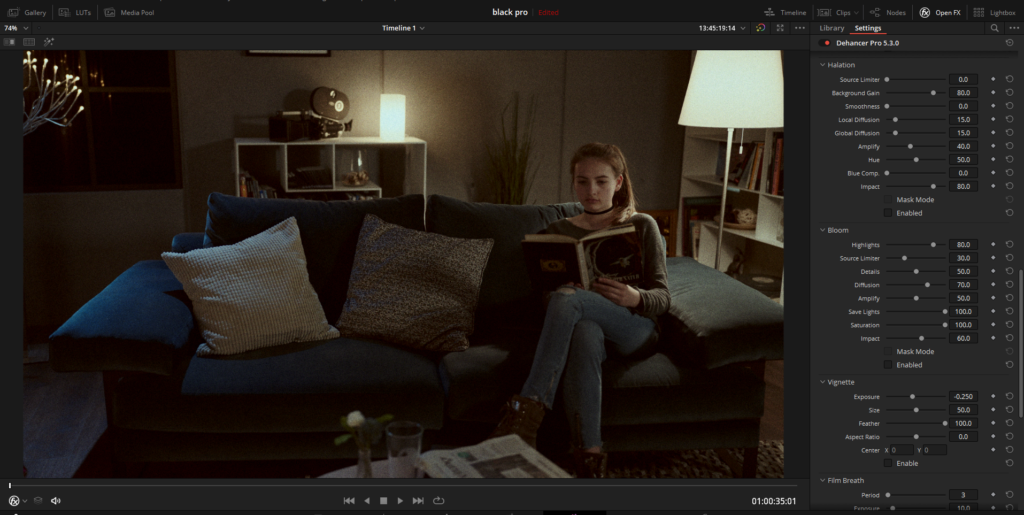
- Halation: Dehancer’s Halation feature reproduces the red-orange halo effect seen around bright light sources, specular highlights, and contrasting edges in film emulsion. It also influences midtones, particularly skin tones. Various parameters, such as Source Limiter, Background Gain, and Local/Global Diffusion, allow users to fine-tune the effect to their preferences.
- Film Breath: This effect simulates the accidental changes in exposure, contrast, and color from frame to frame in film. This can be caused by uneven emulsion coating, development, or camera shutter instability. Dehancer’s Film Breath toolset allows users to adjust the Period, Exposure, Tonal Contrast, Color, and Impact to achieve the desired film breath effect.
- Gate Weave: Dehancer’s Gate Weave feature emulates the mechanical swinging of a film strip as it moves through a camera, projector, or video encoding device. Users can adjust the Period, Translation X/Y, Rotation, and Auto Zoom parameters to create a more authentic film-like experience.
- CMY Color Head and Print Toning: Dehancer’s subtractive CMY Color Head is based on analog color correction tools used in photo enlargers and Printer Lights, a device for optical movie printing. Users can adjust the Yellow-Blue, Magenta-Green, and Cyan-Red complementary color pairs to achieve the desired color balance.
While both Dehancer and FilmConvert offer valuable tools for filmmakers, Dehancer’s extra features provide a more in-depth and customizable film emulation experience. Users can fine-tune the appearance of their footage to achieve a more authentic and distinctive look that is true to the analog film experience.
Conclusion
In conclusion, both Dehancer and FilmConvert Nitrate offer excellent tools for achieving a filmic look in your digital footage. However, Dehancer appears to have the edge with a broader range of film stocks, support for ACES and DaVinci Wide Gamut workflows, and a wealth of extra features that allow for more precise control over the final result.
Dehancer’s approach to film emulation is more comprehensive and its commitment to replicating the intricacies of analog film processes provides a more authentic experience. The plugin is also very well documented, which allows users to better understand its features and capabilities, and ultimately, achieve better results.
FilmConvert Nitrate, on the other hand, offers a simpler and more straightforward workflow. It is a great choice for those who want to achieve a film look quickly and efficiently, without delving too deeply into the complexities of analog film processes.
- Also Read- Dehancer vs Filmbox
- Also Read- Film Look In Davinci Resolve (Full Guide)+ Free Powergrade
- Also Read- How to use Face Refinement In Davinci Resolve (Complete Guide!)