Fujifilm is one of the most popular camera brands among videographers and cinematographers. Their cameras are known for producing beautiful images with rich colors and deep contrast. However, shooting in Fujifilm’s F-Log can be a bit daunting, especially if you’re not familiar with color grading.
F-Log is Fujifilm’s proprietary log gamma curve that provides a flat image with a wide dynamic range. It’s designed to preserve as much detail as possible in the highlights and shadows, making it an ideal option for professional videographers and cinematographers who want more control over their footage in post-production.
In this article, we’ll explore different methods for color grading Fujifilm F-Log footage in Davinci Resolve, including using official technical LUTs, color space transform, ACES, and Davinci Resolve color management. By the end of this article, you’ll have a better understanding of how to achieve the desired look for your Fujifilm F-Log footage in Davinci Resolve.
Whether you’re a professional videographer or a beginner, this guide will help you navigate the color grading process in Davinci Resolve and take your Fujifilm F-Log footage to the next level. So, let’s dive in and explore the different techniques for color grading Fujifilm F-Log in Davinci Resolve.
How To Color Grade Fujifilm F-Log In Davinci Resolve
1. Color Grade Fujifilm F-Log With Official Technical LUTs
This technique involves color grading Fujifilm F-Log footage using the technical transform LUTs from Fujifilm’s official website. To use this method Click Here to visit the download page and download the LUT package.
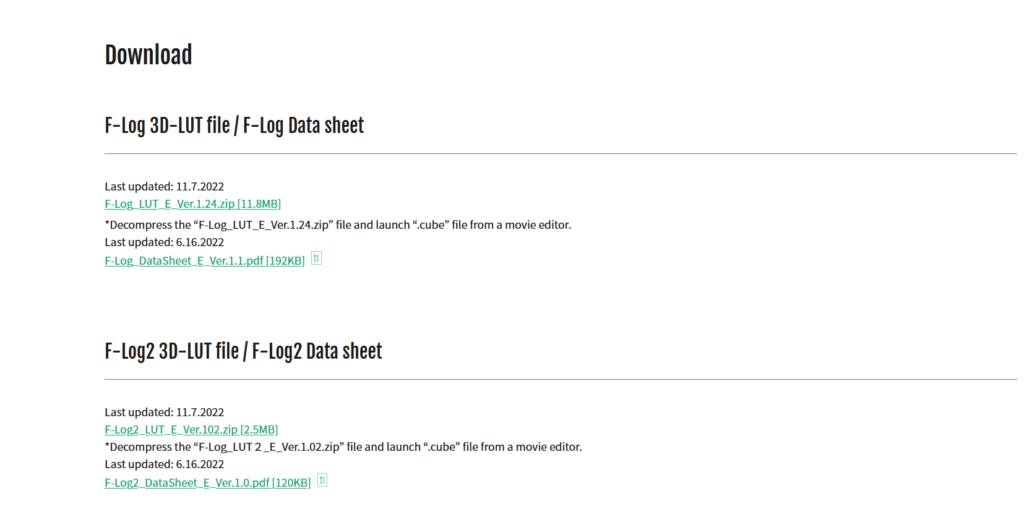
The LUT package has all the LUTs for all the different cameras which are capable of shooting F-Log. These LUTs give you a nice starting point, converting your footage into Rec.709. There are multiple options for every camera so you can try and see which works best for you.
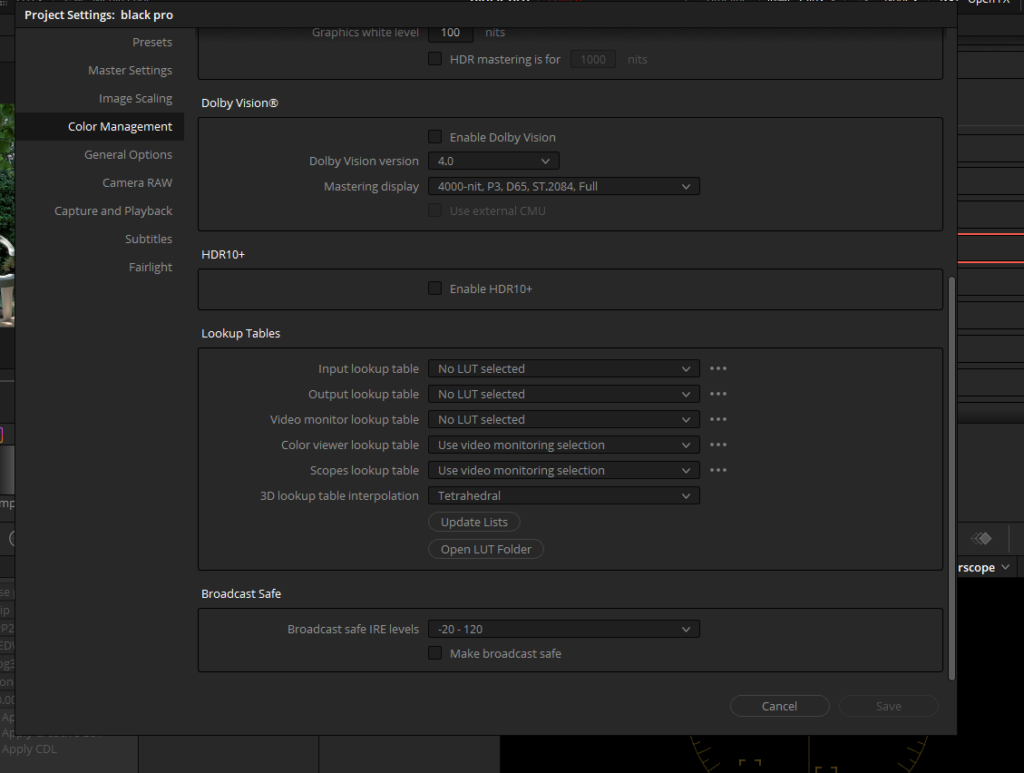
- Click on the gear-looking icon in the bottom right corner to open the “Project Settings”
- Go to the “Color Management” tab, Under “Lookup Tables”, select “Open LUT Folder”
- Drag and drop the folder which you just downloaded from Fujifilm’s website.
- Close the file browser.
- Click on “Update Lists”
- You have just imported the LUTs required for this method.
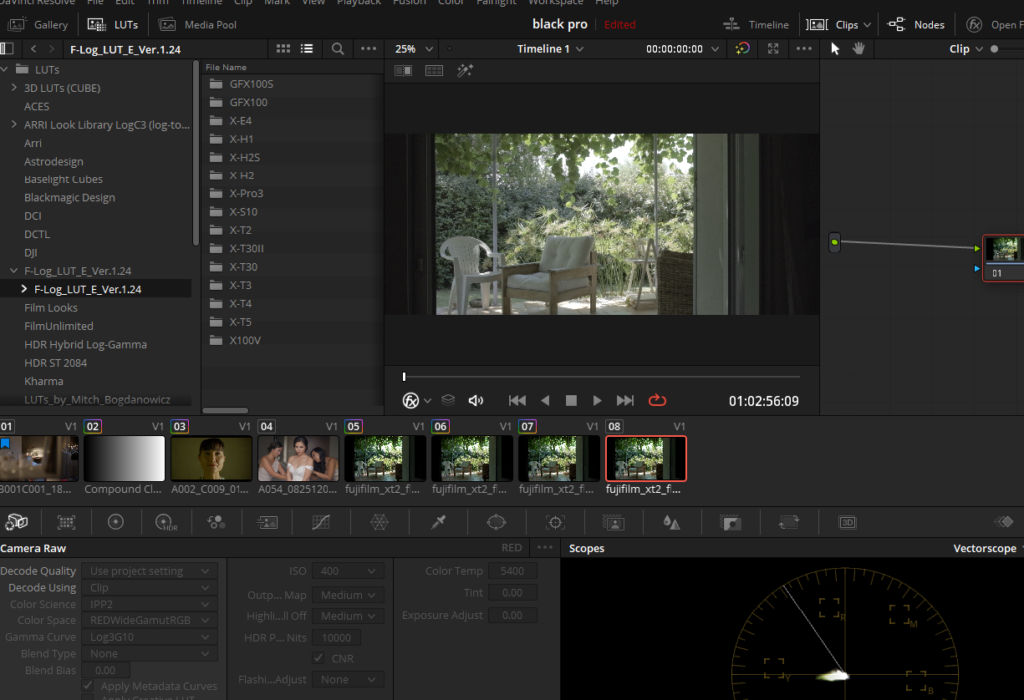
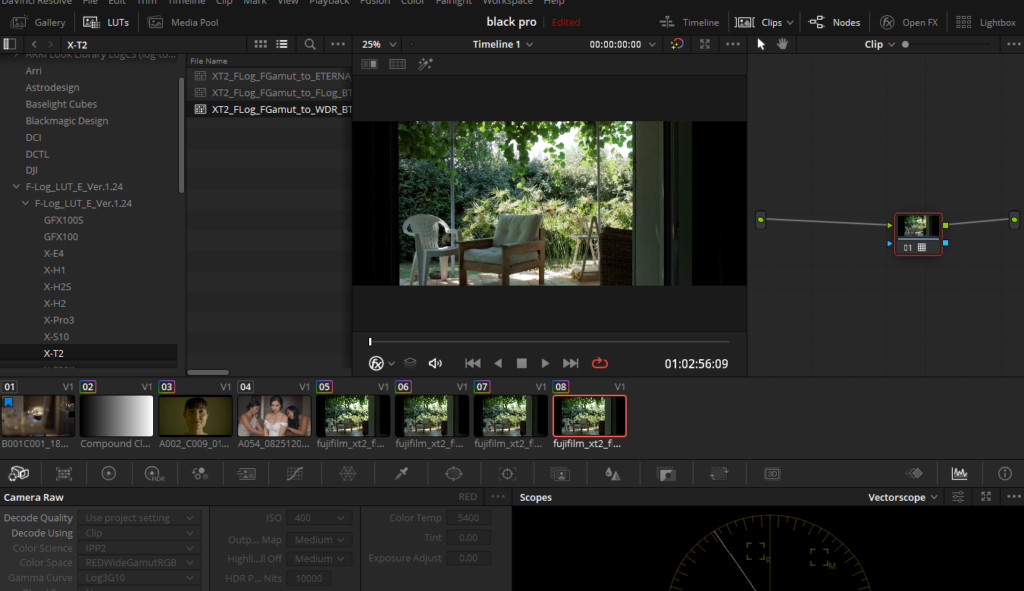
- Head to the color page, and click on the “LUTs” button on the left top corner.
- This will open up the menu with all the LUTs.
- Find the Folder you just imported.
- Select the Camera which you have used. For example, if you shot F-Log on Fujifilm X-T3, select the folder named same.
- There will be a few different options of LUTs to choose from.
- We recommend that you choose the one which has WDR in its name.
- WDR means wide dynamic range. This LUT gives you a good starting point to start with the look development process and compress the overall contrast in the Highlights.
- Keep this LUT in the node at the end of your node tree for best results.
- Now, by using the various tools in Davinci Resolve like Lift, Gamma, and Gain, you create a look.
2. Color Grade Fujifilm F-Log With Color Space Transform(CST) In Davinci Resolve
In this technique, we will utilize the Color Space Transform Open Fx that is already present in Davinci Resolve.
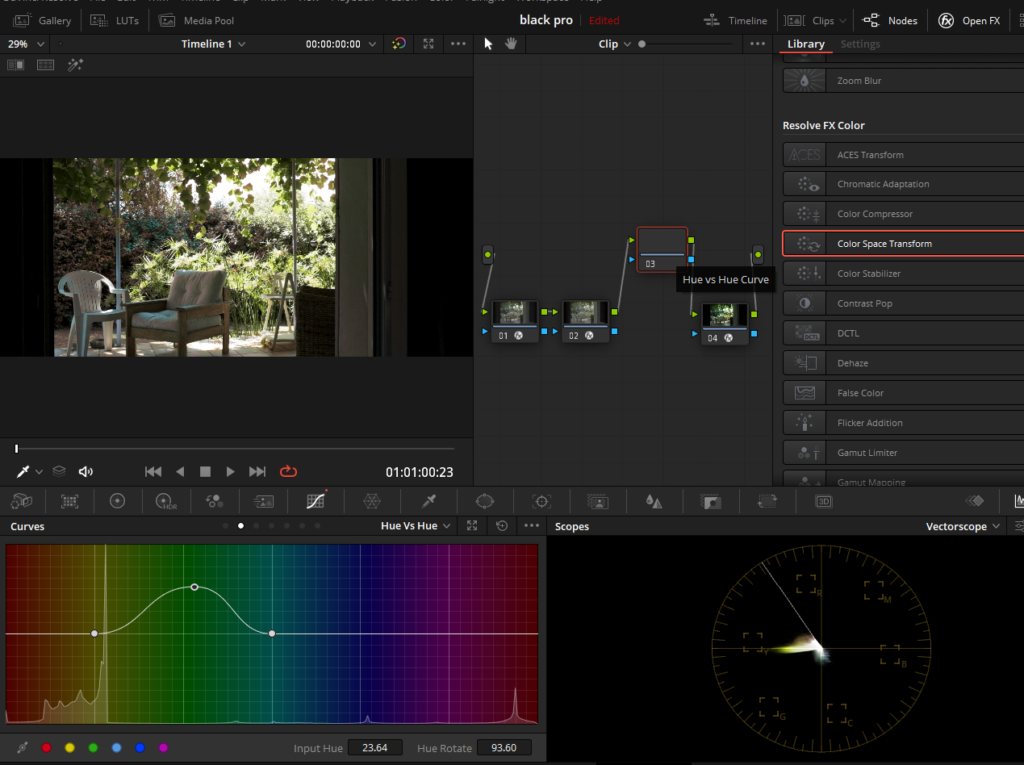
- Using this method is pretty straightforward. On the Color page, select “Open Fx”
- Scroll down and search for “Color Space Transform”
- Drag and drop “Color Space Transform” onto a node.
- Drag it on the last node of the node tree for best results.
- In “Input Color Space” choose “Rec.2020”
- In “Input Gamma” choose “Fujifilm F-Log”
- In “Output Color Space” choose “Rec.709”
- In “Output Gamma” choose “Gamma 2.4”
- In “Tone Mapping” choose Davinci or Luminance Mapping. Whichever works best for you.
- Choose, “Saturation Compression” for “Gamut Mapping Method”
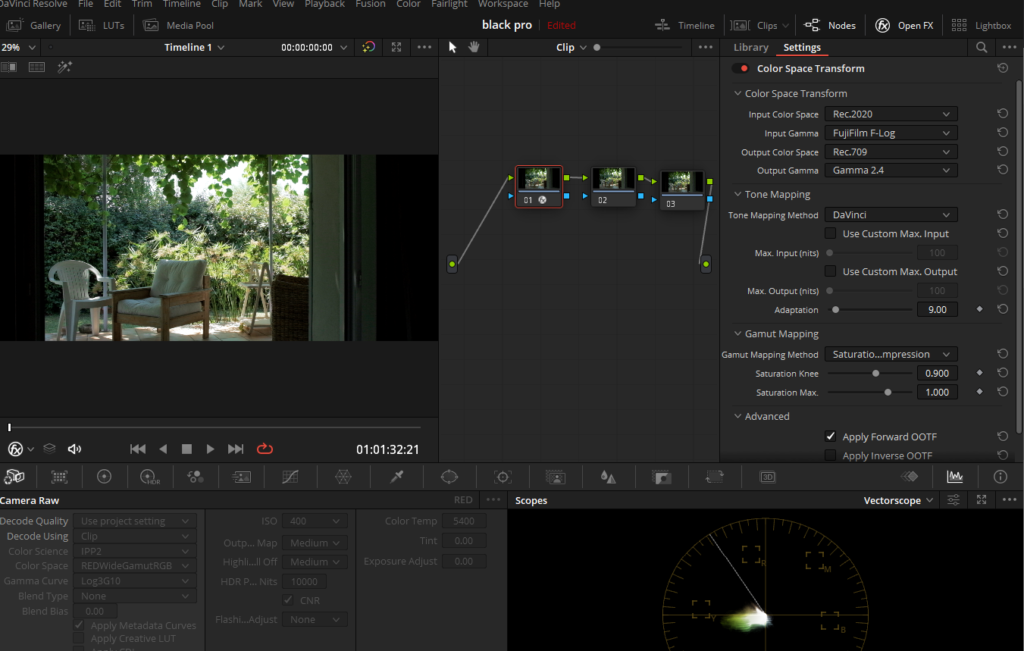
Once you have set the Color Space Transform Open Fx node as per the above steps, you will see a significant improvement in the overall look of your footage. The colors will appear more natural, and the contrast will be better balanced.
However, the Color Space Transform Open Fx node may not be sufficient for some footage, especially if you are trying to achieve a specific look or feel. In that case, you can further adjust the color grading parameters using the various Davinci Resolve tools available on the Color page.
For example, you can adjust the shadows, highlights, midtones, saturation, and hue using the various color grading controls, including the lift, gamma, gain, color wheels, and curves. You can also add secondary corrections to specific parts of the image using the qualifier, power window, and tracking tools.
One advantage of using the Color Space Transform Open Fx node is that it provides a solid foundation for your color grading workflow. You can further refine the image using the other tools available in Davinci Resolve, knowing that you have a good starting point.
3. Color Grade Fujifilm F-Log With ACES In Davinci Resolve
Color grading Fujifilm F-Log footage with ACES (Academy Color Encoding System) in Davinci Resolve is another popular technique. ACES is an industry-standard color management system that ensures consistent color and dynamic range across different devices and platforms. By using ACES, you can achieve more accurate and consistent colors across different displays, projectors, and cameras.
- There is no straight way of using ACES if you are dealing with Fujifilm F-Log footage because there is no Input Device Transform for it.
- However there is a workaround for it.
- Instead of, setting the ACES pipeline in Project Settings, we can set it in Nodes.
- To do this, make three nodes. Press Alt + S or Option + S to make a new node.
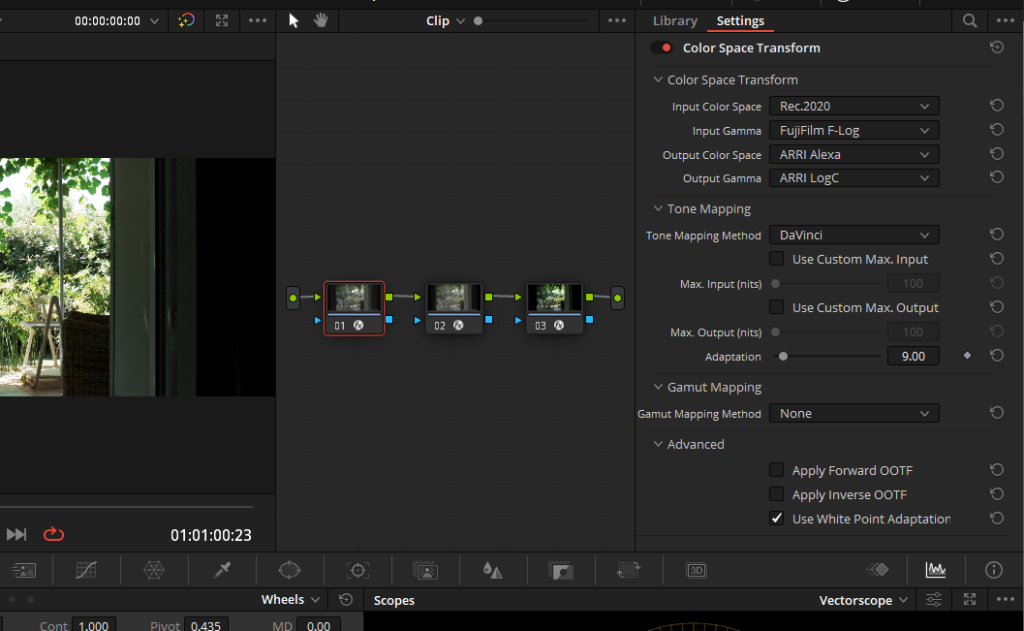
- In the first node we will change the color space of the footage from F-Log to Arri Log C.
- We will do so because there is no IDT for Fujifilm F-Log.
- Click on “Open FX” and look for “Color Space Transform”
- Drag it onto the first node.
- Choose “Rec.2020”, in “Input Color Space”
- Choose “Fujifilm F-Log” in “Input Gamma”
- Choose “Arri Alexa” in “Output Color Space”
- Choose “Arri LogC” in “Output Gamma”
- You just changed the color space. Now we can successfully set a node-based ACES pipeline for our F-Log footage.
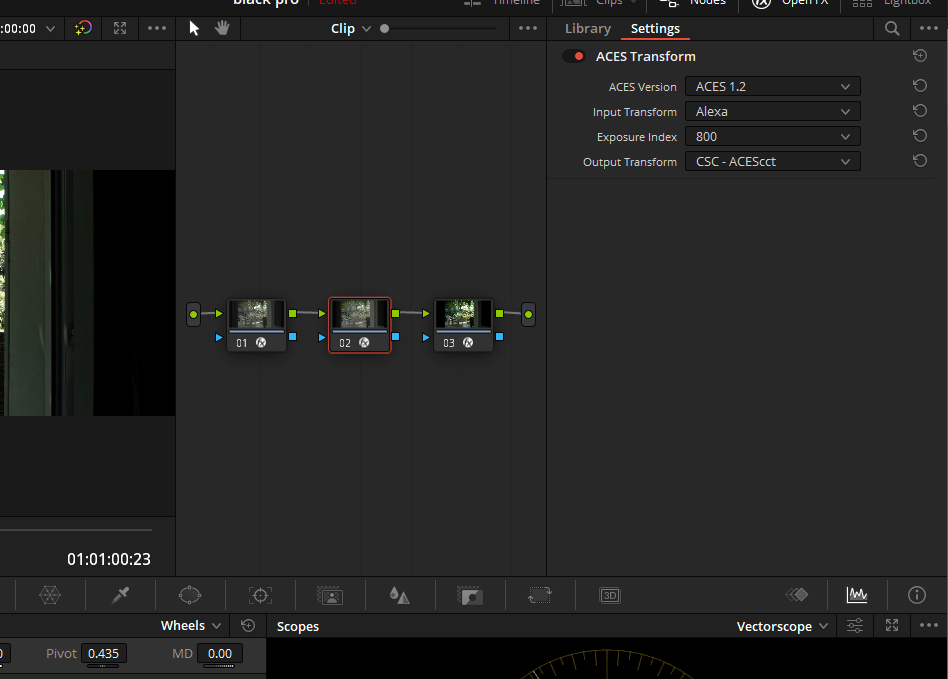
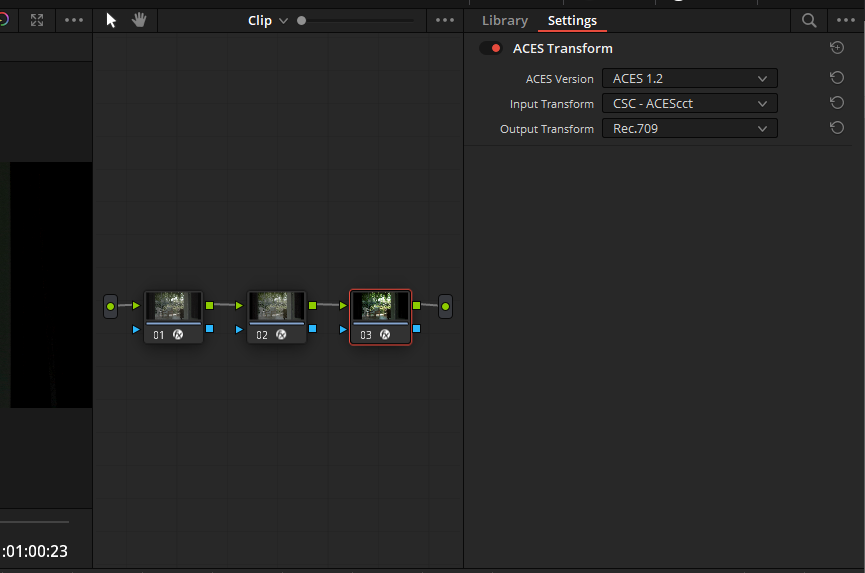
- Go back to the “open FX” again and look for “ACES Transform”
- Drag it onto the second node.
- In “Input Transform” choose “Alexa”
- In “Output Transform” choose “CSC- ACEScct”
- In “ACES Version” choose the latest one.
- Go back to “Open FX” again.
- Drag another “ACES Transform” onto the third node.
- Select “CSC- ACEScct” in “Input Transform.”
- Select “Rec.709” in “Output Transform”
- You just successfully completed your ACES pipeline.
- Make a node before the third node by clicking Shift+S while on the third node.
- Now you can do subjective color changes in this node while staying in the ACES color space.
By using ACES, you can also future-proof your footage as it ensures that your colors will remain consistent as new devices and technologies emerge.
4. Color Grade Fujifilm F-Log With Davinci Resolve Color Management
Color management is an essential aspect of any color grading workflow, and Davinci Resolve offers a powerful set of tools for managing color. In this technique, we will explore how to color-grade Fujifilm F-Log footage using Davinci Resolve’s built-in color management features.
This is my personal favorite way of color-grading Fujifilm F-Log in Davinci Resolve. A bit complex when setting up for the first time. But gives a really nice starting point and is better than ACES as well.
ACES can be a little contrasty as a starting point and is very strong in terms of look. I personally don’t like it and use this method.
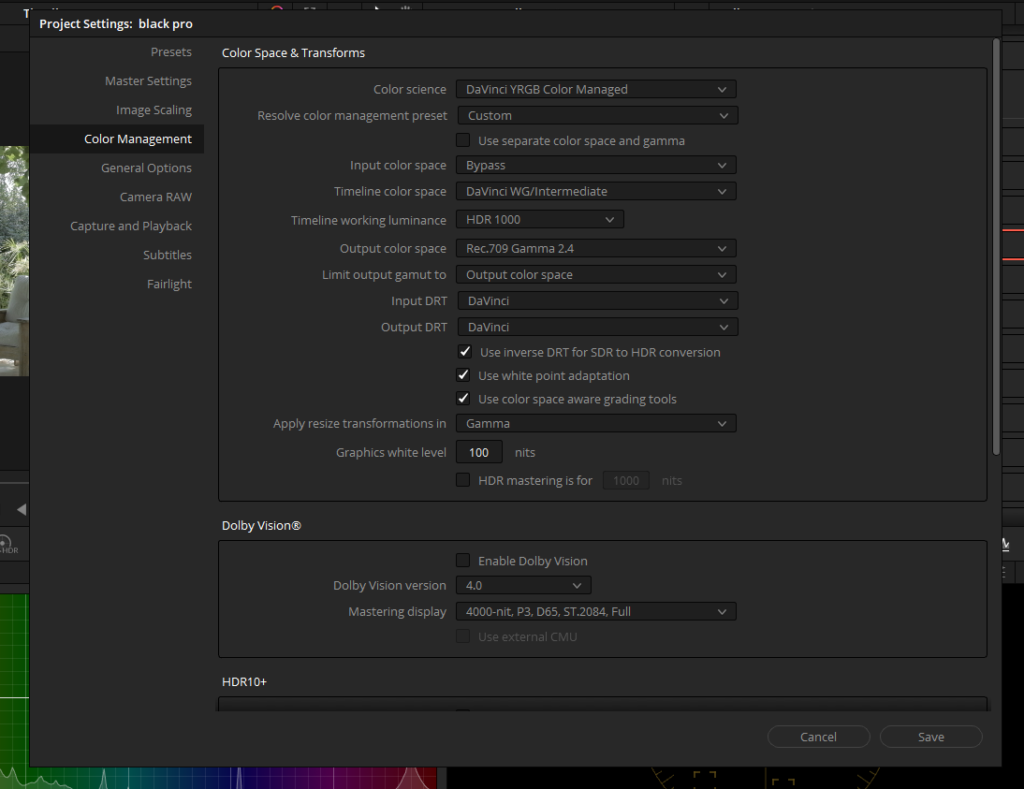
- Click on the “File” dropdown menu from the top and select “Project Settings”
- Select “Color Management” from the options on the left.
- In the Color Science dropdown menu, choose Davinci YRGB Color Managed
- Untick ‘Automatic color management’
- In ‘Color Processing Mode’, choose “Custom”
- In “Input Color Space”, choose “Bypass”
- We will set this later in the color page.
- In the “Timeline Color Space” choose “Davinci WG/Intermediate”
- In “Output Color Space”, choose “Rec.709 Gamma 2.4”
- Click on “Save”
- You will see no visual change for as if now.
- Click on the “Clips” button in the top right corner.
- This will show all the clips in the thumbnail mode below the viewer.
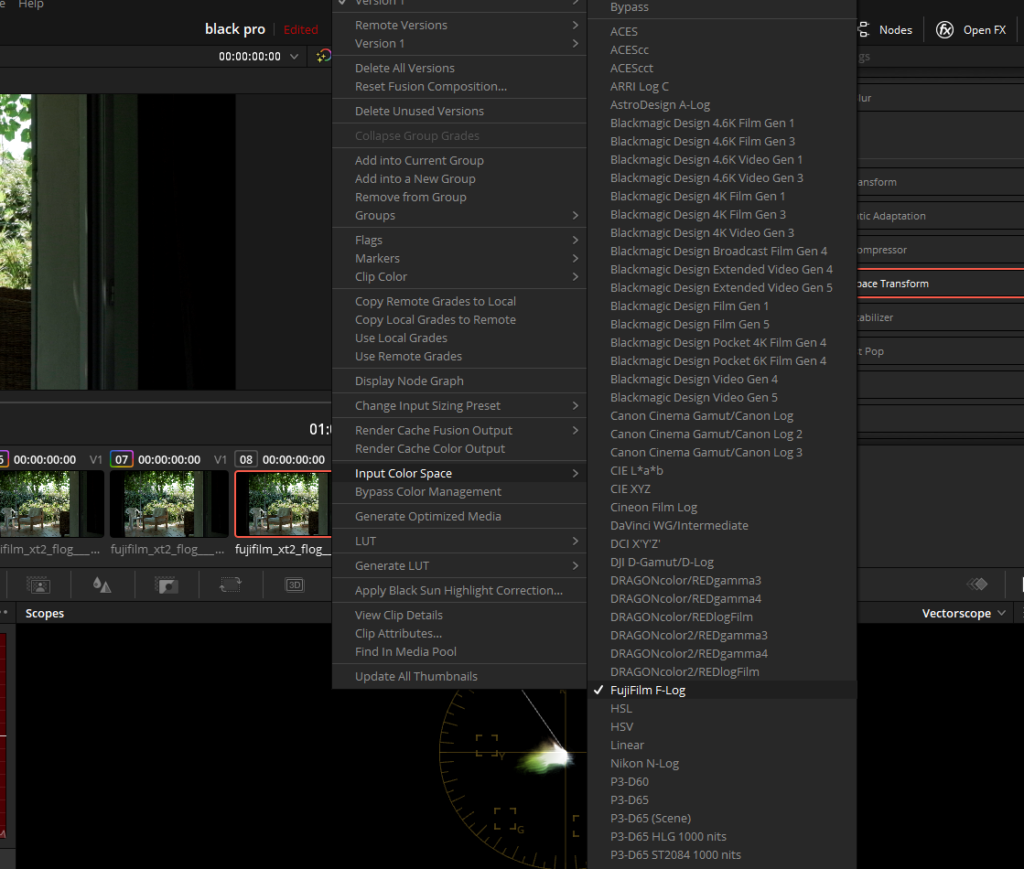
- Select the clip which is shot in Fujifilm F-Log and right-click on it.
- Here you will find the “Input Color Space” menu.
- Select “Fujifilm F-Log”
- Your footage will now be color graded.
Once you have selected the Fujifilm F-Log input color space, you can proceed to color grade your footage using the various color grading tools available in Davinci Resolve. Additionally, you have more control over the color grading process, as you can fine-tune the color management settings according to your specific needs.
Which one is the best technique?
When it comes to color grading Fujifilm F-Log footage in Davinci Resolve, there are multiple techniques available, including LUTs, ACES, and Davinci Resolve’s built-in color management system. Each technique has its own strengths and weaknesses, and the choice ultimately comes down to personal preference and the specific requirements of your project.
Using LUTs is a quick and easy way to apply a specific look to your footage, but it may not be the most flexible method and may not work well with footage shot in different lighting conditions.
ACES is an industry-standard color management system that ensures consistent color and dynamic range across different devices and platforms. It offers a high level of accuracy and consistency, but it can be a bit complex to set up and may not be the best choice for all projects. ACES can be a good option if you are working on a high-end project with multiple cameras and displays, but it may not be necessary for smaller or simpler projects.
Davinci Resolve’s built-in color management system is a flexible and powerful option that offers a good balance between accuracy and ease of use. It allows you to customize the color pipeline to your specific needs and provides a good starting point for further color grading. This method is my personal favorite because it offers a good balance between accuracy, flexibility, and ease of use.
In the end, the choice of color grading technique comes down to personal preference and the specific needs of your project. It’s important to understand the strengths and weaknesses of each method and choose the one that best fits your needs.