
Hey, what’s up guys, welcome back to FilmmakingElements.com. Now, this article is gonna be a lifesaver for so many of you. We cover why there is a color difference or gamma shift or export looks washed out in Davinci Resolve after exporting the video and how it can be fixed.
After doing some research on the Blackmagic Forum and contacting Blackmagic Design support, I found some valuable information that I believe can help you overcome this problem. In fact, I watched an official video from the Blackmagic Colorist that addressed this exact topic.
In this blog post, I will share with you three different solutions that can help you achieve perfect color matching after exporting. I want to make sure you understand what is going on, so please be patient and read through until the end. I will explain everything in detail, so you can apply these solutions to your projects with confidence.
Davinci Resolve Export Color Different Or Gamma Shift 3 Fixes
Achieving color accuracy can be a challenging task, especially when you’re dealing with multiple devices that display colors differently. This is where color management comes into play.
In simple terms, color management is a tool that helps us achieve color accuracy across various devices such as TVs, laptops, smartphones, and more. By using color management techniques, we can ensure that the colors in our digital media look consistent across different devices.
But how do we achieve color accuracy in the first place? This is where the concept of color grading standards comes in. One of the most widely used color grading standards is Rec. 709, gamma 2.4. By working within this color and gamma space, we can ensure that our media looks similar across as many devices as possible.
Different brands have their own color science, making it difficult to achieve a consistent look across various devices. For instance, Apple and Samsung devices have their own color science, and as a result, we can’t achieve a 100% identical look between them unless they work together, which isn’t likely to happen anytime soon.
But that’s not the only challenge when it comes to achieving color accuracy. Even if we use the same brand and model of display, no two displays can be perceptually accurate when watched side by side. This means that even if we calibrate our devices to achieve the same color accuracy, they will still look different when viewed together.
Despite these challenges, it’s still essential to strive for color accuracy in digital media. By understanding the limitations of color science and display technology, we can work towards achieving the best possible results across various devices.
Have you ever watched the same video on two different displays and noticed that they look completely different? From the colors of the skin tones to the hues of the greenery, it can be frustrating to see such discrepancies. However, the good news is that there are solutions to this problem.
If you use Davinci Resolve for color grading and have faced issues with color difference or gamma shift on export, then you’ll be glad to know that there are three different solutions that you can try for yourself. With these solutions, you can achieve better color accuracy and consistency across different devices.
But that’s not all – the best part is that these solutions allow you to work in gamma 2.4 and still have your colors match perfectly after the render, even on devices like the Apple MacBook M1 Pro.
So, if you’re tired of facing color differences and gamma shifts on export, try out these solutions for yourself and see which one works best for you.
1. Rec 709-A
To use Rec.709 accurately, the first thing you would need to do:
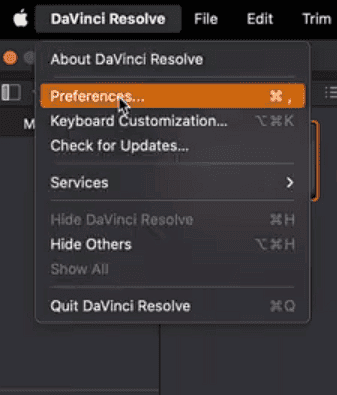
- On the top left corner, go to DaVinci Resolve>Preferences
- Then go to general
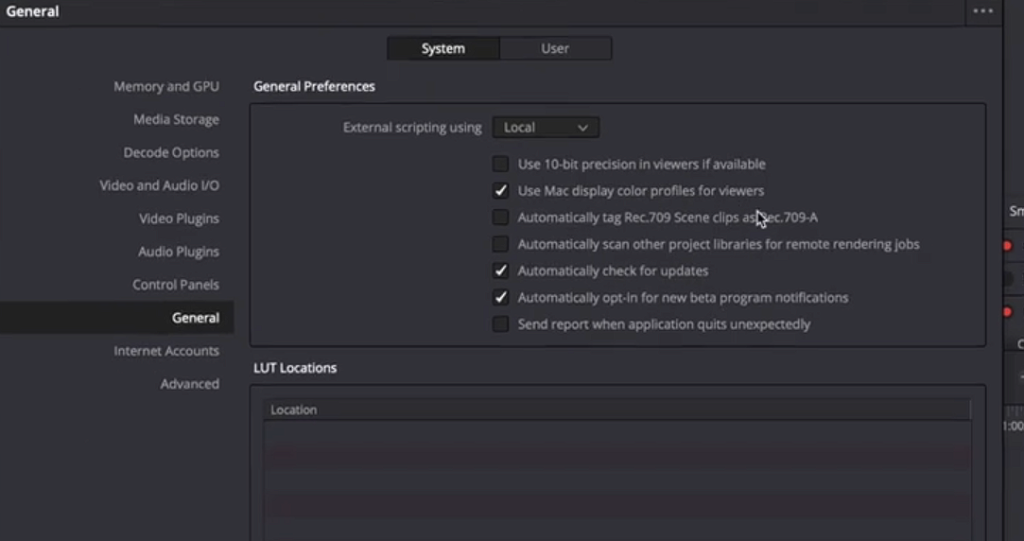
- Make sure that you tick “use mac display color profiles for viewers” and click on save.
- DaVinci Resolve prompts you to restart the program, please do so
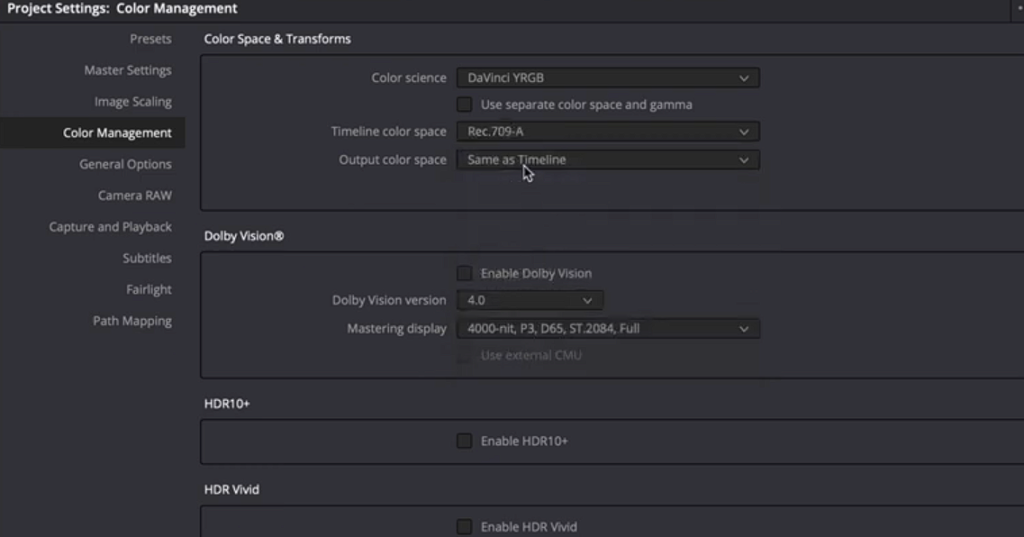
- Then you would need to go to project Settings>Color Management>choose “Color Science”, “DaVinci YRGB“, and in “timeline color space” you need to set “Rec.709-A”
- And in the “output color space” you would need to use “Rec.709-A” as well.
- Click on, “Save” and you will notice a slight gamma shift.
On the good side, your colors will match perfectly now. It is also recommended by professional support from Blackmagic Design themselves.
Now, what does the Rec.709-A setting doing? Rec.709-A is actually compensating for the gamma difference in the apple devices to that of the standard 2.4 gamma.
Using Apple-based programs and devices such as MacBooks, iPhones, and QuickTime players, then you’ll be pleased to know that there’s a method to ensure perfect color accuracy. By using this method, you can ensure that your colors match perfectly across different Apple devices and programs.
However, there are some programs, such as VLC, Mozilla Firefox, and Vimeo, that will bypass the Rec.709-A color space. This means your image may end up over-saturated and over-contrasty when viewed through these programs.
When using this method, you need to understand what your clients use and where this content is gonna be delivered. If you deliver this content to Instagram, TikTok, or YouTube you will not experience any issues at all and if your clients use Apple-based devices they will see no difference.
When creating content for different platforms, it’s important to consider the specific requirements of each platform. For example, if you’re creating a movie that will be broadcast on TV or streamed on Netflix, you’ll need to ensure that your content is optimized for the platform’s specific color space.
Similarly, if your clients are using media players like VLC, or if you’re delivering your content to Vimeo, you’ll need to take these factors into account. These platforms may not support the Rec.709-A color space,
Ultimately, there’s nothing inherently wrong with using Rec.709-A, and it can be a great option for achieving color accuracy in your content. By understanding its strengths and limitations, you can use this color space in a way that produces great results and ensures that your content looks fantastic, no matter where it’s viewed.
2. Setting up the correct gamma tag
First I will explain how to set up this method.
- You would need to go to the Davinci Resolve>Preferences
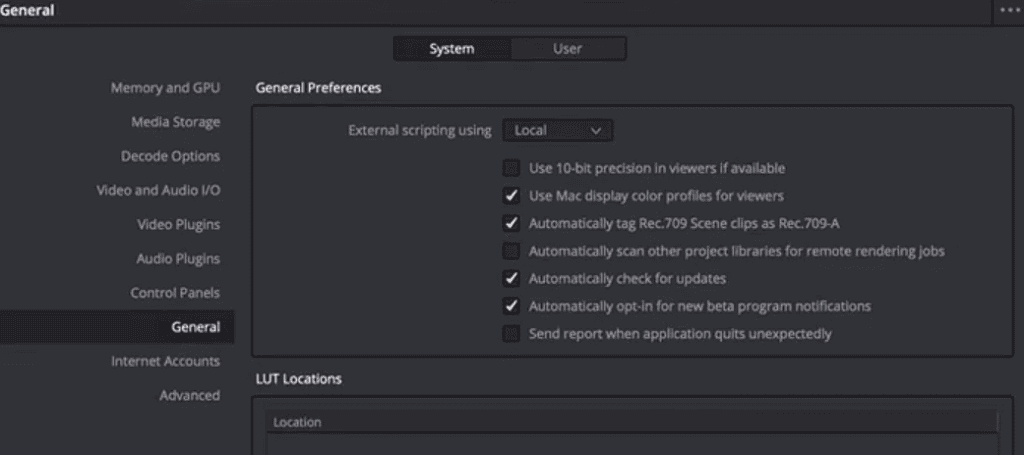
- Under “System” tab go to, “General”
- Make sure that you check the box which says, “Automatically tag Rec.709 Scene clips as Rec.709-A” and hit save.
- Then click on the gear-looking icon on the bottom left corner and go to “project settings”
- In “Color Management” change your “Timeline color space” and “Output color space” to “Rec.709 Gamma 2.4”.
- Click save.
- There is another way if you don’t want to set your Rec.709-A gamma tag in the Davinci Resolve Preferences.
- Go to your delivery page, and in “advanced settings” select “Rec.709” in the “Color Space Tag”
- Select “Rec.709-A” in the “Gamma Tag”
- Click on “Add to Render Queue” and start render.

Rec.709-A gamma tag is created by Blackmagic Design to ensure that Apple-based programs display videos with Rec.709 Gamma 2.4 correctly. This means that if you color grade your video using this standard, you can play it on Quicktime or your iPhone, and it will look exactly as you intended it to.
It is important to note that when using this method, your videos will still maintain their quality even when opened in players such as VLC, as they are still in the industry-standard gamma 2.4. However, some users may experience color shifts on Apple-based devices, which is why I personally do not use this method.
But some of you guys wrote that this method works for you, therefore I understood how it works and why it was created, therefore you can try it out and see it for yourself whether it helps you or not.
3. Utilizing the Davinci Resolve Color Management
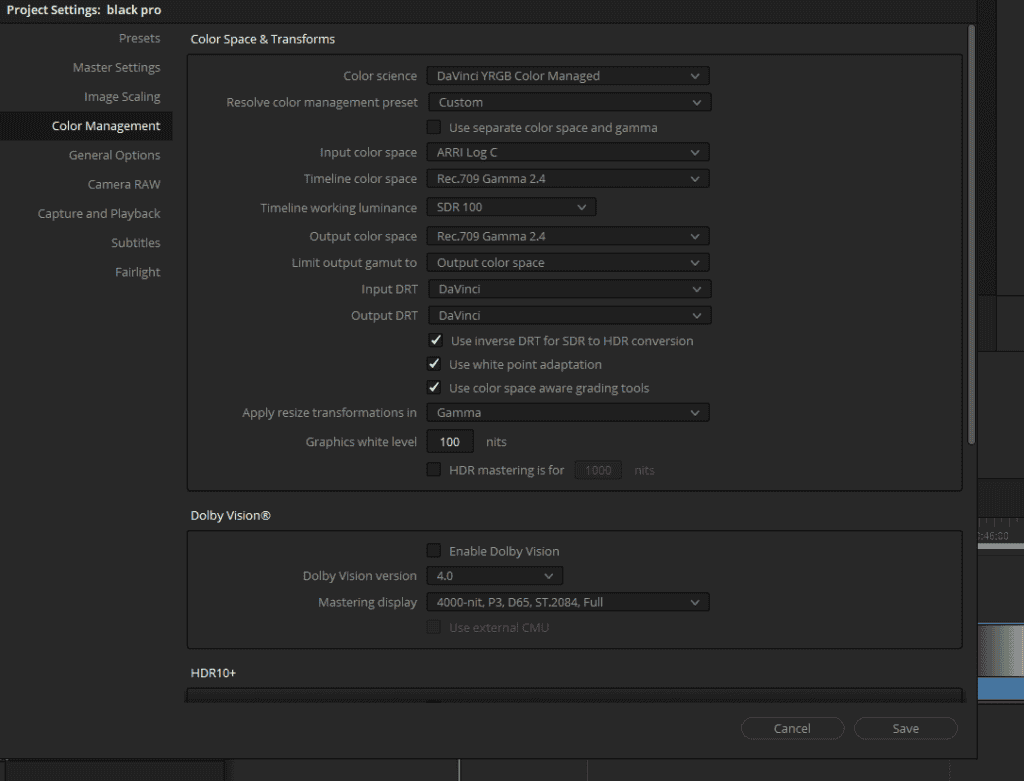
- Click on the gear-looking icon on the bottom right corner and go to the “Project Settings”
- Go to “color management” and select “Davinci YRGB Color Managed”.
- Uncheck “automatic color management”
- Select “color processing mode” to “custom”.
- In the “input color space,” you need to select the camera settings that you were using.
- For example, if you shot your project with Arri Alexa, choose “Arri Log C” In the “timeline color space”
- Select “Rec.709 Gamma 2.4” in the “output color space”
- Hit “save”.
- In this method, I still leave DaVinci Resolve Preferences for automatically tagging Rec.709 scene clips as Rec.709-A.
- Also just for the safe side, when you are about to render, on the delivery page, under “Advanced Settings”
- Choose “Rec.709” from the “Color Space Tag” dropdown menu.
- Choose “Rec.709-A” from the “Gamma Tag” dropdown menu.

In my own experience, this method has proven to be highly effective, allowing me to achieve perfect color matching and ensuring that my work looks great on as many devices as possible.
Whether you’re working on a MacBook or any other device, this approach can help you achieve the results you’re looking for, and provide peace of mind knowing that your work will look just as good on any device.
Conclusion
Now that you have a better understanding of the problem and the possible solutions, I highly recommend trying out all three methods to see which one works best for you.
While working in Gamma 2.4 is ideal for compatibility across devices, if you are still experiencing color mismatches, don’t hesitate to use Rec.709-A. Testing these methods will help you find the best solution for your specific needs.
There is nothing wrong with that, you just need to be sure that you know the limitations of the Rec.709-A and when you will not be able to use it at all.
When it comes to achieving the best possible color grading results, using an external monitor and calibration device is the ideal solution.
So I hope you will be able to fix Davinci Resolve Export Color Different Or Gamma Shift Or Washed Out problems.
This allows for accurate color representation in gamma 2.4 without any issues. However, for those who frequently travel for work, carrying an external monitor may not be a practical solution. In such cases, utilizing the methods discussed earlier can still provide excellent results.
- Also Read- Video Vs Full Data Levels In Davinci Resolve
- Also Read- Gamma 2.2 vs Gamma 2.4 Which To Choose In Davinci Resolve
- Also Read- Stop DaVinci Resolve from Lagging