Welcome back, filmmakers! Today, we’re diving headfirst into the colorful world of karaoke. Our main focus? Using DaVinci Resolve, an industry-standard video editing software, to create captivating karaoke and sing-along videos.
These type of videos, commonly known as lyrics videos, are a fun and engaging way to animate your favorite tunes, presenting them in a fresh and interactive format. Perfect for social gatherings, parties, or even professional events, these videos offer viewers the opportunity to sing along with the music, promoting a more dynamic and participative experience.
So, whether you’re looking to elevate your next party with some karaoke fun, or crafting a sing-along video for your latest music production, we’ve got you covered.
Step-By-Step Guide To Create Karaoke Text In Davinci Resolve
Setting Up Your Project in DaVinci Resolve For Karaoke Effect
In creating a karaoke or sing-along video in DaVinci Resolve, you must first prepare your workspace. Here’s a comprehensive breakdown of the steps:
Step 1: Import Your Media
The first thing you need to do is import the audio track and the background layer onto the timeline. To do this:
- Click and drag your background clip and audio track in the Media pool of the Edit page of Davinci Resolve.
- Drag and drop these files onto the timeline within the edit page.
Step 2: Enable Audio Waveforms
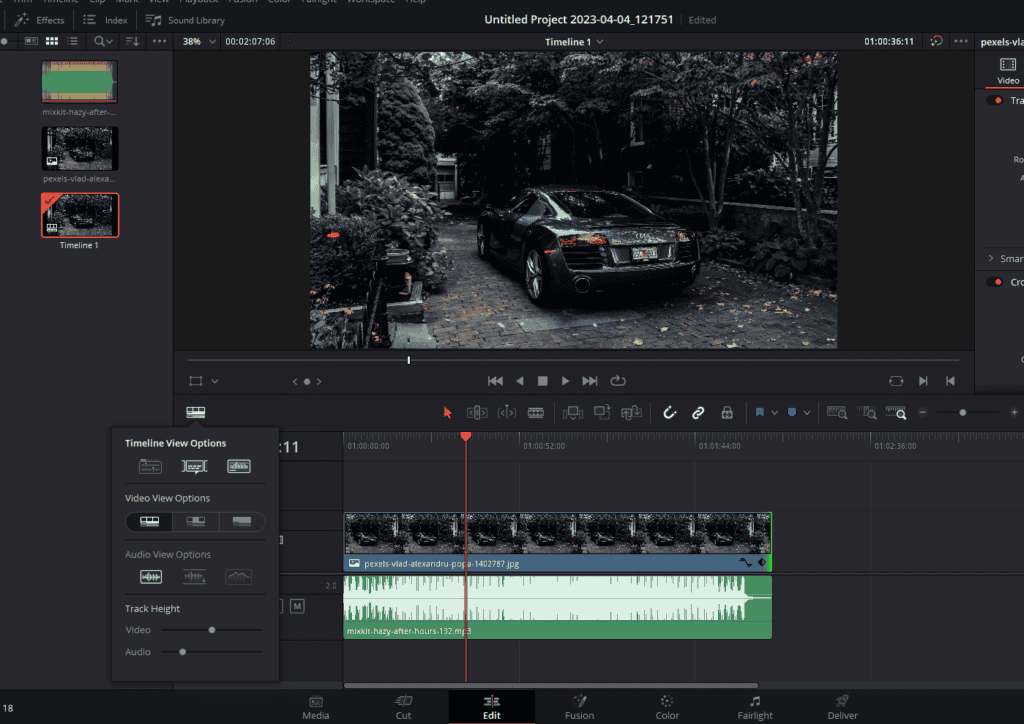
Enabling audio waveforms aids in visualizing your audio. This will be critical when it comes to synchronizing your lyrics with the music. Follow these steps to enable and adjust audio waveforms:
- Locate ‘Timeline View Options’. This icon is situated just above the timeline on the left corner – it’s the first icon.
- Click on ‘Timeline View Options’ to reveal a drop-down menu.
- From this menu, toggle on the ‘Audio Waveforms’ option.
- Adjust the size of the waveforms according to your preference by moving the slider under the ‘Audio Waveform’ option. You can also change the look of the waveforms using options available here.
Step 3: Analyze Your Audio Track
With the waveforms now visible, the next step is to listen to your audio track. Pay close attention to the start of each lyric or phrase in the song, and note these points – they’ll serve as cues for your lyric text.
Step 4: Create Markers
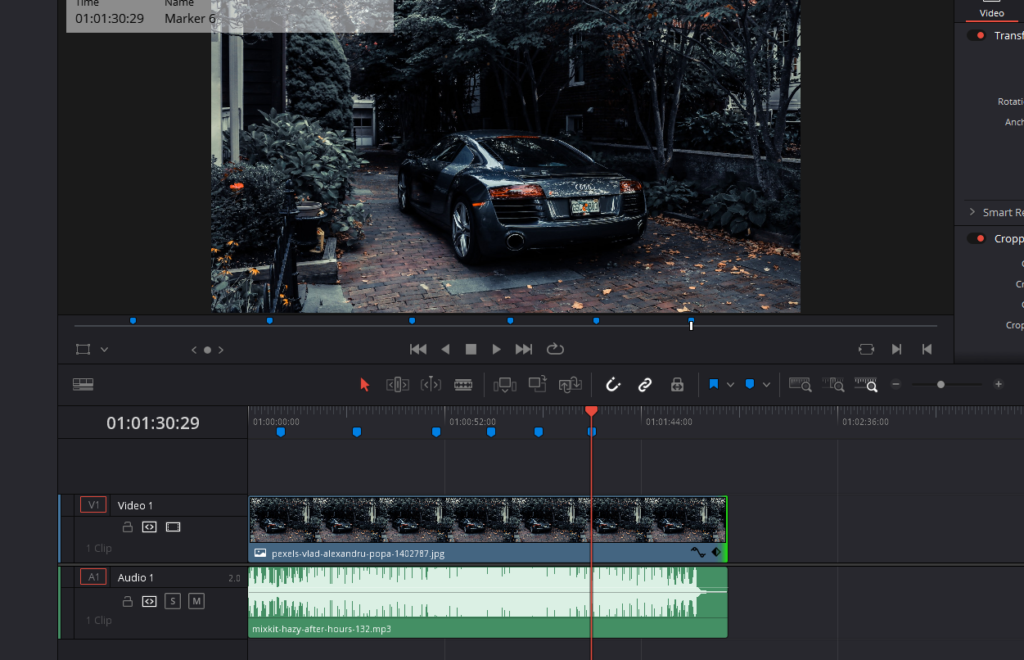
Markers will be your guiding points on where and when to introduce each lyric on screen. Here’s a detailed breakdown on how to create them:
- Play your audio on the timeline.
- At the beginning of each new lyric or phrase, pause the audio.
- With the audio paused, right-click on the desired position in the timeline use the shortcut ‘M’ to add a marker.
- Repeat this process for each new lyric or phrase in the song.
Remember, if no clip is selected, the markers will appear at the top of the timeline. If a clip is selected, the markers will be added to that particular clip. It’s recommended to add markers without selecting any clip at this point.
Text Placement and Styling in DaVinci Resolve
After you’ve prepared your workspace and placed markers for lyric cue points, the next phase in creating your karaoke video in DaVinci Resolve involves introducing text onto your timeline. Let’s explore this process in greater detail:
Step 1: Add Text+ to Timeline
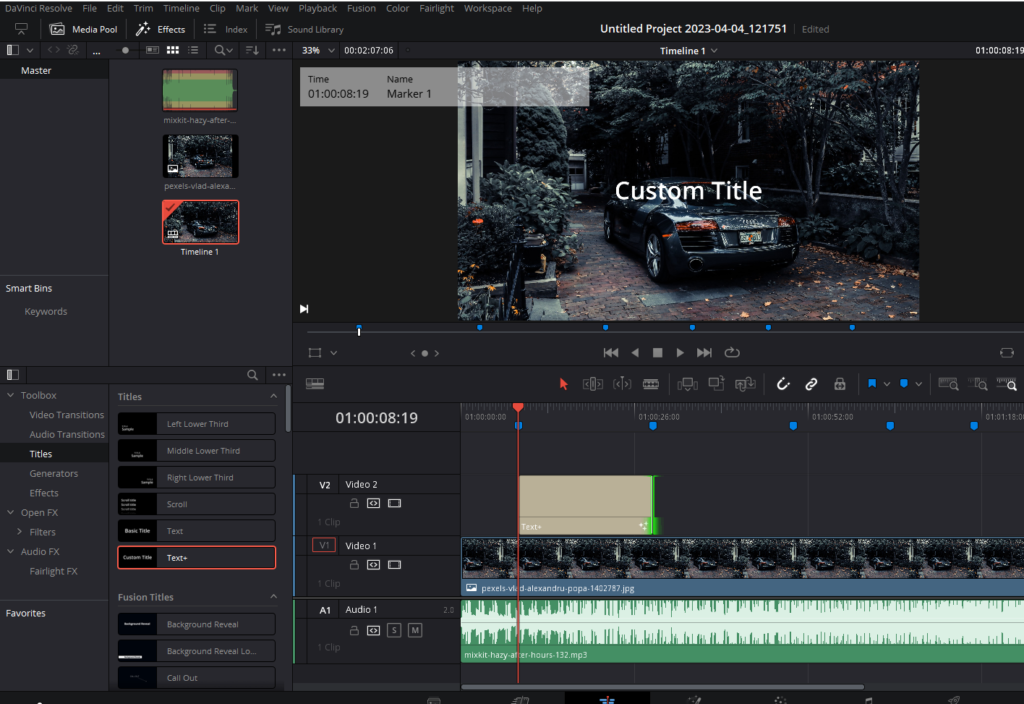
DaVinci Resolve offers various text options, but for our purpose, we’ll focus on Text+, which is a robust and versatile tool:
- Navigate to the Effects Library by clicking the ‘Effects’ button on the top-left corner.
- Under ‘Titles’, choose ‘Text+’.
- Drag and drop the Text+ onto the timeline, aligning its beginning with your first marker.
- Stretch or shorten the text clip to match your intended duration – it should end when your second marker begins.
Step 2: Add Tracks
To successfully layer multiple pieces of text, you’ll need to have sufficient tracks above your original audio and video:
- Right-click in the blank area to the left of your timeline tracks.
- From the context menu, select ‘Add Track’ if you need just one more, or ‘Add Tracks’ if you want to add multiple.
- If you selected ‘Add Tracks’, a dialog box will appear where you can input the number of tracks you want to add.
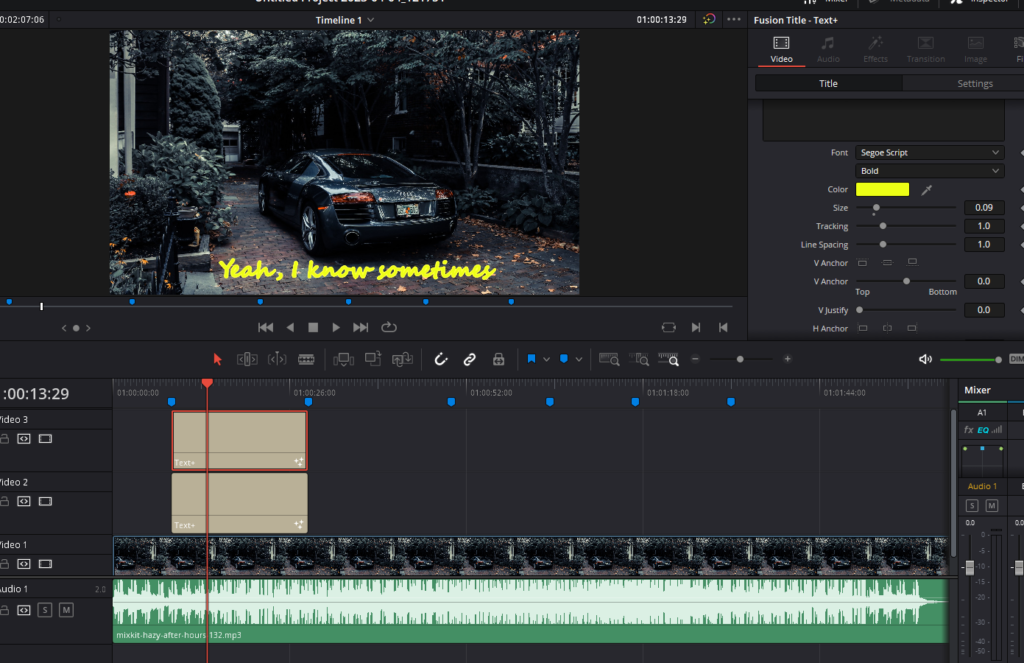
Step 3: Customize Text
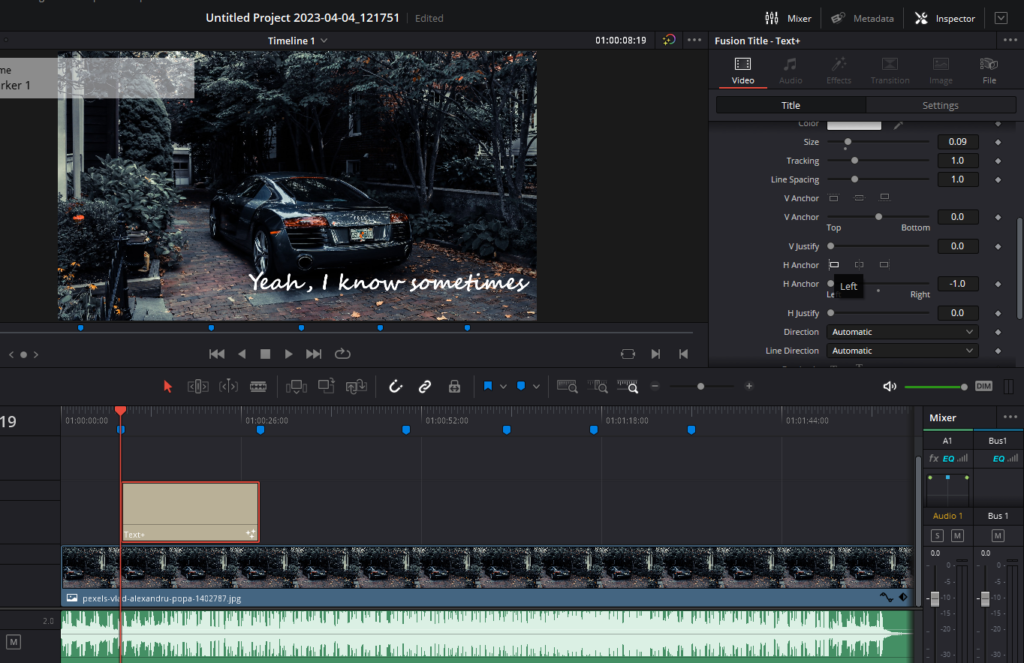
With your text placed on the timeline, it’s time to give it your desired appearance:
- Click on the Text+ clip in your timeline to select it.
- Go to the Inspector panel on the top right.
- Here, you can customize the font, adjust the size, and alter the position of the text.
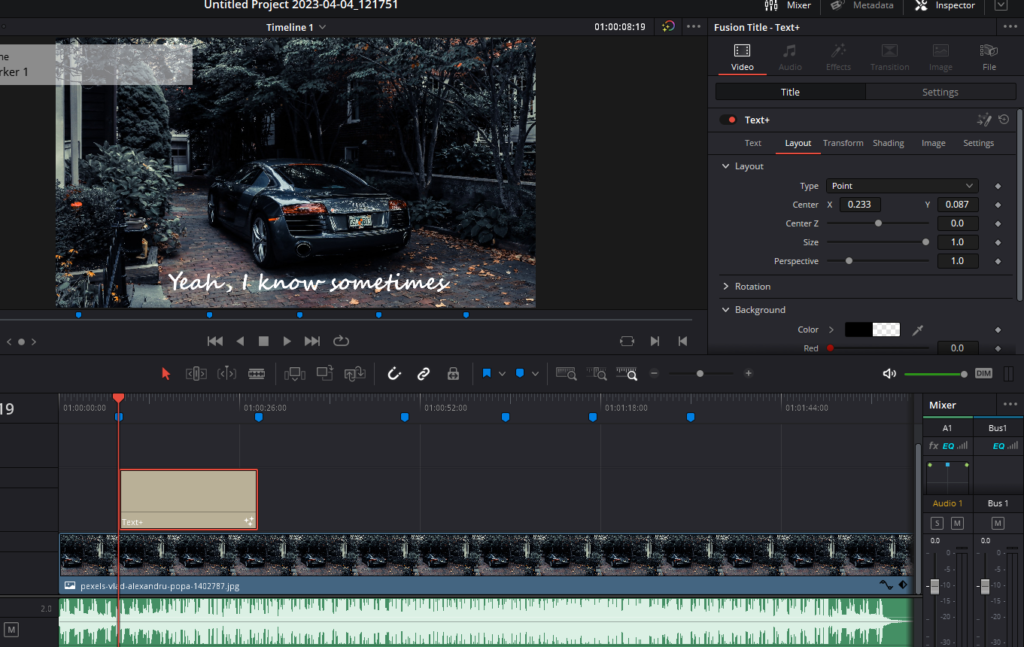
- Importantly, before adjusting the position, set your anchors on the left side. To do this, in the Inspector panel, scroll down till you see ‘H Anchor’ and choose ‘Left’. This is crucial because all the text adjustments will be made based on this anchor point.
- After changing the ‘H Anchor’ to the ‘Left’ scroll to the top of the Inspector panel and click on the ‘Layout’ tab. Use the ‘Center’ option to place your text in the center.
Step 4: Add Text Highlight
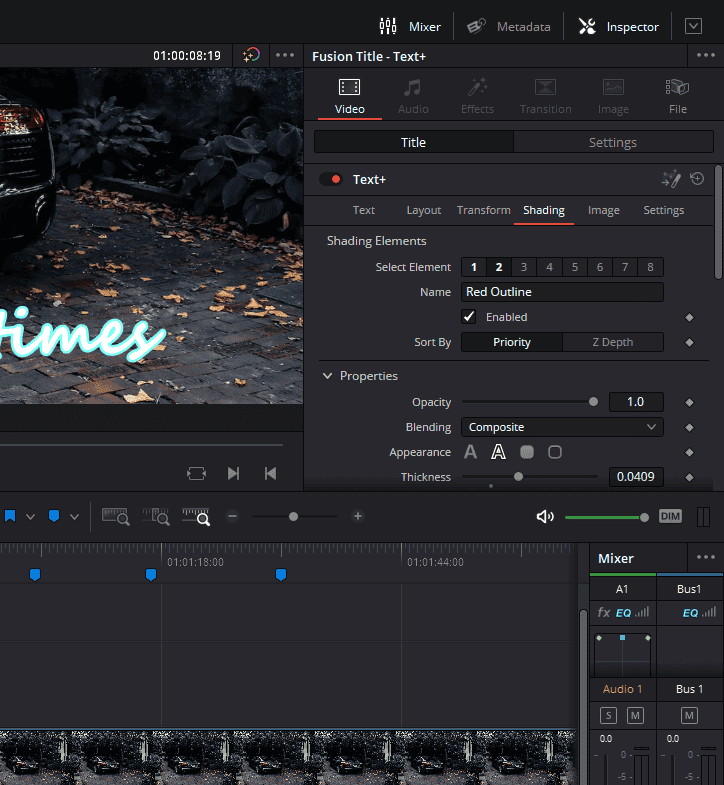
To make your text more visually engaging, consider adding a layer of highlighted text over it:
- In the Inspector panel, go to the ‘Shading’ tab and select ‘Element 2’ within the Text+ settings and enable it.
- By default, this will appear as a red layer on top of your text.
- Change the color of this layer to your preference, such as black, to create an outline effect.
- You can also adjust the thickness of this outline to create a ‘highlighter’ effect.

Step 5: Input Your Lyrics
Now, with your text style defined, it’s time to input your lyrics:
- Select your Text+ clip in the timeline.
- In the Inspector panel, type in the lyric for the corresponding section of the song.
- Adjust the text’s position as required to ensure optimal alignment and readability.
Animating Text in DaVinci Resolve: A Detailed Guide
After setting up your text and customizing it to your preference, the next step is to animate your lyrics for the karaoke effect. Here’s how to do this using DaVinci Resolve’s Text+ tool.
Step 1: Duplicate Your Text Clip
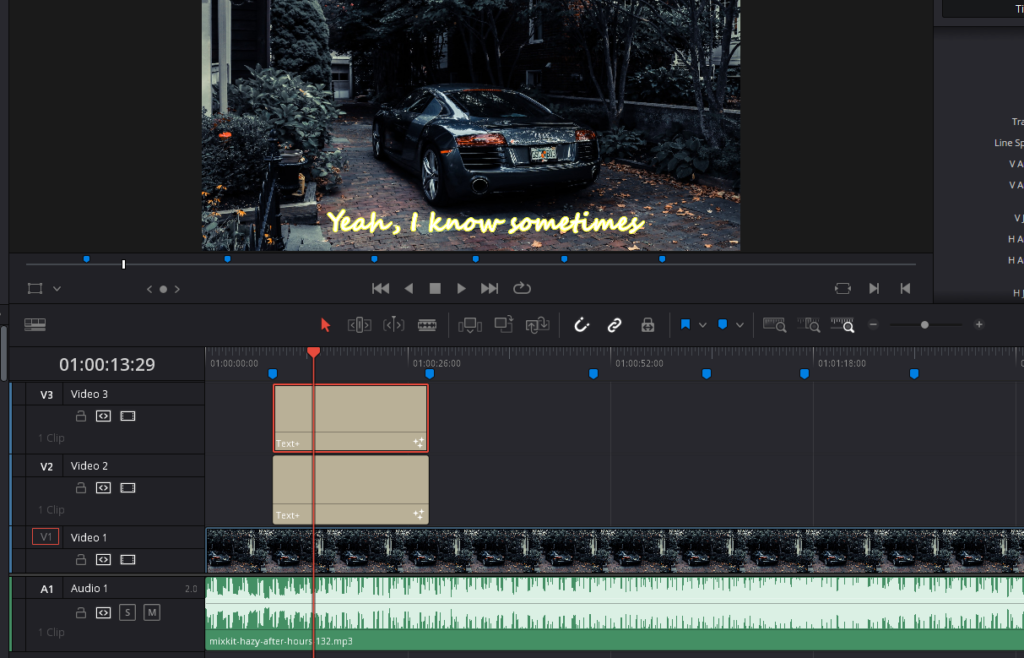
Creating an animated karaoke effect involves two text layers: a base layer and a highlight layer that will animate over the base layer. Here’s how to duplicate your text:
- Click on your text clip in the timeline.
- Hold down the ‘Alt’ key and simultaneously hold down your left mouse button.
- Drag the text clip upwards to create a duplicate on a track above the original.
- Ensure you have two identical text clips by toggling the tracks on and off.
Step 2: Change the Color of the Duplicate Text
The duplicate text layer will serve as the animated ‘highlight’ for your karaoke effect. Here’s how to change its color:
- Select the duplicated text clip.
- In the Inspector panel on the top-right corner, change the color of the text to your preferred color (for instance, yellow).
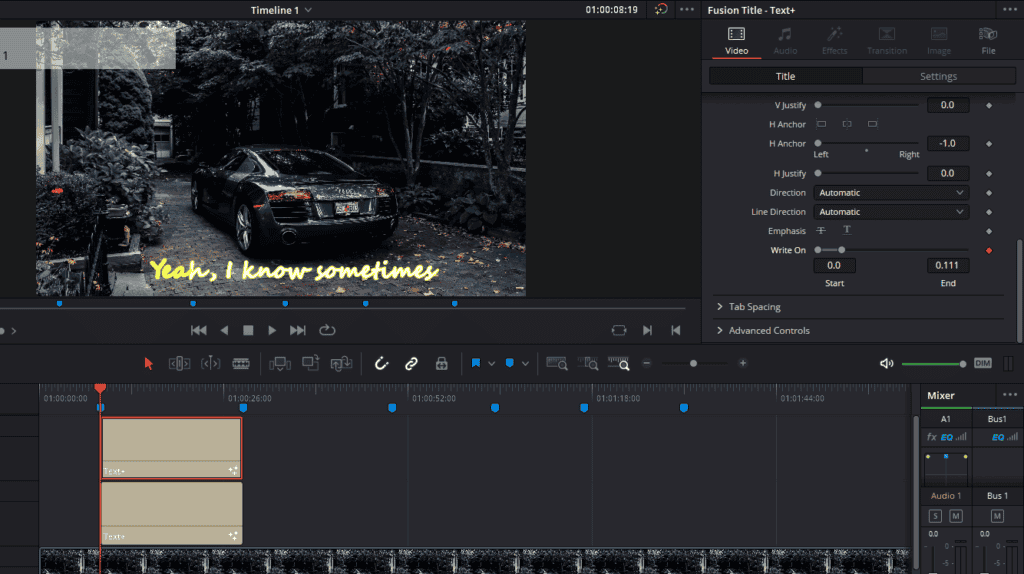
Step 3: Create the Animated Highlight Effect
With your color set, it’s now time to animate it. DaVinci Resolve’s Text+ tool offers a simple ‘write on’ feature that can achieve this:
- Select the duplicated text clip on the timeline.
- In the Inspector panel, scroll down and navigate to the ‘Write On’ setting.
- Here, you can choose to animate character by character or word by word by adjusting the ‘Position’ slider.
- As you move the slider, different portions of your text will be highlighted.
Step 4: Sync the Highlight Effect with the Lyrics
To ensure that each word is highlighted as it is sung, you’ll need to sync the animation with your audio:
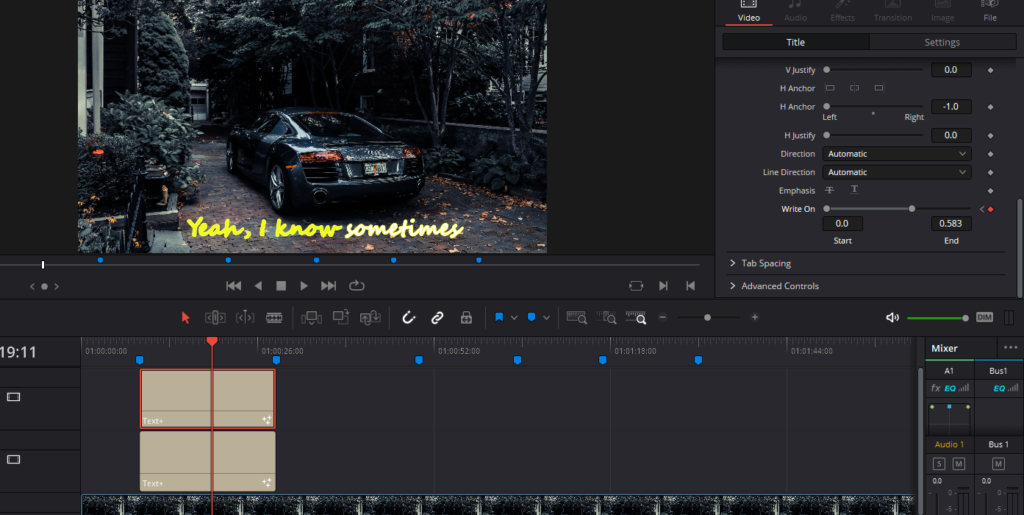
- Move the playhead to the point in the timeline where the first word is sung.
- Click the animate button (a small diamond icon) to the right of the ‘Write On’ slider.
- Move the playhead to the next point where the word changes in the song, and move the ‘Write On’ slider to highlight the next word or words.
- Because you have already pressed the keyframe button, Davinci Resolve will automatically add the keyframe to the second point when you adjust the ‘Write On’ slider.
- Repeat this process throughout your song to create a word-by-word karaoke effect.
You can change the highlight color at any time by selecting the duplicated text clip and altering the color in the Inspector panel. If you have your lyrics sheet, you can conveniently copy and paste your lyrics into the text box, saving time and ensuring accuracy.
Creating and Animating Additional Lyrics: A Practical Approach
Once you’ve mastered the process of setting up your first line of lyrics, you can easily replicate this for the rest of your song. Here’s how you can create and animate additional lines of lyrics efficiently.
Step 1: Duplicate Your Animated Lyrics
Rather than creating new text elements and customizing them from scratch for each line of lyrics, you can duplicate the animated lyrics you’ve already created:
- Select both the base and highlight text clips for the first line of lyrics.
- Hold down the ‘Alt’ key and drag these clips to the right, creating duplicates for your next line of lyrics.
Step 2: Adjust the New Lyrics
The duplicated lyrics will need some modifications to fit your song:
- Trim or stretch the duplicated clips to match the duration of the next line in your song.
- Change the text in the duplicated clips to match the new lyrics in your song. Remember to do this for both the base and highlight clips.
- If needed, adjust the position of your text to keep it centered and visible in your frame.
Step 3: Reset the Animation
The animation from your original lyrics will carry over to your duplicated clips. Here’s how to reset it:
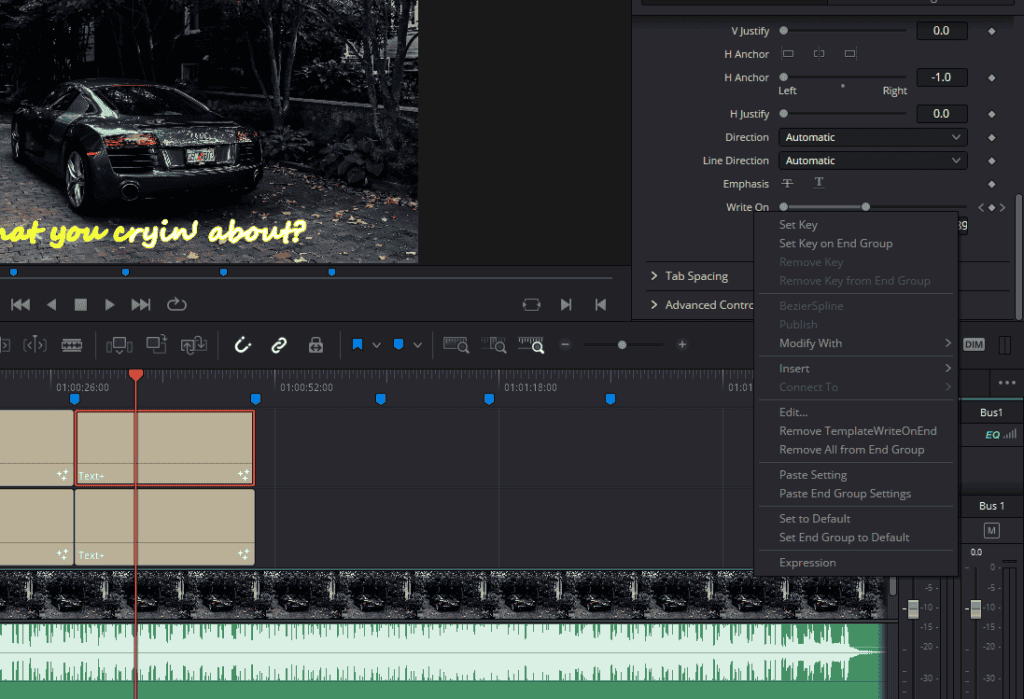
- Ensure the top clip (the highlight text) is selected.
- In the Inspector panel, right-click on the ‘Write On’ setting and select ‘Remove All from End Group’. This will freeze the highlight in its initial position.
Step 4: Animate the New Lyrics
With the animation reset, you can animate your new lyrics to match your song:
- Move your playhead to the beginning of the new lyric line.
- Click on the animate button (a small diamond icon) next to the ‘Write On’ slider.
- Move the playhead to the points in your timeline where the words change in the song, adjusting the slider each time to highlight the new words.
- Repeat this process for each word in the new line of lyrics.
Continue to duplicate, adjust, reset, and animate for each line in your song. For repeating sections like choruses, you can copy the entire animated lyric section, saving you time. While it may seem a bit tedious, this method provides precise control over your lyric highlights and can be used to create professional-looking karaoke videos.
Remember, while DaVinci Resolve is a powerful and free program, it requires some hands-on work to achieve the best results. With patience and practice, you’ll be crafting your own stunning lyric videos in no time.
- Also Read: 8 Best Music Video Effects In Davinci Resolve
- Also Read: Davinci Resolve Kaleidoscope Effect: 3 Methods
- Also Read: Davinci Resolve Ghost Effect: 4 Methods