Hi, I’m Salik, the author of FilmmakingElements.com. I have been a filmmaker for over 10 years. I am also a certified DaVinci Resolve Trainer and I have used DaVinci Resolve for many of my projects. In this article, you will learn How To Do Broadcast Safe Finishing In Davinci Resolve.
If you ever get a chance to produce something and deliver something that goes to broadcast, then this is a tutorial that you’ll want to have made sure that you’ve seen.
So we’re going to be covering how to make your video broadcast safe or compliant with broadcast standards. So let’s jump right in, and I’ll share a couple of techniques to ensure compliance with you.
When working on projects for broadcast, it’s critical to verify that your film is completely safe for broadcast. A QC (quality control) failure at the broadcast station causes difficulties for everyone because you often work under tight timelines and budgets. Producers are frequently required to pay additional fees, which may be fairly large, so this is obviously not beneficial for you.
Furthermore, the program or commercial may not be scheduled on time, which is bad for your reputation. As a result, always check with the production team ahead of time to see if there will be a finishing artist who will take care of mastering the project properly after you, or if you should send your files broadcast ready.
Because sometimes there’s only an editor at the production company who throws everything together. Which is totally fine as long as he gets everything (picture, sound, animations) within the right parameters.
When I’m working on a broadcast job, I never render a file that isn’t broadcast safe because it’s so simple to do it with DaVinci Resolve these days. Of course, the big post houses still utilize hardware limiters (and other similar tools), which is the most precise and effective method.
But I never failed a QC yet with tools within Resolve (fingers crossed it stays that way).
Last but not least: Never use the “Make Broadcast Safe” checkbox within the “Color Management Settings .”I have seen many Youtube videos tell you to use it, but your grading will look very different with this setting. Especially the reds.
The two compliances that we’re mostly concerned with are Luma levels and Chroma levels, and we can either actively manage them while color grading or fall back on a few fell-safe techniques that I’ll guide you.
1. Adjusting Luma Levels For Broadcast Safe Finishing In Davinci Resolve
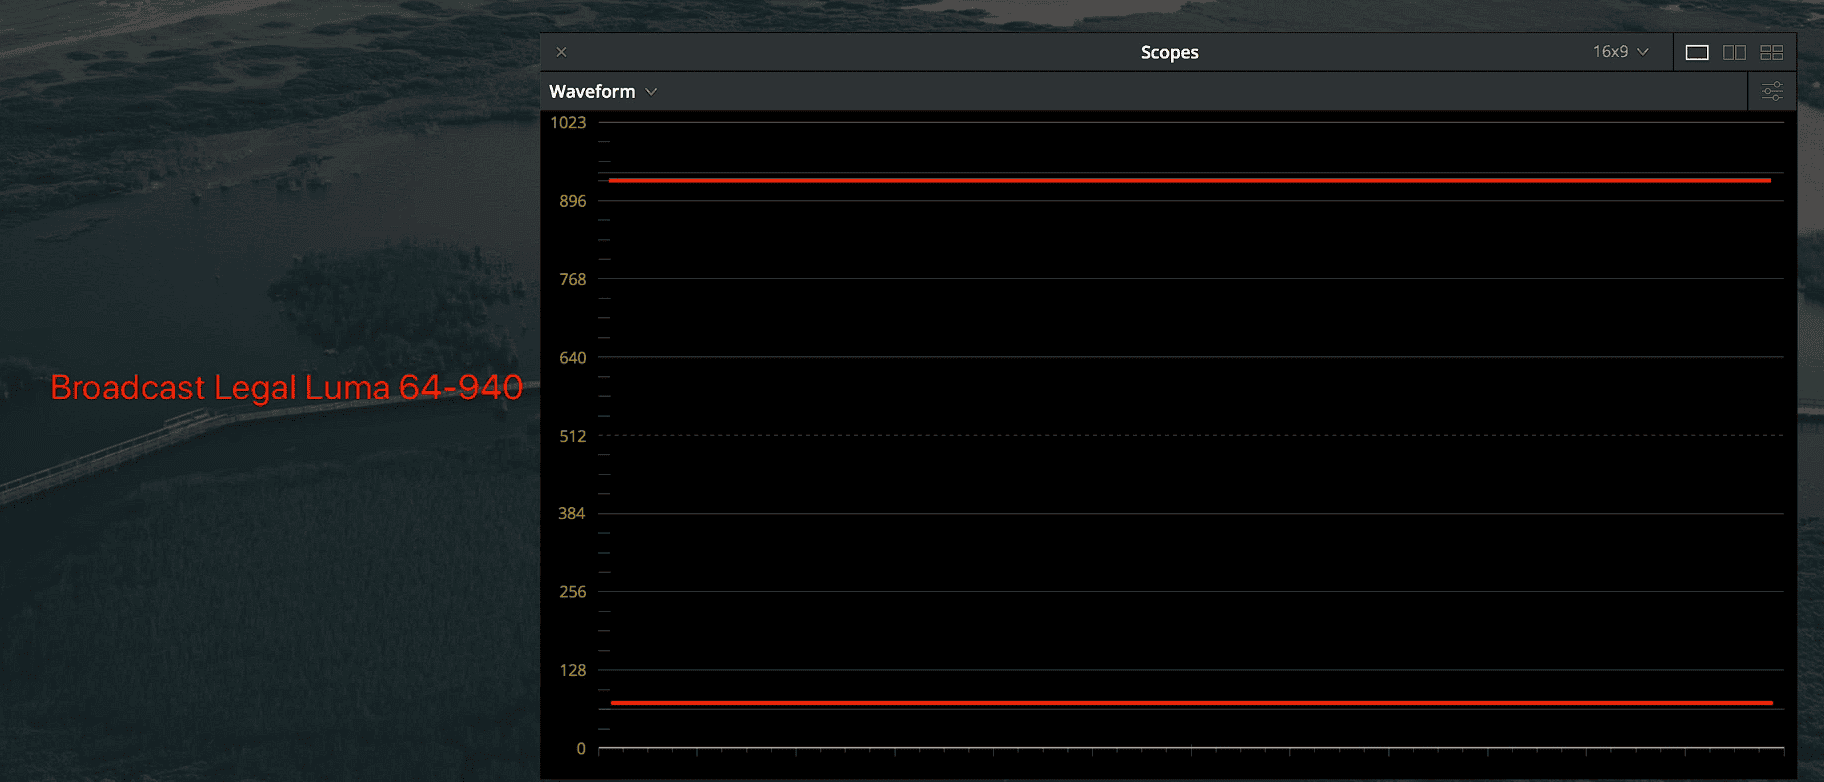
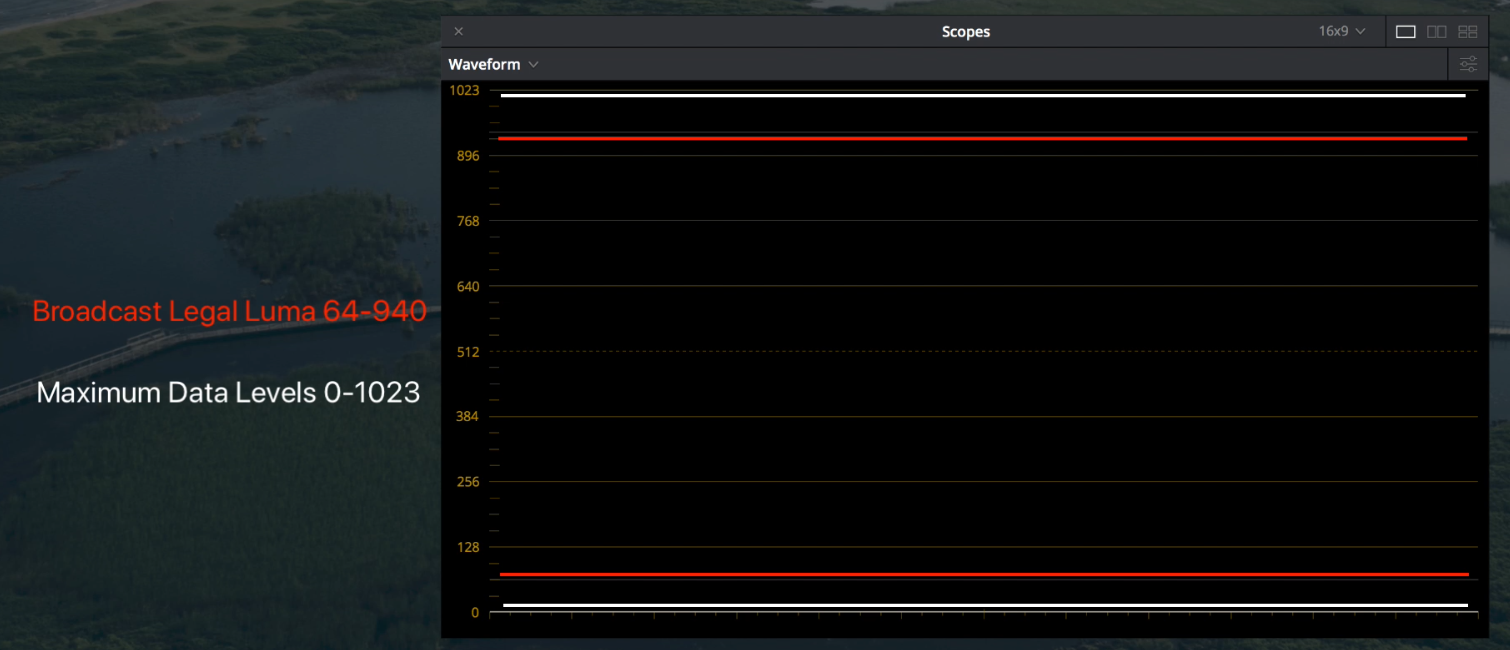
With regard to exposure, the range for legal video levels in Davinci Resolve falls between the 10-bit image values of 64 and 940. Now, if you’re not concerned with broadcast legality, you still want to make sure that your image’s highlights are below 1023 and your shadows are above zero.
Since that’s the full range that Davinci Resolve’s 10-bit processing can handle. Anything above or below those values will get clipped or crushes hence in quality check problems when finishing for broadcast.
In the first example, we have a common problem where portions of the image have gone into illegal broadcast levels by exceeding 1023 and falling all the way below zero. Now, typically what I like to do is just make a subtle highlight adjustment to back off the trace from the 1023 Mark.
But where exactly are the values of 64 and 940 that I threw out earlier? That seems impossible to see in the default settings of your Waveform Scope, but not if you set up the guides in your waveform.

If we open the waveform options, we can check on “show reference levels .”Then just change the low number to 64 and the high number to 940. Now you can see white horizontal lines representing those values that are safe for broadcast in your Waveform Scope.
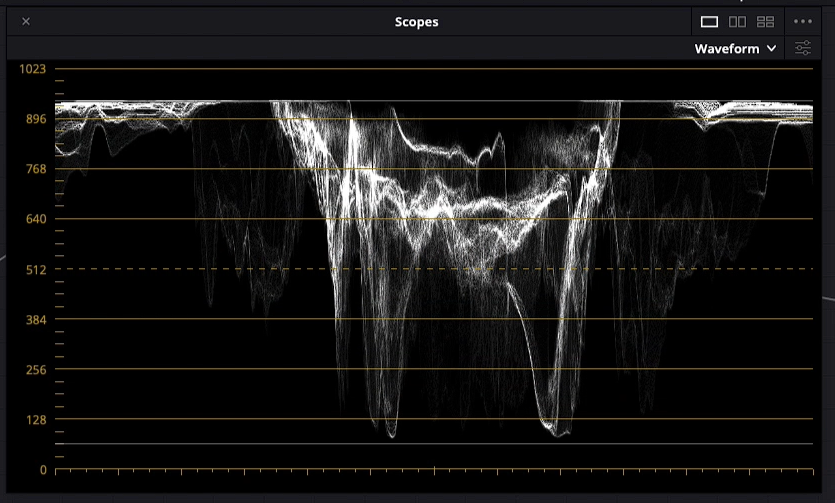
Ok. Now to manually bring the exposure values into compliance, you can use the primary color wheels to adjust the gain control down until the trace is under 940 in the scope. Then to fix the shadows, you will need to drag up on the lift control till the shadow trace is above 64, and that’s it.
2. Adjusting Chroma Levels For Broadcast Safe Finishing In Davinci Resolve
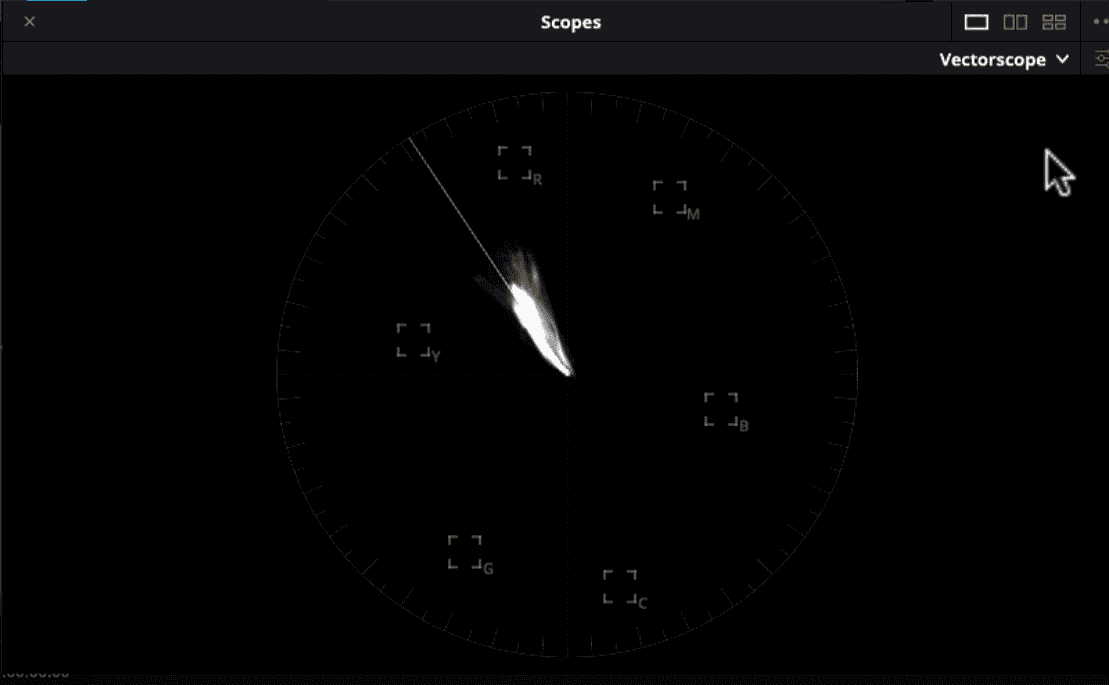
Now, as far as Chroma is concerned, you need to use your Vectorscope to make sure you will meet the broadcast finishing compliance. Notice the square markers on the Vectorscope for the vectors of red, magenta, blue, cyan, green, and yellow.
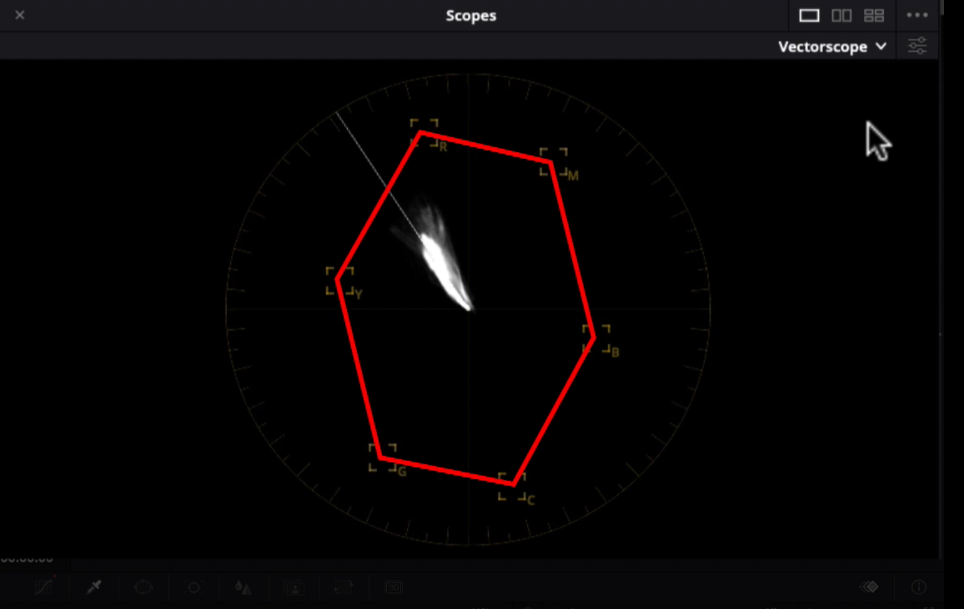
If, say, you were to draw an imaginary line from the middle of one box to the next and so on till you join all the lines and make a hexagon. Any Chroma levels that go outside of that line would not be safe for broadcast. As long as the trace remains inside the lines, you’re fine.
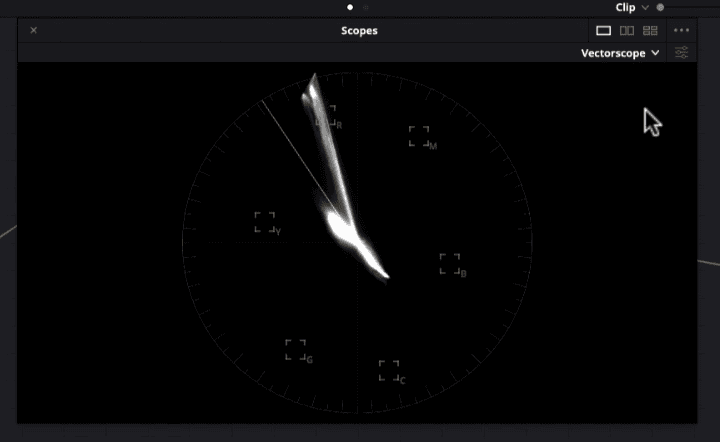
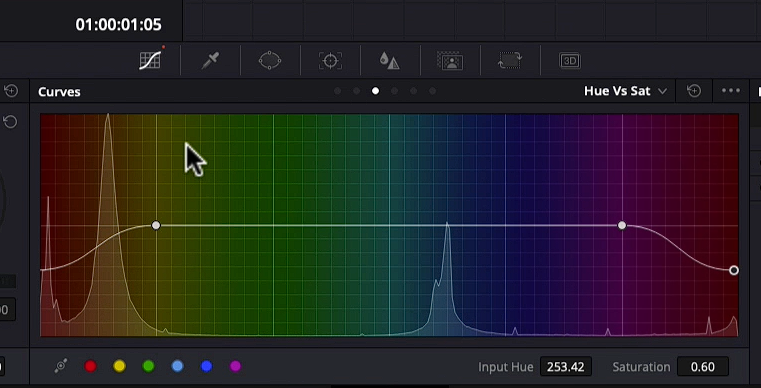
Let’s suppose I am color grading a shot with bright red color that is exceeding the legal Chroma limits. What I typically do in this case is a quick secondary correction to fix it. I move to the “hue vs. saturation curve” in the Curves panel and click on the red vector.
After that, I drag the middle point down until the red trace is inside the imaginary line connecting the boxes. It’s as easy as that.
Other Settings For Broadcast Safe Finishing In Davinci Resolve
Now that we’ve covered actively managing compliance during our color grade let me show you a couple of fail-safe ways to make sure your Luma and Chroma levels are legal when you go to render your project out.
This is an easy and really fast method of getting your footage through the quality control of broadcast stations without any additional and expensive hardware.
When I am done with color grading, and it’s time to export, I make two extra nodes at the timeline level. Please keep in mind that these two nodes must be the very last ones in your node tree. Nothing should be altered after them.
Gamut Mapping
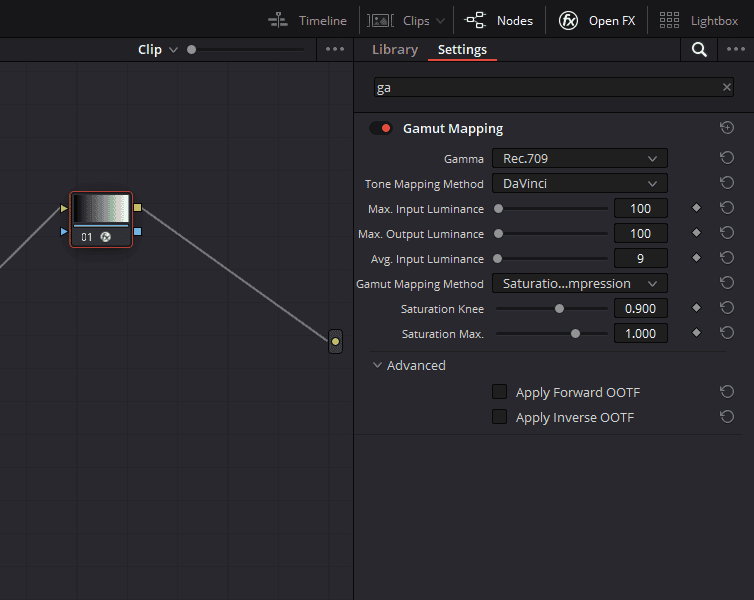
On the first node of these two, I use the Gamut Mapping OFX. Click on the “OpenFX” button on the top right corner, search for “Gamut Mapping,” and drag and drop it onto the node. In Gamut Mapping OFX follow these steps.”
- Choose Rec.709 from the Gamma Options
- In the “Gamut Mapping Method,” select “Saturation Compression.”
By enabling these settings, you’re making sure that if there are any color values outside the Rec.709 legal standards, they are getting mapped correctly within this range.
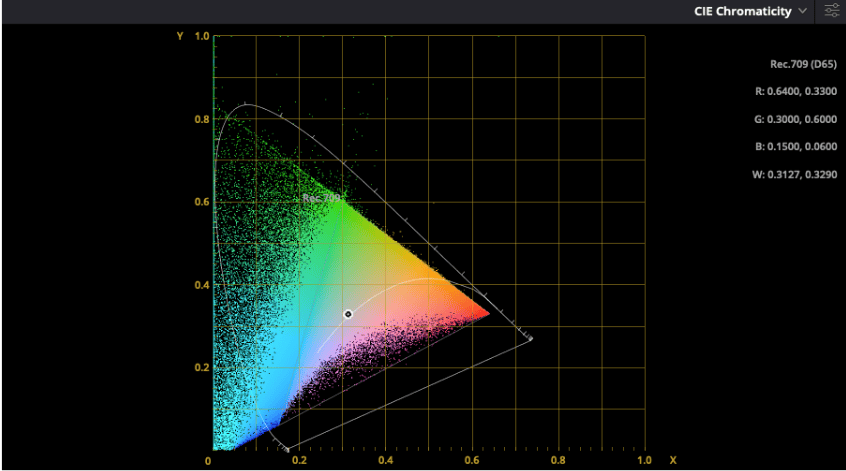
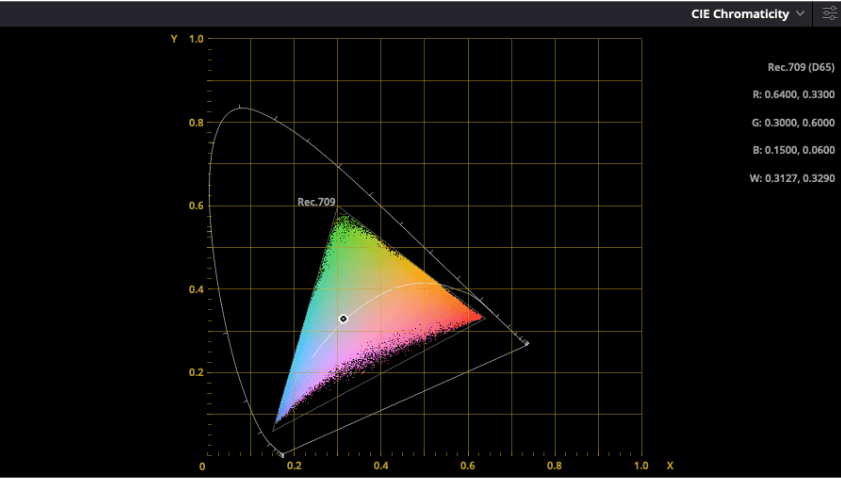
You can set your scope to CIE Chromaticity, Rec.709, and D65. With this setting, you’ll get a plot where you see if everything’s staying in the chosen target. This is very helpful for double-checking and making sure everything is broadcast safe.
By using the soft clipping
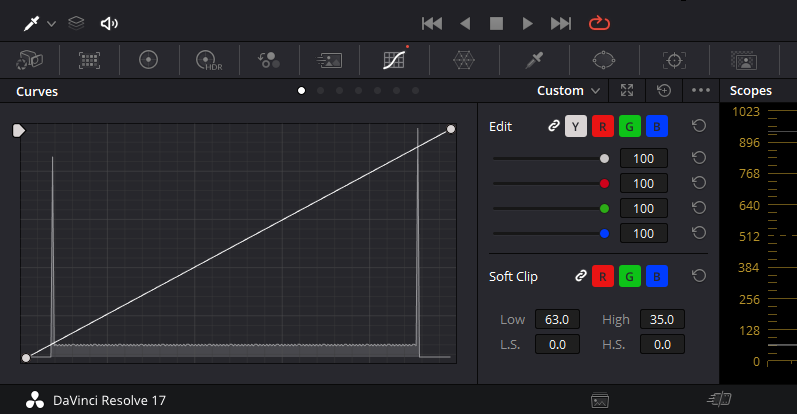
The soft clip option is present on the right side of the custom curve. Using the High and Low options, you ensure that your signal gets cut off within the Rec.709 legal standards.
The settings I personally use that gets me 100% pass the QC stage are as follows:
- In Soft Clip, set Low to 63.0
- In Soft Clip again set High to 35.0
That’s especially important for Luminance values. For example, let’s say there is a reflection of a rim of a car with really high and bright highlights.
It’s easily possible that you won’t recognize the specular highlights on your monitor or the scopes. With soft clipping enabled, you ensure that this out-of-legal spike gets cut off and stays within the range.
How to Use DaVinci Resolve’s Broadcast Safe Visual Display Feature
Broadcasting standards are essential to maintain a uniform viewing experience across various platforms and devices. But adhering to these norms isn’t always straightforward. Luckily, for video editors using DaVinci Resolve, there’s a nifty feature that can help you visualize any part of your video that falls outside of Broadcast Safe levels. Here’s a guide on how to activate and use this indispensable tool.
Setting Your Broadcast Safe Levels
To begin with, you’ll want to set your Broadcast Safe levels within DaVinci Resolve. To do this, navigate to the ‘File’ menu and select ‘Project Settings.’ In the settings window, go to the ‘Color Management’ tab, and scroll down until you find the ‘Broadcast Safe’ section. Set the levels to range from 0 to 100 from the drop-down menu. Click ‘Save’ if your settings weren’t automatically saved.
Activating Visual Display for Broadcast Safe Exceptions
Now that you’ve set your Broadcast Safe levels, you’ll want to visually identify areas in your video that do not comply with these limits. To do this, head over to the ‘View’ menu on the top. But before you do, make sure you are in the ‘Color’ workspace; otherwise, the option you need will be grayed out.
Once in the ‘Color’ workspace, go to the ‘View’ menu and select ‘Display Broadcast Safe Exceptions.’ Upon activation, you’ll notice a blue dot or other indicators appearing on areas of the video frame. These markers identify parts of the video that are outside of your Broadcast Safe levels.
Interpreting the Visual Indicators
The blue dot or other indicators are your guide to understanding which parts of the video are not compliant with Broadcast Safe norms. For instance, you may see the blue dot appear in areas that have extreme brightness or color saturation levels. These are areas you’ll want to pay special attention to when adjusting your video to meet Broadcast Safe standards.
Adjusting Video to Meet Broadcast Safe Standards
Once you’ve identified problem areas, you can start making corrections. You might use the curves, color wheels, or other grading tools available in the ‘Color’ workspace to adjust these regions. This way, you can bring them into the safe range you previously defined in your ‘Project Settings.’