Film Halation Emulation In Davinci Resolve plus Free Powergrade.
Hi everyone, welcome back!
We recently got a question in our mailbox asking us how we emulate Film Halation?
That led to me and my fellow colorist friend kind of discussing how we emulate Film Halation in our projects. It turns out we both have entirely different workflows and setups for doing Film Halation. So in this article, I want to walk you through all three methods and talk a bit about what Halation is and how we can create it in Davinci Resolve.
What in the Universe is Halation?
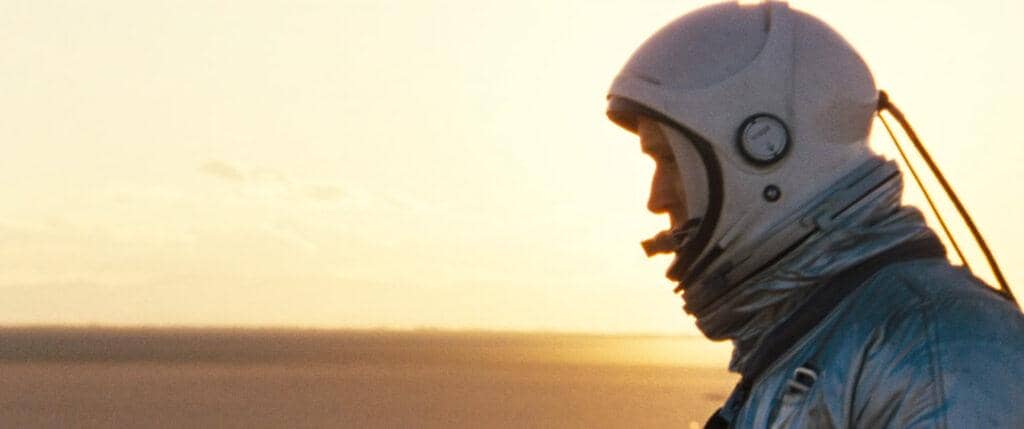
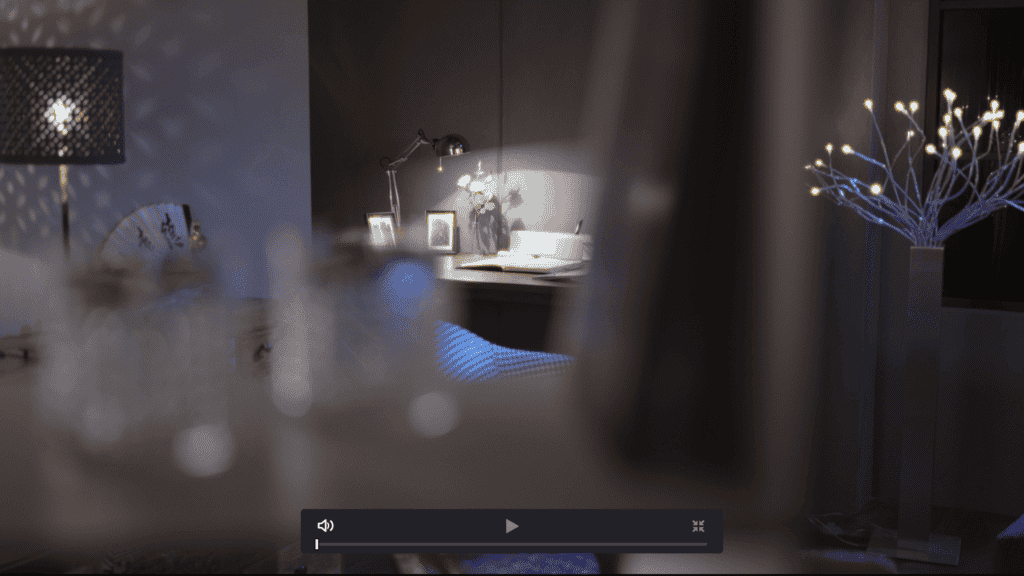
So first, let’s talk about what Halation is. Halation is a sort of reddish, yellowish fringing around bright, high contrast edges. That’s inherent to shooting on film, it doesn’t matter if you are shooting on 8mm, 16mm, or 35mm, and it comes from the way light interacts with the various layers of photochemical film.
So first, let’s start by looking at some actual film images. So if I zoom in on these images, you can see around the high contrast edges, there’s a sort of yellowish, reddish blurry fringe surrounding and bleeding into that edge.

Where there’s a very high contrast edge, you get this unique fringing that’s just inherent to film acquisition. And it’s an aesthetic thing that I like. So when I’m doing any kind of film emulation on a project, I like to add a little bit of Halation.
So let’s jump back into Davinci Resolve and talk about emulating film halation using these two methods.
Three Methods of creating Film Halation In Davinci Resolve
First Method of Film Halation
So my friend sent along with a power grade of what he’s been using. And the first thing is, where do you put your Halation in your node tree or your project, in my opinion, because Halation happens on the actual negative.
If we want to emulate how it behaves, we should put the Halation at the very beginning of our node tree. That way, everything we do to the image afterward will be affected, just like if we were working on a scanned negative.
But because you are shooting on Digital, why don’t you leverage that? Putting Halation in the beginning can cause problems if you will be keying afterward. I work with highly skillful cinematographers and directors, who shoot everything at its best and most of the time do not require keying.
So I like to follow the exact film emulation process and confirm how it would have looked if this was shot on film.
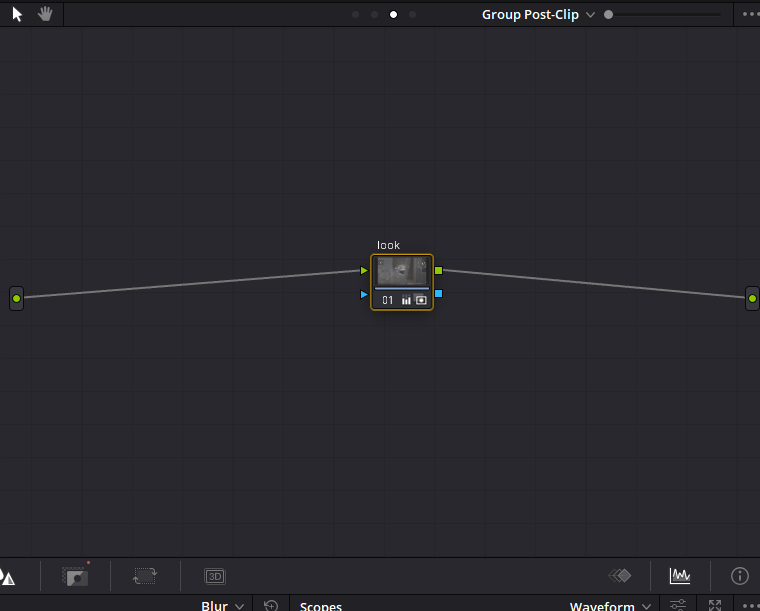
So, in this case, I’ve got my grade, or you can say look for the shot on the post clip group level, and I’m applying the Halation on the clip level. So it happens before the grade.
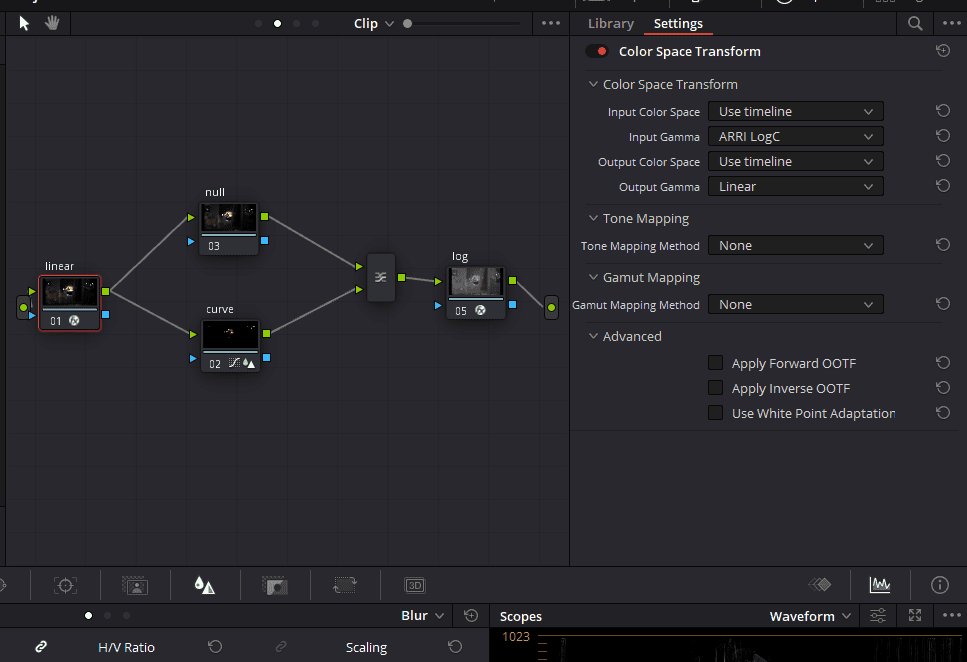
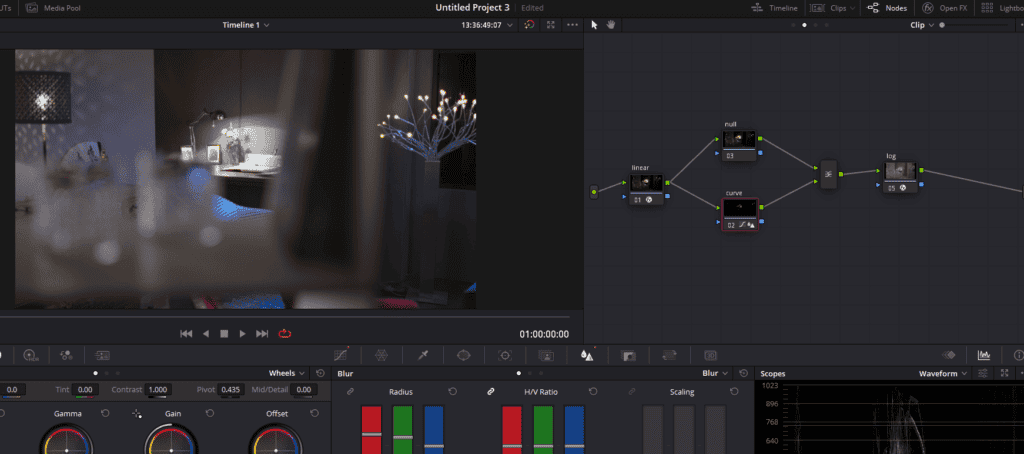
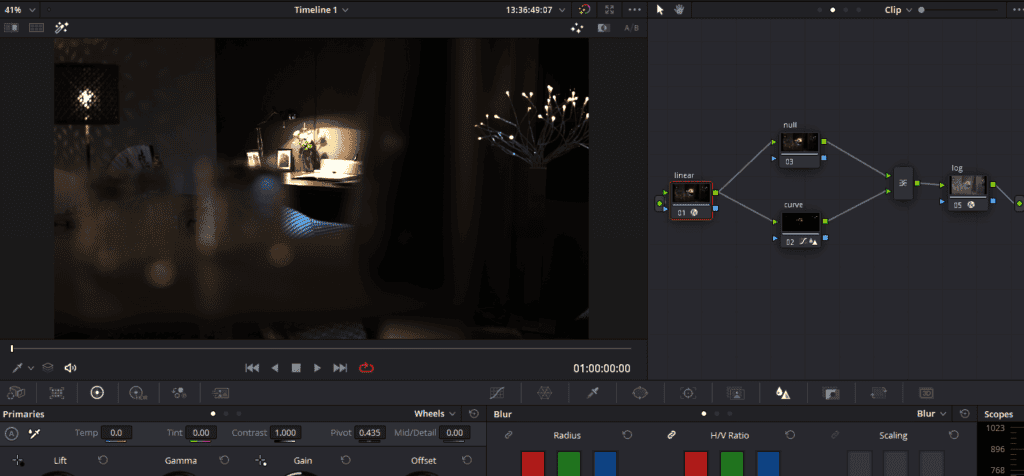
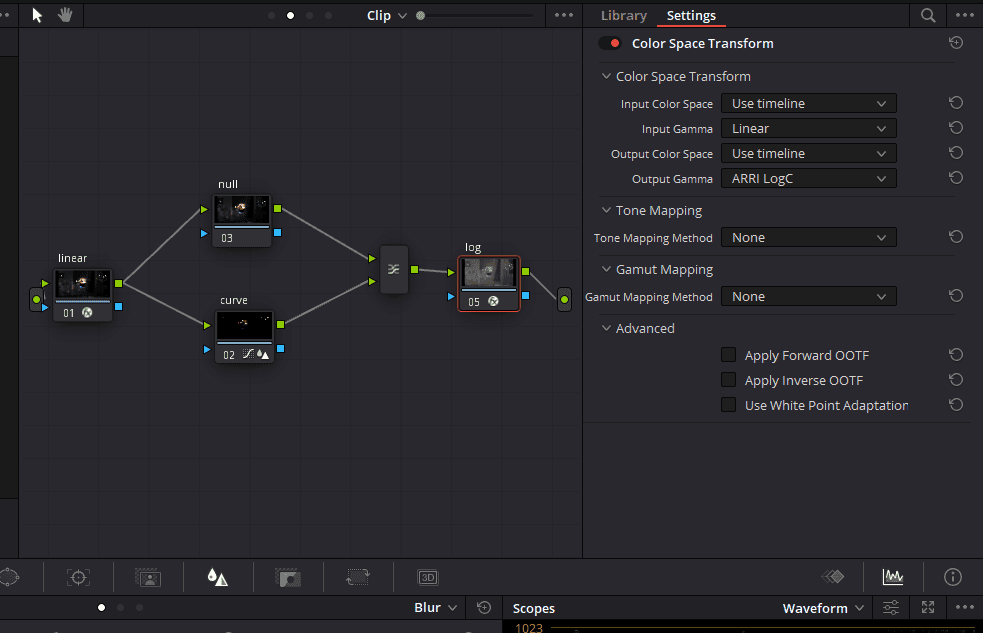
So let’s step through this first method. It starts with a color space transform, converting the Arri LogC gamma to linear gamma. If you highlight that node, you can see that it makes only the highlights in the image visible.
After converting the Arri Log C gamma to Linear, you then have to make a serial node with a layer mixer node. At the bottom node, there’s a custom curve to crunch out all of the rest of the image except for the brightest highlights. Now in the composite mode of the layer mixer node, you have to choose “Add.”
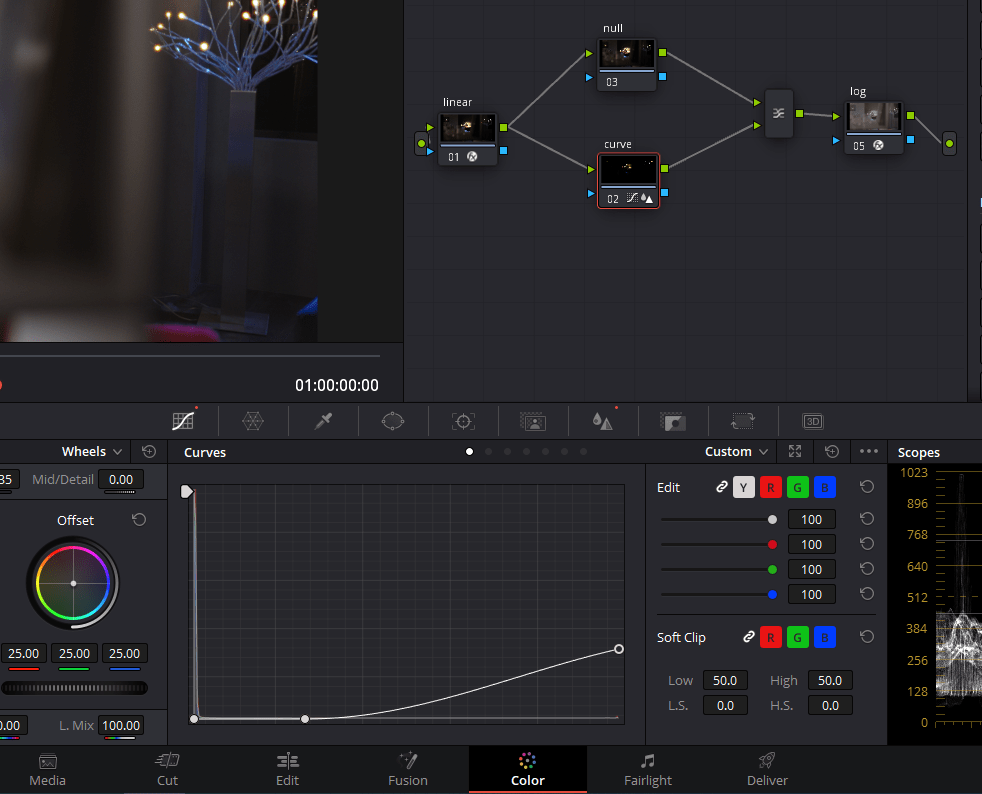

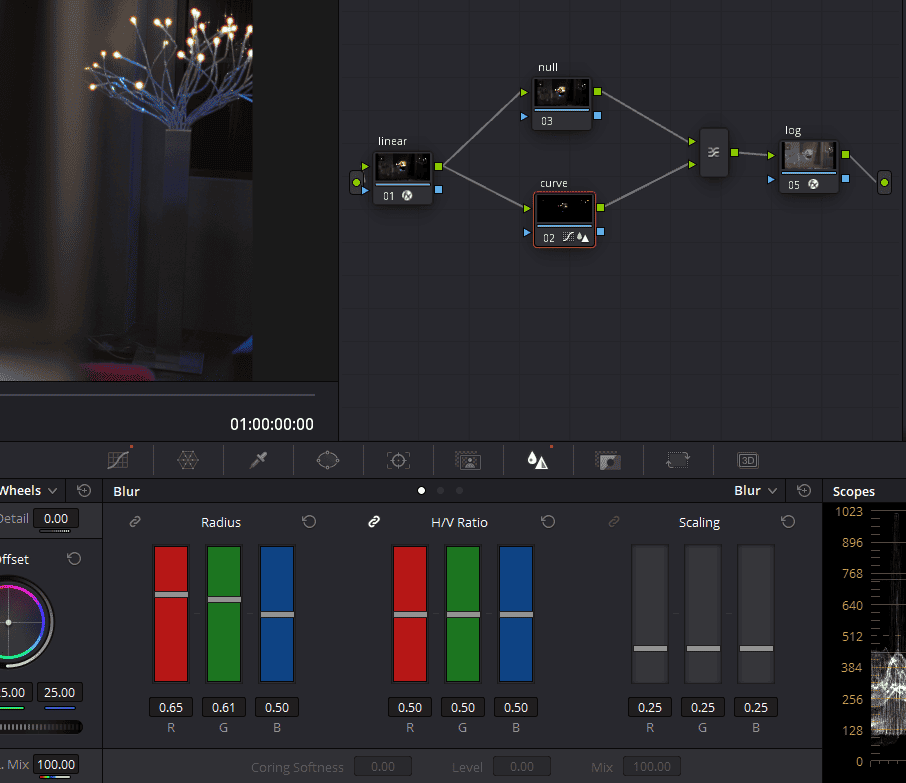
Then using a layer mixer node, that isolated highlight is added to the original linearized image. There’s a little bit of blur in the red and green channels to blow out those edges and give it a little bit of reddish, yellowish fringing; you have to do this in the same node where you used the curves.
Remember, you have to keep the serial node above untouched.
Then finally, another color space transform to convert the image back to its original log, which means converting Linear Gamma back to Arri LogC. Now, if you select all of these and toggle them on and off, you will see immediately it’s adding a little bit of yellowish Halation and fringe to those high contrast edges. And I think this looks pretty good.
Also, don’t forget, you can select all these nodes, right-click and make it a compound node and it as a power grade so that you don’t have to make it every time you need a film emulation.
But I think there’s a better way to do it because if you toggle this on and off, you can see it’s affecting the overall luminance of the whole shot just a tiny bit.
There are not many good ways to customize or shape this to taste. So the method I prefer is a little bit more complex to build, but I think it’s a lot more flexible.
- Also Read- 8 Important Continuity Editing Rules in Filmmaking!
- Also Read- Best Tools and Softwares for Indie Filmmakers! (2022 Updated)
- Also Read- How to write a tragic film story?
Second Method of Film Halation
Again, I do this method in the clip node and put the look in the Group level. My way of creating film halation in Davinci Resolve gives a slightly softer and more natural feel. So I’m going to clear this out, and let’s build it from scratch so you can understand how and why I do it this way.
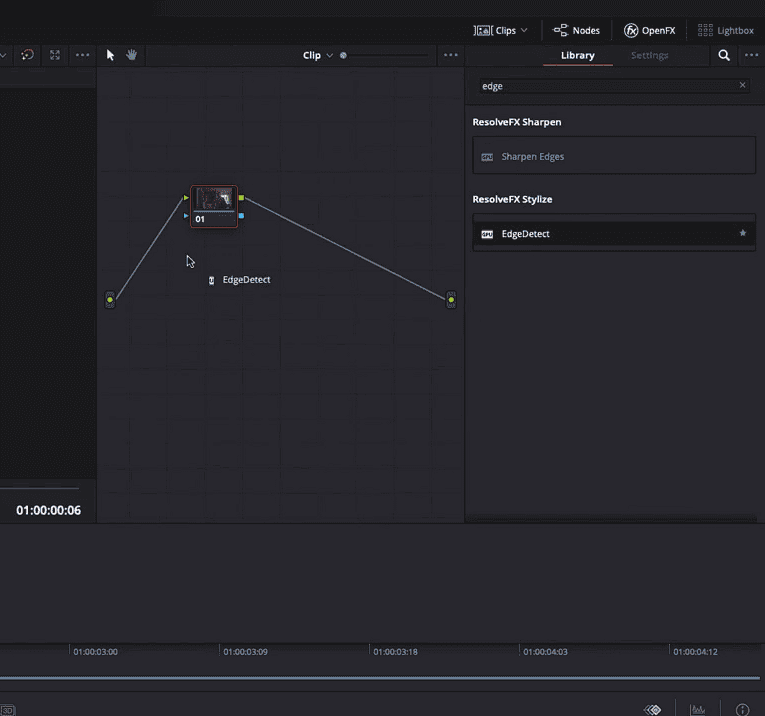
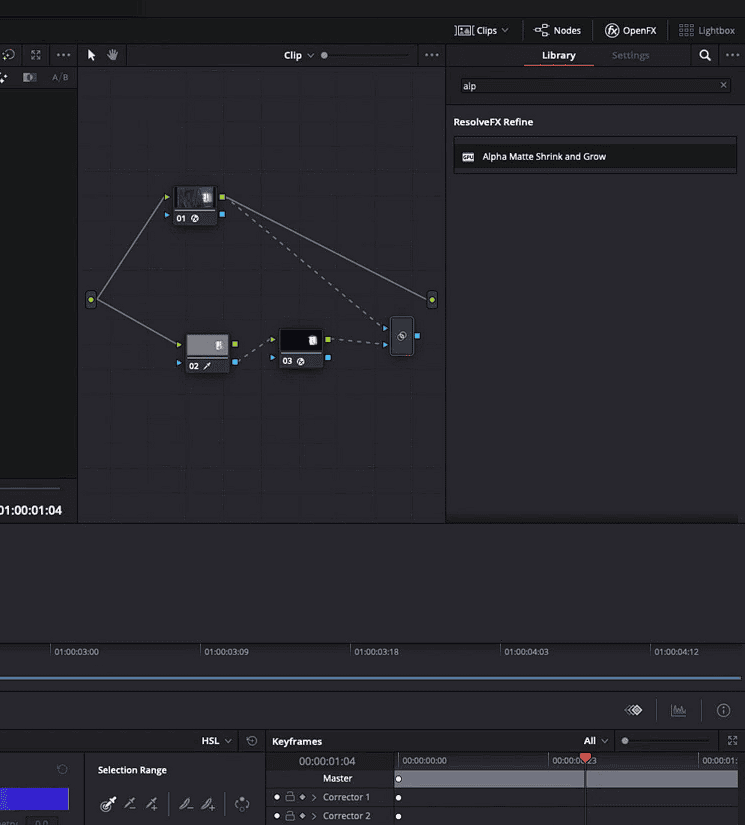
I start with an openFX edge detect plugin that comes pre-installed with Davinci Resolve because we know that the Halation only applies to those edge areas.
So we’ll use the edge detect to find the sharp edges in the scene. Now I’m going to switch it from RGB to Grayscale, and I’m just going to increase the brightness and adjust the threshold, smoothing and denoise a little bit to really highlight only the hard edges of the frame.

So after just isolating the edges in the shot, we will isolate the brightest areas in the shot. So we will add another node, connect it to the input, and I’m just going to pull a soft luminance-only key to isolate those bright areas.
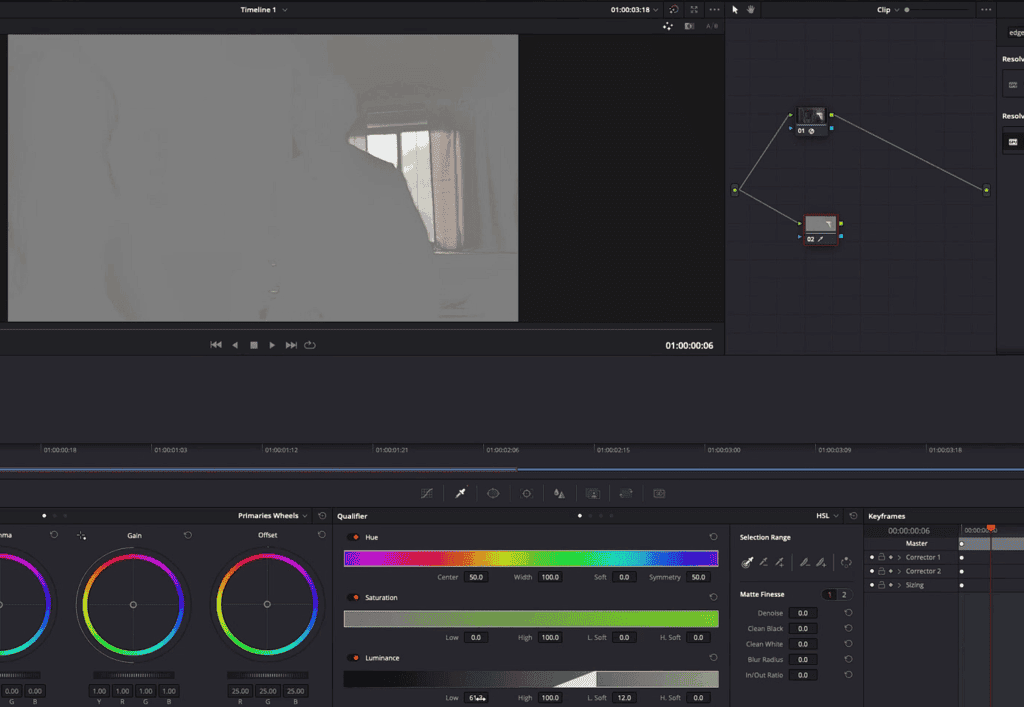
I’m going to add another node, take the key channel or the alpha channel from our Luma key, fill it into the RGB input of that node, and I’m going to use the openFX, “Alpha Matte Shrink and Grow,” which also comes pre-installed to adjust that matte a little bit.
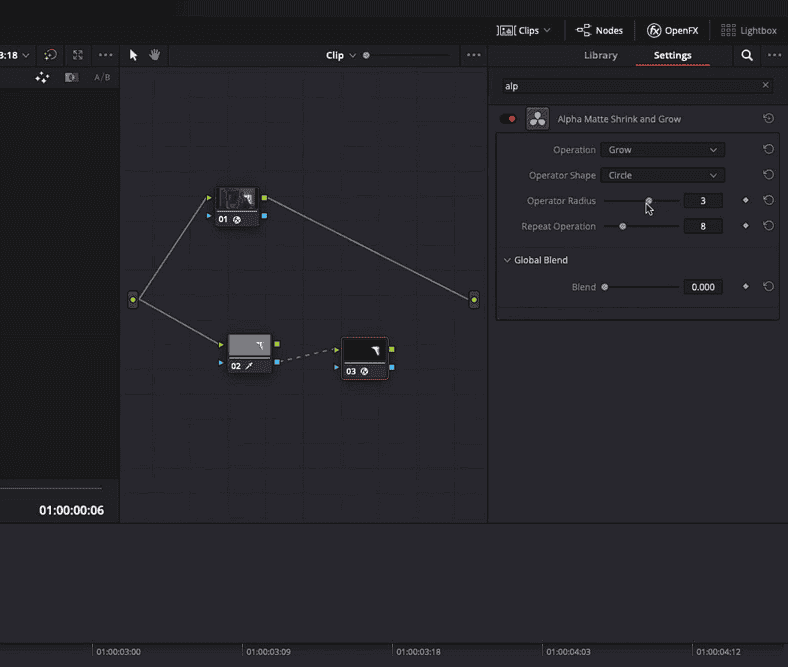
So I’m going to change the operation to “Grow” and get a really rough, soft isolation of only the bright regions of the scene.
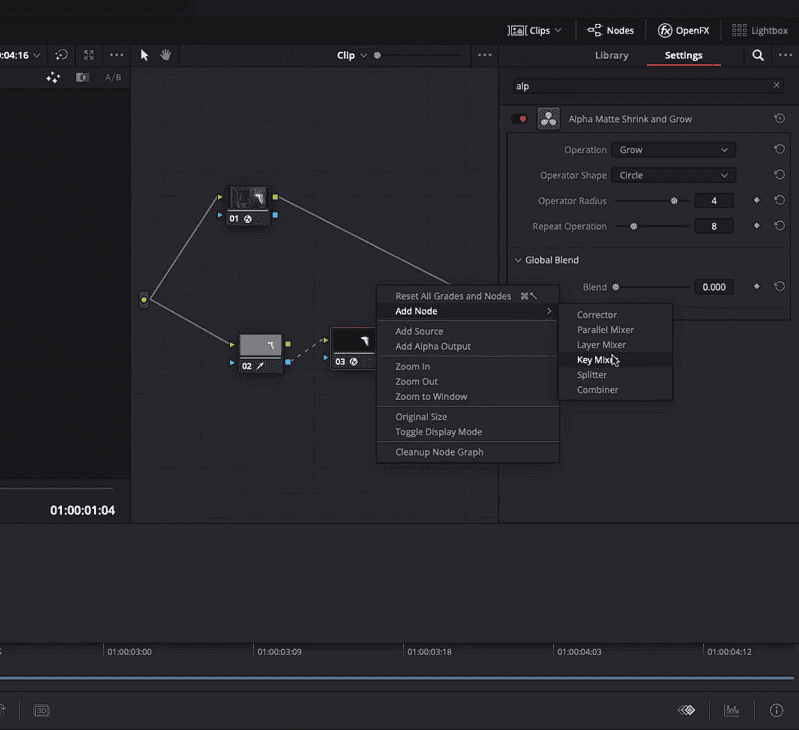
Then I’m going to combine Node 3 matter to Node 1 Matte using a key mixer. So I’ll add a node and combine our Luma key with our edge detect.
Now, by default, the key mixer adds the two images together. But if we go into the key tab and then use input link number two and set it to mask. Now it’s going to limit our edge detect matte based on the Luma key.
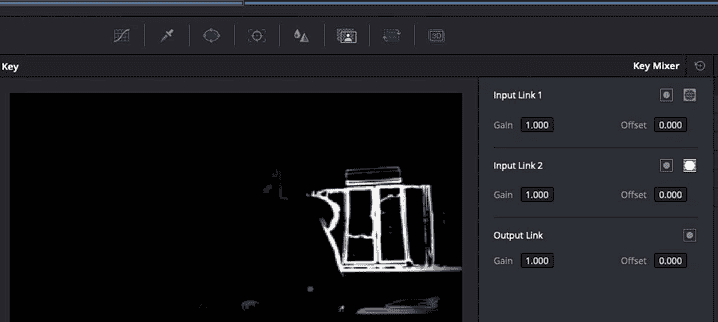
After doing this, you will get a really nice mask, only showing the brightest, hardest edges in the scene. But it will look a little bit harsh. If I were to use that to add Halation, it would just look like a hard edge. So the last thing I do here is adding another node and throw a little bit of a “lens blur” effect on it from OpenFX.
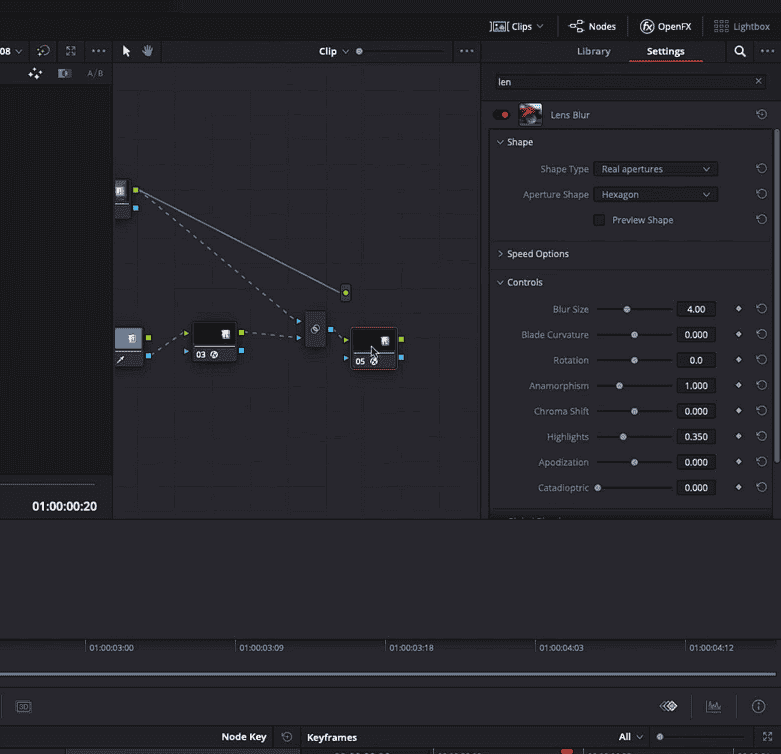
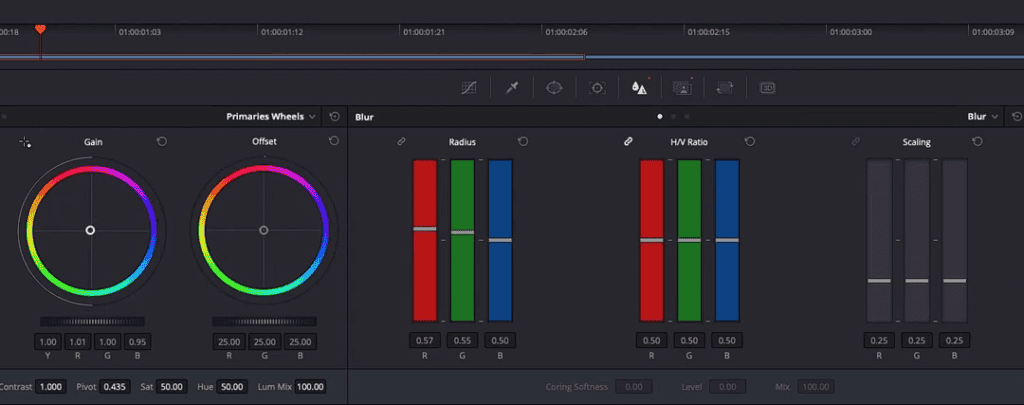
Then if I go back to my node tree and I add a final node, connect it to the input and the output, effectively bypassing everything we just built. But then I take my matte feed into the key input of this node. Now what you can do is jump over to the blur tab and again blur the red and green channels just a little bit. You can also take the gain wheel and push it a little bit towards yellowish red.
Now, if you Zoom in and toggle that node on and off, you can see a nice little Halation is now hitting all of those edges.
But the beauty of this setup is it’s completely customizable. For example, I’m looking at a clip where I put this node tree, and I think my Halatian mask is just a little too big. It’s affecting more than just the edges. So I can jump into my edge detect node, adjust that, and now we’ve changed the shape of the Halation.
Same thing. If I adjust the lens blur, we can really go in and shape this exactly how we want. We can also go back to our gain control and adjust the color of the Halation to taste. If we go to the key tab of our final node and adjust the gain, we can easily adjust the overall strength of the effect.
If you Zoom out and toggle this completely on and off, you will see unlike the linear conversion method, it really only affects the highlights and the edges. It’s not affecting the color imagery of the rest of the image.
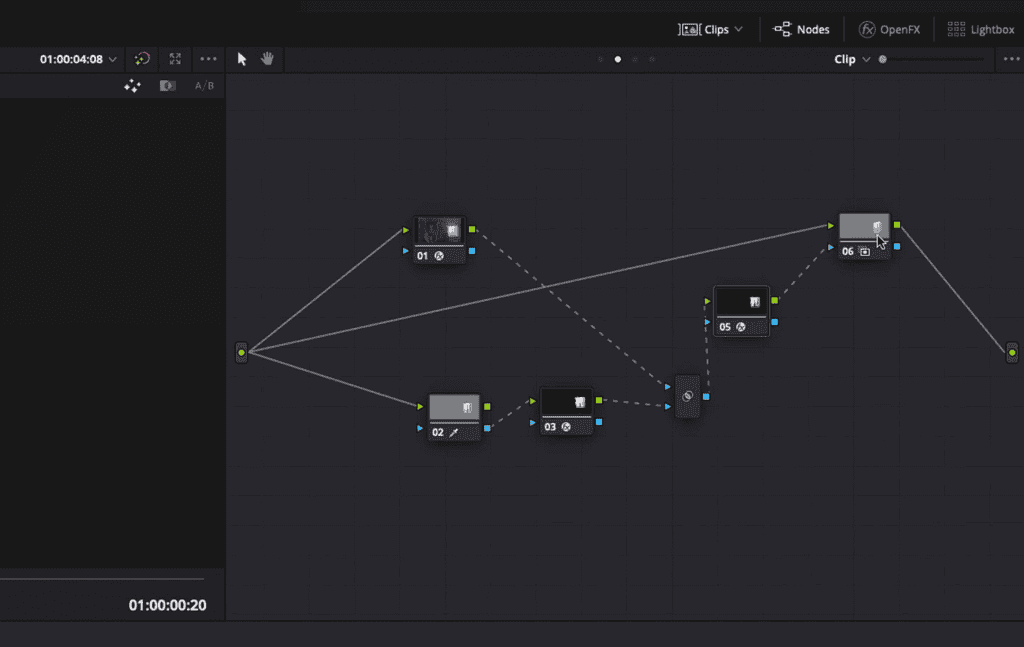
So to quickly recap, I start with an edge detect and then use a Luma key that I grow it using the “Alpha Matte Shrink and Grow” tool. Then I use a key mixer to isolate only the bright highlighted edges. I feed that combined matte into another node which blurs the red and green channels slightly and adjusts the gain just a little bit to push towards yellowish red.
Again, no matter how you do the effect, I really like to keep it at the beginning of the node tree. That way, you are treating it more like a negative.
Remember, with a complex build like this; you can always select all the nodes right click and create a compound node that you can reuse anywhere in your project or in other projects.
- Also Read- How To Color Grade RED RAW(R3D) In Davinci Resolve-4 Ways
- Also Read- How To Color Grade Arri Log C In Davinci Resolve (3 Ways)
- Also Read- Everything About Nodes In Davinci Resolve (All Types)
Third Method of Film Halation
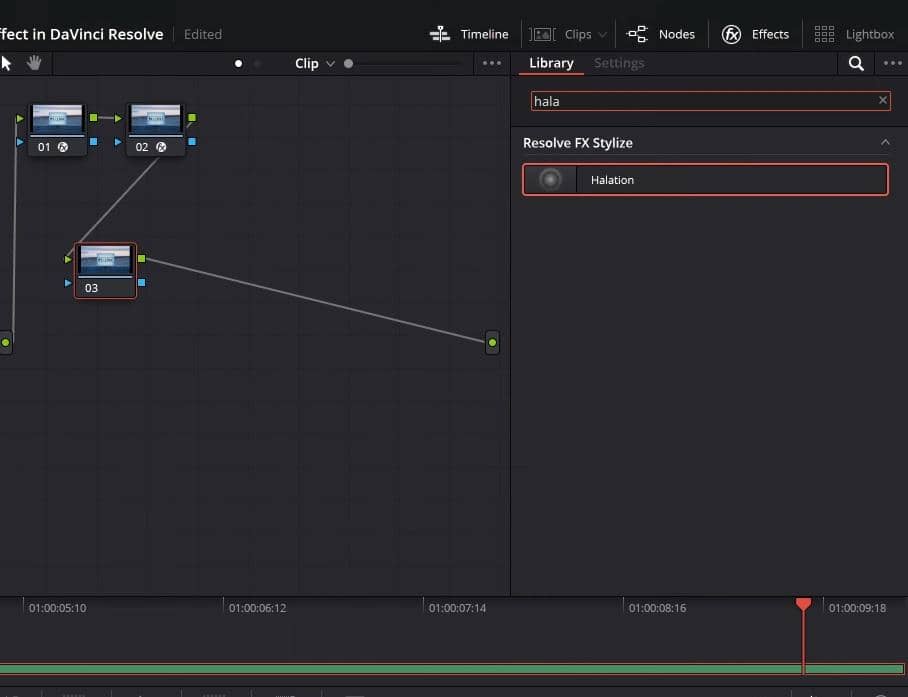
The easiest method of them all is just using the Film Halation OFX, which comes pre-installed in the newer versions of Davinci Resolve and is present in openFX.
The reason I don’t use it is that it slows down my computer’s processing. Using it is pretty simple. You just drag and drop the openFX on a node.
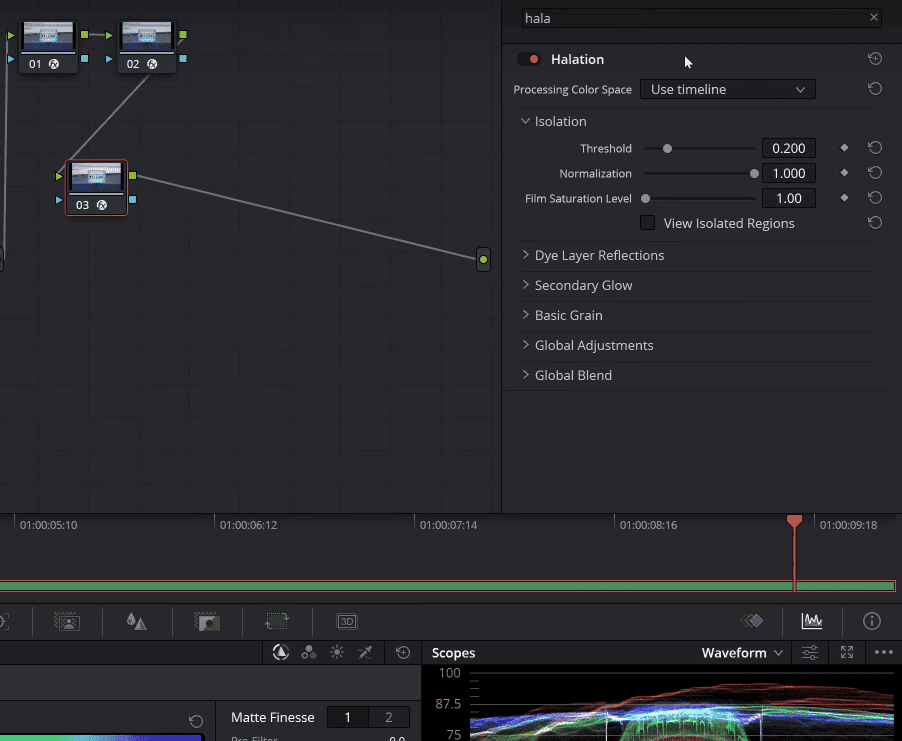
You can start by choosing what Processing Color Space you want. The drop-down list consists of all the different color spaces from different cameras so you can choose the one which you shot on.
In the Isolation section, as the name suggests, you can adjust the areas being affected by the plugin. You can do that by changing the “Threshold .”You can also tick the check box saying “View Isolated Regions .”By using the Normalization option, you can feather out your selection according to your liking.
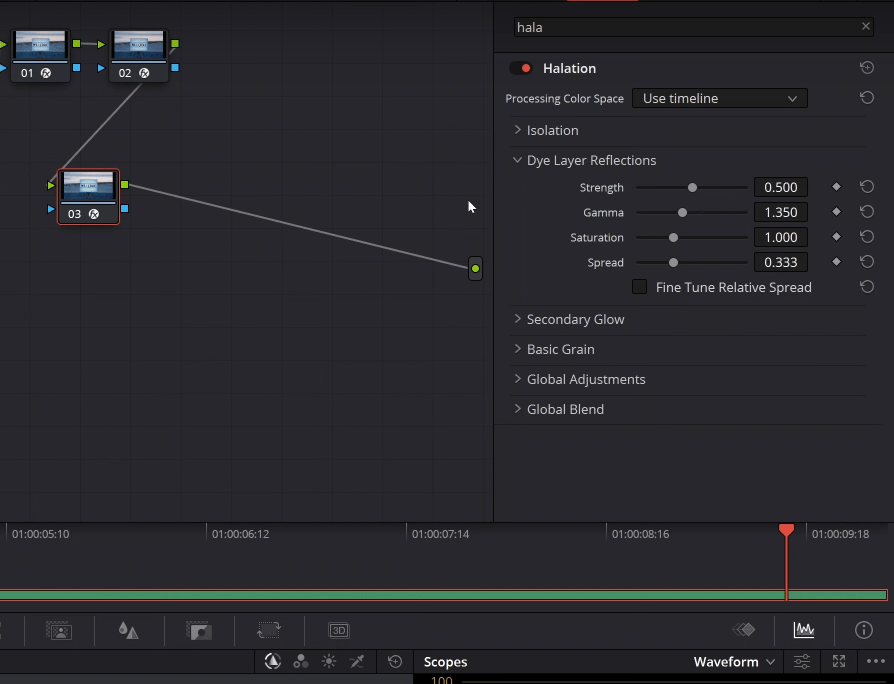
In “Dye Layer Reflection,” this is where the magic happens. You can choose the strength of the Halation here. You can also change the spread and saturation of the Halation.
The advantage of using the pre-installed plugin is that you can also add a soft glow and a little grain, just like it happens in a photochemical process.
Free Halation Powergrade
So, you have read this article throughout and now you are wondering can I get a free powergrade. The answer is yes! We have prepared a free film halation powergrade for the people who are having a tough time making one by themselves.
How to use this free film halation powergrade on Davinci Resolve?
- Extract the zip folder
- Go to the Color Tab on your Davinci Resolve
- Go to the “Gallery” section from the top left corner
- Right-click in the blank space and click on “import.”
- Navigate to the folder where you downloaded the powergrade.
- Select only the “.drx” file and your powergrade will be imported.
- Just drag and drop it on any node.
Also Read- Film Look In Davinci Resolve (Full Guide)+ Free Powergrade