
Today, I’m going to show you how to Import GIFs in Davinci Resolve . If you ever tried to import GIFs in resolve before, you’ll know that, unfortunately, just like a lot of video editing software, GIFs are not supported.
But that changes today because I’ve got two techniques that will work great, and we’ll cover all of your GIFs problems. So if you’re ready to learn some fantastic DaVinci Resolve tricks, then grab your snacks, get comfortable, let’s get cracking.
So a few months ago, I came up with a brand new technique to import GIFs inside any video editing software that I see nobody use, despite it being so straightforward.
But then I realized that many creative Editors, including myself, are turning themselves more towards DaVinci Resolve these days, as Premier Pro is getting clunky and hasn’t been fundamentally updated in years. So for that reason, I thought it was essential to show you guys how to apply my techniques to DaVinci Resolve. Let’s get into it.
How To Import GIFs in Davinci Resolve (2 Ways)
1. Using a converter to import gifs in DaVinci Resolve
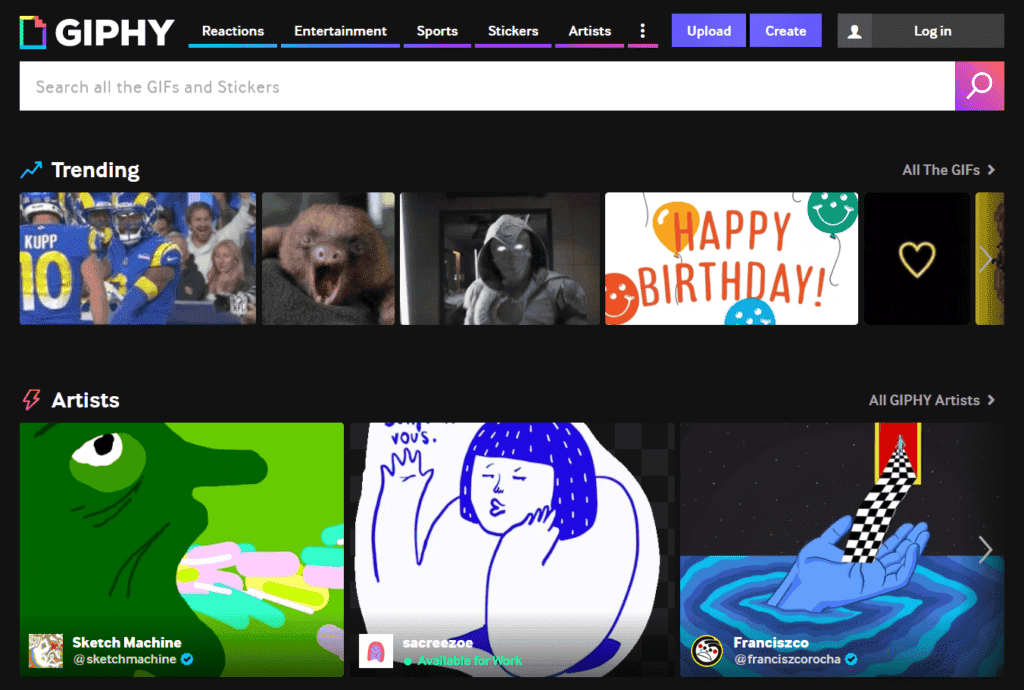
Let’s look at the first technique to import GIFs inside of DaVinci Resolve. I think you will love this one, so make sure you stick until the end to check it out. For the first technique, what you’re going to want to do is go to GIPHY. I’m sure you’ve already heard of this website, but if you haven’t, this is like another gold mine for GIFs. A massive database of GIFs. There’s a trending part on the website that you can use. Otherwise, there’s a search bar at the top for you to choose a specific GIF.
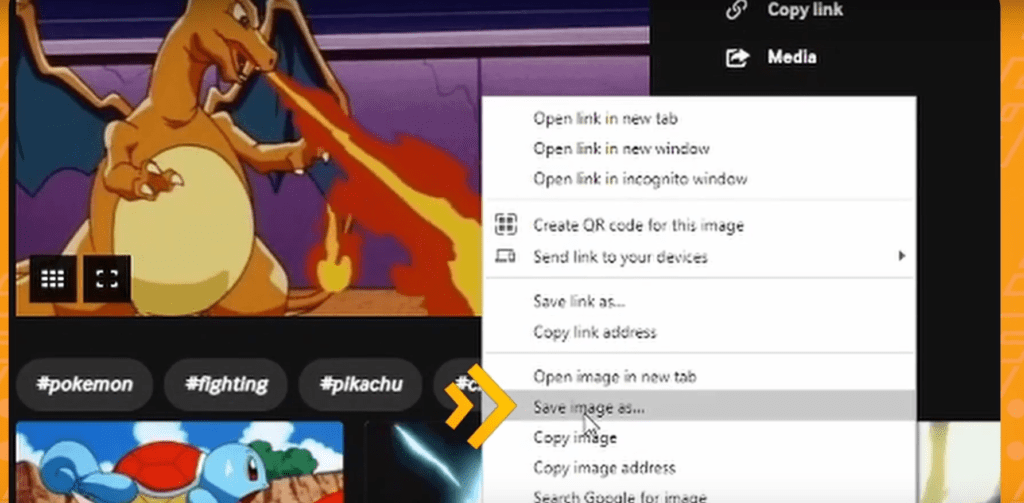
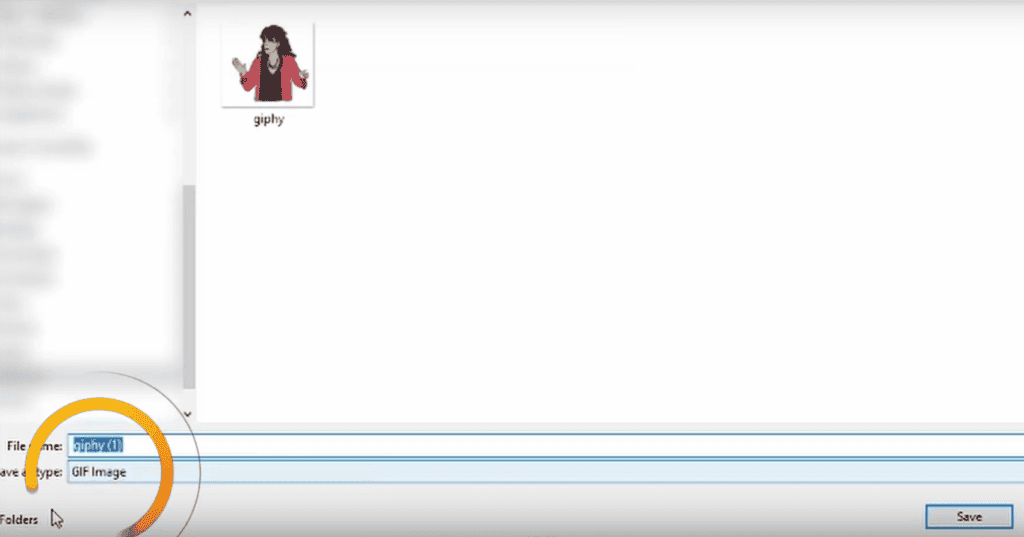
Once you find a GIF that you want, right-click on it and save it to your computer by choosing “Save image as.” Just make sure that the file extension does say GIF and nothing else.
If you can’t find the save image as an option, you can right-click and select “Open Image in a new tab,” and then you should be able to find the “Save image as” option.
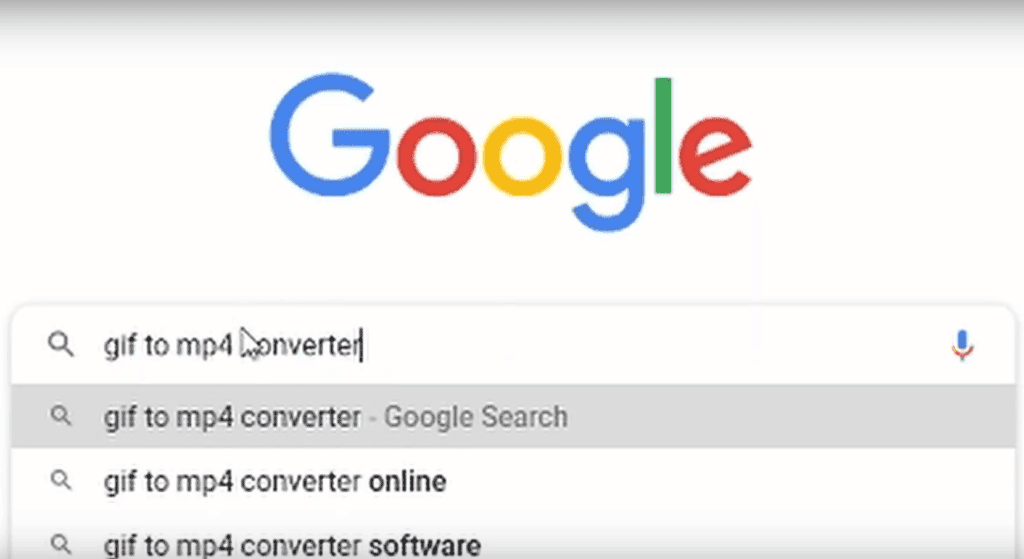
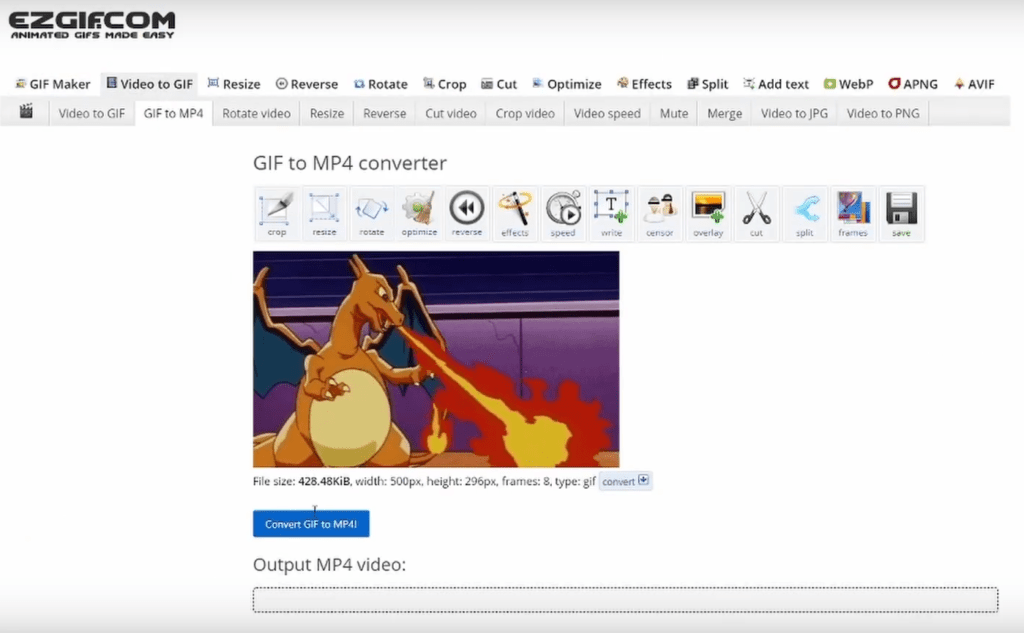
Now go to Google and search for GIF to MP4 Converter; this will return a list of the most popular online converters. I’m going to choose EZGIF.
It is a simple and free GIF converter that can also convert GIFs.
Now all you have to do is upload the GIF you’ve just downloaded, click Convert and download the video as MP4 back to your computer after the conversion.
Now open up Davinci Resolve and just like with any other videos, you can drag and drop your footage onto the media pool or directly in the Timeline.
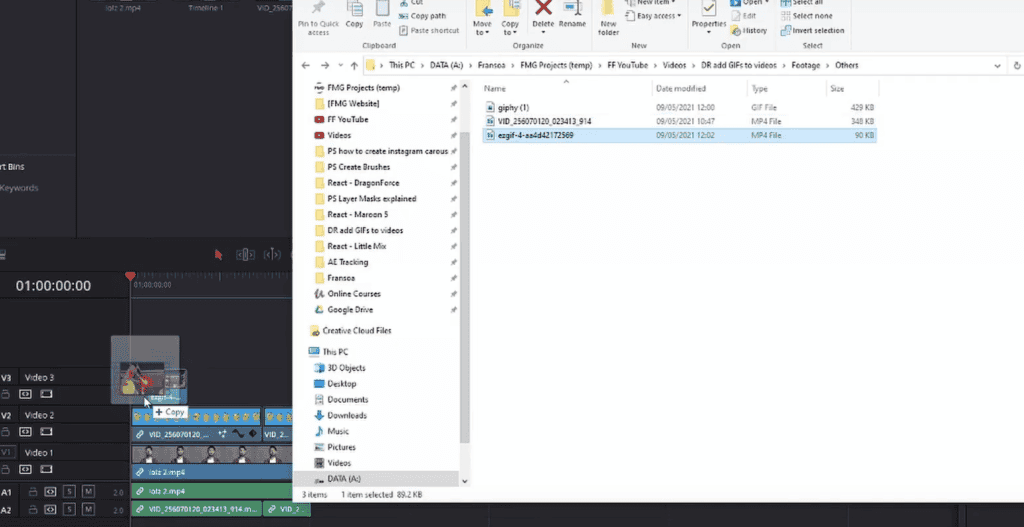
Also, you can loop it by simply duplicating the same GIF repeatedly. Now this will work just like any other video, so feel free to import as many as you can wish.
2. Using Instagram to Import GIFs in Davinci Resolve
Now for the second way of doing it. We’re going to start with a new technique I came up with recently, which I think you’ll like. So before even opening up DaVinci Resolve, we first need to take our phones and open Instagram.
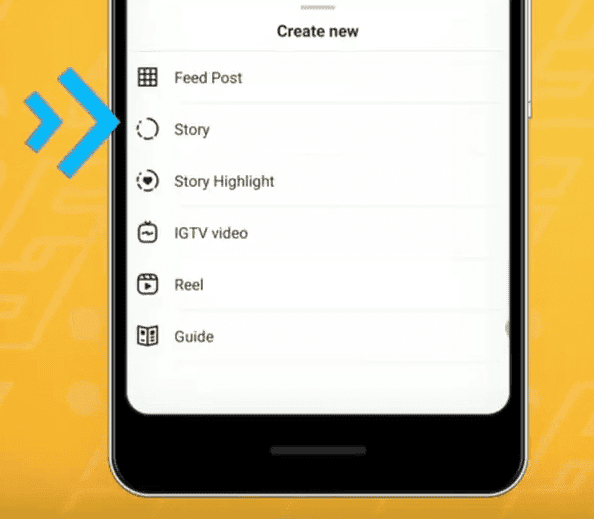
You didn’t see it coming, did you? Depending on when you watch this video and which phone you have, the layout of Instagram may look different, but don’t worry, this technique will still work no matter what. I’m on a Samsung phone, so I will tap the plus icon at the top of the screen and Select Story at the bottom.
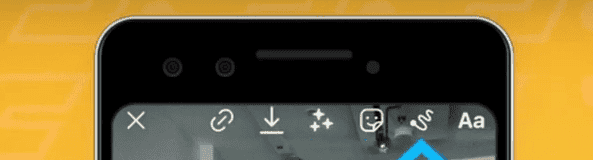
Now take a picture. It doesn’t have to be anything unique or well-composed because we won’t actually use it. At the top of the screen, we have got a few options to choose from links, Downloads, Filter, Stickers, Brush, and Text.

I’m going to choose the brush and leave the brush tab as the default one but change the color. Now, I recommend you to choose between either blue or green from the bottom, but because of the colors of the GIF I’ve got in mind, I’m going to go for blue. I’m now going to tap the screen and hold until the whole picture is filled with blue.
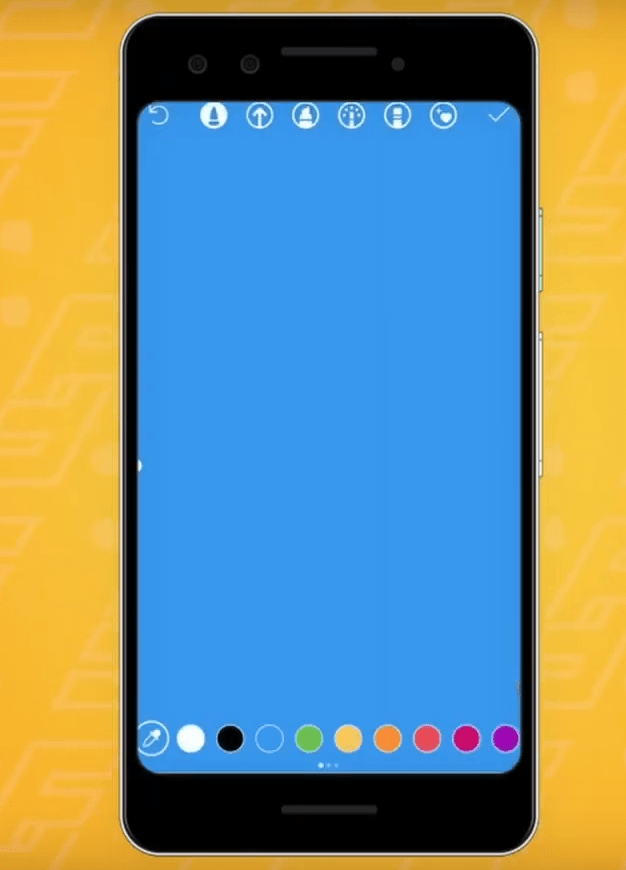
Press the tick icon in the top right corner and leave the Brush tool. I’m now back on the main menu, so to speak, where we had all of the original options. I’m now going to select the Sticker option and go to GIF. I hope you’re ready for this because if you’re not familiar with Instagram stories just yet, this is going to open a whole new world of GIFs you didn’t even know existed.
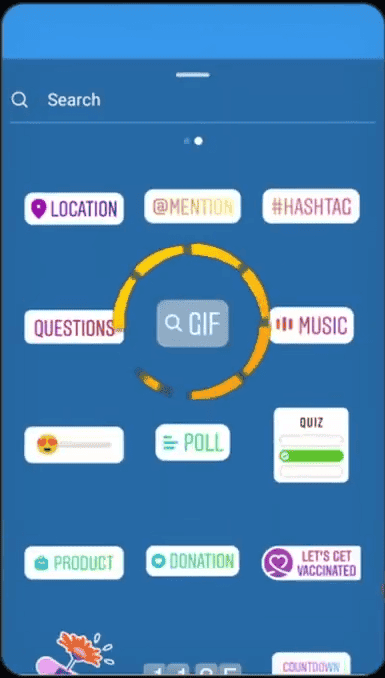
The great thing about this story is that you can find the latest trending GIFs, or you can also search specific ones based on the keywords you type in. I’m going to find a GIF of Pikachu because, let’s be honest with ourselves. We all wish Pokemon were real, right?
Also Read- How to Reverse a Clip in DaVinci Resolve
Also Read- Using Magic Mask To Remove Background In Davinci Resolve
Also Read- How To Render 60fps In Davinci Resolve
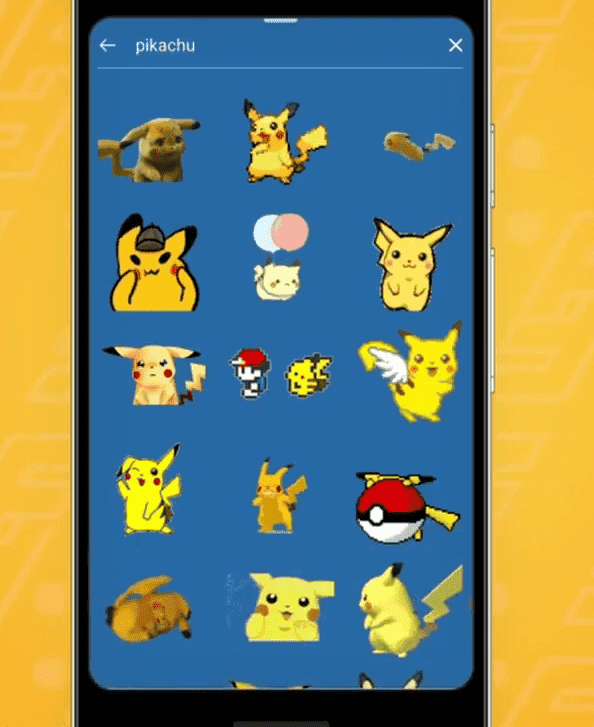
All I have to do is tap the search bar at the top of typing Pikachu and press the search icon on the keyboard. You can scroll until you find the one that you prefer. I’m going to choose one; if you need to, you can use two fingers to resize it and make it fill up as much of the screen as possible.
I’m going to download this story on my phone. You can hit the download button above to save it on your phone. Now Instagram has saved the story to my phone as a regular video, not a GIf, so I can press X, i.e., close at the top left corner, and choose discard.
Now you get to transfer this video from the gallery to your laptop or computer, and I know that this can often be a tricky process. If you’re an Apple user, you can use AirDrop.
But if you’re a Windows user, you can use Airdroid, which I’ve used before and works really well. In my case. I’m just going to go to my normal Google Gallery, open the picture, swipe up, and select the option which says Backup. Now that means that this video will now be backed up to my Google Photos accounts in the cloud so that I can open my laptop, go to Google Photos, sign in, and my picture is will already be there.
Open the video, click on the three dots on the top right corner and choose Download. Once it’s done, you can open up DaVinci Resolve and import your video and the GIF you’ve just downloaded in the Edit tab.

Place your two clips in the Timeline, select the Pikachu one, and now open up the Fusion panel. If it’s not really showing up, click on Nodes at the top. MediaIN is your clip, so select it and bring up your effects By pressing Shift + Space on your keyboard. We’re going to search for the Word key. As you will see, there’s a whole list of effects, so feel free to experiment with the one that you want.

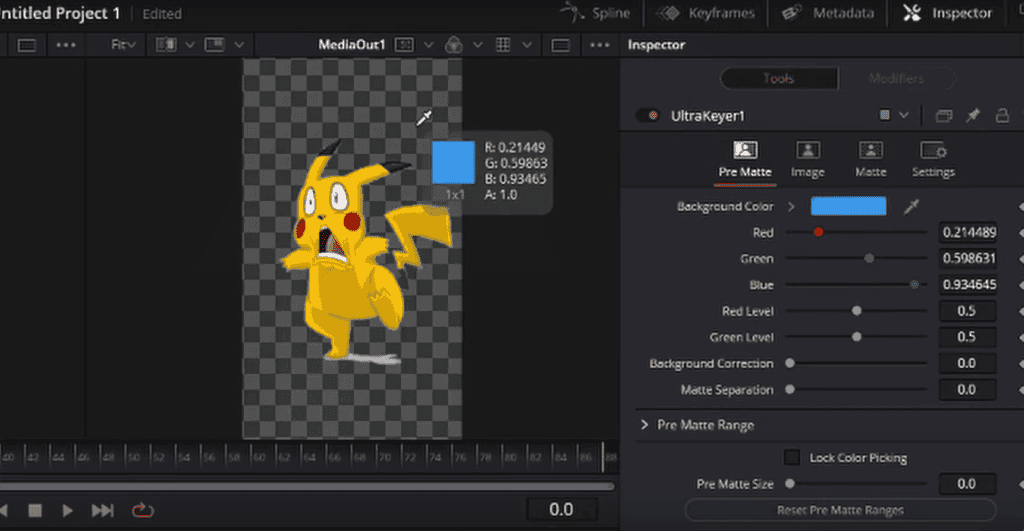
For this tutorial, I’m going to choose Ultra key if you’re not yet familiar with this effect. The way it basically works is you select the color that you want to remove the effects, analyze each and every frame of the video and remove all the pixels that are the same or similar colors.

In the Inspector panel, let’s use the eyedropper tool. Click Hold and drag over the blue background. In the Matte panel, you can increase the blur a little bit to finesse the edges.
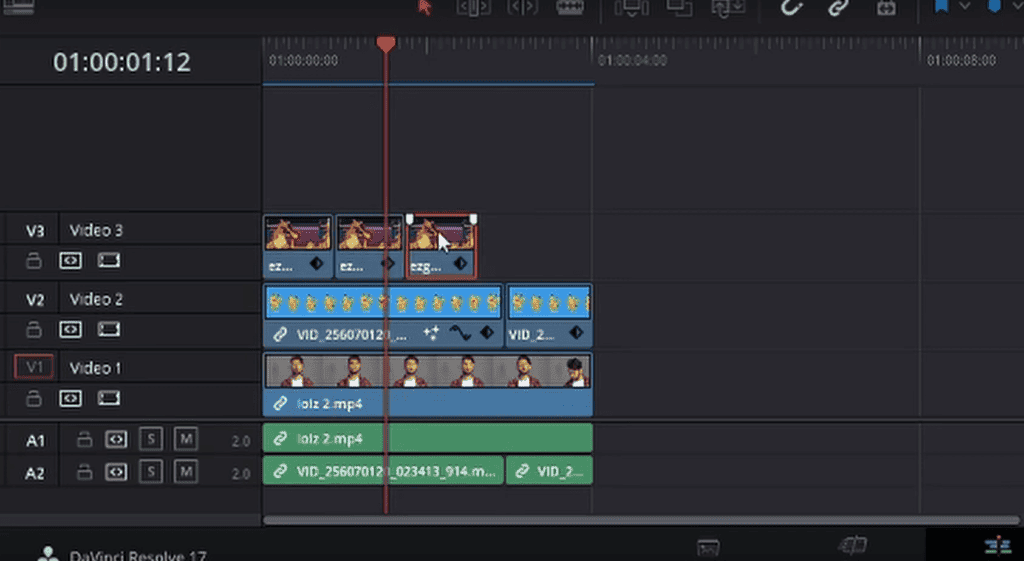
And just like that, by default, the effect should work just fine without us having to play around with the settings. So if we go back to the Edit tab and duplicate the GIF in order to loop it, then we will get a working GIF.
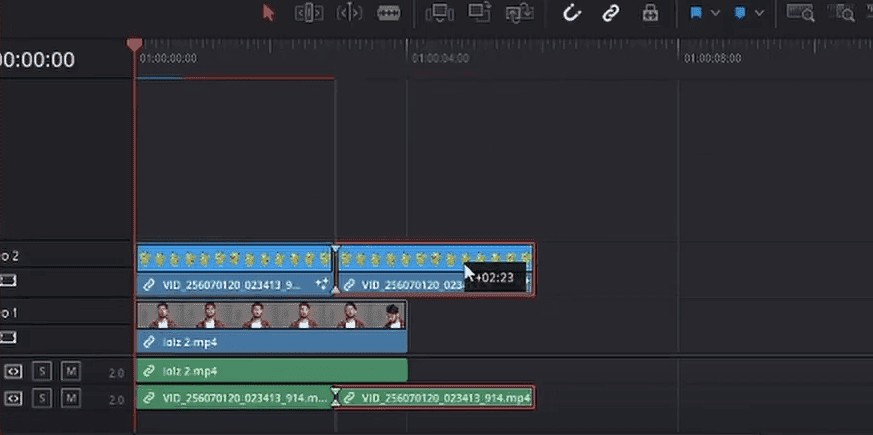
It’s crucial to bear in mind that if the actual GIF contains any blue or even specific similar colors, then the ultra key will remove it. So you’ll have to either choose a GIF that doesn’t have any blue in it or change the blue to green in the original story on Instagram. And that’s my second technique to import GIFs inside of DaVinci Resolve.
Now you can resize it and move it however you like in your videos.
So there you have it. These are the best technique to import GIFs in DaVinci Resolve.