
Hello everyone, and welcome back to our blog. Today we will discuss how to reverse a clip in DaVinci Resolve and how to add a smooth reverse effect in DaVinci Resolve. First, let’s start with why do we need to reverse a clip in DaVinci Resolve? There are a couple of different areas where you might want to use this technique, and these are-
- While editing frame blocking transitions. All you need to do is to film the second half of your transition in reverse. If you were using autofocus, then when you go into the post, you can switch the direction of the clip, and everything would look normal.
- You can use reverse clip by throwing a little sound effect, speed it up, and you’d be good to go. You can see this a lot in movies, especially like explosions. They’ll show the explosion, and then they’ll reverse everything so you can actually see how it got started or who started it.
- Music videos also use this a lot to quickly switch the direction, for people running or jumping or dancing or other stuff.
Reversing your footage is just a fantastic tool for transitions and just creative edits in general. Alright, let’s jump into DaVinci Resolve, and I’ll show you how to reverse a clip in DaVinci Resolve .
How to Reverse a Clip in DaVinci Resolve ?
I’ve got a couple of Clips queued up in DaVinci Resolve, and the first one is of a woman playing with her dog. We are going to try the reversing effect on this clip. Reversing this clip is easy. You just need to follow the below-mentioned steps.
- Select the clip that you want to change.
- Go ahead, right-click on the selected clip, select- Retime Controls, as shown in the above screenshot.
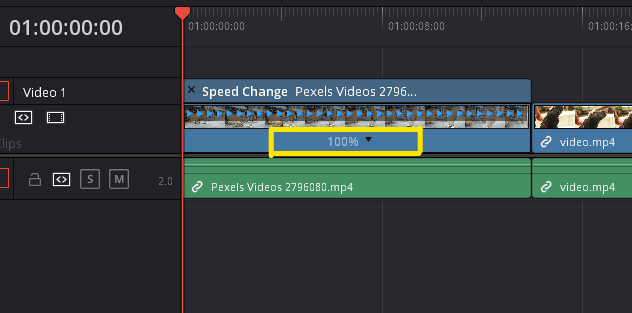
- Go down to the little drop-down arrow that says 100%, as shown in the screenshot. Click on that.
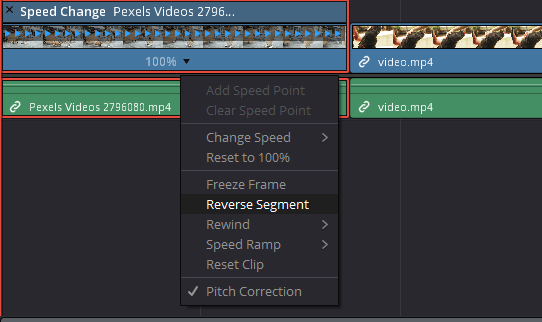
- Hit Reverse Segment, as shown in the screenshot.
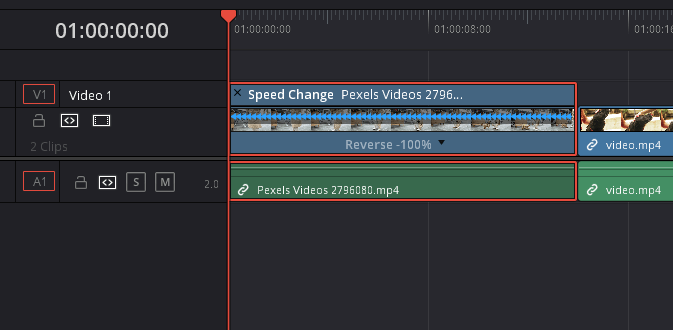
- Boom! You got your clip reversed.
So, now we know how to reverse a clip in DaVinci Resolve, it’s time to discuss how we can use it in a clip to add a smooth and cool reverse effect.
How to Add Smooth Reverse Effect in DaVinci Resolve?
We all have seen those video effects that look super smooth and boggle the viewer’s minds. So that’s why in this blog, I’m going to show you the smooth reverse effect, which takes your everyday normal-looking slow-motion clip and adds some flavor to it.
Now that we’re in DaVinci Resolve, we’re going to go ahead and start creating this smooth reverse effect. The only thing you really need is a clip, and the one that I’m using specifically for this effect is shot at 120 frames per second. It needs not be shot at 120 frames per second, but it is ideal. I just went on a stock video website like art grid and downloaded a clip from there.
Add Freeze Frame in DaVinci Resolve

- Once you have your clip, just go ahead and drag it onto our timeline. If any of you guys are wondering about the timeline settings, we’re using 24 frames per second and 1920×1080 resolution.
- Just zoom into the clip by holding alt and using your scroll wheel, and then look through the clip to find the place that you want this effect to happen.
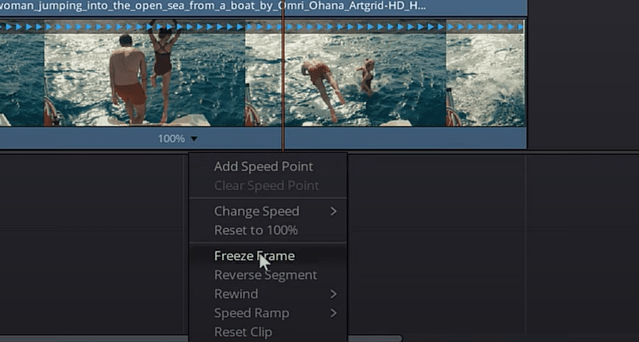
- For this clip, it’s right as the guy’s about to hit the water. Right-click on the clip and select Retime controls, as shown in the above screenshot.
- Hit the drop-down arrow and select freeze-frame, as shown in the screenshot.
I want to have the person diving into the water and, just right at the last moment, stop and reverse. It breaks the assumption. You assume that the person is just going to dive right in and splash, and it’s going to keep moving forward, but no. It stops, and it reverses. It just does the opposite of what you think; that’s why I love to throw this effect in there. The reverse effect is just kind of like a curved wall every once in a while and keeps your audience on their toes and stops them from being bored.
Reverse a Clip in DaVinci Resolve
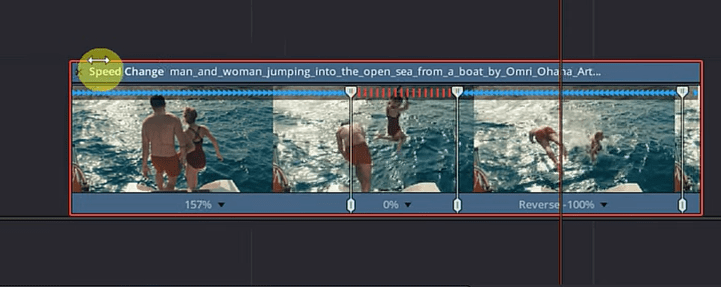
You can see that there’s a freeze-frame right in the middle of our clip, as shown in the above screenshot of step 3. We want our effects to go from normal speed to freeze-frame and then reverse. We need to add another speed point to make our clip reverse.
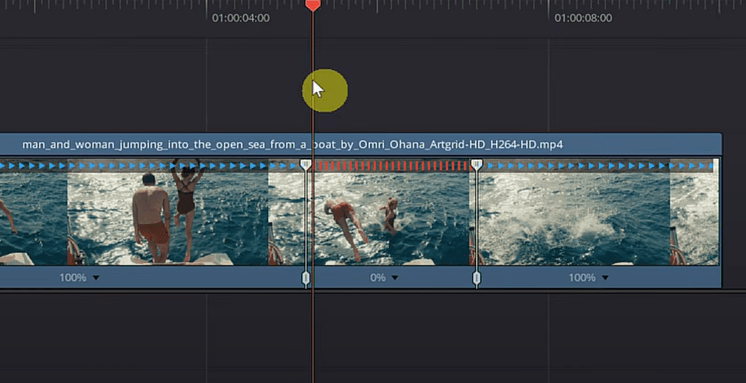
- You want to add a speed point close to the clip’s end, as shown in the screenshot. You have to add another speed point at the end because DaVinci Resolve will not recognize this as a section that can be reversed. So, by adding a speed point, it will allow that section to be reversed.
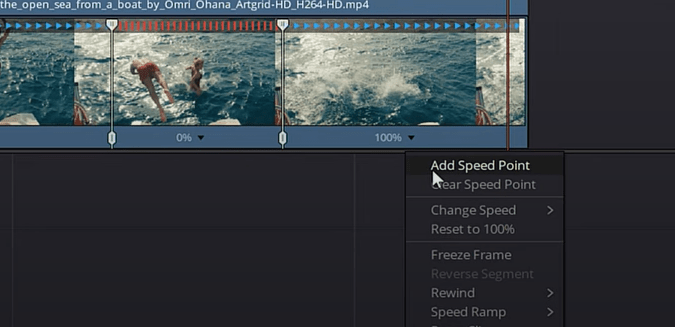
- In this section, right after the freeze-frame, hit the drop-down arrow and select the reverse segment, as shown in the screenshot.

Smooth Reverse Effect in DaVinci Resolve
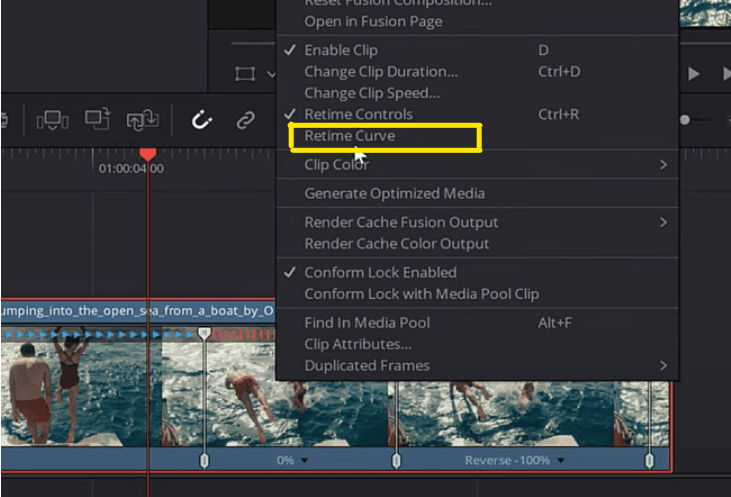
If we move our play-head over, you see that the section is now reversed, but it’s not smooth.
- To fix this, right-click on the clip and select retime curves, as shown in the screenshot below. This will pull up our keyframe editor.
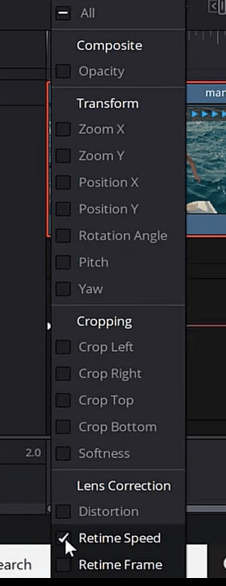
- Hit the drop down arrow in the top left, as shown in the screenshot below.

- Uncheck Retime frame and check Retimes speed, as shown in below screenshot.
We can see our speed changes, and clearly, that is not smooth. We have our normal speed, and our normal speed drops down to the freeze-frame, and then from the freeze-frame, it goes down even more to the reverse, as shown in the screenshot.
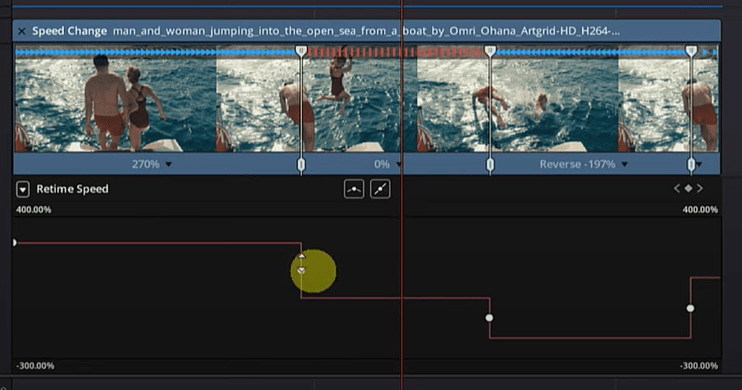
- We have to click on the point and hit smooth keyframe, as shown in the below screenshot. Then do the same thing for the other keyframes.
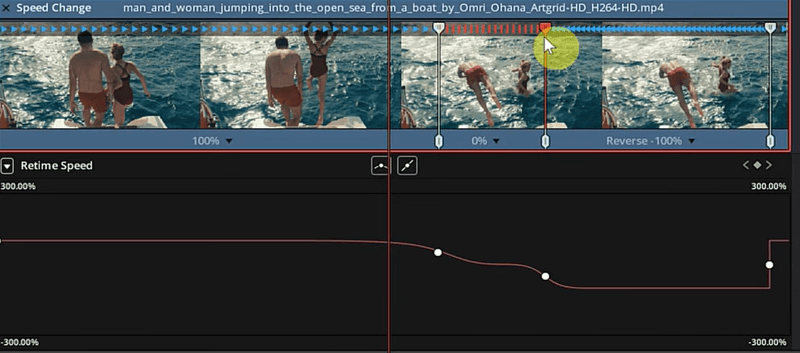
You can adjust the curves by clicking and dragging the handles all around, but if you only want to modify one side of the curve, you can grab the handle on that side, hold control, and just drag it around.

- Once you have everything the way you want, grab the top tab on the speed point and drag it closer to where the speed ramps, as shown in the screenshot.
Now, the effect itself looks good, but the clip is choppy because we’re transitioning from 100 percent speed down to zero. So, there’s going to be some frame losses in there. To fix that, we can enable the optical flow.
Enable Optical Flow in DaVinci Resolve
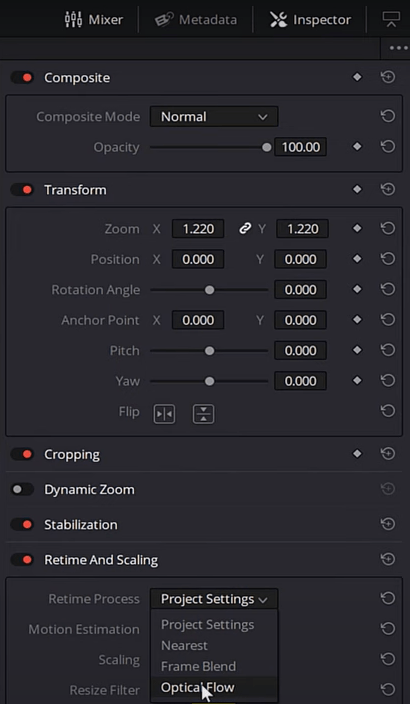
- Click on your clip right and go into the inspector tab.
- Move down to the retime and scaling.
- Change the Retime process to optical flow, as shown in the screenshot.
- Then under motion estimation, change it to enhanced better, as shown in the screenshot.
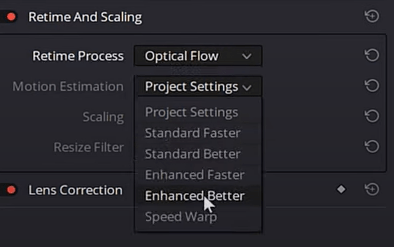
Depending on your clip, you could play around with the motion estimation. It doesn’t have to be enhanced better. Personally, that works well for what I do and the look I’m going for. But just try it all out.
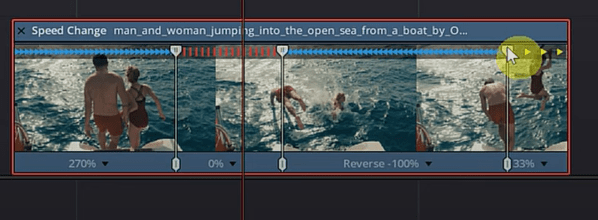
It looks pretty fantastic, and if you want to add some emphasis on the reverse effect, you can go back into your retime controls and make the beginning and the end section faster.
- To do that, go ahead and grab the blue tab as shown in the above screenshot. And drag it closer to the freeze-frame section. You’ll see that the speed increases.
- You can do the same thing for the reverse section, but instead, grab the top of the speed point as shown in the screenshot. And drag it towards the freeze-frame.
- So, there you have it, the smoother reverse effect in DaVinci Resolve!
So, I hope you were able to find the answer to all of your questions regarding DaVinci Resolve, like How to Reverse a Clip in DaVinci Resolve? and H How to Add Smooth Reverse Effect in DaVinci Resolve? And if you have any more doubt regarding DaVinci Resolve, make sure to check out our other articles. If you have any suggestions feel free to contact us.
- Also Read-4 Best Davinci Resolve Effects
- Also Read- How to Undo in DaVinci Resolve
- Also Read- How to use qualifiers in Davinci Resolve