
How To Render 60fps In Davinci Resolve.
Welcome, everyone. In this article, I’m going to show you how to render 60fps in Davinci Resolve and use Handbrake in order for you to upload your videos faster at 1080p 60fps to YouTube. Of course, this tutorial can be followed for any resolution.
The first thing we’re going to do is just make sure that you open the Davinci Resolve, and I am using the free version of the program, not the paid version, just for the sake of this tutorial.
Make sure to open whatever Project, whatever you’re working on, and have successfully edited your video, and we’re going to go straight ahead to the delivery tab. The one thing I recommend is that you make sure to go to render and make sure you have it on the entire timeline.
Of course, you can switch it to in and out points depending on how many videos you are going to render.
How To Render 60fps In Davinci Resolve.
1. Preparing your Project for it to be exported in 60fps
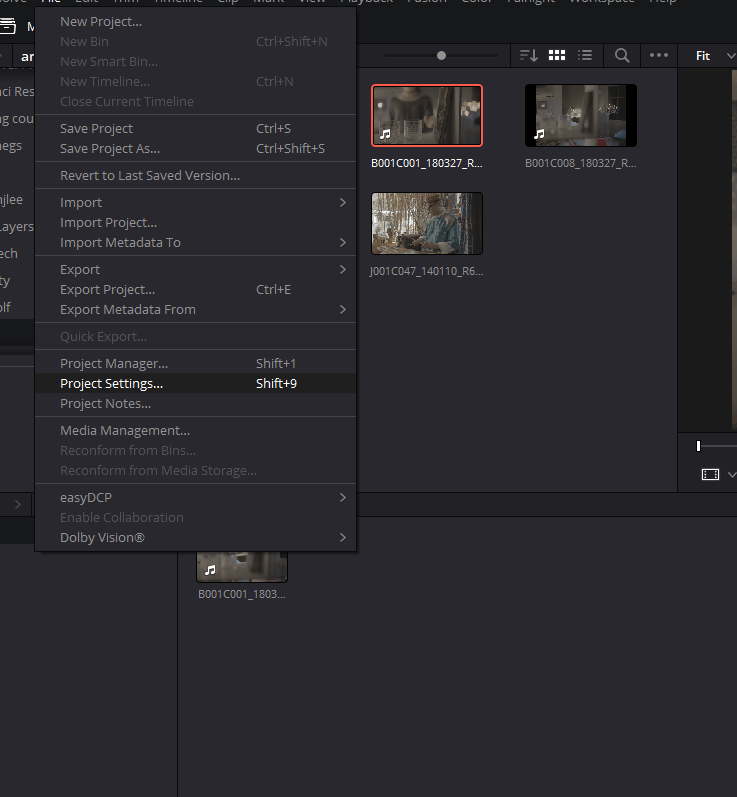
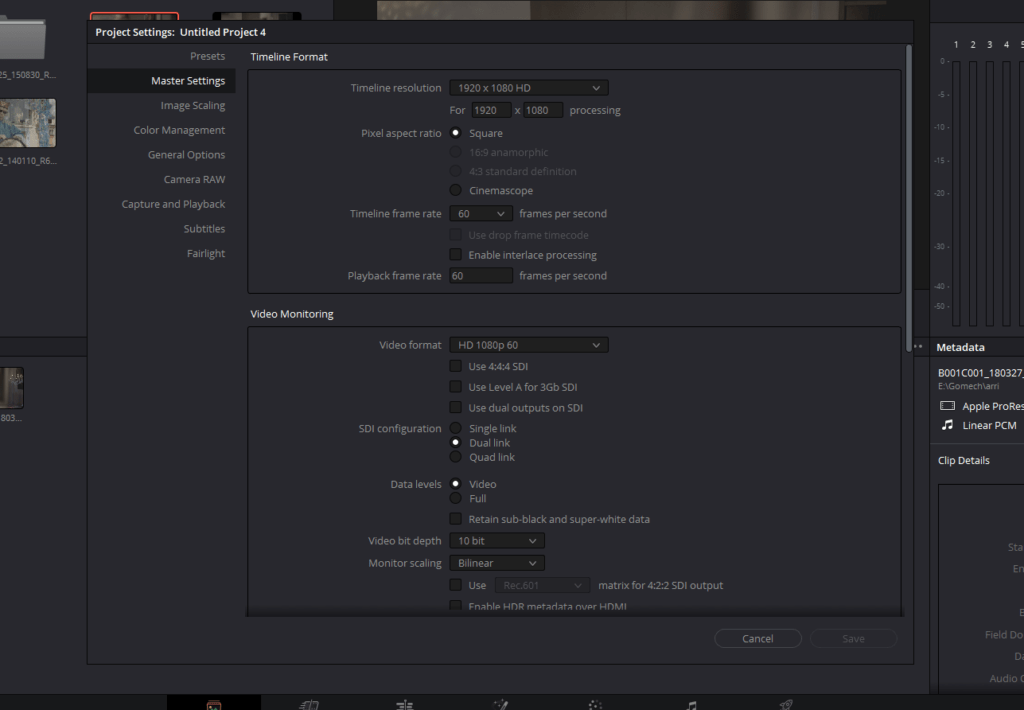
Before you even start your Project, your first need to go to File>Project Settings>Master Settings and make sure your Timeline Resolution is set at 1920 x 1080 HD, but you can set it to 3840 x 2160 Ultra HD for 4k output and your Timeline frame rate is set at 60 frames per second. If you don’t manage to set your frames per second at the beginning of the editing, you won’t be able to edit it later in the Delivery tab.
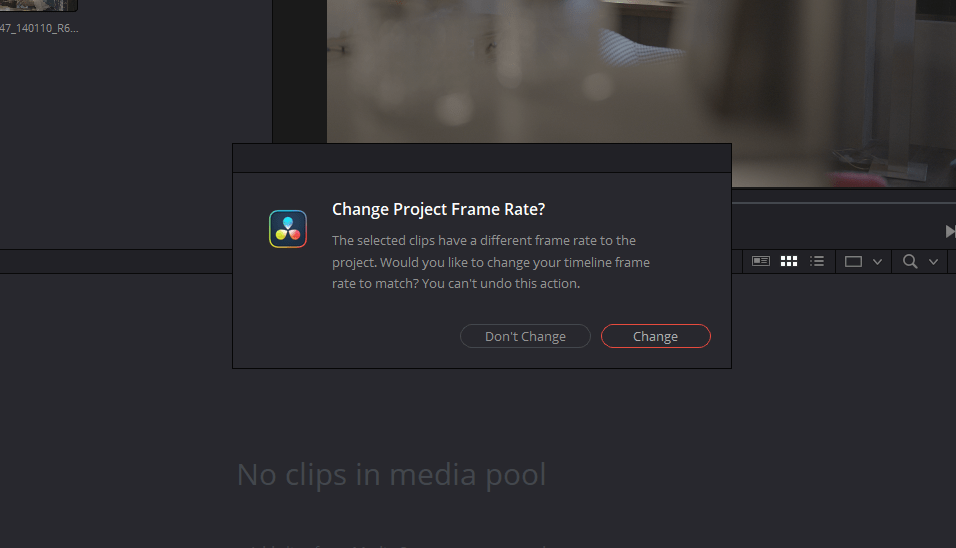
One thing you also have to make sure of is, your footage is recorded in 60fps to edit your Project in 60fps. If You don’t put media files that are shot in 60fps, Davinci Resolve will ask if you want to change the project frame rate.
If you click on Change, your project setting will change to the frame rate of the media you are trying to put it. So it is important to have your videos to be shot or recorded in 60fps.
2. How To Render 60fps In Davinci Resolve

Now when we are on the delivery page, we’re going to move over to the top left corner. There’s a lot of presets that you can choose for your video.
The main two that most people use are either YouTube or H.264 Master. The one that I use is H.264 Master and Custom.

So beginning with how to render at 60fps on Davinci Resolve.
I will show you how to do it from the Custom options. First, we will start from the Video tab in the Custom. You can keep your Format at MP4 or Quicktime. In my tests, if you are uploading your videos to any digital platform such as Youtube or Vimeo, the best one is to go for MP4.
Heading to Codec, you will have only two options, H.264 or H.265 if you choose MP4; I mostly use H.264 because my work is mostly to upload on Youtube and H.265 compresses a lot already.
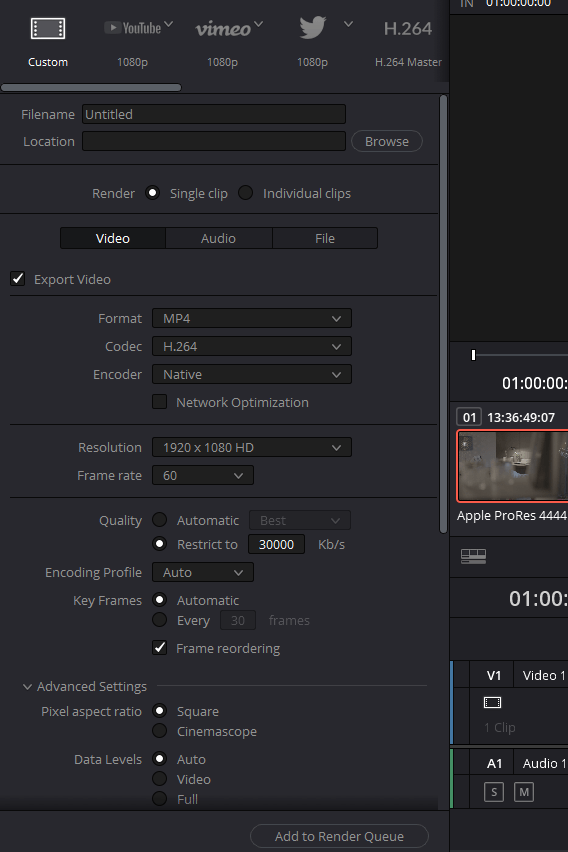
Heading to the resolution, you can keep your resolution at whatever delivery you are going for; in this tutorial, I am going to set it at 1920 x 1080 HD, but you can set it to 3840 x 2160 Ultra HD for 4k output.
Coming to the most important part of the article, you have to keep your Frame rate at 60fps.
What I mostly do for my videos is I keep quality restricted between 30,000kb/s to 80,000lb/s. Yes, you could switch it to whatever number you want. Just remember, the higher the bid rate, the higher the quality, the higher the file size lowering the bid rate, the lower quality, the smaller the file size.
Yes, there is a way to still keep your original quality while reducing your file size, thanks to Handbrake. We’ll get into that in a little bit. The reason why I keep it at 30,000kb/s is that it is kind of like the sweet spot for 1080p 60fps. You got to remember that even if you lower the quality to 12,000kb/s, yes, it will still look okay, but it’s not going to be the best quality because remember, YouTube does compress your videos.
Your miles may vary depending on the length of videos you edit and how many effects you put in. You have to do a lot of tests. I always keep it at 30,000kb/s and make sure your encoding profile is high.
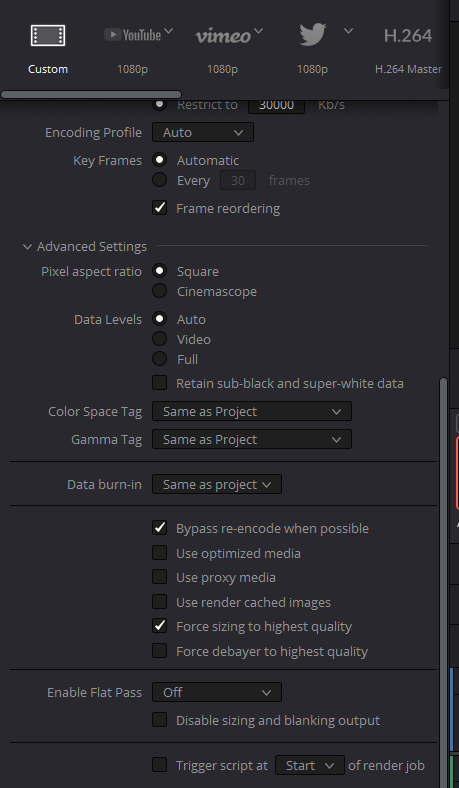
Then head to the Advanced Settings and make sure your Data Levels are set to Auto. Also, make sure “Use optimized media” is unchecked and “Force sizing to highest quality” is checked.
You can keep every other setting at its default value. You can also save your settings as a preset by clicking on the three dots above the menu and selecting “Save As New Preset,” and giving it a name.
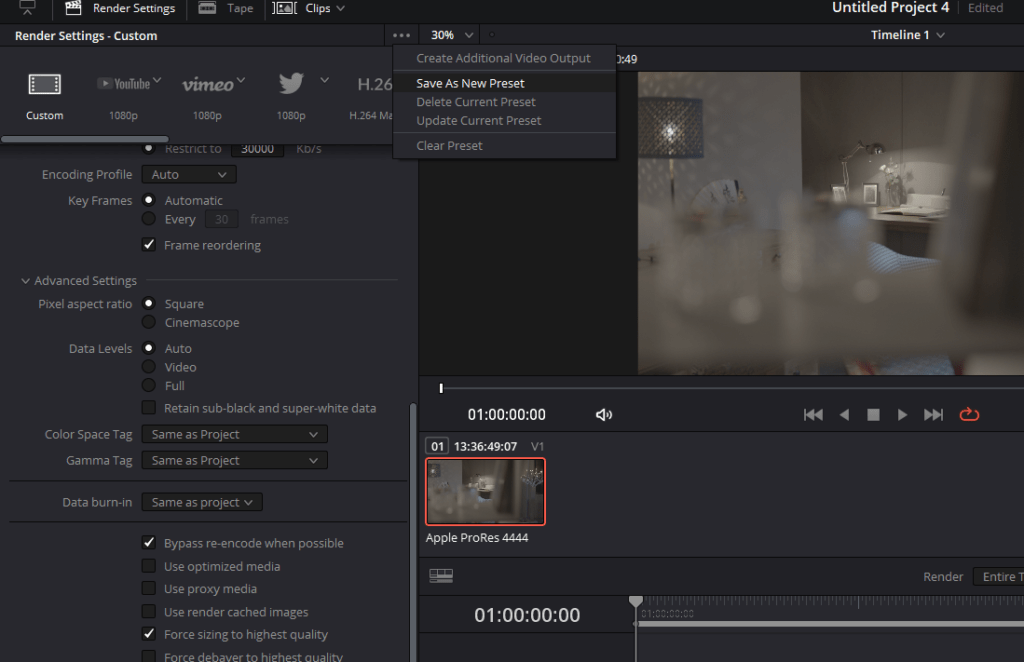
So next time when you are exporting 60fps in Davinci Resolve, you can just use your self-made preset. It will make your work easier.
Of course, the last thing you need to do is just name the file; whatever your video is going to be named, put it in whatever location added to the render queue.
3. Checking files after delivery
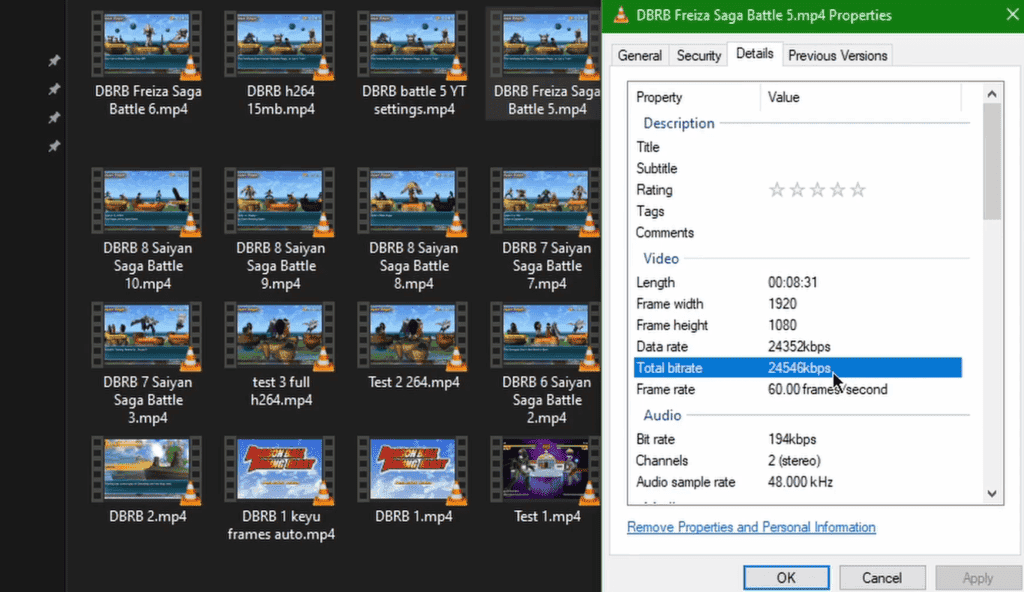
Right now, I’m going to show you the videos and how to make sure they are exported in 60fps. After heading to the location, you exported your video; you can right-click, go to properties and go to details. You can see the Frame rate of your video and the resolution it was exported in.
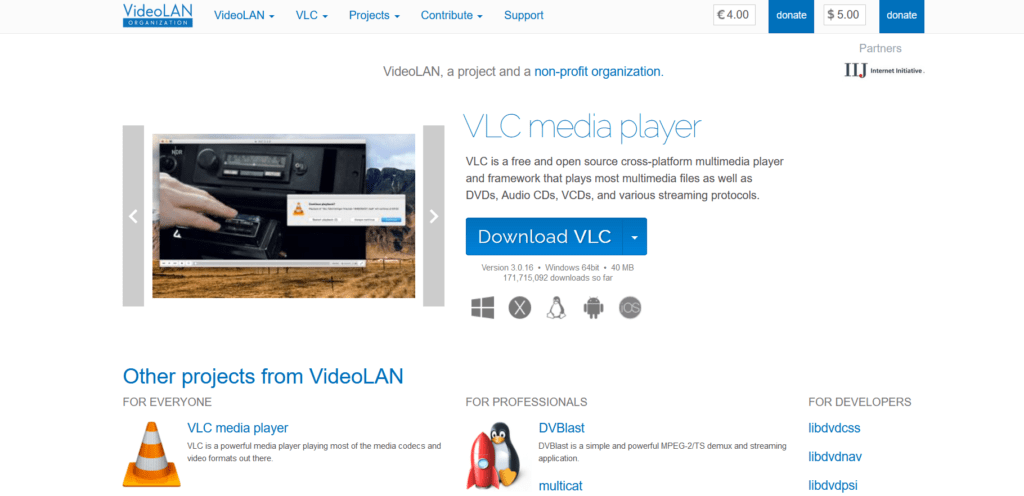
I use a media player, which is called VLC. It’s an open-source media player, and you can download it for free. As you make sure, everything looks good, really nice and clean. It’s time to transcode the video to make it smaller in size.
4. Using Handbrake to lower the file size
Now for people who slow internet speeds or just want a smaller-sized video to save space on a long-term basis. The best they can do is use a software called Handbrake. It will reduce the file size but not reduce the quality of the video.
I had to wait long in order for me to upload my videos to YouTube. Right now, we are going to switch over to Handbrake so we can keep our original quality video, but lower our video file size so that we can upload to YouTube a little bit faster.
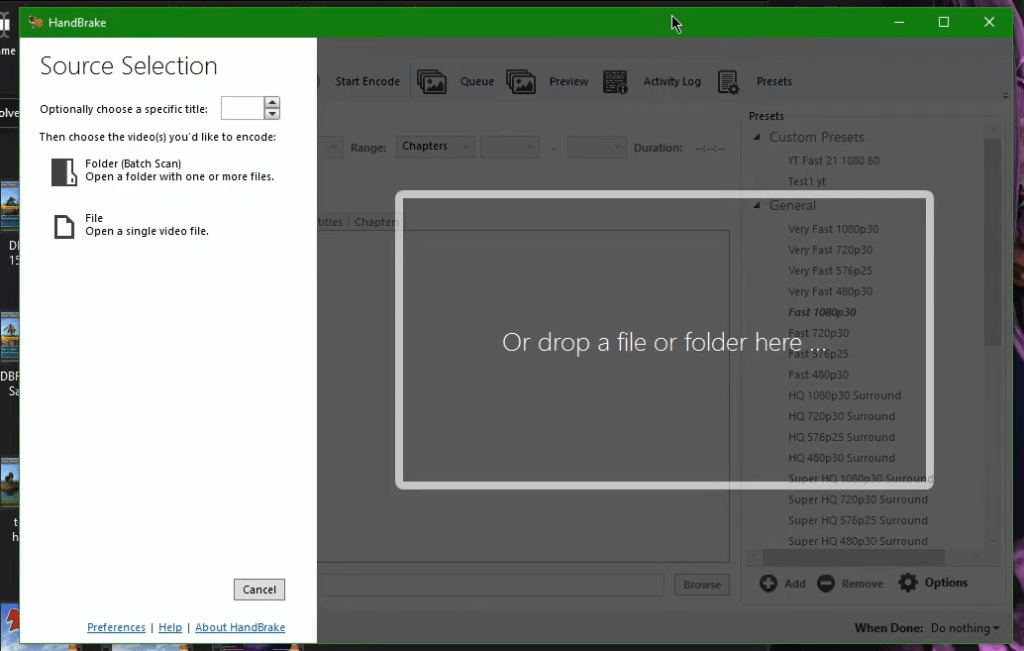
Now, everyone, I have Handbrake already open, and of course, you can download it for yourself, and it’s free. All you need to do, you could look for the video and drag it into Handbrake.
Now the video is ready to encode so that we can do all that stuff to upload our video a lot faster. I’m going to show you the presets that I use basically. All you need to do is go over to the right where General is and select whatever preset you want and make sure it is at 60fps.
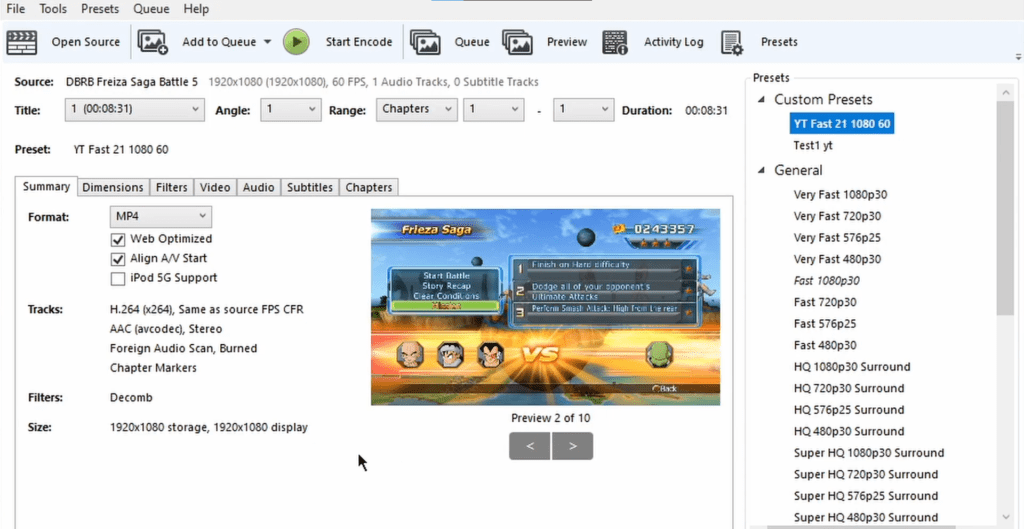
I already have a preset so you could follow along and just set up the settings for your Handbrake. Right here, in summary, make sure that you have it at MP4 and you have it at web-optimized so that whenever you go to upload to the web or to the network, it will be a little bit easier to playback your video.
It really helps out a lot when it comes to uploading videos to the internet. You do want to check on that. Of course, keep Align A/V Start checked.
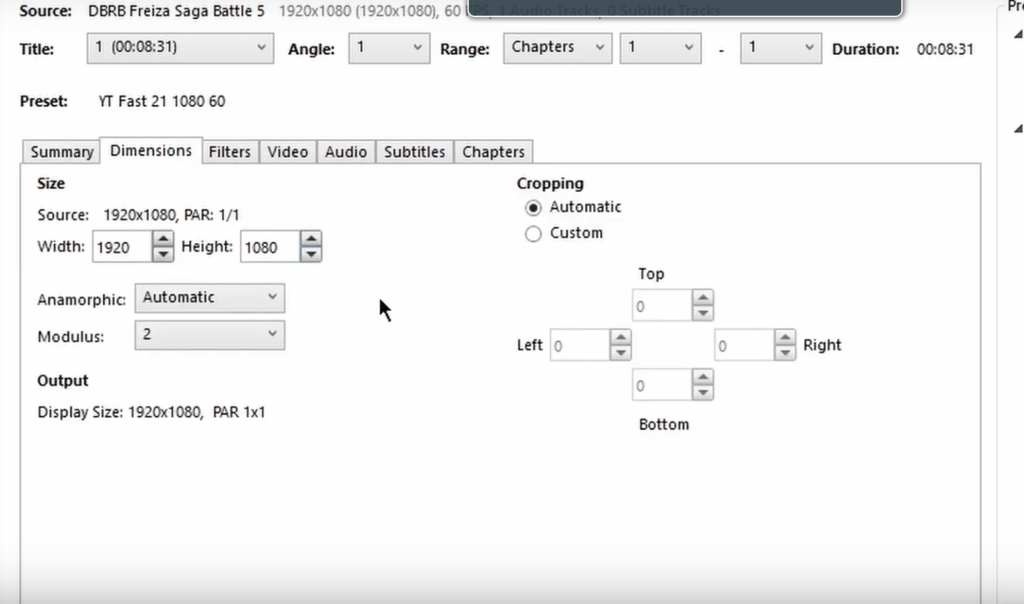
That’s how it is, now going to dimensions. It’s basically your resolution. You don’t need to change anything. If you do see numbers in the Cropping section, make sure you hit Custom and make sure everything is at zero in Top, Bottom, Left, and Right.
Now moving on to the filter tab, there’s nothing to change here, guys. Just leave everything at default. Now finally, right in the video, this is where everything happens.
What I mostly do is mostly keep everything at default. As you can see right here, Video Codec is set to H.264; the Frame rate is the same as the source.
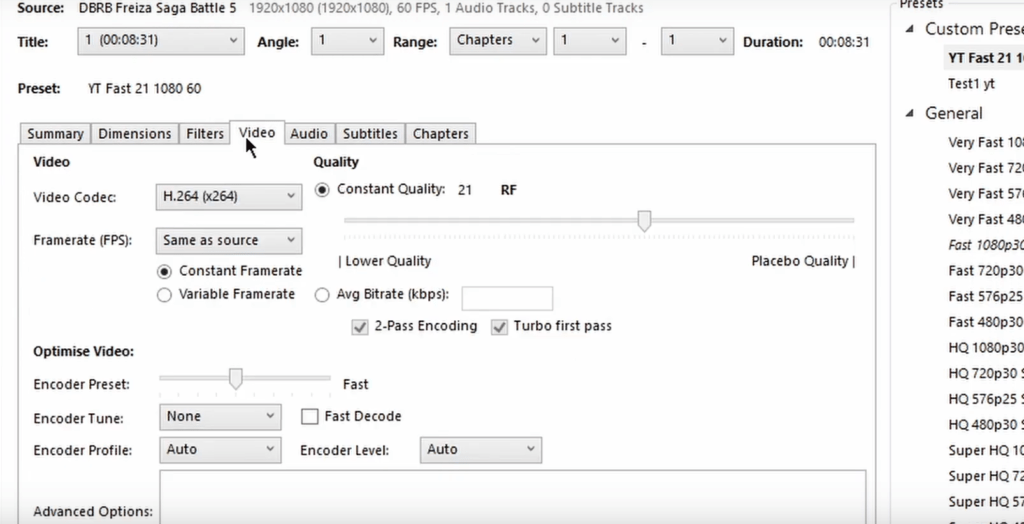
I have it at constant frame rate because apparently, right here, in variable frame rate, they say it’s not compatible with some players, so you got to be careful with that.
I mostly keep it at a constant frame rate. Now coming to the optimized video, I keep Encoder Preset at fast because if you go to the slow side, yes, your videos are going to look a little bit better, but the rendering times are going to take a while or your encoding for Handbrake.
I always keep it as fast, and it’s been working well with me. Of course, yes, I could go a little higher if I want to, but I mostly keep everything at fast. Now it’s going to depend on your CPU, how much it can handle, and how much it will render, but you have to do some tests.
In tune option, keep it on none. You only need to change anything profile and level. I keep my Encoder Profile and Encoder Level at Auto. You can change your Encoder Profile to High, but Auto works well too.
Then finally, going right to RF, I mostly use 21 as the quality number. Of course, if you go to suggested values, they are 18 to 24 for standard definition and then 20 and 23 for high definition. You go to the right more quality; you go to the left lower quality. You do have to play around with what works best for you.
For me personally, 21 has been great. Of course, yes, I could go higher if I want to, but that’s also going to increase the Loading time for the encoding.
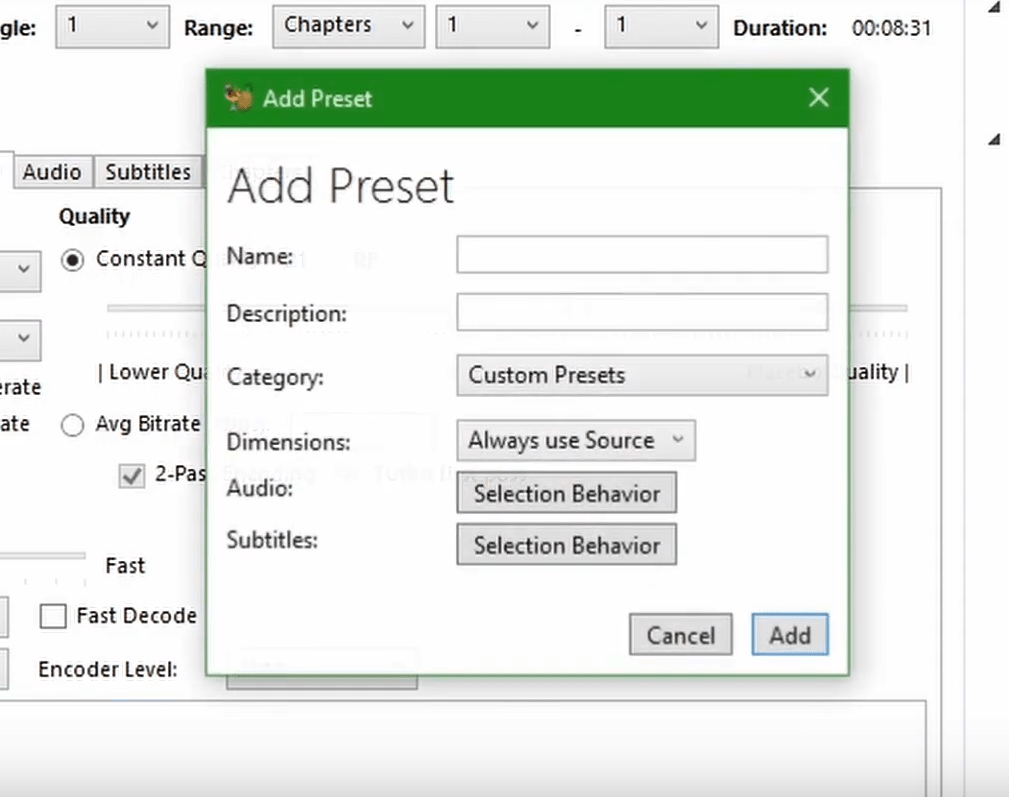
Then coming to the Audio tab. I always keep my Bitrate at 192 all the time, and that’s pretty much it. That’s all the settings. If you do want to save it as a preset, all you have to do is go to add, name the preset, whatever you want, and just click add, and it will show up in Custom Presets.
One last thing you can do is to make sure in Save As; the file extension can be changed to MP4. You just erase the existing file extension with MP4. After setting all this up, you can click on Start Encode to render the final output.


Now when you go to the export location and go to Properties, you will see you have lowered the file size of your 60fps video, but when you play the video, the quality will be the same.
So that’s how you Render 60fps in Davinci Resolve and transcode it in Handbrake.
I hope this article answers all your questions.
Happy Editing.
- Also Read-How to get your short film funded
- Also Read-How do you write a compelling short film
- Also Read- How to export from Premiere Pro?