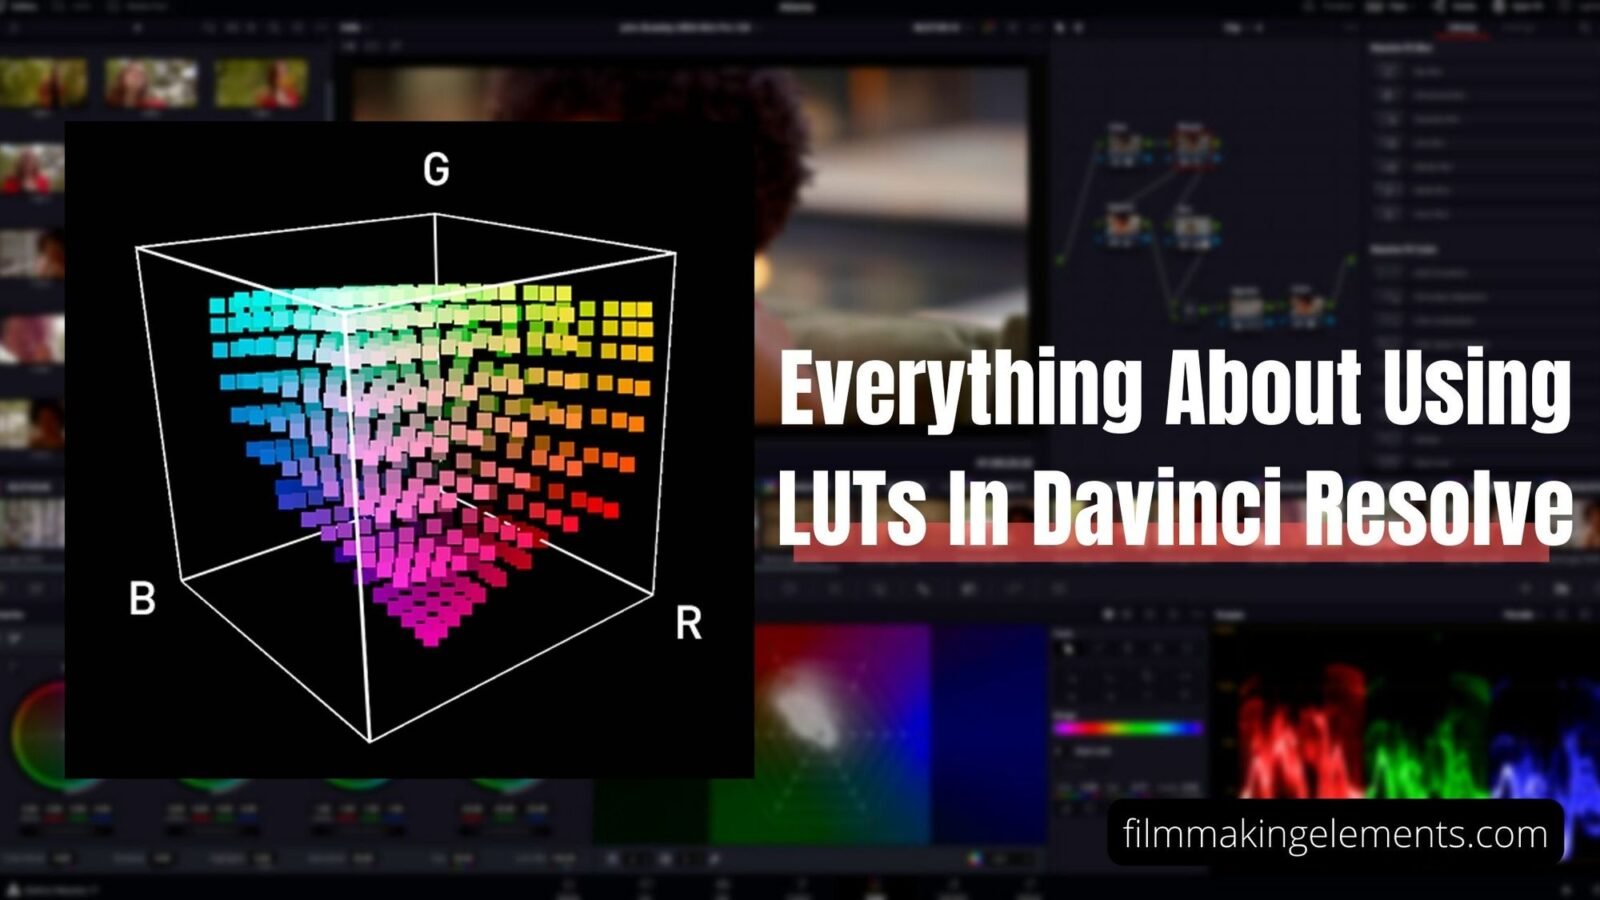
Welcome back, everyone! So in this article, we walk you through everything about using LUTs in Davinci Resolve and how to apply lut to all clips Davinci Resolve.
But wait! What is LUT (Look Up Table)
So we’re going to go over LUTs; what is a LUTs, or a lookup table is a document containing a table of values that are looked up by the software you’re using, in this case, Davinci Resolve. It translates an image from one set of color values to another.
Doing this a lot can translate an image from one Gamma and color space to another, shortcut creative grading, or even make sure that a reference monitor gives a more accurate image.
We can use LUTs in the grade for several purposes, both technical and creative. We’ll go over the primary ones.
Calibration LUTs
This is a super important one in facilities and high-end industry; a LUT calibration is used to make an external reference monitor display colors correctly within a given color space.
So, for example, a calibration LUT can be used to compensate for known display errors in a monitor to ensure that it accurately represents Rec.709 for delivery to broadcast.
Technical LUTs
These are intended to translate an image from one color space and Gamma to another. This then attempts to ensure that the image comes out the same looking correct in multiple playback scenarios.
For example, we have a video meant for the Web and broadcast. We don’t make two separate grades. We grade to one standard first. In this case, it would-be broadcasters. The accuracy would be the most important due to things like QC (Quality Check).
After that, we can apply a LUT that translates our image from Gamma 2.4, which is appropriate for broadcast, to Gamma 2.2, suitable for Web. We then have a single graded video stream that we can translate to fit multiple viewing scenarios.
We can use LUTs like this to prepare an indie feature film for a DCP package using a Rec.709 to P3 XYZ LUT for theatrical usage while still being able to deliver the same stream to broadcast.
We can also use technical LUTs to make HDR Timeline SDR as well.
Display LUTs
One of the most common usages of the lot is the display LUT; a display LUTs changes the image shown on a monitor without changing the source footage that is being displayed. A display that is loaded into a monitor or camera, and then when shooting, you get an image that looks normal and makes more sense to the eyes of all involved than a flat image in LOG.
Together with Creative LUTs, these can start an argument depending on your DOP, a display that aims to give you a good approximation of a finished image while capturing LOG footage.
Now here’s the thing. Plenty of people out there think a LUT like LOG C to Rec.709 is a one size fit in every scenario. that’s not accurate.
A LUT is essentially a preset color transform. It was made with a particular set of conditions in mind with lighting, set design, etc. So if you take your LUT into a different lighting setup or daylight changes throughout a shoot, then it’s not going to produce the results you might be after.
Arri provides a LUT generator that allows you to change how the LUT behaves. The real trick to display LUTs is to get a good gel between your exposure and a LUT intended for your lighting conditions and camera.
Display LUTs are very important because it’s very easy to accidentally badly expose an image if you’re monitoring in LOG as it leaves a good chunk of the tonal range empty in its ideal exposure.
A display that can be supplied to the colorist to assist with the grade is typically made on the set by the DIT team.
Creative LUTs
These are shortcuts to a creative look during the color grading. Now, I don’t use these very much as the cold, hard reality is that any preset look will produce variable results with real-world footage that was not shot with that particular preset in mind.
Together with the fact, LUT cannot carry any secondary grades.
This means that LUTs that go for more stylized looks are a pretty blunt instrument.
These kinds of lights are popular with indie filmmakers who are starting out as they can give a head start when going for something that looks sophisticated. But the truth is, a real grade will consistently outperform these.
That being said, some of the film print emulation LUTs are pretty useful when looking for a particular print film stock look. This was an excellent intro to the primary uses of lookup tables.
In the next section, we will look through how to use LUTs in Davinci Resolve and how to apply lut to all clips in Davinci Resolve.
- Also Read- How To Use Color Warper In Davinci Resolve
- Also Read- How To Buy Davinci Resolve Online (In 1 Minute)
- Also Read- How To Export In Davinci Resolve- Absolute Guide
How To Use LUTs In Davinci Resolve- 5 Different Ways

In this section, we will take a look at the application of LUTs within resolve itself.
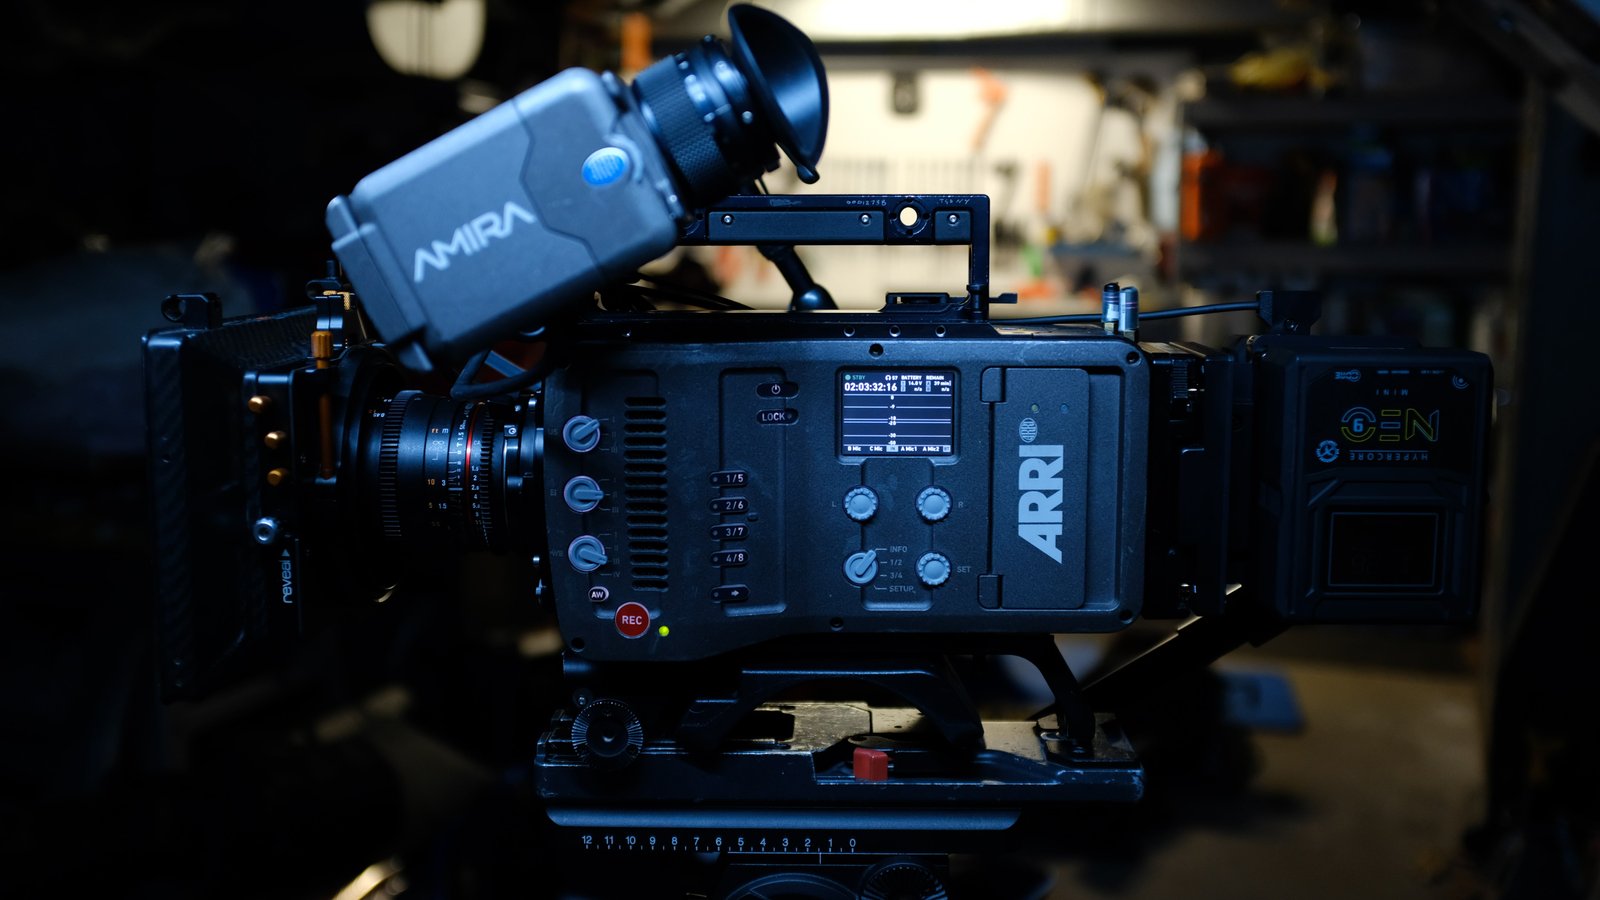
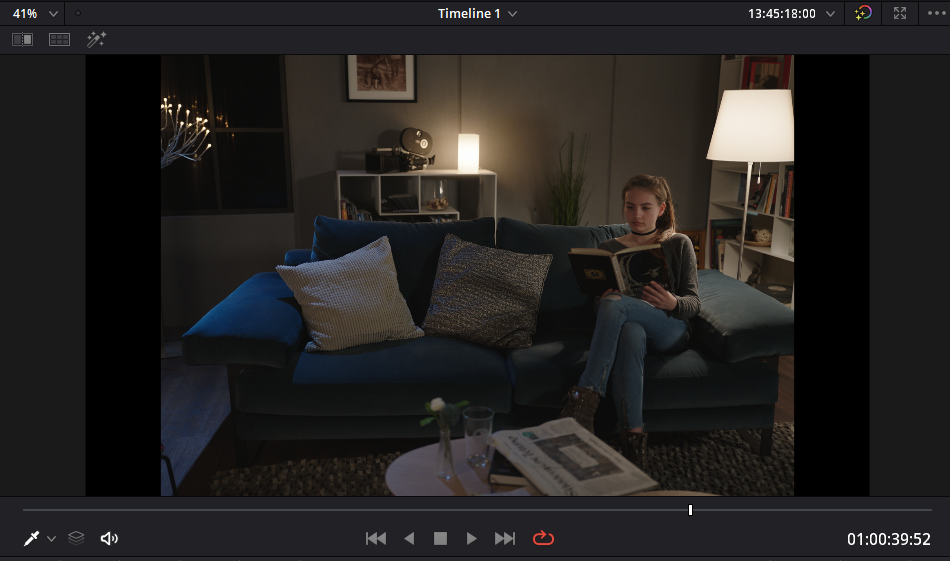
We’ve got some footage loaded in our Davinci Resolve to use, and we can approach this in several different ways. The footage that you see in the picture is shot with ARRI Alexa in LOG C. We can grade the LOG footage from the ground up. And I quite like doing this, or we can apply a LUT to ensure that we’ve got an accurate translation from LOG C to REC.709.
1. Applying LUT at the starting
First, we can apply an input LUT; this applies a LUT and its transformation right at the start of our pipeline. This means that our RGB input, the little green dot, represents the image with the LUT applied. It will happen before everything else.
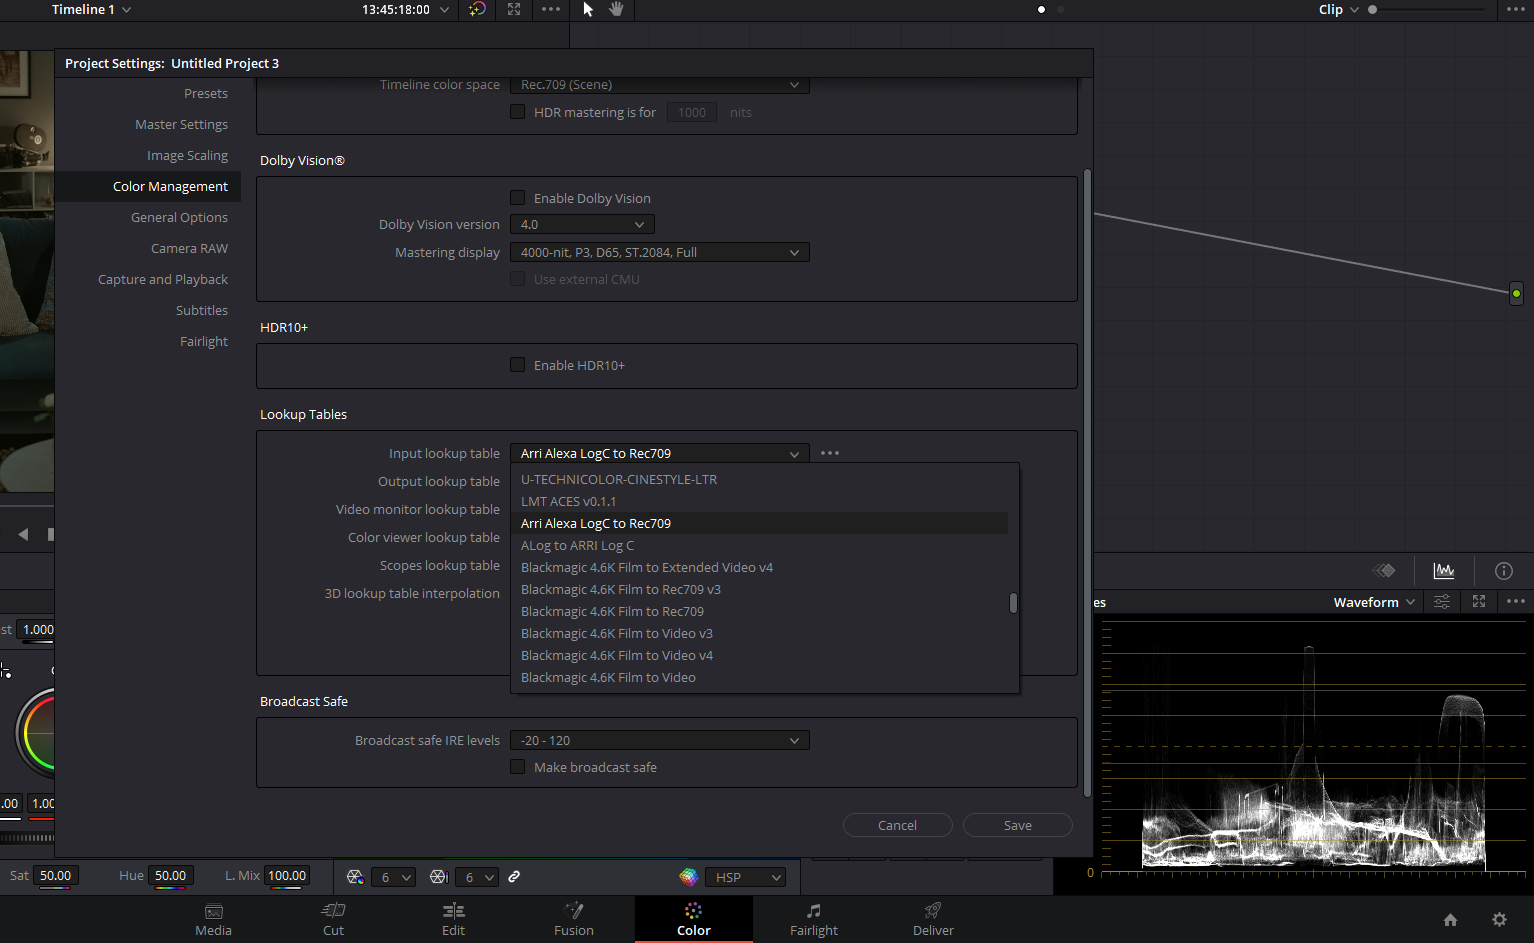
To do this, we click on the little gear-looking icon in the bottom right to access our Project Settings. Choose the color management settings and scroll down to the menu called “lookup tables.”
Here we have several dialogues that let us apply 3D LUTs in several places. We can select our “Input Lookup Table” option and choose LOG C to Rec.709 from the menu. Now be aware that Davinci Resolve comes with many LUTs pre-installed, which are accurate conversions from different LOG formats and different cameras to display color space such as Rec.709, P3, or Rec.2020.
Now, before anything else happens to our image, the LUT has taken the values and translated them so that they are accurately represented when shown in 709; we can now close this window and go ahead and grade our timeline.
There’s a catch, though. This LUT has been applied to every clip on our timeline, and we have sources from multiple cameras in this project; if we go to another clip that was not shot in Arri LOG C will also get through this LUT, resulting in the wrong conversion. This is not an appropriate technique. I will go over how to approach this in a minute.
2. Applying LUT at the end
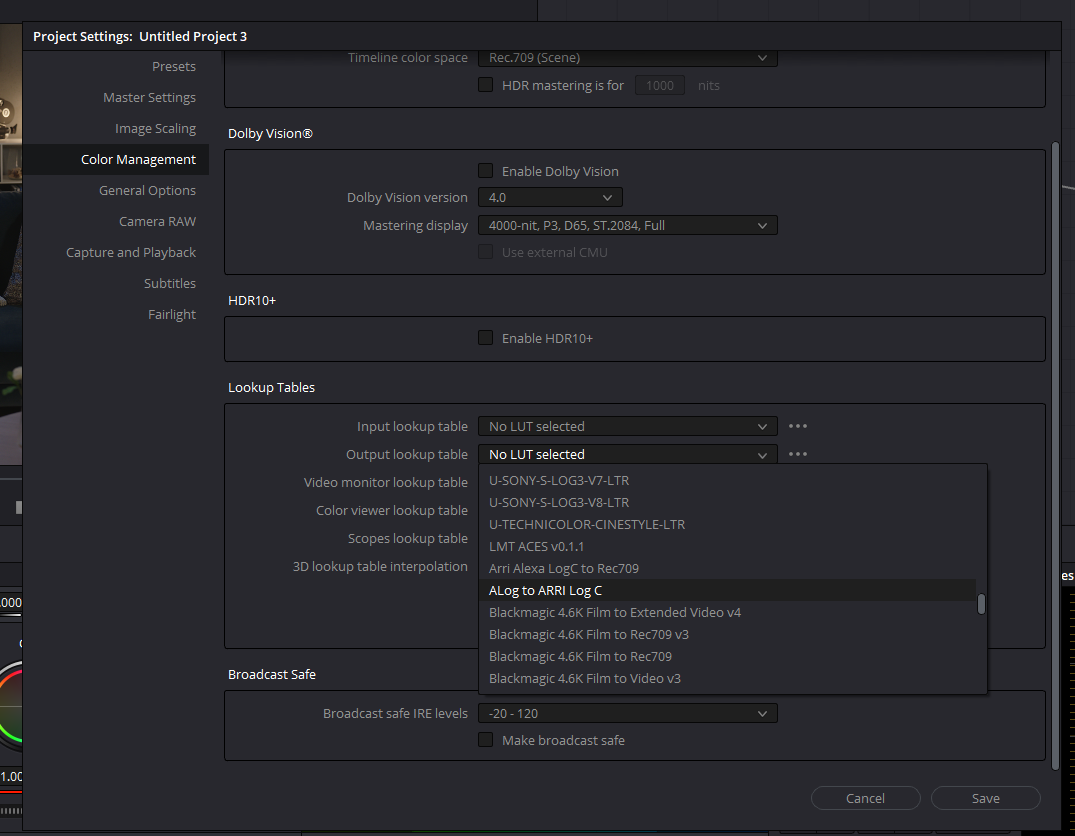
Next, we can apply an output LUT, which applies all the transforms right at the end of the pipeline, dramatically changing how our image responds to our adjustments.
We go back to our color management settings to do this—this time, we choose Arri LOG C to Rec.709 from the “Output Lookup Table” menu. Now, doing this technically gives you a little more space with your image. However, many colorists don’t like the way grading feels when using LUTs like this; you can try it yourself.
Things wrench around and compress your colors when you don’t intend them to, and it can take quite a lot of practice to get used to this. This is why it is essential to use LUTs that are made by professionals and don’t bend the hues soo much that it introduces artifacts or Luma Or Chroma noise.
These two approaches are typically only suitable for single-camera projects.
A more flexible way of doing this is to apply LUTs to nodes in the node tree. This is easy to do.
3. Applying LUTs In The Node Tree
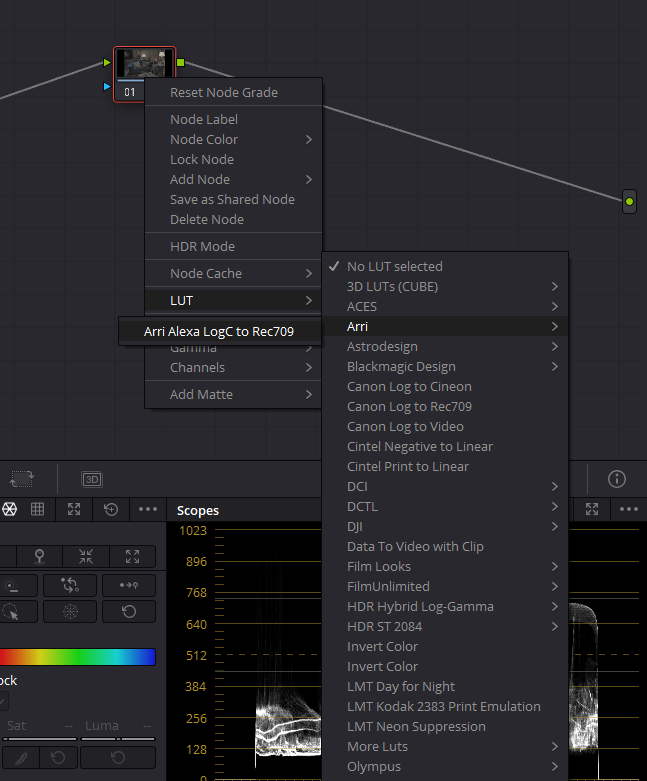
Just right-click the node, go to LUTs and then mouse to the LUT that you actually want to apply. In this case, it’s a 3D Lut, which converts Arri Log C to Rec.709. It’s obviously the same LUT but just applied in the node graph.
We can now place the LUT and its mathematical transforms anywhere we want in our pipeline, and of course, this only applies to the affected clip. Using this in conjunction with group shots is a great way to keep a multicamera project under control.
We can also Right Click in our clip list that is below the viewer and apply the LUT directly to that clip. Doing this Is the same as applying an input LUT but only to the selected clips. We can select multiple clips this way and apply them for a multicamera project.
4. How to apply LUT to all clips in Davinci Resolve
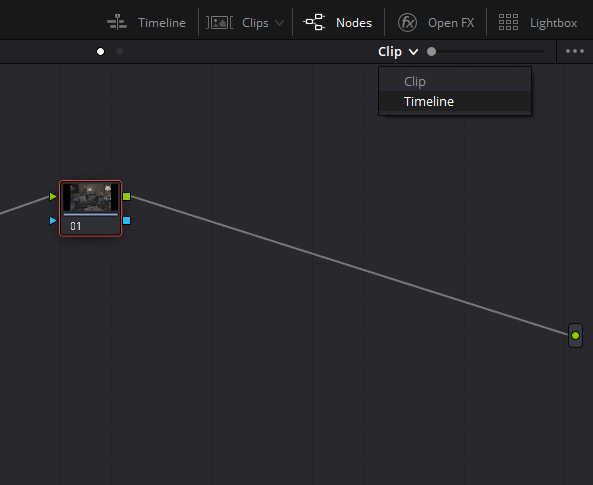
Now there is also more way to apply LUT to all the clips in Davinci Resolve. It is the same as adding a LUT in the Output option from the Project Settings. But it gives you more control doing this way.
From the top right corner, where it says “clip,” if you click on it, a menu will appear. Select “timeline” from the same menu.
Now anything you do in this Node tree will change all the clips in your footage. All you have to do now is right-click a node, go to LUTs and choose whatever LUT you want. Now, you must be wondering how this is different from adding a LUT in the Output option.
Well, from here, you change the opacity of the LUT according to your taste. You can also mix match LUTs by qualifying them just for a specific color or use your luma qualifier to restrict it for only highlights or shadows.
5. Using the viewer

By clicking on the LUTs options from the top left corner, you can browse all your LUTs. It’s my favorite way of applying LUTs. You can easily browse your LUTs, also by hovering over different LUTs you can preview them before applying.
Once you have decided upon it just double click on it and it will get applied in your node tree.
Exporting and Importing LUTs in Davinci Resolve
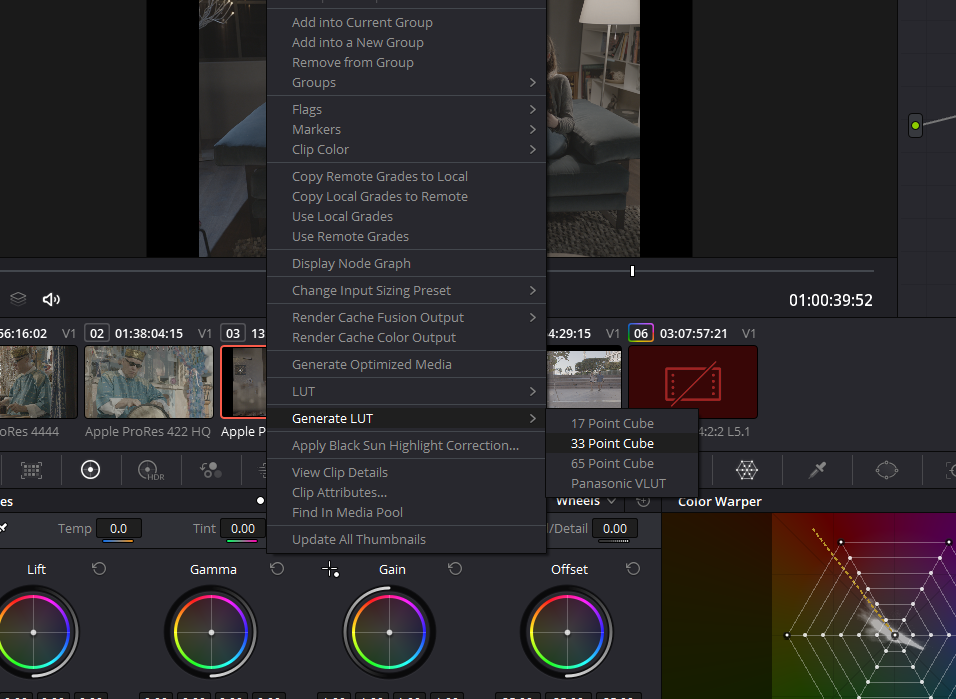
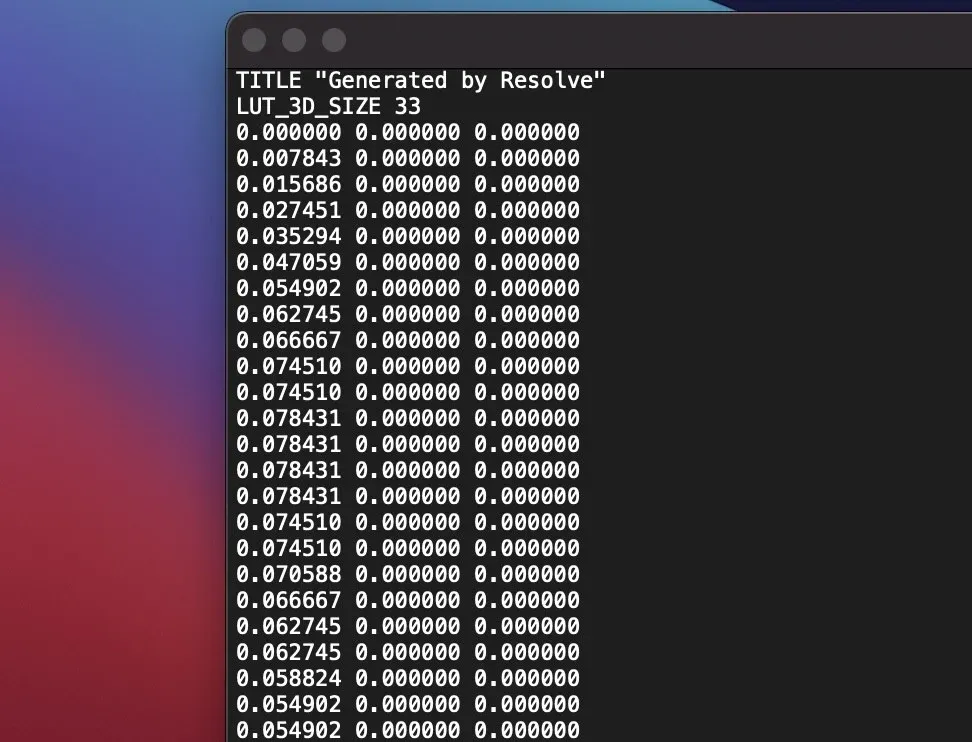
Finally, we’ll go over how to export and install a custom LUT into Davinci Resolve so you can then apply it at your preference. Any primary grade or collection of primary grades can be exported as a .cube or Panasonic V LUT.
To do this, simply right-click on the thumbnail of the clip with the desired grade, go to “Generate LUT,” and choose either “33 point cube” or “65 point cube.”
“65 point cube” is the one that will give you more color accuracy but will use more CPU processing. I generally use “33 point cube” as the color accuracy is slightly lesser, but it does not slow the processing.
Once we’ve done that, we can then choose where to save it and save it directly into the resolve’s LUT folder.
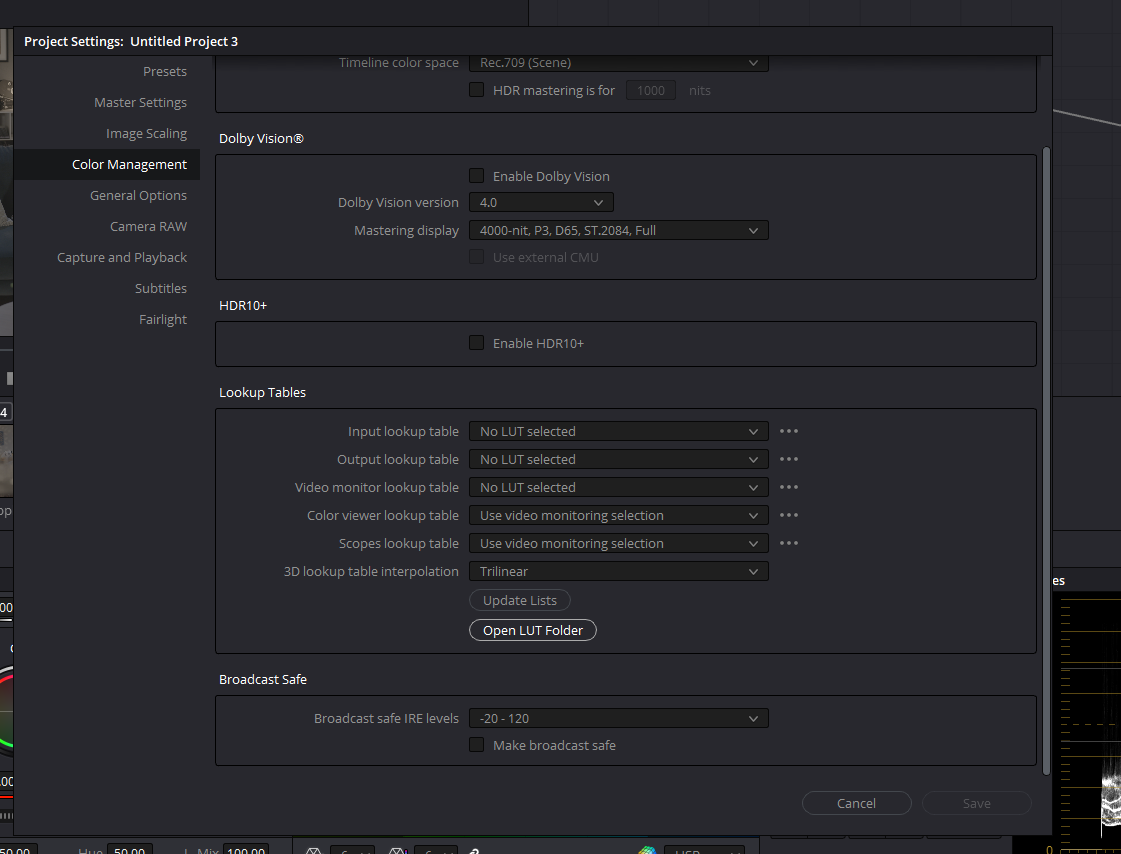
To import a LUT in Davinci Resolve, we need to navigate to Resolve’s LUT folder. The easiest way to do this is to open our project settings and click the “Open LUTs folder” button.
Now, paste a LUT into the appropriate place, and you can even create a new folder to keep your new LUTs. After that, we hit the “update lists” button in the Project Settings, and the new ones will appear in your LUTs list. One important thing to mention, a LUT cannot carry your secondary grades like windows and qualifiers.
This has been a good overview of how and where to apply lookup tables.
How To Stress Test A LUT
Sometimes a Client may give you a 3D LUT and insist that you grade with it. I strongly advise you to stress test this LUT first. If your tests fail totally, it’s simple to explain to the individuals who gave them to you that it’s not optimal to work with the specific LUT offered.
Simply present and explain the test to them. But, in the same phrase, tell them that they can easily reconstruct the 3D LUT and even improve it so that nothing gets clipped or clamped and the video isn’t breaking up with artifacts, and so forth.
Furthermore, this is a fantastic test not only for a LUT but also for your color pipeline.
You may also use these strategies to assess and learn what specific tools in Resolve are doing and how they behave. It’s an excellent tool to comprehend and learn new techniques.

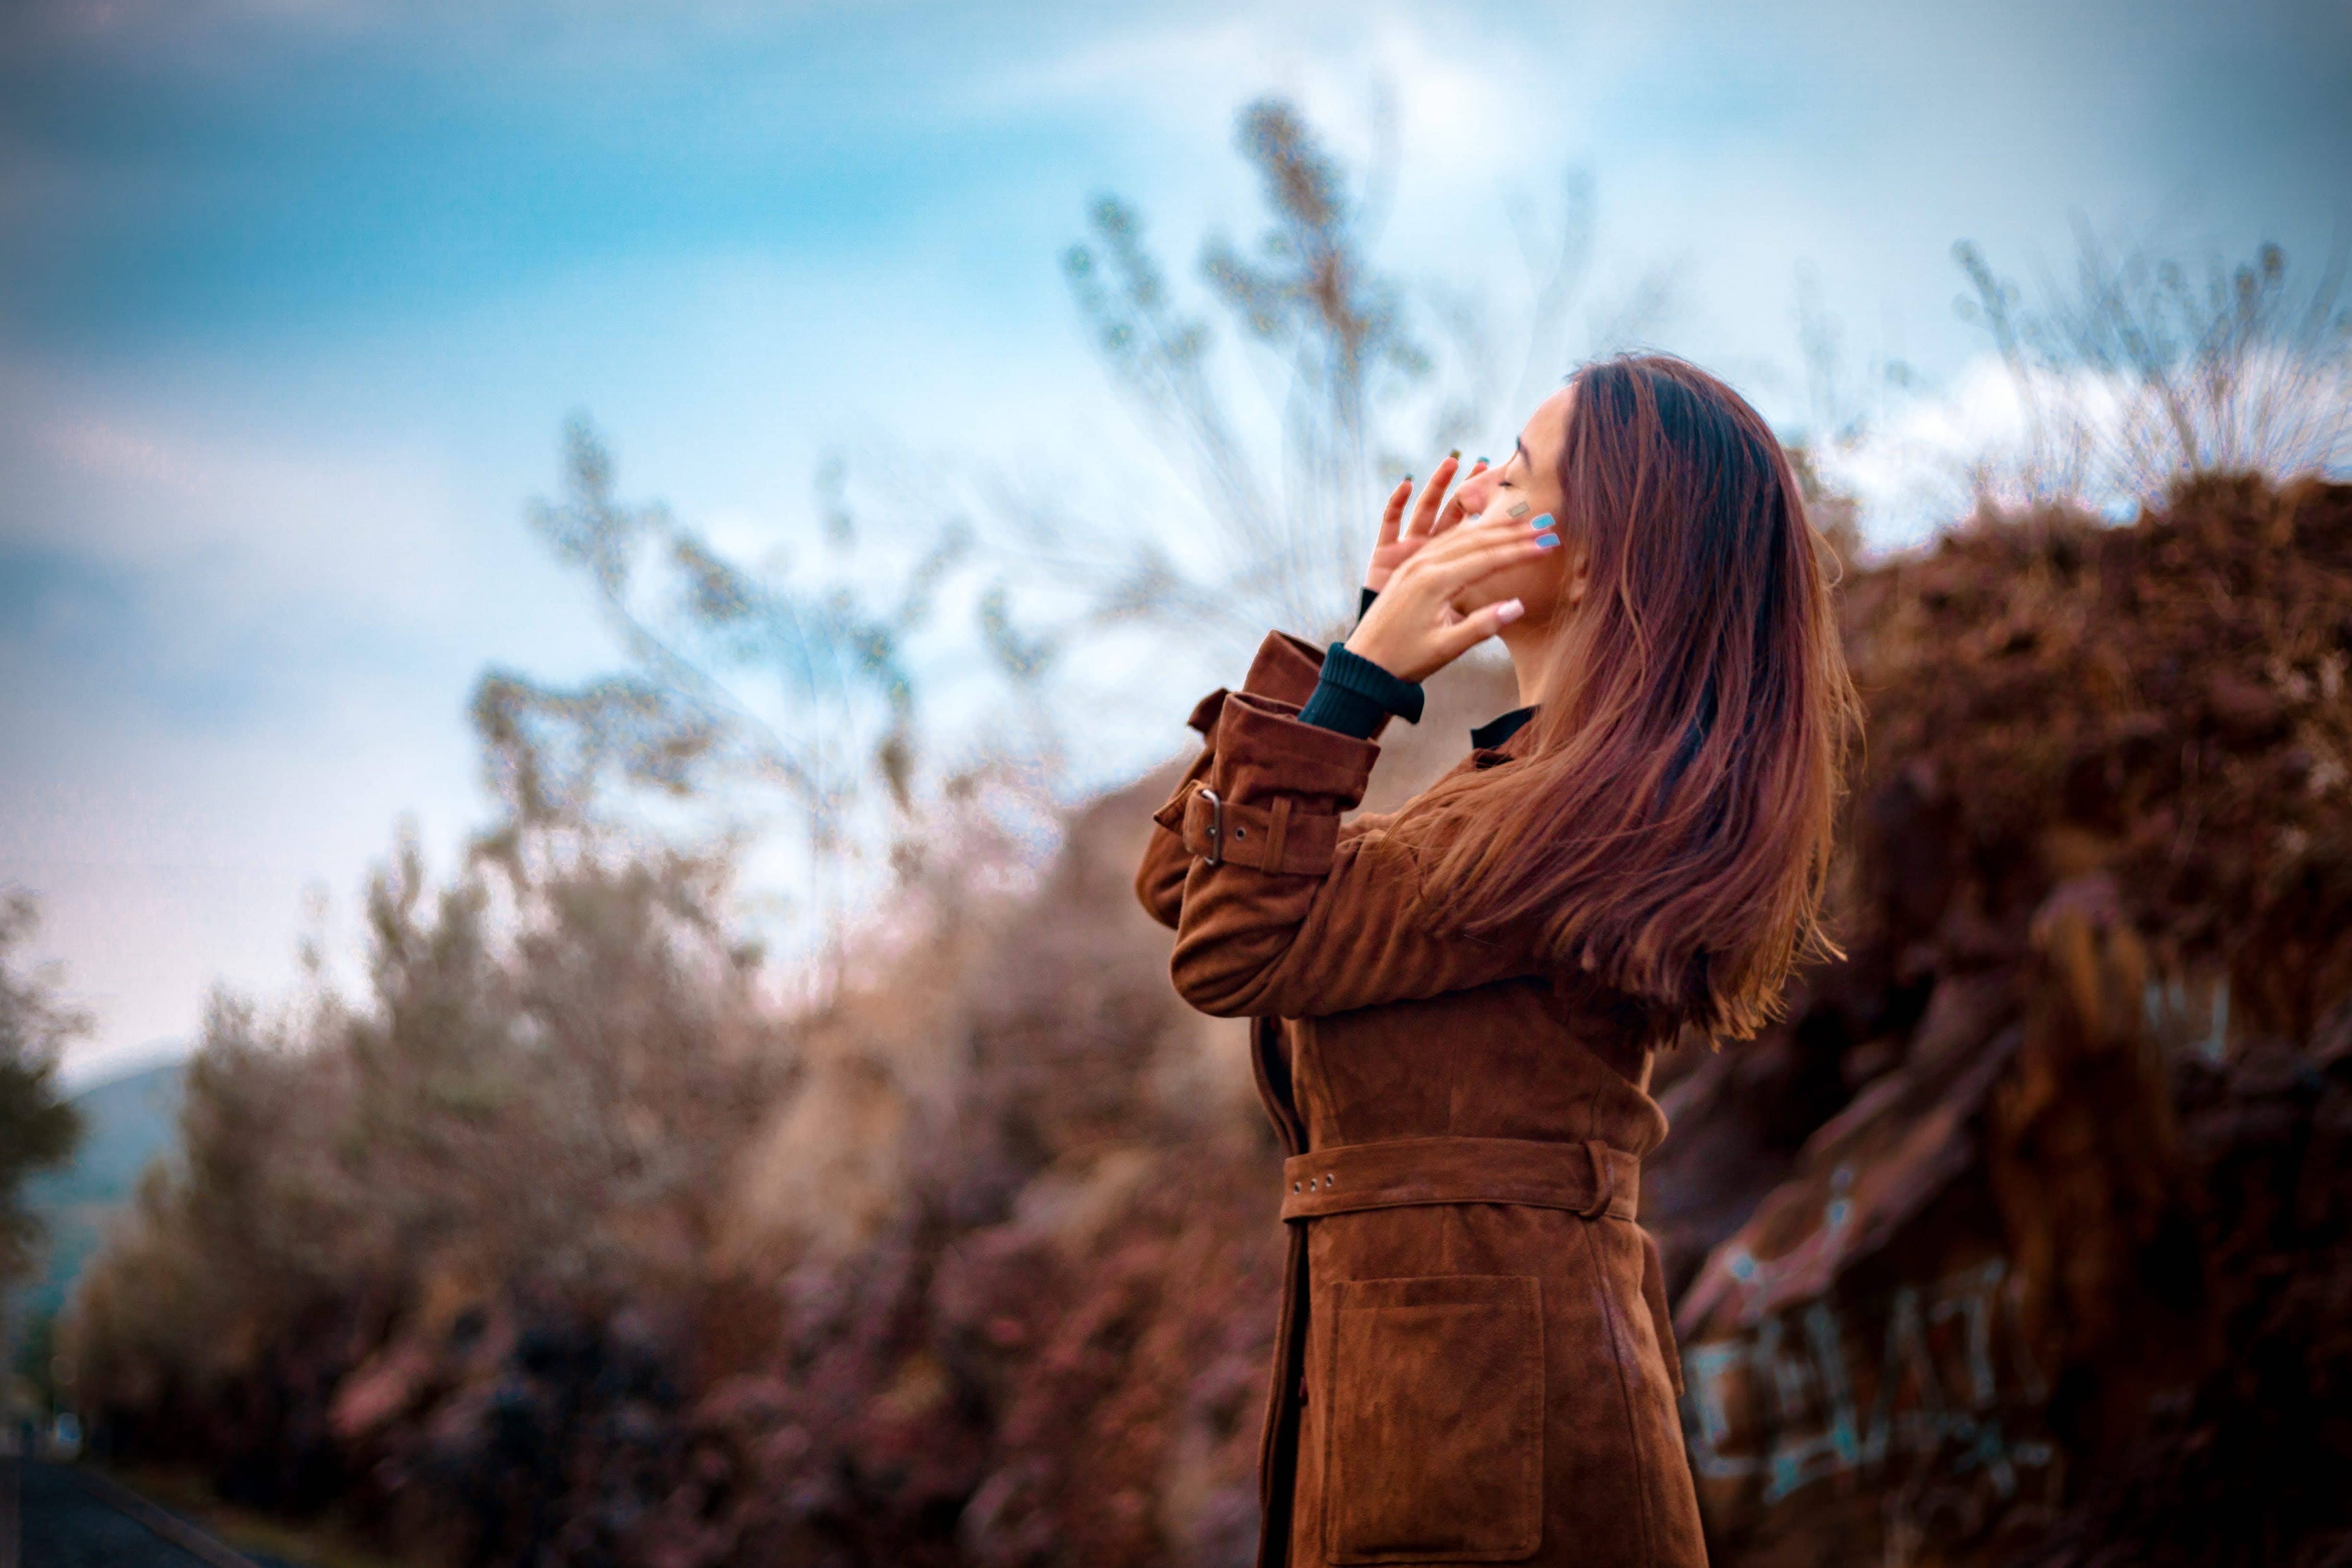
Stress testing a LUT is very easy, just download the image that I am linking to. It’s a free image by True Color, specially made to stress test your LUTs.
All you need to do is import the downloaded image into your timeline start putting LUTs in the node the same way as you learned earlier in this article. If the LUTs is good it will not show any suspicious sign, if it breaks you will see artifacts.
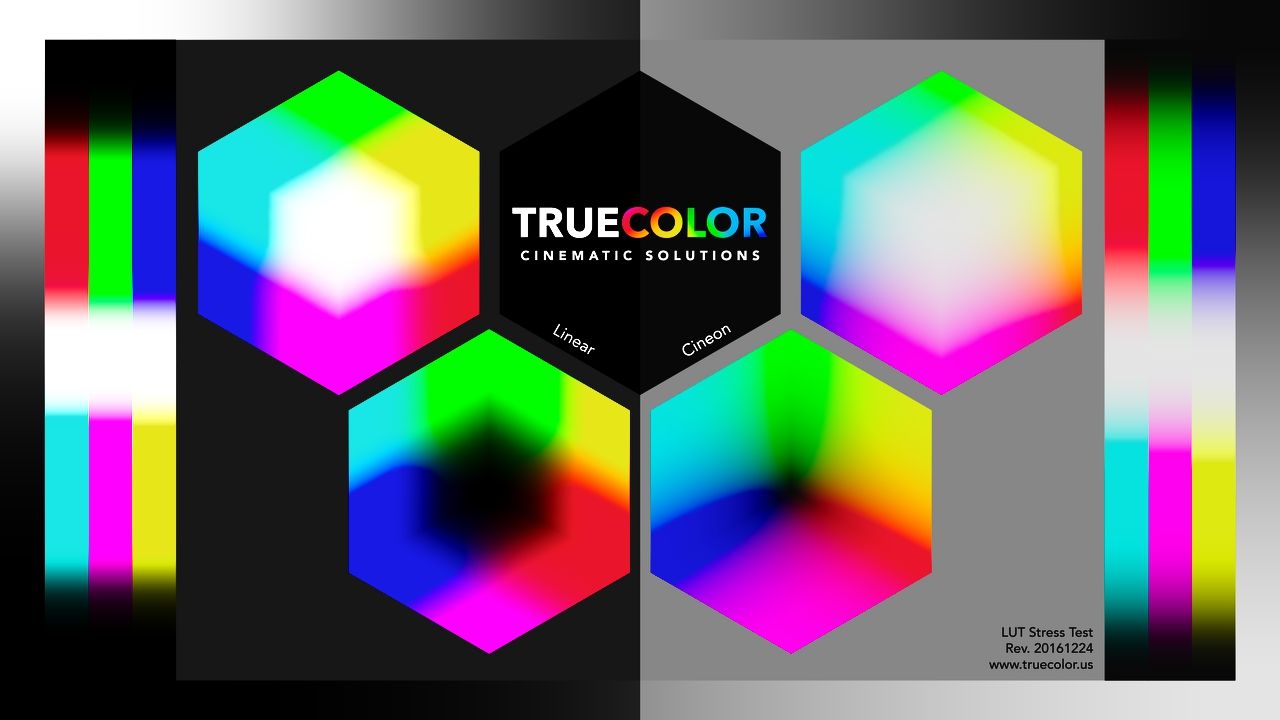
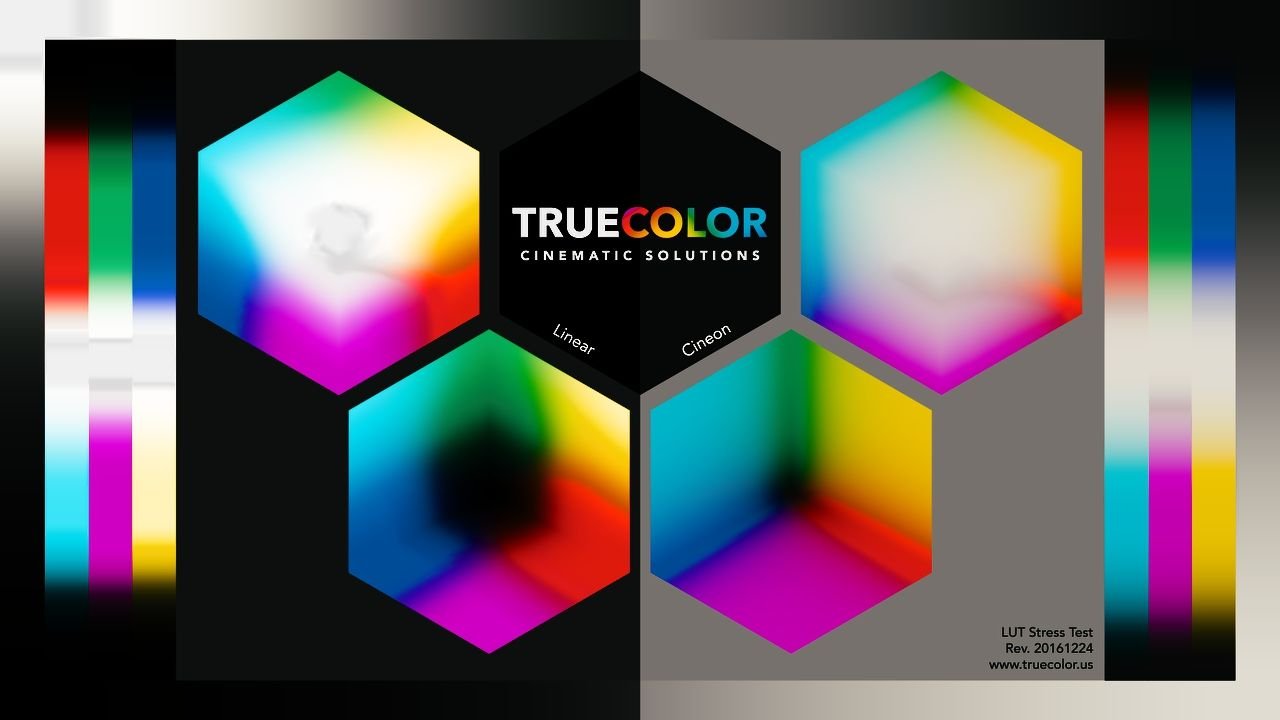
You can clearly see the LUT downloaded from the internet is not suitable nor advised to use in the project. This not just makes your grade worse but also damages your reputation as a colorist in the market and you might even lose clients too.
So always stress test your lut before using them.
I hope this article answers Everything About Using LUTs In Davinci Resolve.
Happy Color Grading!
Also Read- Davinci Resolve LUTs: Import/Export (Tip To Adjust Intensity)