
Hey wassup guys, welcome back to Filmmakingelements.com, This article is going to be super interesting for sure. In this one we help you with, Importing and Exporting LUTs in Davinci Resolve. In the end, we also share a tip to help you adjust the intensity of a LUT. Enjoy!
How to import LUTs: DaVinci Resolve
In this blog post, we will guide you through the process of importing LUTs (Look-Up Tables) into DaVinci Resolve for your projects. LUTs are used for color grading and can drastically improve the look and feel of your footage. There are three methods to add LUTs to DaVinci Resolve, and we will cover them in detail.
Method 1: Adding LUTs to the Default Folder
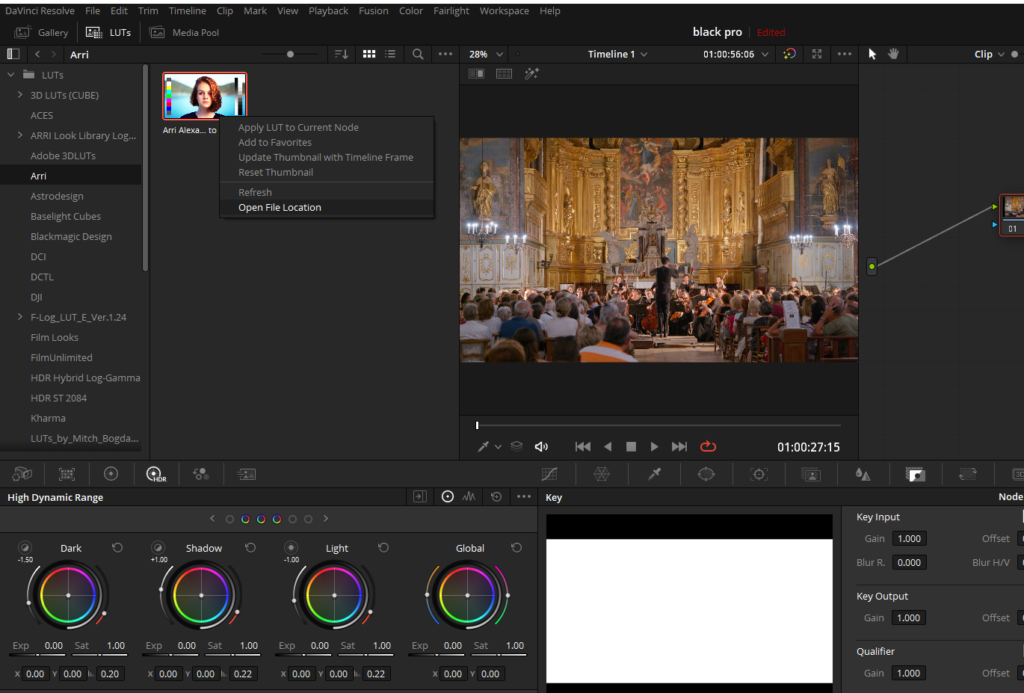
- First, navigate to the color page in DaVinci Resolve. You will find the LUTs tab at the top left of the screen.
- Click on the LUTs tab to reveal a list of pre-installed LUTs, which are organized into different folders.
- To find the location of these LUTs, right-click on any LUT and select “Open File Location.” This will display the folder where the LUTs are installed.
- You can choose to add your LUTs to this location, but we do not recommend this method as it might lead to disorganization.
Method 2: Creating a Custom LUTs Folder (Recommended)
- Close the LUTs folder and navigate to the top-left corner of the screen, where you will find the “DaVinci Resolve” menu.
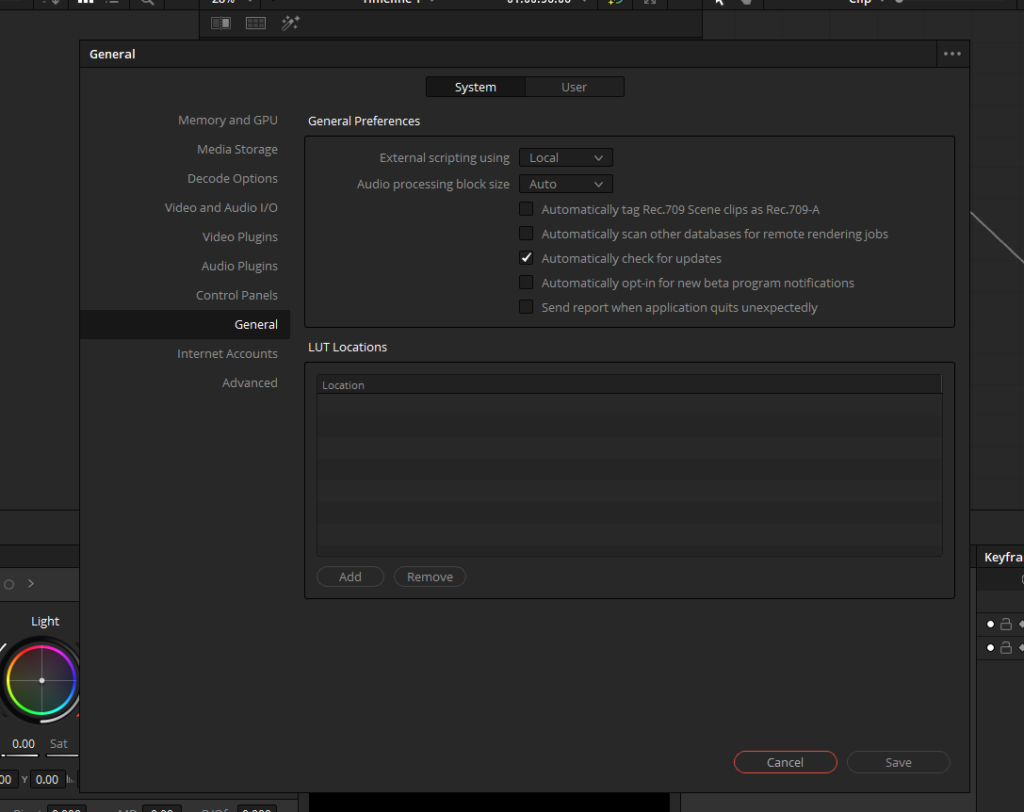
- Click on “Preferences” and then select the “General” tab.
- In the General tab, you will find the “LUTs Location” section. This feature allows you to specify multiple folders for LUTs.
- Click “Add” and navigate to the folder where you have stored your LUTs. We recommend creating a main folder for all your LUTs and pointing the LUTs Location to this folder for easier organization.
- Once you have navigated to your main LUTs folder, click “Select Folder” to add it to the list of LUTs locations.
- Click “Save” to confirm your changes.
- Return to the color page in DaVinci Resolve and right-click on the LUTs tab. Select “Refresh” to update the LUTs list with your newly added LUTs.
- Your custom LUTs should now be visible within the LUTs tab.
It is important to note that if you point the LUTs location to a specific subfolder within your main LUTs folder, the LUTs will be mixed with the pre-installed LUTs, making it difficult to identify your custom LUTs. To avoid this issue, ensure that you only point the LUTs location to your main LUTs folder.
Method 3: Import LUTs in Davinci Resolve using Project Settings
In this section of the post, we will discuss an alternative method to import LUTs into DaVinci Resolve, which is through the project settings. This approach is straightforward and easy to follow. Let’s dive into the step-by-step process:
- First, locate the small cog icon in the bottom right corner of the DaVinci Resolve window and click on it to open the project settings.
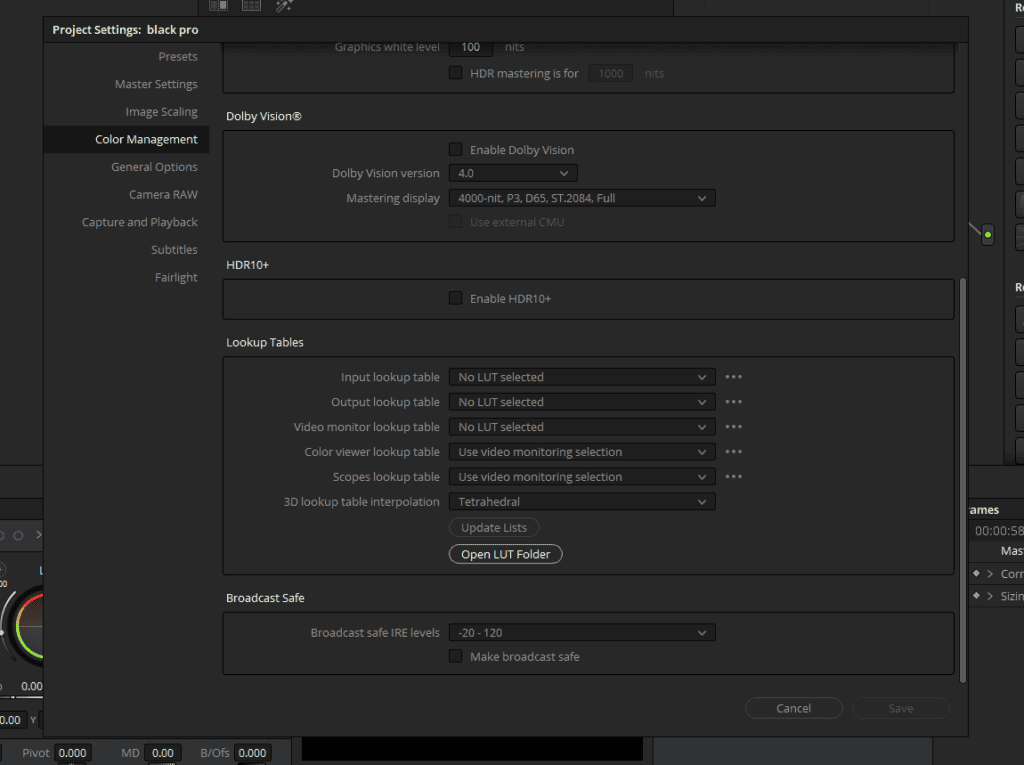
- By default, you may find yourself on the “Presets” or “Master Settings” tab. Navigate to the “Color Management” tab.
- Within the “Color Management” tab, find the “Color Space and Transforms” section at the top, and scroll down to the “Lookup Tables” section.
- Click on “Open LUT Folder.” This action will bring up the folder containing all your LUTs.
- To add your custom LUTs, create a new folder within the LUTs folder, such as your own LUT pack.
- Locate the LUTs you want to import, which could be in your downloads folder if you acquired them from the internet. Drag and drop the LUT files into the newly created folder in the LUTs directory.
- After moving your LUTs into the appropriate folder, click on “Update Lists” and then “Save” in the project settings window.
- Now, navigate to the “Color” tab in DaVinci Resolve, and your newly imported LUTs should be available for use in the LUTs section.
Organizing your LUTs into separate folders can make it easier to navigate through them. As demonstrated in the example, you can have folders within folders to create a more structured organization if desired. This method allows you to efficiently import and manage LUTs in DaVinci Resolve, enhancing your color grading workflow and ultimately improving the quality of your video projects.
How to apply LUTs: Davinci Resolve
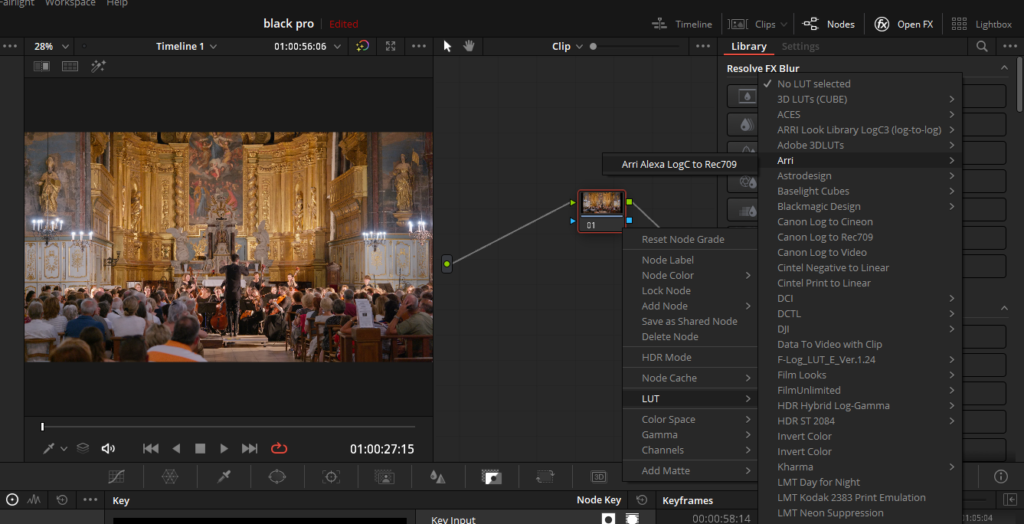
DaVinci Resolve offers a powerful way to incorporate LUTs (Lookup Tables) into your grading workflow by connecting a LUT to a specific node in the Node Editor. This provides maximum control over the LUT’s position in your image processing pipeline, as well as the flexibility to apply image adjustments before and after the LUT as needed.
To apply a LUT within a node, you can Right-click on any node, and hover over the option “LUT”, and you will see all your pre-installed and custom LUTs here. All you have to do is click on the one you want to apply.
How to export LUTs: Davinci Resolve
In this section of the blog post, we will discuss the process of exporting LUTs (Lookup Tables) from DaVinci Resolve, a crucial technique when working with color grading, compositing, or non-linear editing (NLE) applications.
Exporting a LUT allows for seamless inter-application communication, whether your grade is composed of a single node or multiple nodes, as long as they include Primaries palette adjustments, Custom Curves palette adjustments, and compatible ResolveFX plug-ins such as Color Space Transform, ACES Transform, and Gamut Mapping.
It is important to note that nodes utilizing Qualifiers, Windows, incompatible filtering operations (e.g., sharpening or blurring), or incompatible Resolve FX or Open FX will not be taken into account, and all correction operations within these nodes will be disregarded.
Follow these steps to export a LUT:
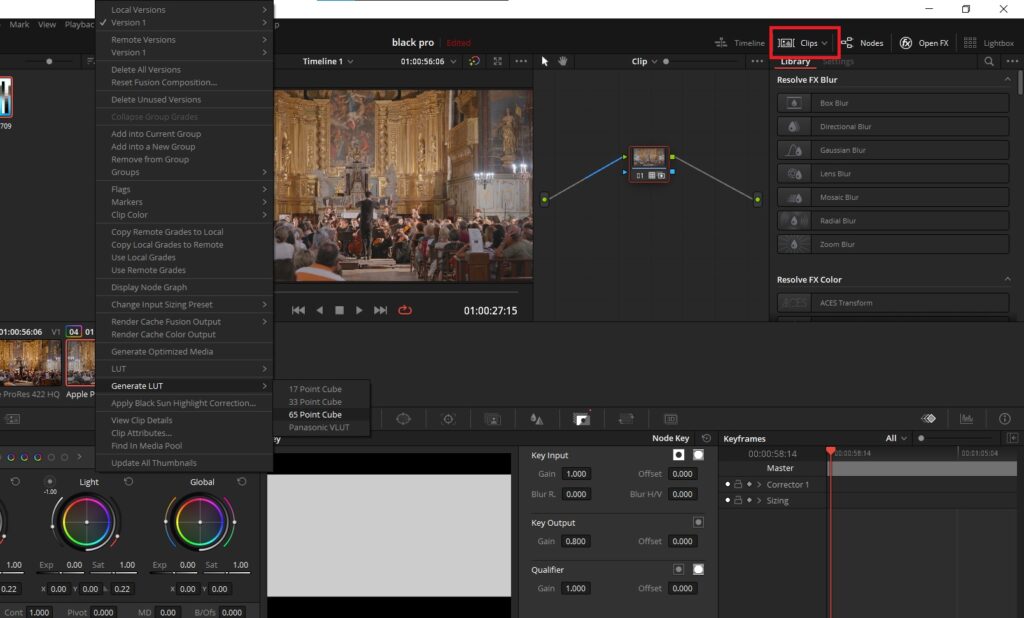
- To export lut from Davinci Resolve you need to use the clip thumbnail section. To do so, click on the “Clips” button in the top right corner.
- Right-click on a clip thumbnail in the Color page Timeline and select an option from the Generate LUT submenu. You can choose from Generate 3D LUT (17 Point Cube), Generate 3D LUT (33 Point Cube), Generate 3D LUT (65 Point Cube), or Generate 3D LUT (Panasonic VLUT) for Panasonic VariCam cameras. All of these are DaVinci-developed LUT formats.
- Select a destination for the LUT file in the file dialog. The default path varies depending on your operating system. Saving it in the default location will make it accessible for future use in DaVinci Resolve:
- macOS: Library/Application Support/Blackmagic Design/DaVinci Resolve/LUT/
- Windows: C:\ProgramData\Blackmagic Design\DaVinci Resolve\Support\LUT
- Linux: /home/resolve/LUT
- Optionally, create a new folder for storing your custom LUTs.
- Input a name in the “Save As” field and click “Save.” Your LUT file is now saved.
Once you have exported a LUT, it can be utilized within DaVinci Resolve by applying it directly to a clip or node, or by applying it to the entire project through the Color Management panel in the Project Settings. You can also transfer the LUT to a memory stick for on-set monitoring or previewing purposes, or for sharing with someone using a different grading application that supports the LUT format.
Remember that each node in the Node Editor can execute multiple operations in a specific order. When adding a LUT to a node, its transformation is applied as the last operation within that node, after all other Color page adjustments made by that node.
This allows you to use the node’s Color and Contrast controls to fine-tune the image data before it is processed by the LUT. For instance, if a LUT’s contrast adjustment excessively clips the highlights, you can use the node’s Contrast controls to lower the highlights before the LUT is applied, thus preserving image detail.
How to Adjust LUTs Intensity in Davinci Resolve

In this section, we will demonstrate how to modify the intensity of your LUTs using DaVinci Resolve. This technique can help you fine-tune the impact of a LUT on your footage. You can also add various LUTs by decreasing their intensity to create a new look for your project. Here’s a step-by-step guide on how to achieve this:
- Open the clip you are working on in DaVinci Resolve and navigate to the Color tab.
- In the Color tab, you may already have a node with adjustments such as temperature modification and an S-curve for added depth.
- Create a new node to apply the LUT.
- Right-click the new node, select “node label”, and name it “LUT.” This node will be used to add the LUT to your clip.
- Access the LUTs menu by clicking the LUTs icon on the top left of the screen. Here you will find all available LUTs, including any imported ones.
- To adjust the intensity of the applied LUT, navigate to the Key panel.
- Key panel is located in the menu below. (as shown in the picture above)
- Locate the “Key Output” section.
- There will be an option called “Gain” in the “Key Output”
- By dragging the slider, you can decrease or increase the intensity as needed. Observe how the scopes change accordingly, reflecting the adjustments made to the LUT intensity.
By following these steps, you can easily control the intensity of LUTs in DaVinci Resolve, enabling you to achieve the desired visual effect in your project.
- Also Read- Everything About Using LUTs In Davinci Resolve
- Also Read- How To Color Grade Arri Log C In Davinci Resolve
- Also Read- Day For Night Color Grading In Davinci Resolve