Welcome back to FilmmakingElements.com! We’re diving into the world of lens flare and tracking techniques in DaVinci Resolve. With just a few minutes and some simple steps, you can add convincing lens flares to your footage, even with slight camera movement. In this article, we’ll explore two methods for creating lens flares and tracking them within DaVinci Resolve.
Choosing the Right Shot and Applying the Golden Hour Grade
To achieve the most realistic lens flare effect, it’s important to start with a clip that naturally lends itself to the addition of lens flares. Ideally, choose a shot with some camera movement and dynamic lighting, as this will make the lens flare feel more organic and convincing.
First Method: Realistic Lens Flares Using the Aperture Diffraction OFX in DaVinci Resolve
In this detailed guide, we’ll walk you through the process of creating convincing lens flares in DaVinci Resolve using the Aperture Diffraction OFX. This method is perfect for adding depth, warmth, and a touch of realism to your footage. Follow along as we break down the process step by step, providing tips and best practices for achieving the most natural-looking results.
Step 1: Import and Prepare Your Footage
Begin by importing your selected clip into DaVinci Resolve and placing it on the timeline in the Edit page. Look for footage with dynamic lighting and some camera movement, as these elements will help make the lens flares feel more organic and integrated into the scene.
Once your clip is on the timeline, navigate to the Color tab from the bottom toolbar of Davinci Resolve to start making basic color adjustments. Balance your footage by correcting exposure, adjusting white balance, and tweaking contrast. Properly balanced footage will provide a better foundation for adding lens flare effects.
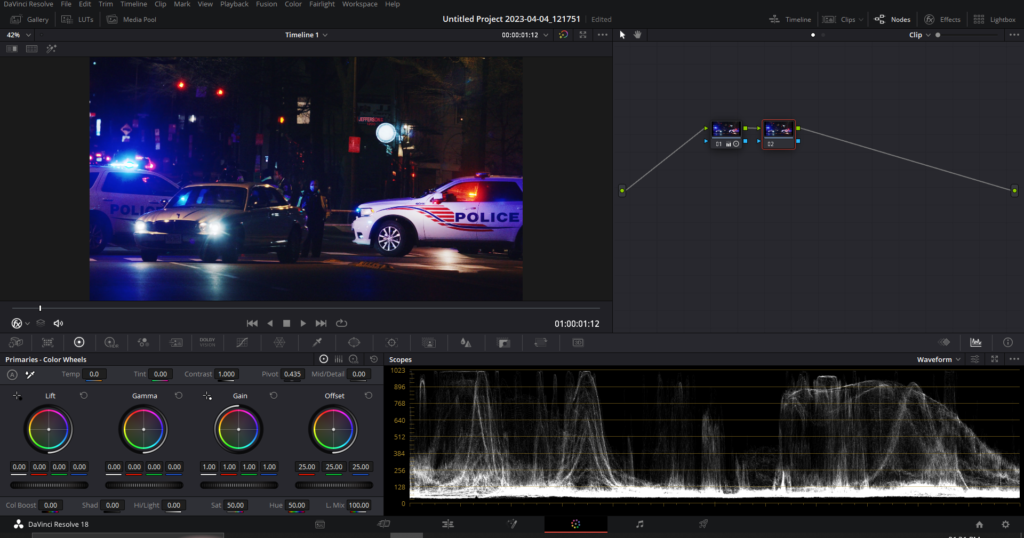
Step 2: Set Up Your Nodes for Grading and Effects
In the Color tab, create a new serial node (Alt+S) to separate your basic color adjustments from the lens flare effect. This will allow you to make adjustments to the effect later without affecting the overall color grade of your footage.
Step 3: Access the Aperture Diffraction Effect
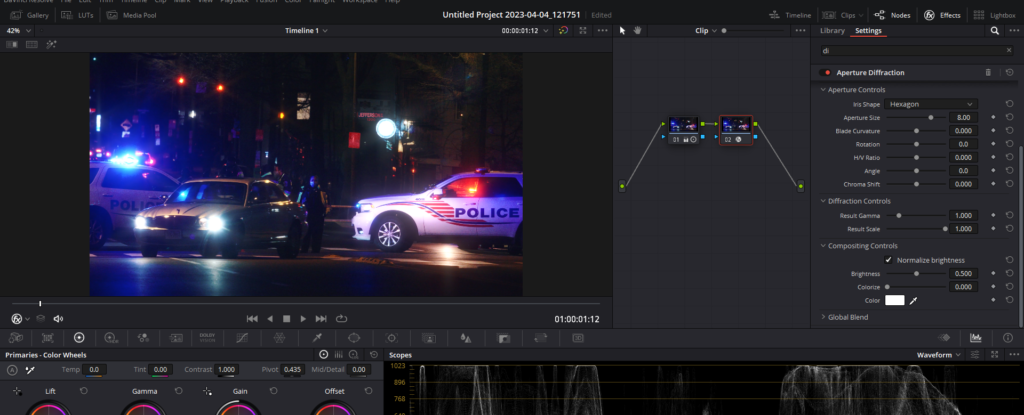
Open the Effects panel by clicking on the “Effects” button on the top right corner of the interface. Scroll down to the “Resolve FX Light” section and locate the “Aperture Diffraction” effect.
Step 4: Apply the Aperture Diffraction Effect to Your Node
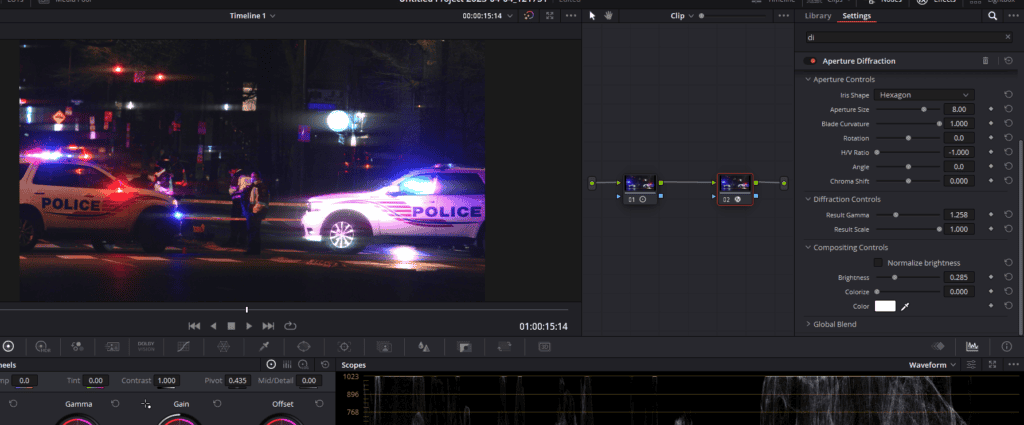
Drag the Aperture Diffraction OFX onto the new serial node you created earlier. In Aperture Diffraction OFX settings on the right of the viewer, scroll down and find “H/V Ratio” to “-1”. This effect emphasizes the highlights in your footage, compositing the lens flare effect onto those areas. The Aperture Diffraction Effect naturally tracks highlights, making it an ideal choice for moving shots, as it requires no additional tracking.
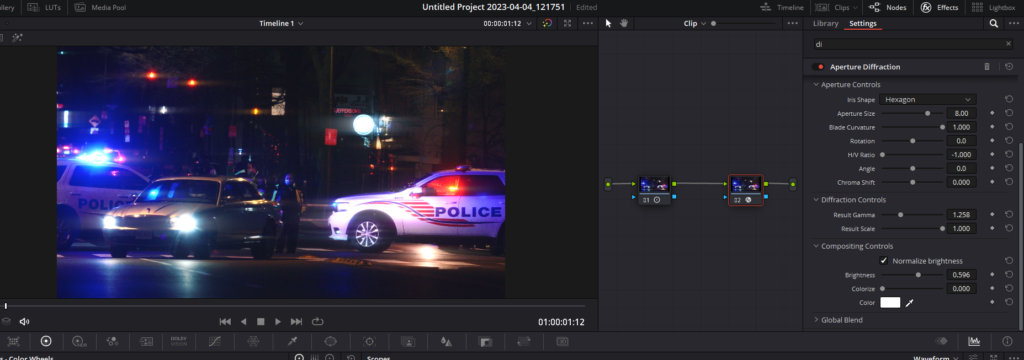
Step 5: Customize the Aperture Diffraction Effect
The default settings for the Aperture Diffraction Effect may look unnatural. To achieve a more subtle and realistic look, adjust the various settings in the OpenFX panel:
- Blade Curvature: Lower the Blade Curvature value to soften the effect and create a smoother transition between the flare and the surrounding image.
- Brightness: Decrease the brightness to ensure that the lens flare effect doesn’t overpower the rest of your footage. This will make the sun appear to be hitting the rims of the wheels or other reflective surfaces more subtly, creating a more natural look.
- Rotation: Adjust the rotation of the lens flare to match the angle of the light source in your scene. This will help the lens flare feel more integrated with the existing lighting conditions.
Step 6: Fine-Tune the Effect
After customizing the Aperture Diffraction Effect, play back your footage to see how the lens flare looks in motion. Make any necessary adjustments to ensure the effect appears natural and well-integrated with your scene. Pay close attention to the intensity, size, and position of the lens flare, adjusting the settings as needed to create the most convincing result.
If you feel the results of this method aren’t satisfying try our second method.
Method 2: Lens Flare OFX Effect in DaVinci Resolve
In this second method, we’ll introduce another approach for creating and tracking lens flares in DaVinci Resolve. This technique involves using the Lens Flare OFX effect to achieve a realistic and engaging result.
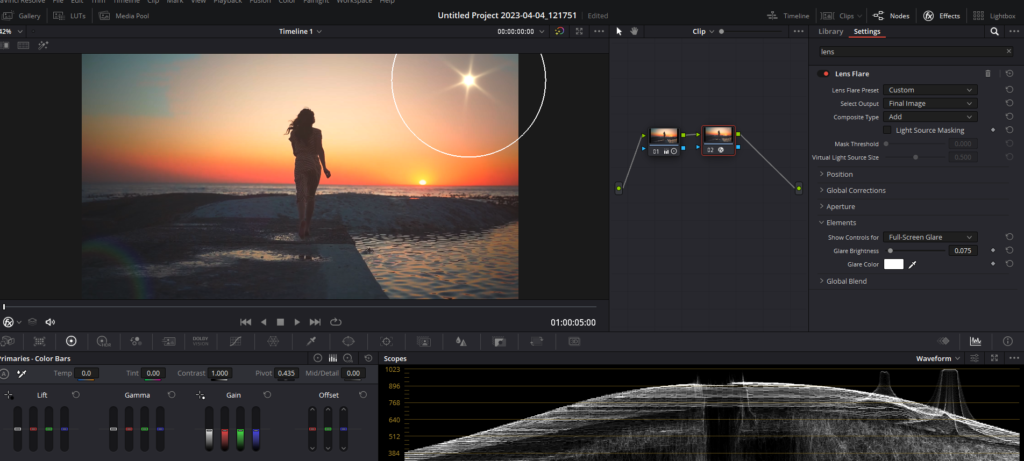
Step 1: Apply the Lens Flare OFX Effect

Start by dragging and dropping the Lens Flare OFX effect onto a new node. You can find this effect in the Effects panel in the top right corner on the color page of Davinci Resolve, under the “Resolve FX Light” section.
Step 2: Reposition the Lens Flare
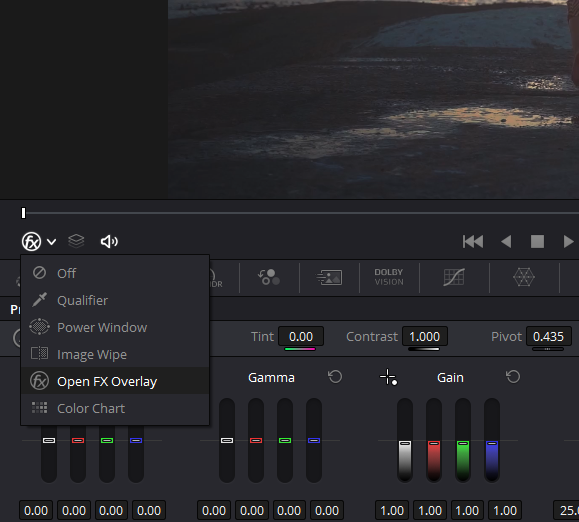
To reposition the lens flare, ensure you are in the “Open FX Overlay” mode. Click on the drop-down menu below the viewer and select “Open FX Overlay”. This mode enables you to move the lens flare directly within the viewer. Click and drag the lens flare to your desired position within the scene. Make sure you are not in any other mode, as this may prevent you from repositioning the effect.
Step 3: Adjust the Lens Flare Size
You can also easily change the size of the lens flare by dragging its edges within the viewer. This allows you to customize the appearance of the effect to better match the lighting conditions and focal length of your footage.
Step 4: Play the Clip and Assess the Lens Flare
After positioning and resizing the flare, play back your clip to see how the effect looks in motion. If you notice that the lens flare appears unnatural due to the camera movement, you’ll need to track the effect so that it reflects off the lens properly throughout the clip.
Tracking Lens Flares with the Effects Tracker in DaVinci Resolve
In this section, we will guide you through the process of adding tracking to your lens flare effect in DaVinci Resolve using the Effects Tracker. This technique will help ensure that your lens flare remains properly aligned with your footage as the camera moves, creating a more natural and believable result.
Step 1: Switch to the Effects Tracker
Go to the Tracker tool in the toolbar at the bottom of the viewer (target-looking icon). By default, the tracker in DaVinci Resolve is set to Window mode. To change this, click on the FX button in the top right corner of the Tracker tool window. This mode applies the tracking points to the OFX on the current node – in this case, the Lens Flare OFX effect.
Step 2: Add a Tracking Point
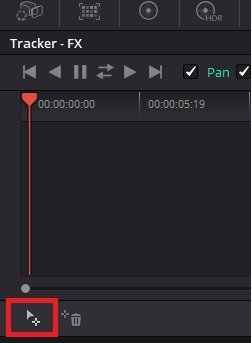

With the Effects Tracker selected, navigate to the beginning of your shot and click the “Add Track Point” button, it is situated in the bottom of the Tracker tool window. A blue square will appear in the center of the viewer, representing the tracking point. You can add multiple tracking points if needed.
Step 3: Position the Tracking Point
Drag the blue square to a point of contrast within your scene. This will help the tracker accurately follow the movement of your footage. Ideally, choose a high-contrast area that remains visible throughout the entire shot.
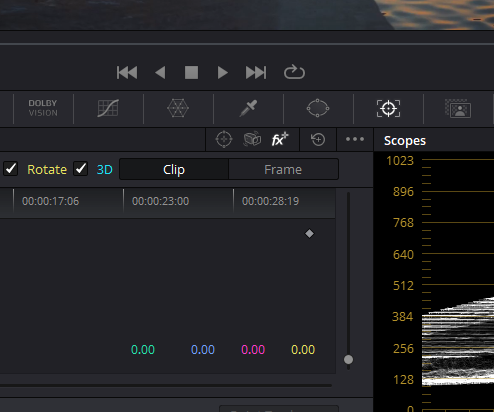
Step 4: Adjust Tracking Parameters
Before starting the tracking process, ensure that only the “Pan” and “Tilt” options are selected. Disable the “Zoom,” “Rotate,” and “3D Perspective” options, as these are not needed for this specific tracking task.
Step 5: Track Forward
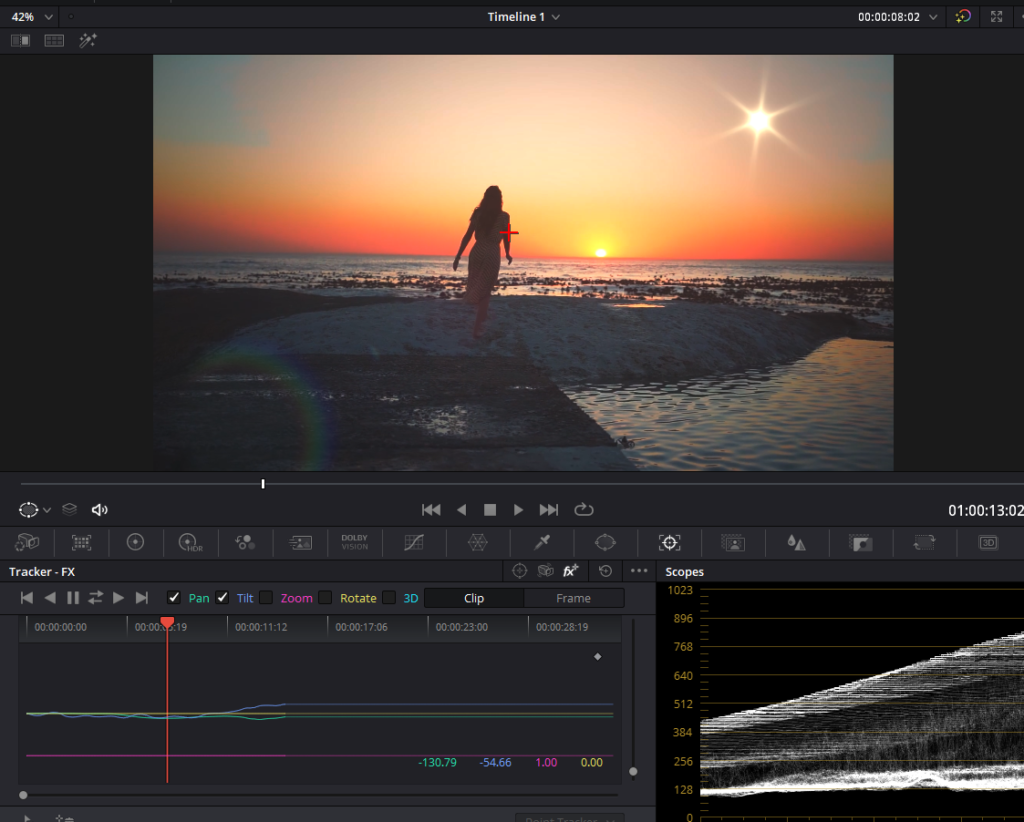
Press the “Track Forward” (arrow pointing right) button to begin the tracking process. DaVinci Resolve will analyze the movement of the selected tracking point and apply the tracking information to your lens flare effect.
Step 6: Review the Tracked Lens Flare
Once the tracking process is complete, play back your footage to see the results. The flare should now follow the movement of your camera, appearing more natural and integrated with your scene.
Fine-Tuning the Lens Flare Effect and Masking Unwanted Elements
In this section, we will discuss how to modify the lens flare effect, work with individual elements, and mask unwanted parts using power windows in DaVinci Resolve. This step-by-step guide will help you achieve a more polished and realistic lens flare effect in your footage.
Step 1: Modify the Lens Flare Elements
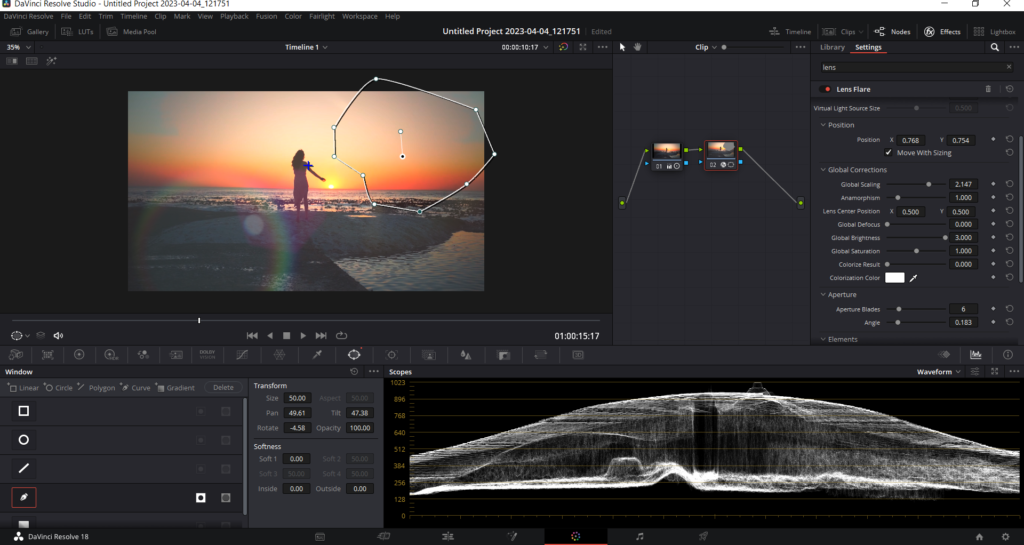
The default lens flare may not look perfect for your scene. To adjust the lens flare, select the node with Lens Flare OFX and go to the settings panel on the right of the viewer, where you’ll find options to modify each element of the effect. You can work with Lens Flare Presets, Anamorphism, Aperture Blades, and change color to customize the appearance of the lens flare.
Step 2: Identify and Adjust Ghosting Elements
In the Elements section of the Lens Flare OFX settings, you can identify and adjust individual ghosting elements, choose the element from the “Show Controls For” drop-down menu, and click on each ghost element in the menu. This will help you locate the specific ghost element in the viewer, allowing you to make the necessary adjustments, such as changing the size, color, or intensity.
Step 3: Remove Unwanted Elements with Power Windows
If you want to completely remove a specific element from the effect, you can use power windows. Select the Window tool next to the Tracker tool and choose the pen tool. Draw a power window around the unwanted element. The default setting includes everything inside the power window, so click the “Invert” button on the right of the pen tool to exclude the area inside the power window instead.
Step 4: Track the Power Window
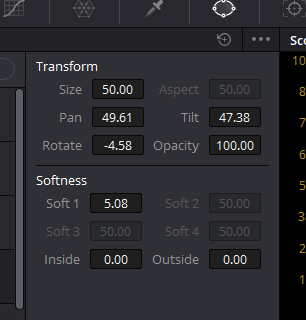
To ensure the power window stays aligned with the flare as the camera moves, you’ll need to track it. Make sure you’re at the beginning of the shot, then switch from the Effects Tracker to the Window Tracker in the tracking panel. Enable all tracking elements and click “Track Forward.” Finally, add some softness to the power window to create a smoother transition between the masked and unmasked areas.
Conclusion
In conclusion, DaVinci Resolve offers a multitude of tools and techniques for creating and tracking realistic lens flares in your footage.
Tracking the effect ensures that it stays aligned with your footage as the camera moves, resulting in a more natural and integrated appearance. Finally, fine-tuning individual elements and masking unwanted parts using power windows will help you achieve a polished and professional effect.
With these methods at your disposal, you can elevate your video projects and captivate your audience with visually stunning results.