
Welcome back! This article is a complete guide on how to nest or use compound clips in Davinci Resolve.
Now we all need to accept the fact that we all had come from the days when Adobe Premiere Pro was our leading editing software, and nesting clips was a way out from those messy and infinite number of tracks on the timeline.
I need to admit this; merging clips have saved my brain from exploding like soo many times.
But due to a lot of bugs and errors popping out in every update that Adobe rolls out for Premiere Pro, I decided to move to Davinci Resolve.
Of course, Davinci Resolve is a beast of editing software, but also it does not cost very high.
Davinci Resolve is no less when compared to Premiere Pro. Still, while I was editing, I was thoroughly missing the nest clips feature in Davinci Resolve by which one could merge clips in Premiere Pro until I found out about Compound Clips.
What is Compound Clips In Davinci Resolve? How to Nest in Davinci Resolve? How to marge clips in Davinci Resolve?
The idea of a compound clip is to combine multiple video clips from a sequence into one single video clip.
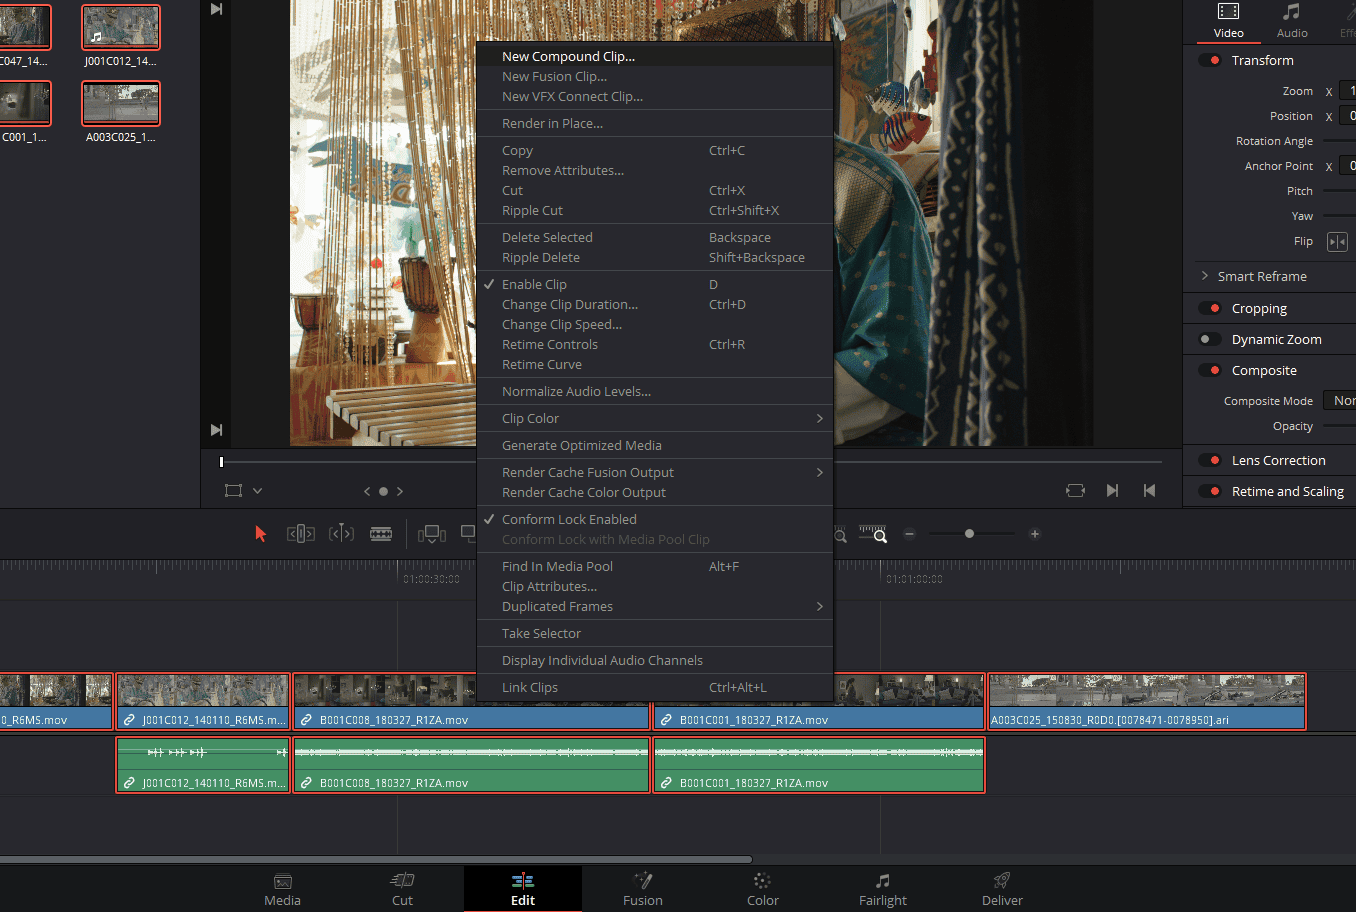
To execute that in Davinci Resolve, all we need to do is make sure we select our video clips and then right-click, and then in the menu Select New compound Clip, it is situated at the top of the menu.
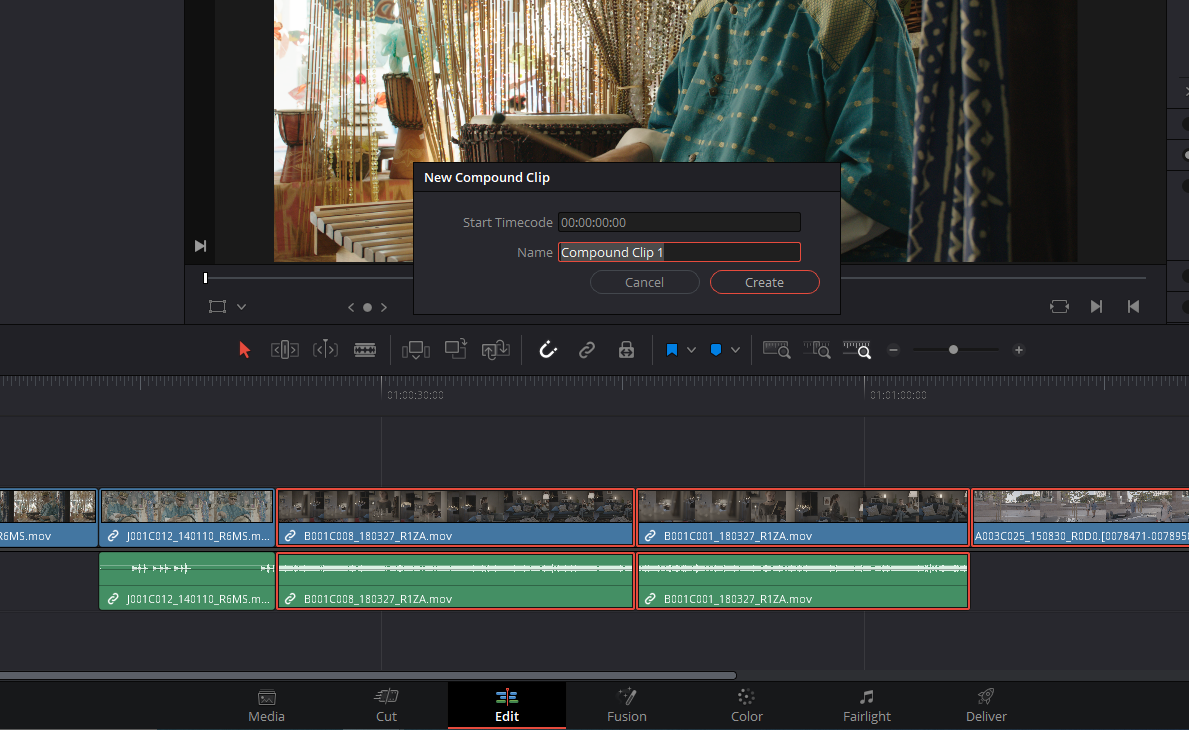
Now we’re going to be greeted with a pop-up window that asks to give it a name. You can leave it the way it is and then hit Create.

So now we just created a compound clip that is a single video clip that combined all the video clips that were in that sequence into one.
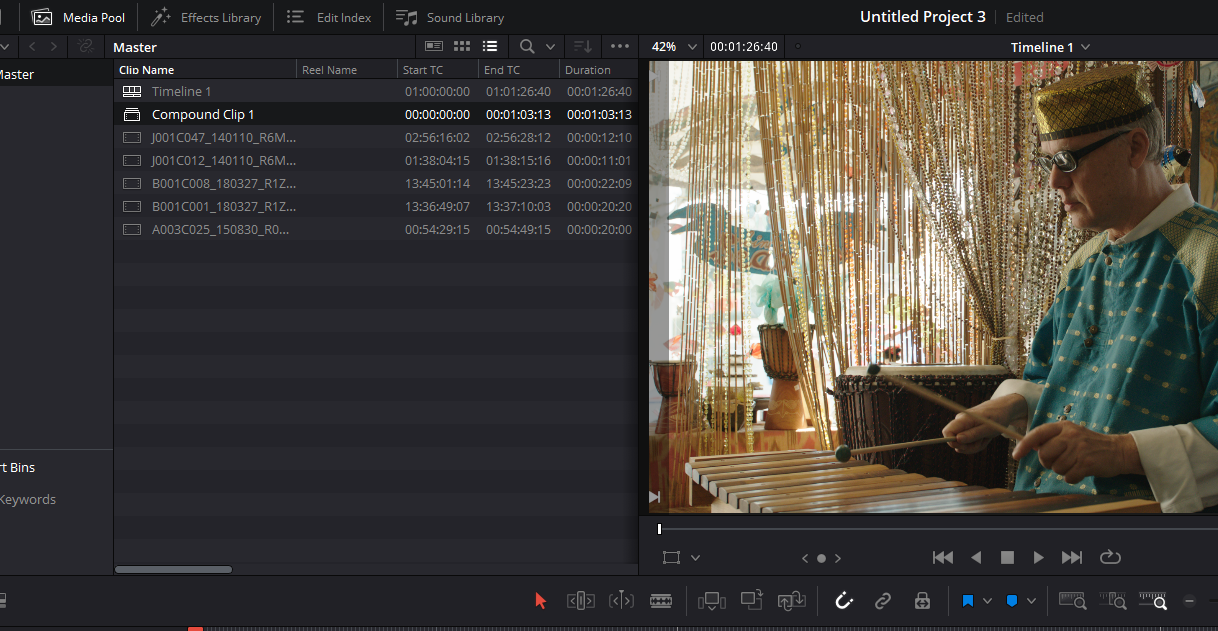
The cool thing is that if you look under the media pool, we see that this new compound clip is saved as a separate video clip that can be extracted and reused down the road.
The compound clip can be especially helpful when videos are on multiple tracks. As long as we select all the videos, the rest of the compound clip process is the same. Select New compound Clip and then hit Create. We have a single video clip that combines all the videos from different tracks into one.
Using compound clip in Davinci Resolve on Just the Audio or Video Track
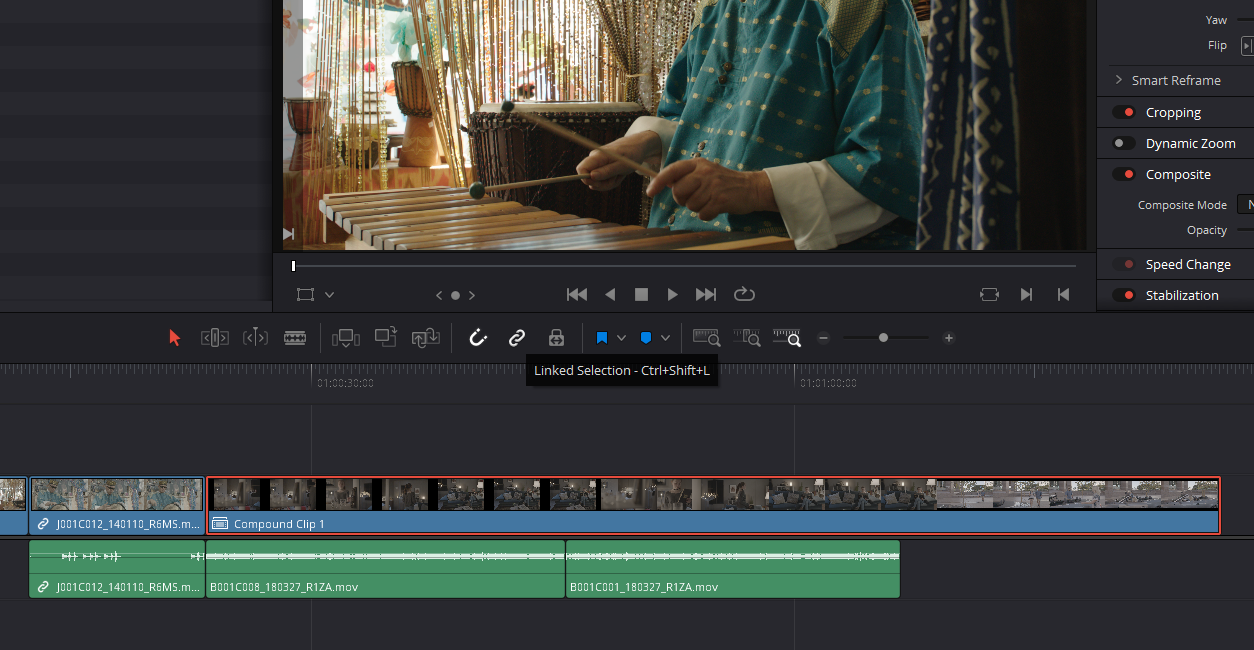
The compound clip in Davinci Resolve can also work for only the video or the audio from the timeline, and if link selection is turned off, we can now select only clips from the audio track.
Then we can go through the same process for creating a compound clip. And now we have a compound clip that only contains clips from the audio track.
Of course, the same can also be done for videos as well as long as link selection remains turned off. We now can select only the video clips and then create a compound clip that contains only clips from the video track.
Reusing Compound Clips
As we saw earlier, when we create a compound clip, the compound clip itself is saved as a separate video clip under the media pool. What that means is that we always have the ability to bring it back even if the file is removed from the timeline.
You can drag and drop the compound clip from the media pool into the timeline. You can also use the same clip at multiple different locations in the timeline. That is the reason why it is important to name the compound clip so that you know what’s in it and where to place it.
Undo A Compound Clip In Davinci Resolve
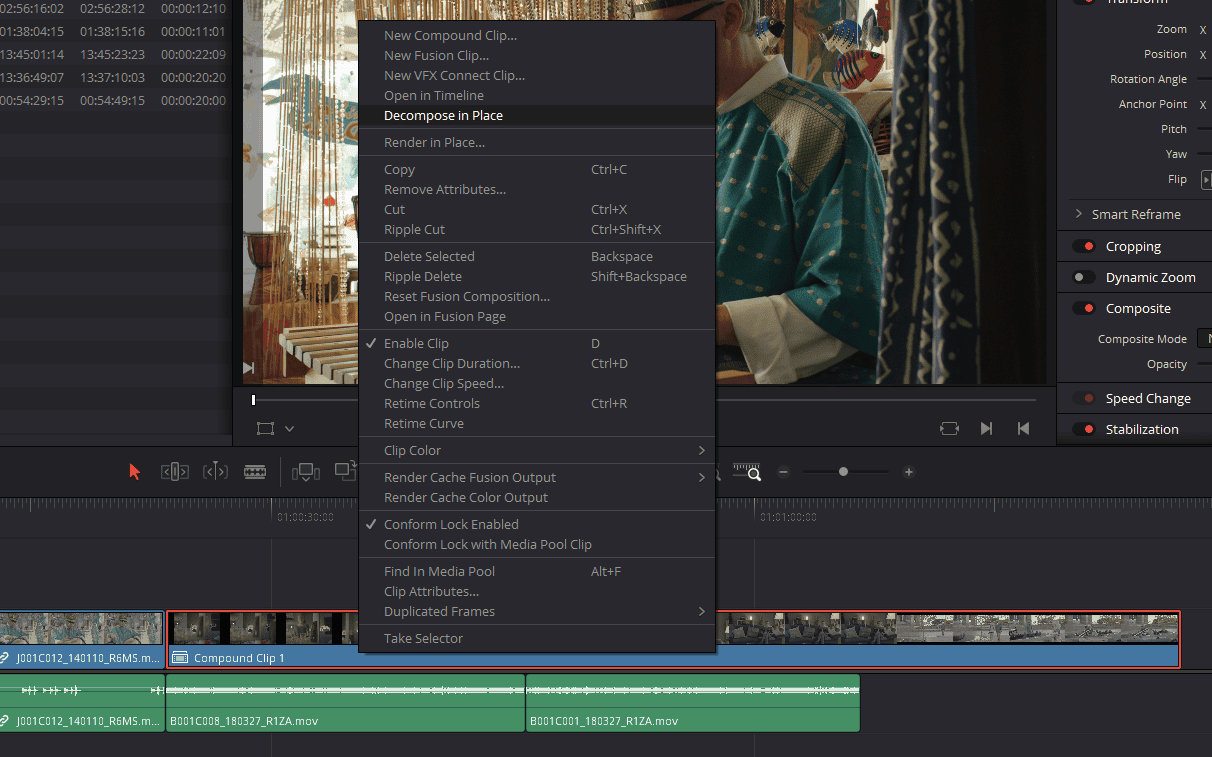
Now another question you may have at this point is that do we have the ability to bring back all the original video clips in the sequence? Yes. All you need to do is make sure you select your compound clip and then right-click and then in the menu Select “‘Decompose in place,” which will bring back all the original video clips in that sequence. And now you have the ability to edit only those individual clips in that sequence.
Using Compound Clip In Different Sequence
The compound clip can also be very helpful if we move that sequence to a different timeline. So let’s say you switch to a different timeline that has very different videos. And now we have the ability to bring that sequence very easily into this new timeline because that entire sequence is now saved as a single video clip.
So instead of having to try to create that sequence from scratch in this new timeline, we can drop that entire sequence easily into our timeline.
- Also Read- Are Rokinon Lenses Worth Buying for Photography (Answered)
- Also Read- 7 Tips For Making The Best Colorist Showreel
- Read- Premiere Pro: Color Management & Export Highest Quality
Practical Uses Of Compound Clips
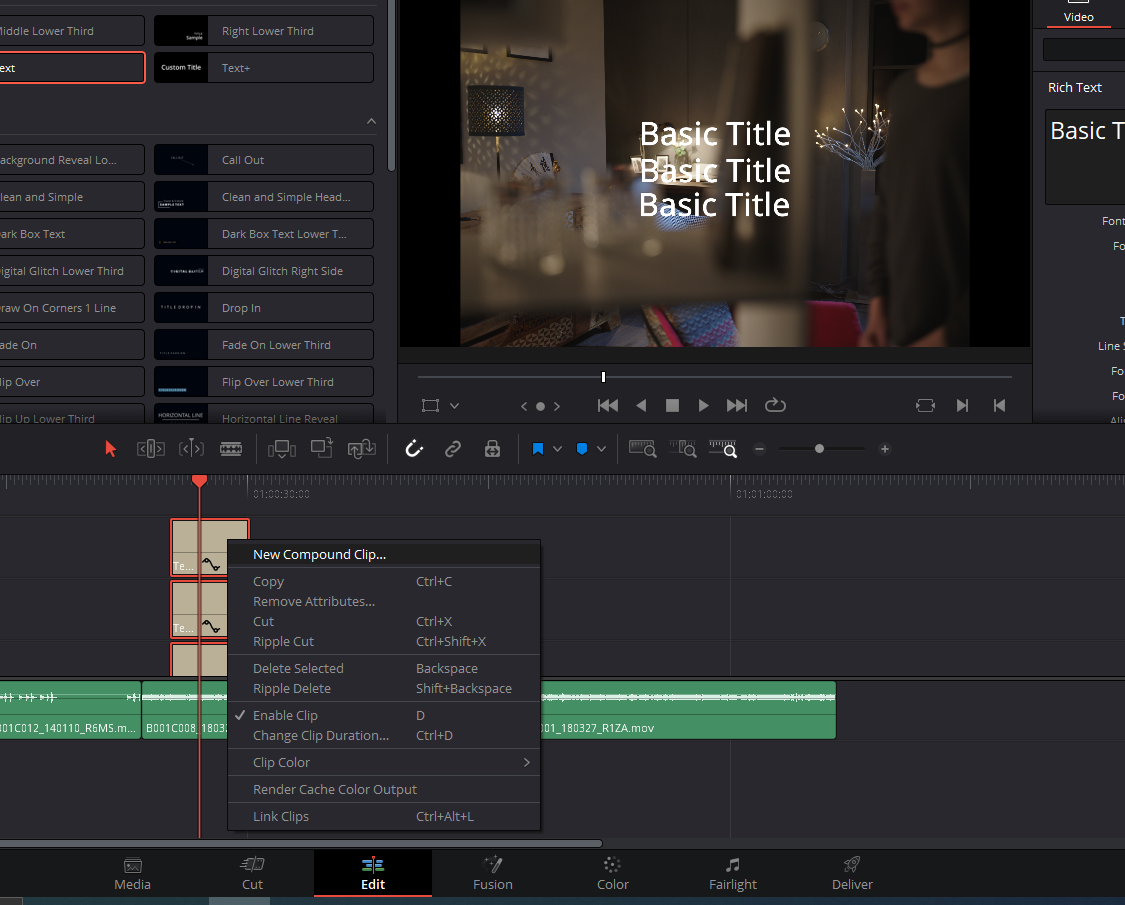
A good way to think about it is if I want to have a bunch of titles on top of each other, or I am trying to make a table or a checklist in my video, which will require a lot of video tracks, and it might get complicated.
To tackle that and dodge confusion, you easily use the option to compound all the title tracks and elements into one.
Keyframing and Using different effects in The Compound Clips
Now, as we have discussed this plenty of times, already compound clips act like they are a clip. You can obviously use any effect, be it a glow effect or glitch.
Another creative usage is that you can easily animate your characters using the compound clips without the need to jump into the fusion page or Adobe After effects.
Supposedly you have a character that has all his hands and legs in different video tracks. You easily keyframe the individual body parts on their individual video tracks and use the compound clip option to move your character as a whole in the sequence.
We have created lots of intuitive animations like it and are loved by the clients. We use this hack now and then when there is not a lot of animation that needs to be done to shift to After Effects.
Using Compound Clip In Fusion Page
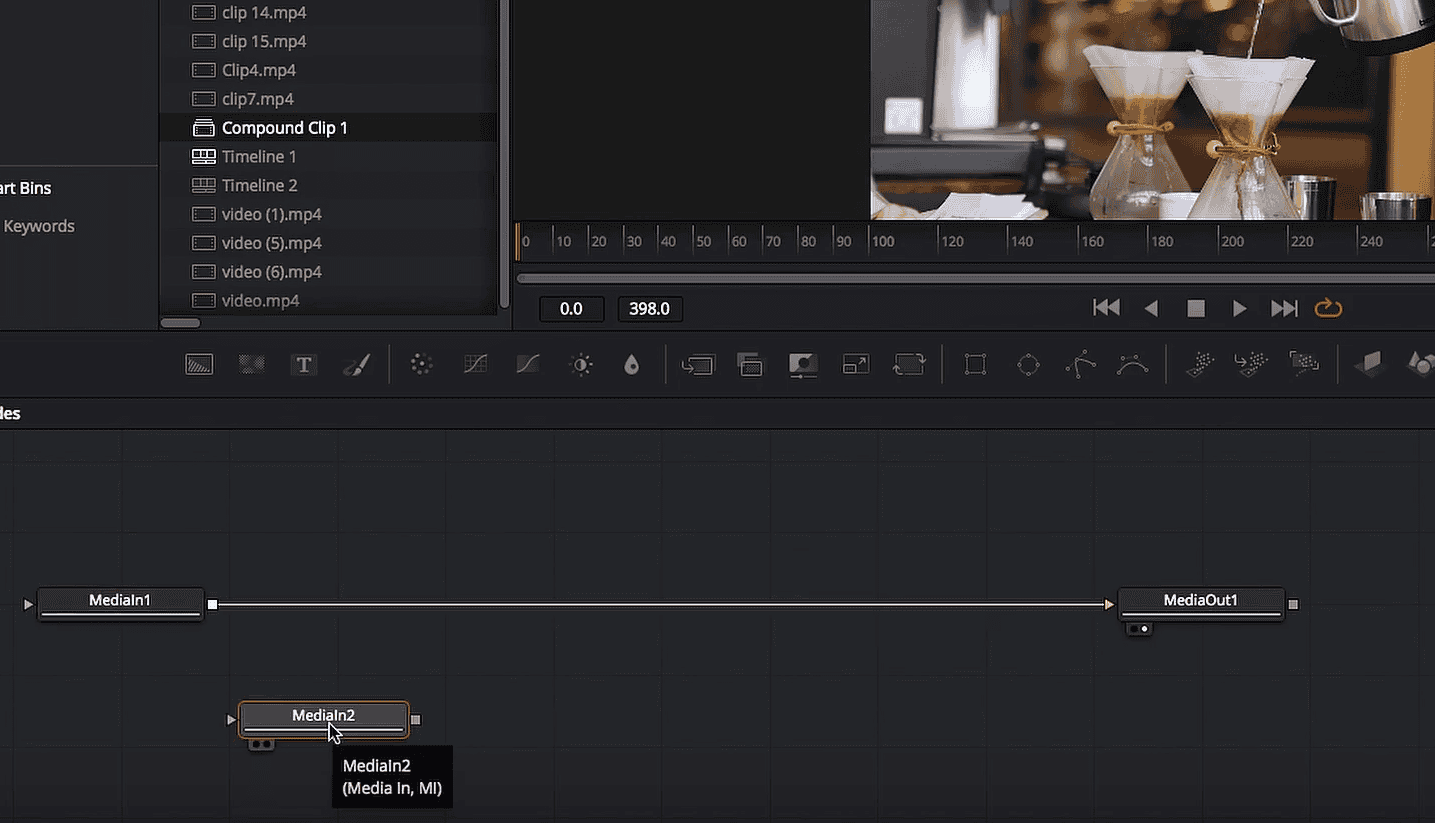
The compound clip also works great in the fusion application. We can actually use the compound clip as a secondary video input to a new video on our fusion page.
Now, if, let’s say, you want to apply a fusion effect to our compound clip, you can do so by taking it to the fusion page and going ahead and using any fusion-specific effects whatsoever.
It really allows us to easily apply a fusion effect to all the video clips that are in that sequence. You can also apply changes to Inspector control very easily through the compound clips. For example, you can go ahead and change the Zoom setting and apply a gradual Zoom out effect to the sequence.
Zoom out effect, and compound clips definitely make it very easy for us to execute these kinds of effects to our sequence.
Can compound clips be used on the color page in Davinci Resolve?
Now, if you are editing a low-budget film or video for your client and they require basic color correction or LOG to base conversion.
You can put all the videos of one sequence which have the same lighting, white balance, and the same location and put them all in a compound clip.
Now with the color page, it also works great as well. All we need to do is take our video clip, take our compound clip to the color page, and any change that you apply on the color page will be applied uniformly to all the clips that are in that sequence.
You can use a basic Rec.709 LUT to do the LOG to Rec.709 conversion in all the clips. Obviously, this is a situation where the budget of the film or the video is not that high that you spend a lot of time on each and every clip to grade and match.
Compound Clips can retain frame rates and resolution.
Compound clips can retain the frame rate and resolution that it was created in even if it is taken to a sequence using different settings.
For example, you have created a compound clip in a 1920×1080 resolution timeline, and you want to take the compound clip to a 1080×1920 resolution timeline that is vertical. You can drag and drop the clip in a different timeline, and its original resolution will be intact.
This way, you can remain consistent with all your deliverables for different platforms by maintaining the linearity between different resolutions.
Conclusion
Compound Clips have exponential potential. I always say to my colleagues that these tools are built so that they have no limitations. The only limitation that can be is you. Think of these tools like brushes are to a painter. You can use them however and whenever you want them to.
I see them as simple calculations and use my creativity to solve the answers using these tools. Remember, it is you who the artist is.
So as you can see, the compound clip is a very powerful alternative to nest clips. It is one of the most versatile tools in Davinci Resolve, and I hope this article helps. I’ll see you guys next time.