Hi everyone. in this article, I will talk about the Proxy Workflow on Davinci Resolve.
Why use this Proxy Workflow on Davinci Resolve?
Now, Resolve has had various methods of using Proxies, either via the Playback menu you or via Optimized Media or source caching or Render caching.
But none of those solutions encompassed all of the reasons why you might use proxy media. And the new Proxy toolset is flexible and addresses a lot of these concerns, but there are a lot of details you need to understand and get right.
So I’m going to walk you through generating Proxies, Linking Proxies, using Proxies, and Sharing Proxies in Davinci Resolve to help speed up your workflow when you might not be able to use full-resolution media.
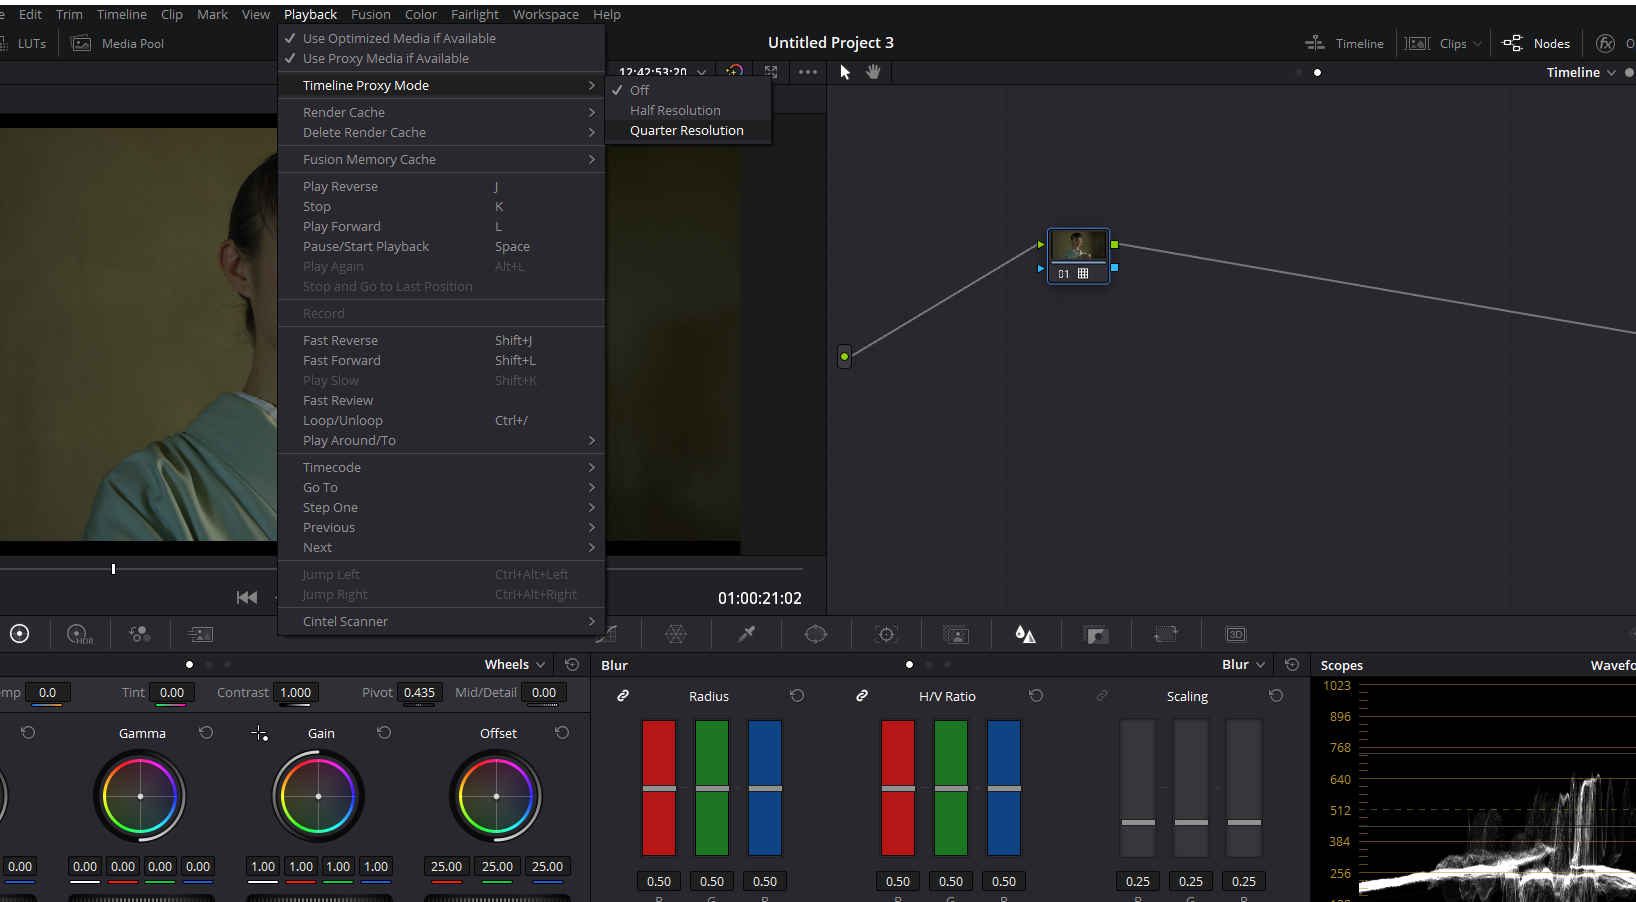
The first thing you might think is, well, Resolve already has Proxy right in the Playback menu>Timeline Proxy Mode.
There’s always been a Proxy mode of half or quarter resolution. It downsamples your Timeline, so things like color page effects and complex color grades play in real-time, but it doesn’t create low-resolution proxy media.
Now, another common way of speeding up your playback is to use source caching or render Cache. Cache down a RED RAW file, for example, into an HD ProRes clip, and then your Timeline will playback faster.
The problem is that you can’t share that project with its caches, and it’s very easy to accidentally knock those caches offline. So let’s walk through this new proxy workflow and see how it’s different and how we can use it.
Most Efficient Proxy Workflow on Davinci Resolve
You first want to look in your project settings and under Optimized Media and Render Cache. There’s Proxy Media Resolution Format and Proxy Generation Location. So the generation location is the folder where Resolve will make Proxy media.
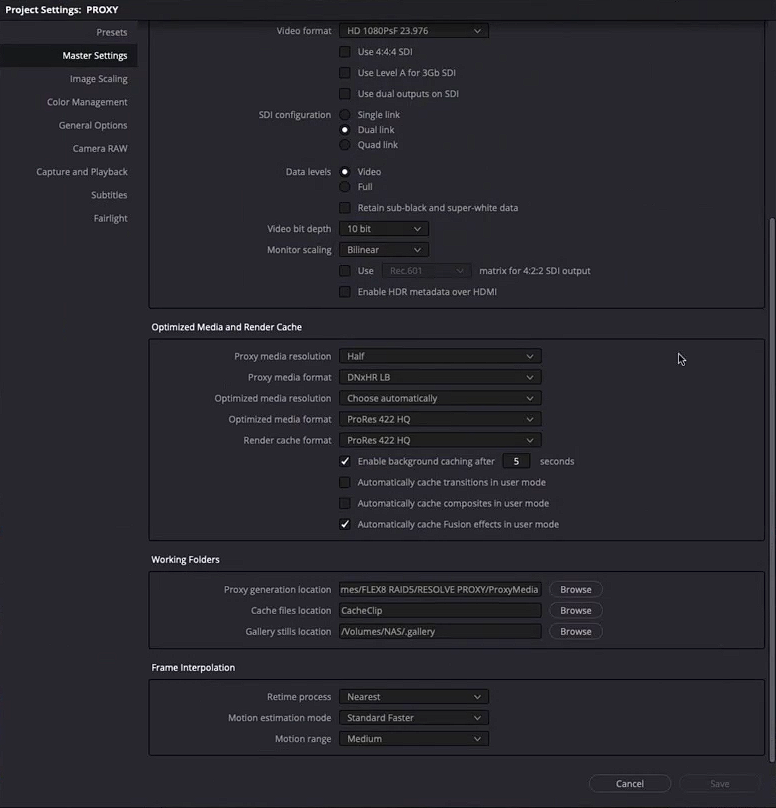
The resolution is the size of the proxy media, which you can choose automatically in a lot of cases. But usually choose the half resolution. And Proxy Media Format is the type of media it will generate. You’ve got your usual codec options. H.264, H.265, ProRes if you’re on a Mac and DNxHR.
Now, I wouldn’t say I like editing from GOP formats like H.264, H.265. So I think the best choice for this is DNxHR, low Bandwidth, or a ProRes Proxy. So I usually choose the DNxHR LB in proxy media format. I’ve already set my generation location, and I Save it.
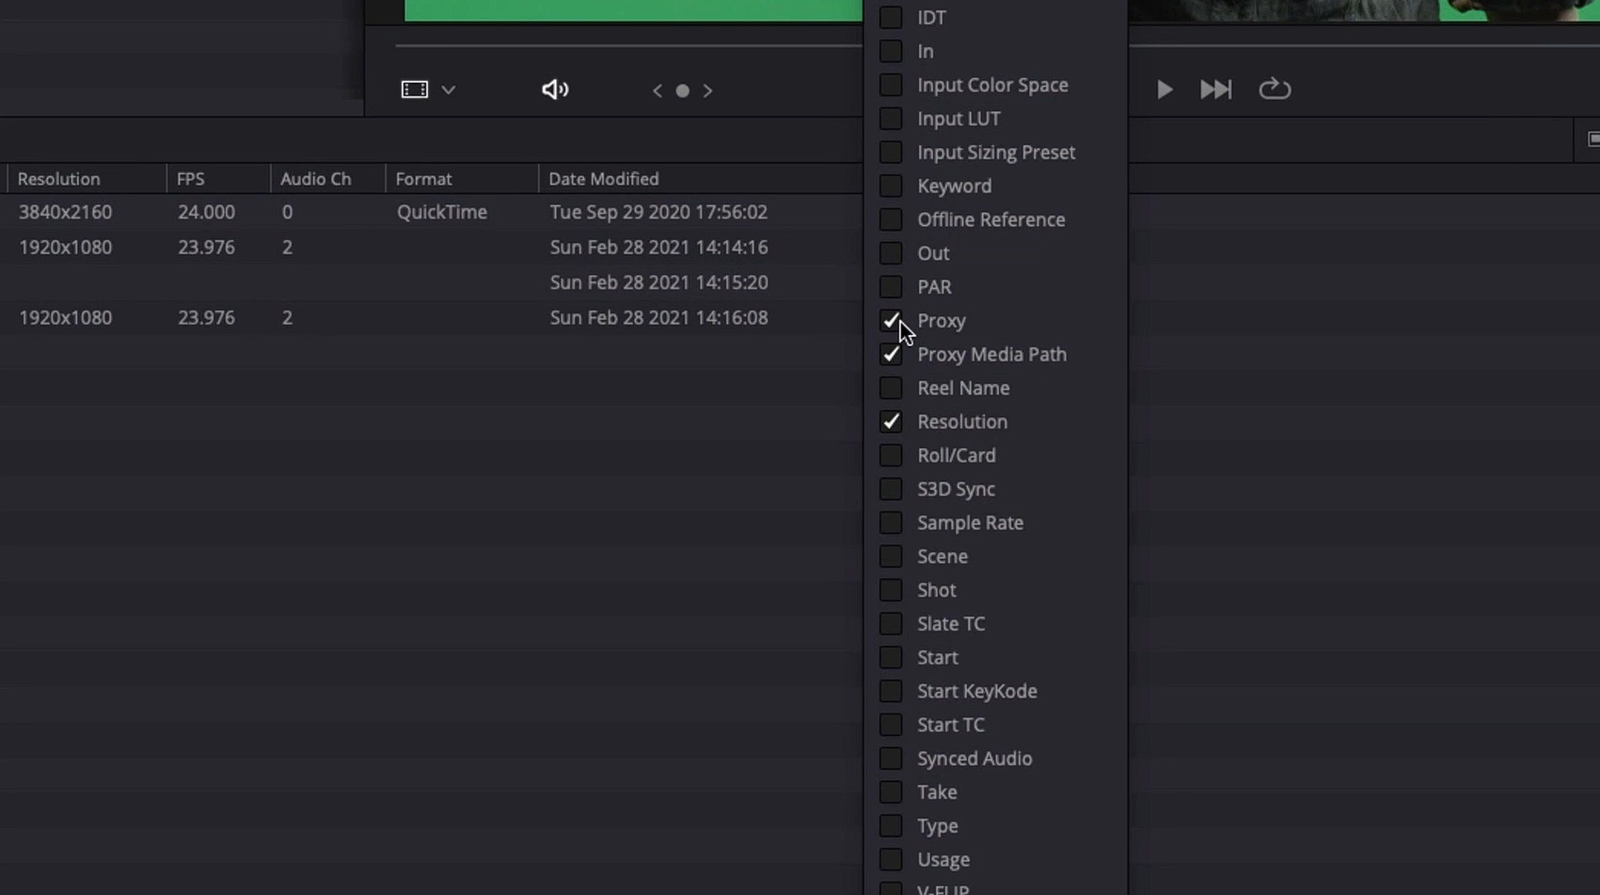
So in the media pool, right-click on the title bar where it says “Format, Date Modified, etc.” and enable Proxy Media Path and Proxy. A new menu with the title Proxy will appear in the media pool.
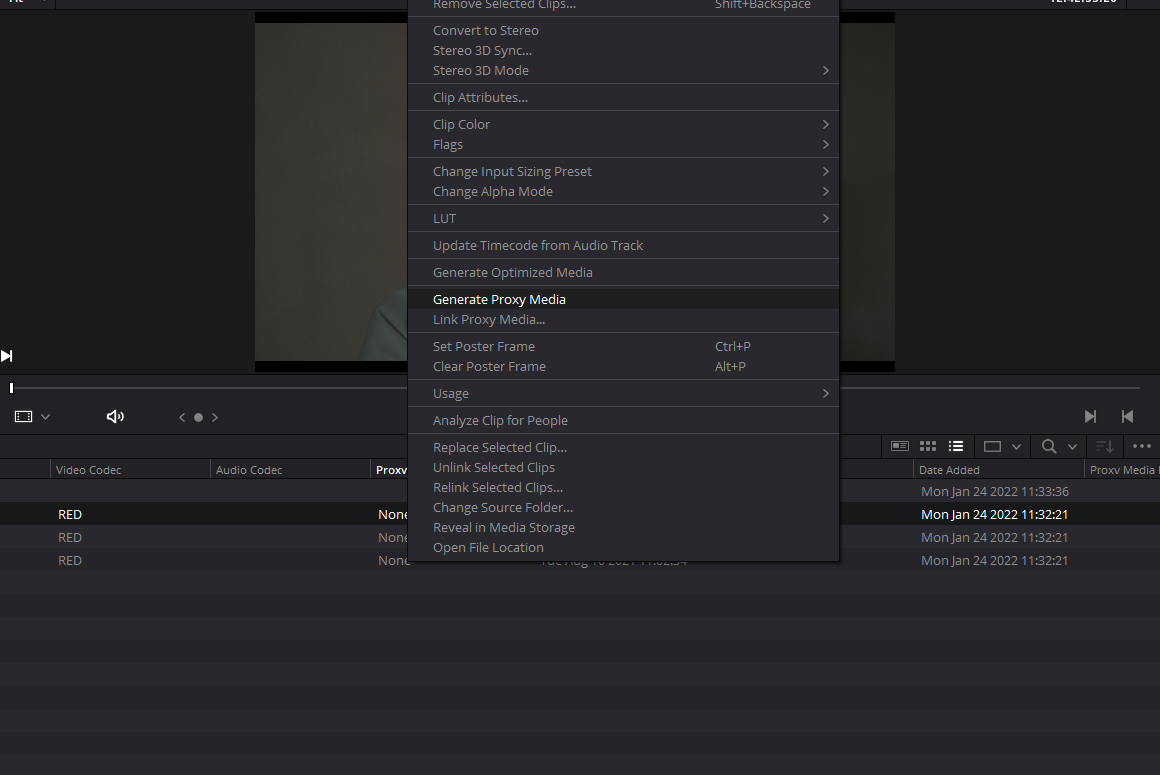
Now, you will see there’s no proxy still there for your media, but if you right-click in the Proxy Menu, you will have an option to Generate Proxy Media. And Resolve is going to automatically make Proxy Media into the folder that we specified in the project settings. You will immediately see how it’s linking the proxy showing as 1920 X 1080, which is half the original resolution, and it’s showing us the proxy media path as well.

But what’s cool about this is, unlike optimized media, you have access to these files. If you go over to the Finder and head to the location you specified and open up the file that Davinci Resolve just created, you can see that you have just created a DNxHR LB proxy file, and we could use this anywhere else in our workflow.
We could use it in another nonlinear editor. We could give it to a graphic designer or a compositor to start working in After Effects or something like that. And it’s available for us to use and resolve.
So, now, how do we use this proxy media in Davinci Resolve itself?
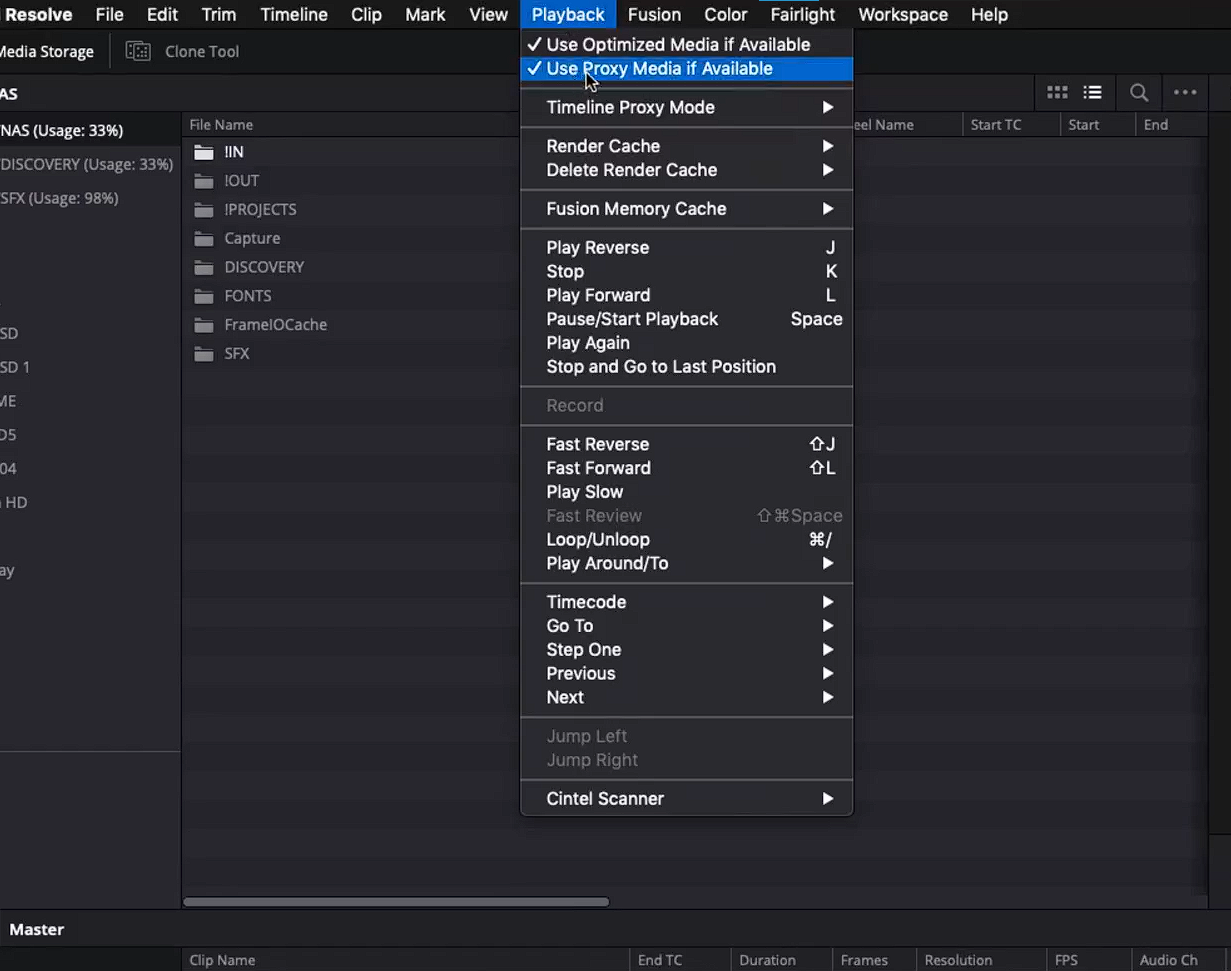
Doing so is as simple as going to the Playback Menu and turning on Use Proxy Media If Available.
If working with green screen footage, after generating your Proxy Media, you can jump into the color page and start working with the proxy media. You can start by roughing out the Chroma key, and if you Zoom in and go into the Playback menu and turn off the proxy media, you will immediately get more detail back, and you can go ahead and refine that key further.
Creating Editorial Proxies
So next, let’s go through a workflow that I think many people are going to use, which is Editorial Proxies.
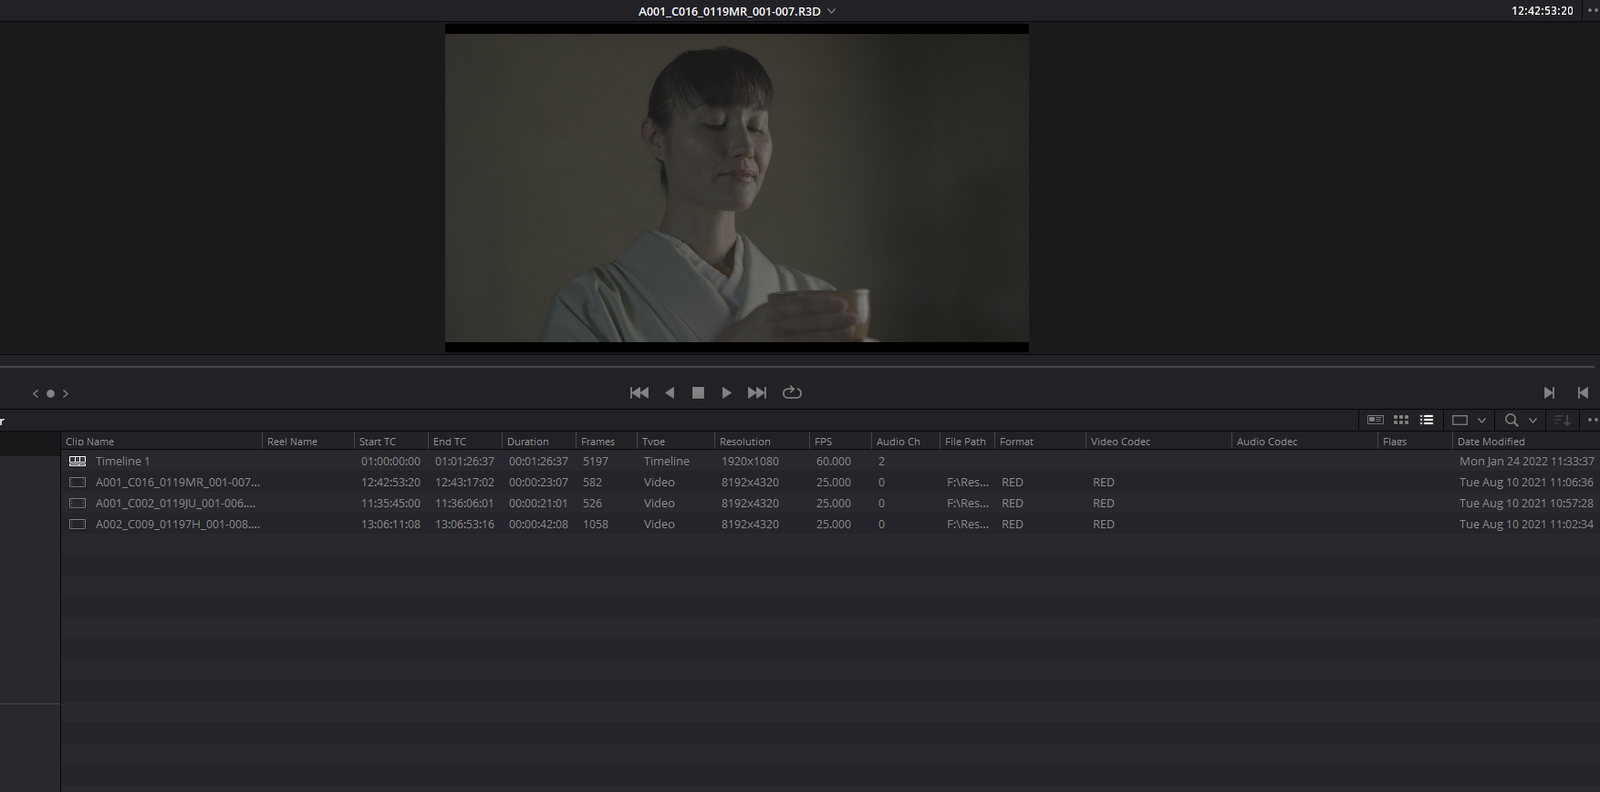
Supposedly, you have some RED RAW files in your media pool. You can generate proxy media with Adobe Media Encoder as well, and it is a very good Proxy Workflow.
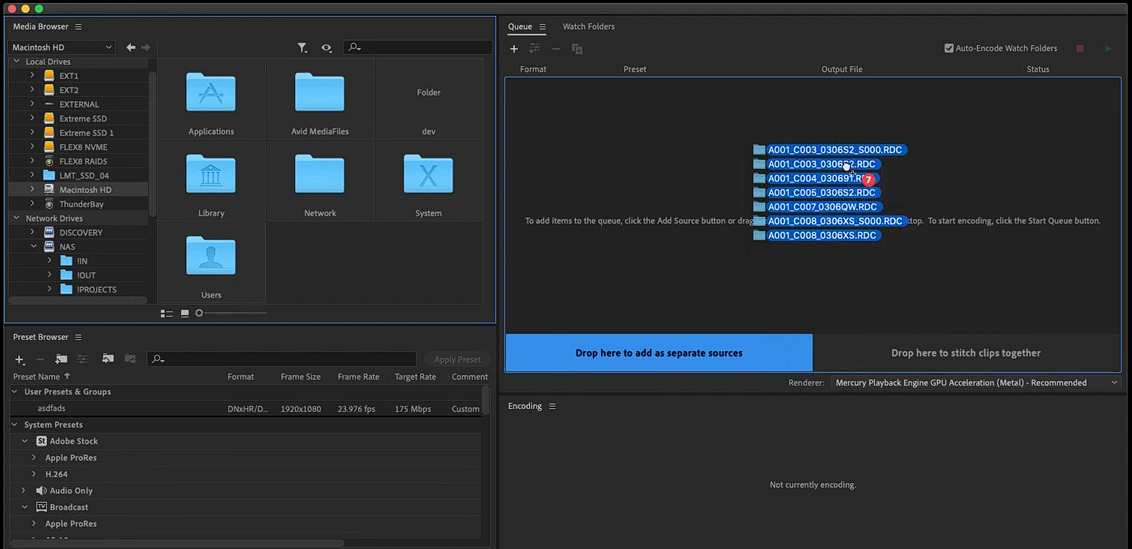
You will add all your clips in the Adobe Media Encoder, select them all, define where you are going to save them to, and then change the settings of our transcode.
You can use DNxHR MXF OP1a for the format and select the DNX low bandwidth 1080p preset that is DNX LB. Then you can hit okay and run the transcoding.

When the transcoding is done, you’ll jump back over to the Media page, select all the clips, right-click and link Proxy Media, and you will navigate to that folder of Proxies, and immediately it finds all of the right proxies, and you will see the aspect ratio is correct.

Adobe Media Encoder also applies the default RED Rec.709 color space transform to them because it was a RAW format (it won’t apply any color space transform to LOG footage), and on the edit page, you will immediately see that we’re using the proxies because of the color change and scrubbing around in the Timeline will become butter smooth, and this would be a great way to get editorial going.
Then when you are ready to grade, you can go right back to the color page and, under playback, turn off proxy media. And now you have got your original full-res Red RAW.
Requirments of Davinci Resolve Proxy Files
Now, there are a couple of things you need to know about the Proxy file requirements to link into Davinci Resolve:
- Obviously, they need to be a format that Resolve can read.
- They need to have the correct timecode. So you don’t want to try to do an MP4 container that doesn’t have a timecode; you want to do a Quicktime or an MXF.
- They have to have the same name as the file name in Davinci Resolve. But there’s an exception to this. It will ignore the last underscore in a file. This gives you some flexibility when you’re generating these proxies.
Moving the proxies to other Davinci Resolve Machine
Now, the last thing I want to talk about with this proxy workflow, I think, is probably the most advantageous part of it above, for example, the old proxy option or optimize media or even source caching, and that is it’s portable.
You can move these proxies, send them, send a project with them, which opens up some really good workflow possibilities. Let’s say I was working at a facility but needed to take a project home, and my system at home wasn’t powerful enough to work on the RAW files, or I didn’t have enough storage to work on the RAW files.
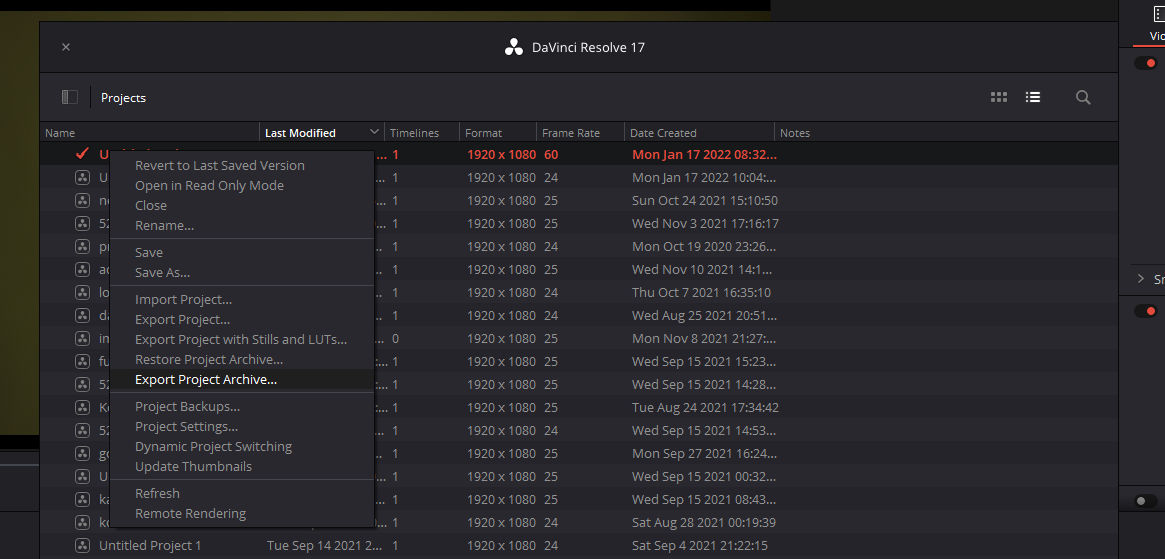
You can now create a proxy only Davinci Resolve archive of a project. So if you open up the project manager and right-click on the project and Select Export project Archive, it’s going to ask where to save it. And then, you will hit Save, and you will get some options.
Then you have to want to turn off “Media files” and “render cache,” but initially, it won’t even let you do that until you turn on the proxy media option.
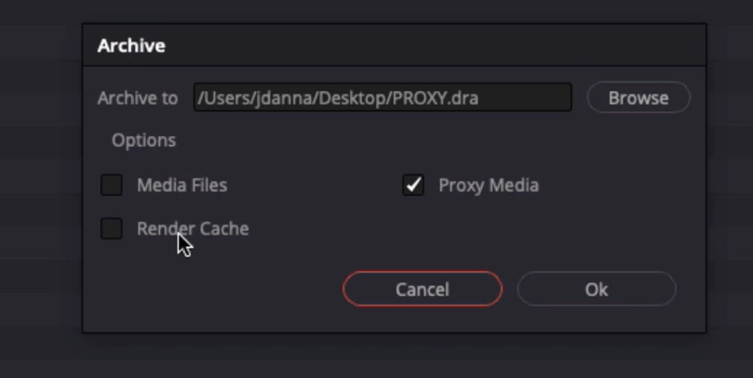
Now you can turn those options off and hit okay, and it’s going to copy only the proxy media. If you jump over to Finder and open up that .dra folder, it will only have the proxy media.
It won’t have any of the original media, but you can still import that back into Resolve and work on the proxies.
Sorting the Proxies

Now there’s one very important thing to know about exporting these .dra with proxy media, and that is if your project has any full-resolution media that doesn’t have proxies associated with it, it will copy that media in its original format.
So a good thing to do is select all your bins in the media pool and sort by Proxy by clicking on it. You can then see how many clips have proxies. If there are clips that don’t have proxies that you don’t want to copy the original resolution media for, you can go ahead and generate proxies for them.
Or if you have clips like stills or small pieces of media that you don’t care if it copies the original, you can go ahead and leave them. But sorting by that proxy tab will give you a single view of what in your project has proxies and what doesn’t before you export an archive.
Conclusion
So I think you can see the proxy workflow is a big step forward in functionality, not just for colorists, but for Editors, for finishers, for anybody working with Davinci Resolve in complicated projects that might need to send them to lower-powered machines, might need to send them home with them, or on a trip with a laptop.
Or you might want to have faster performance until you’re ready to do your final finish.
Now, when you do your final renders by default, Resolve will not use any proxy media but on the delivery page if you want to render out with Proxies, maybe for client approval or a low res copy.
You can always enable “Use Proxy Media” from the Advanced Settings, and then they’ll use the proxies when you render as always.