Hi, I’m Salik, the author of FilmmakingElements.com. I have been a filmmaker for over 10 years. I am also a certified DaVinci Resolve Trainer and I have used DaVinci Resolve for many of my projects. In today’s blog post, we’ll guide you through the process of creating professional-looking scrolling end credits in DaVinci Resolve. Whether you’re working on a short film, documentary, or a full-length feature, a well-designed end-credit sequence is essential to give credit to your hard-working team and leave a lasting impression on your audience. So, let’s dive in and explore how you can create stunning end credits using this powerful editing software.
Method 1: Making Scrolling End Credits In Edit Page Of Davinci Resolve

Creating scrolling end credits in the Edit page of DaVinci Resolve is a simple and straightforward process. Follow these steps to add basic scrolling credits to your film:
- Locate the Effects Library: In the upper left-hand corner of the screen, ensure that the Effects Library button is bright white. If it’s not, click on it to activate the panel.
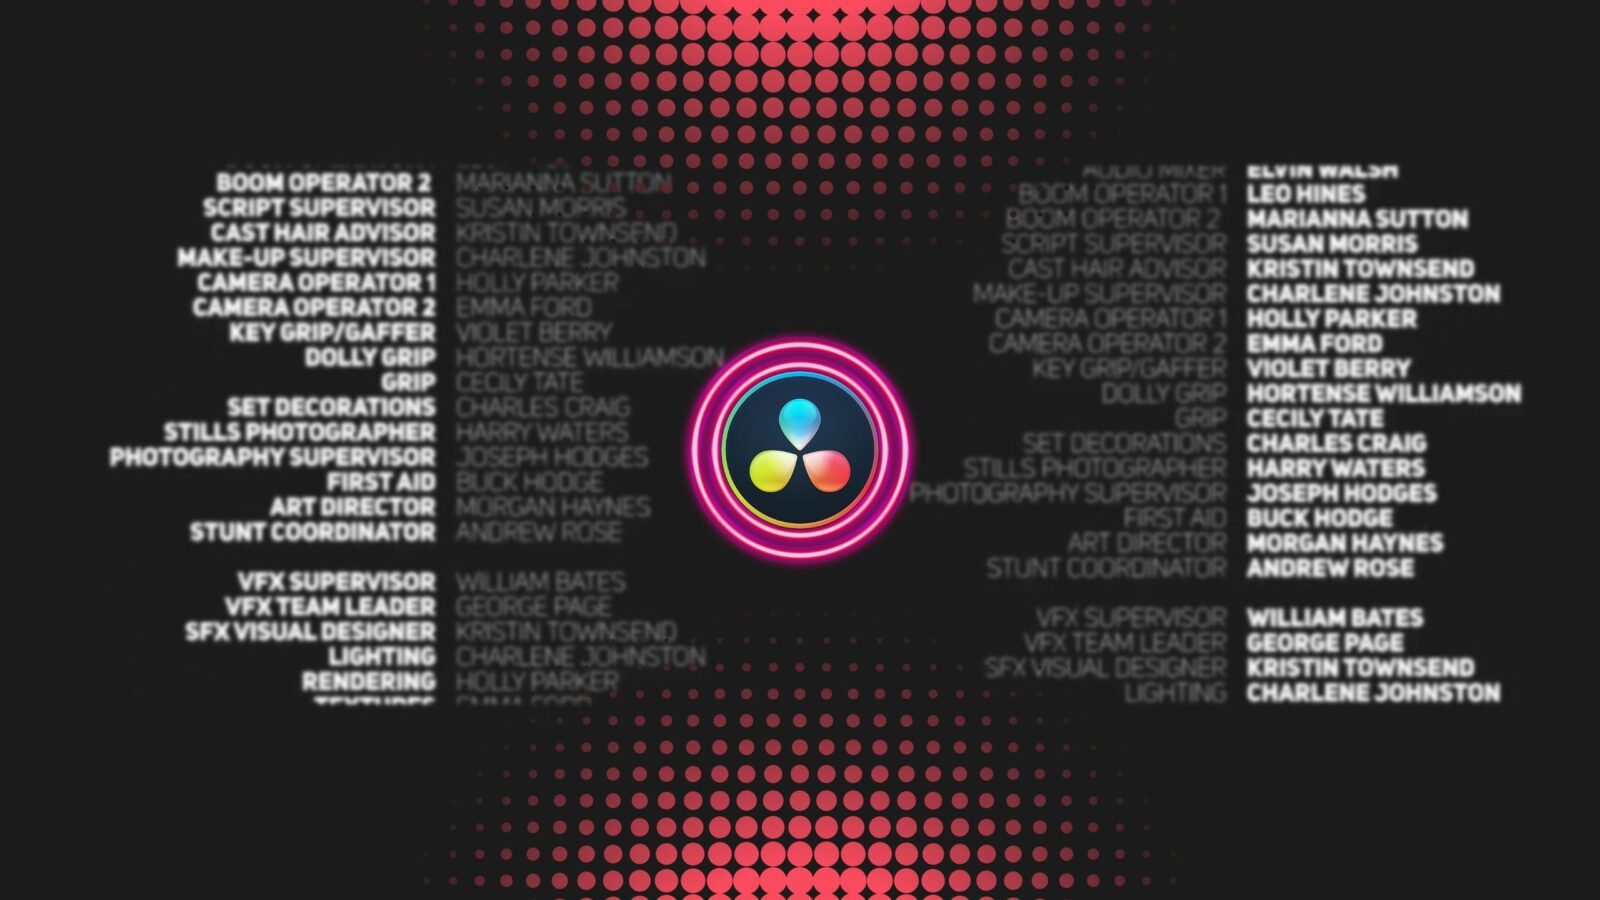
- Choose the Scroll Title: In the Effects Library, find the Titles section and scroll to the top. Look for a title called “Scroll” and drag it to your timeline where you want your credits to appear.
- Select the Scroll Title: Click on the Scroll Title in your timeline to highlight it in orange. This allows you to modify its properties in the Inspector panel.
- Open the Inspector: If the Inspector panel isn’t visible, click the Inspector button in the top right corner of the screen. Note that if you’re not seeing these buttons, you might be in the Cut page instead of the Edit page. Ensure you’re on the Edit page before proceeding.
- Edit the Text: With the Scroll Title selected, you can now edit the text within the Inspector panel. Type in your credits or copy and paste them from a prepared document. The text will automatically scroll upwards once it’s entered.
- Format the Text: Under the Formatting tab in the Inspector, choose a font, adjust the alignment, and resize the text to your liking. Remember, smaller text often looks more professional, so avoid making your credits too large.
- Adjust the Scroll Duration: To control the speed of the scrolling credits, simply adjust the duration of the Scroll Title in your timeline. The scroll speed will be automatically timed to fit the entire duration of the title.

And there you have it – a simple and easy way to create scrolling end credits in DaVinci Resolve’s Edit page.
With just a few adjustments, you can achieve a professional-looking end credits sequence for your film.
Method 2: Making Scrolling End Credits In Fusion Page of Davinci Resolve
End credits are essential for wrapping up your film or video project, and DaVinci Resolve’s Fusion page offers a versatile and powerful way to create advanced scrolling end credits. This detailed guide will walk you through the process of creating professional-looking scrolling end credits using the Fusion page in DaVinci Resolve.
Setting up the Fusion Composition
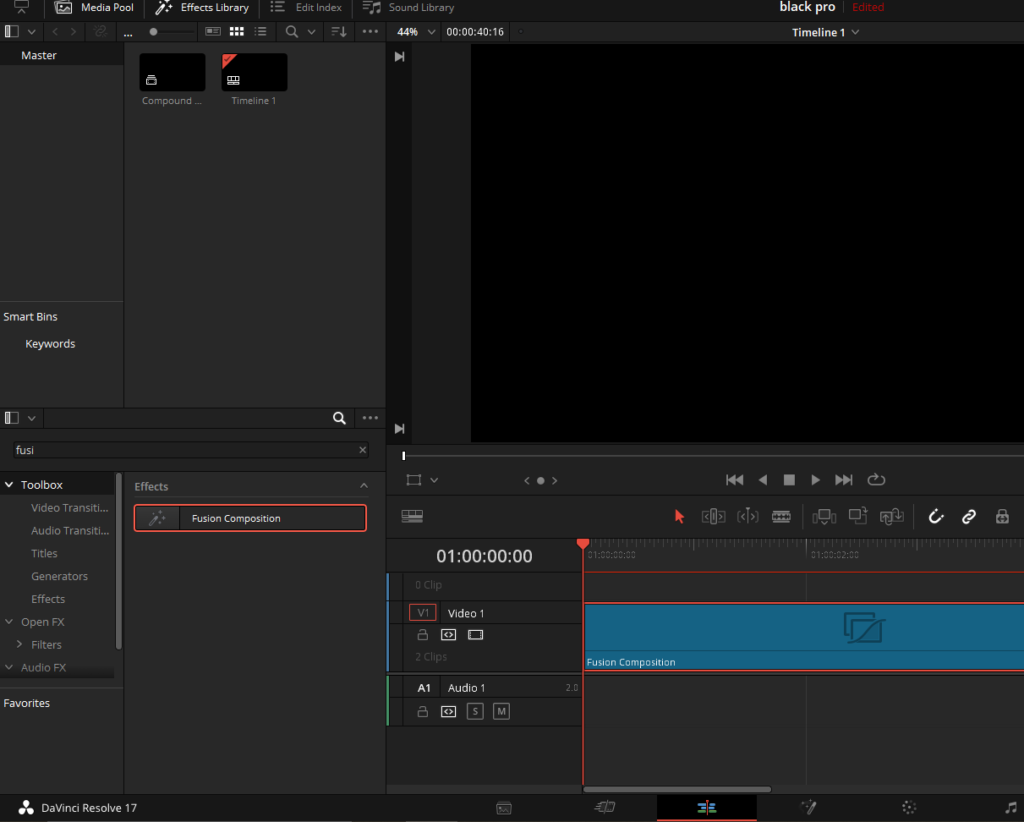
- Open DaVinci Resolve and navigate to the Edit page.
- Add a Fusion Composition to your timeline and extend it to the desired length for your end credits. You can adjust the length later, depending on the speed you want your credits to roll and the length of the credits themselves.
- Move on to the Fusion page.
Creating a Background Node

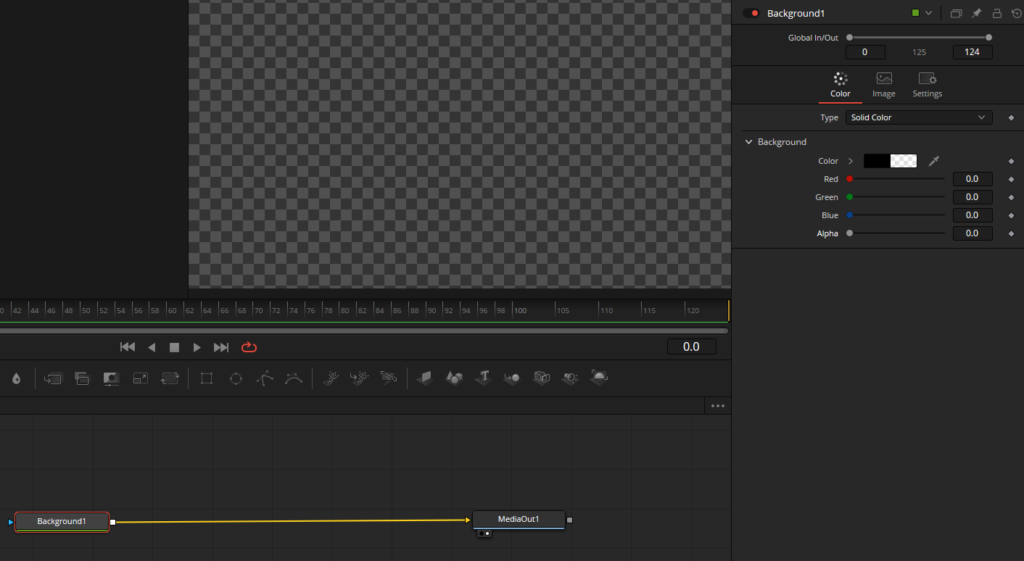
- To add a new node in the Fusion page, right-click on the empty space, press “Shift+Space” and type “Background” in the search bar. This will bring up a new background node.
- Link the output of the background node to the MediaOut node.
- Reduce the alpha channel to zero to gain transparency in the inspector tab.
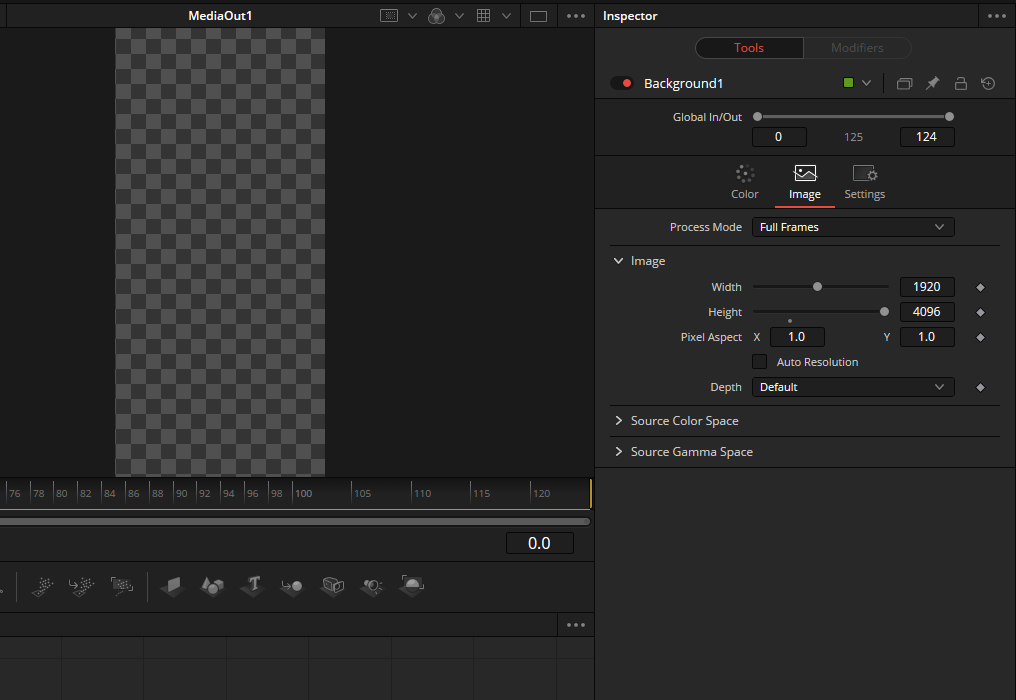
- Go to the Image tab, in the inspector tab of background node, untick auto resolution, and increase the height to the maximum. This sets up a vertical canvas for creating and animating your scrolling credits.
Creating the Text Layout

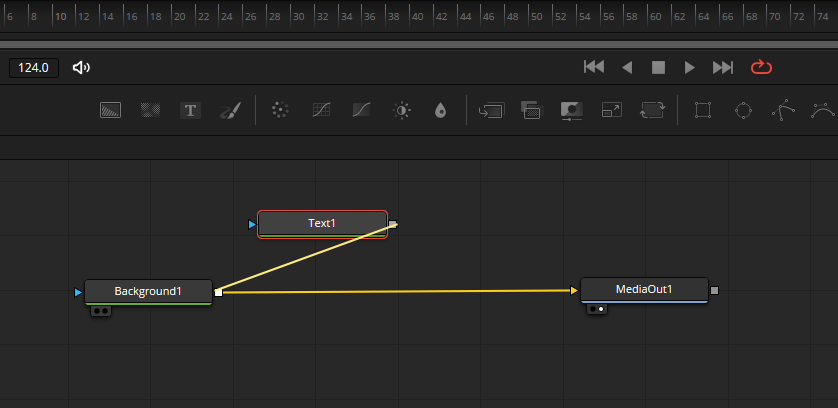
- To add a new text node, first, click in the empty space, press “Shift+Space” and type “Text+” in the search bar.
- Link the output of the text node to the background node.
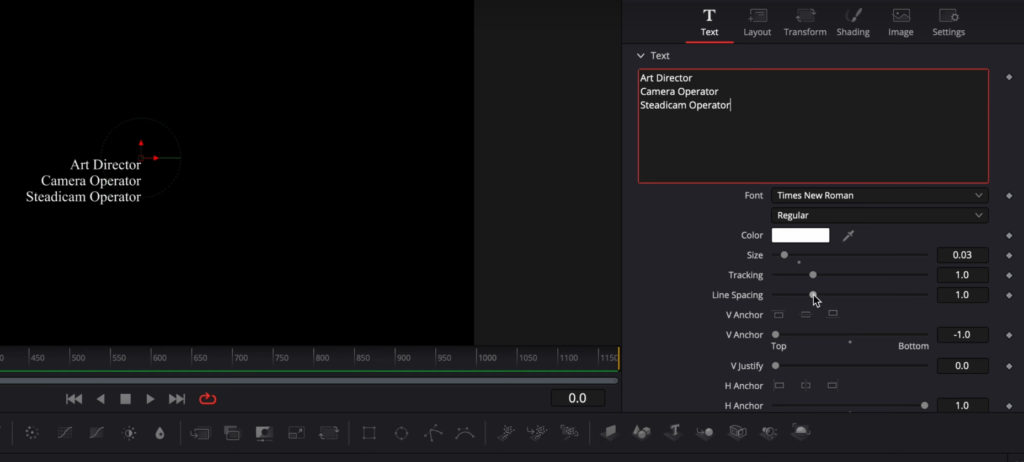
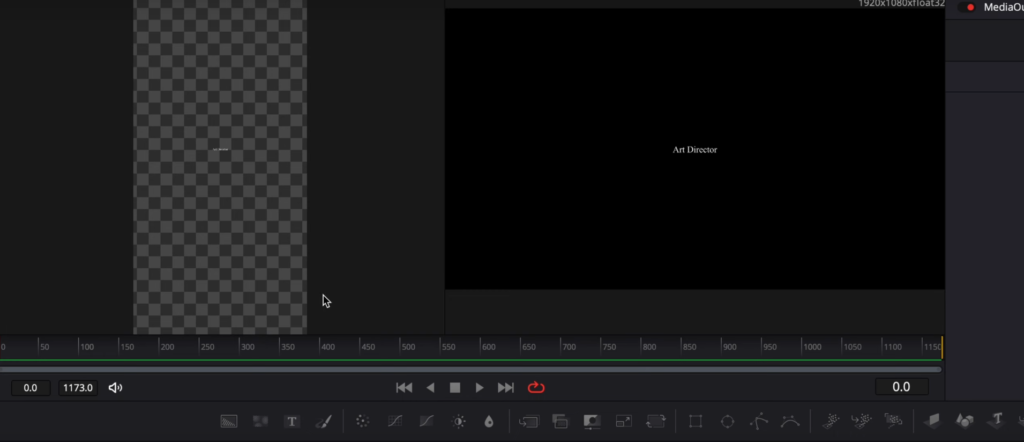
- While the Text node selected, in the inspector tab, enter the role (e.g., Art Director) and change the font to Times New Roman, set the size to 0.025, and switch from bold to regular. This initial text node will be the starting point for your end credits layout.
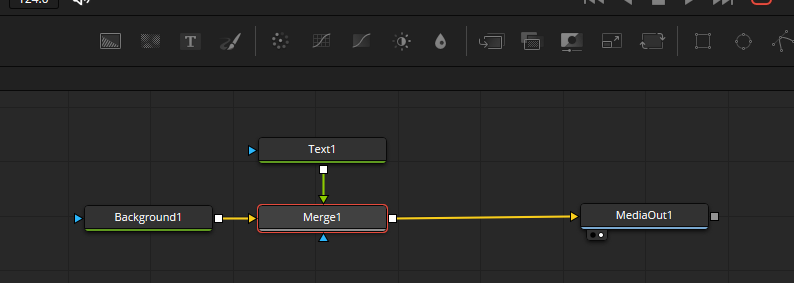
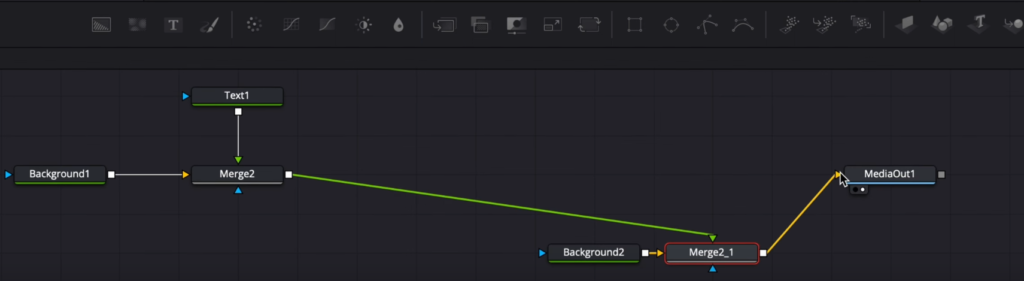
- To preview the final version, create a new background node and link the output of the Merge2 node to that background, a new merge node will be created, and link that merge node to the Media Out.
- Select the Merge2 node, press Shift+Space, and bring in a Transform node.
- Now you can see the preview in the original form.
- Now keep the transform node selected and press “1”
- Go the MediaOut and press “2”
- Now when you switch from single viewer to dual viewer from pressing the small rectangle on the top right corner of the viewer, you will see the whole canvas on the right viewer and the final output on the left viewer.
- Now with the transform node selected, and in the viewer on the left, if you click and drag the arrow pointing upwards, you will be moving the text down or up.
- This is how we are going to animate the scrolling of the end credits.
- Now before adding more names or anything, change the V anchor in the inspector tab to top.
- Change the H anchor to the right.
- Play around with the text size as well if you still feel its too small.
Adding Names and Roles
- To add names associated with the roles, create a second text node.
- Link the output of the text node to Merge2
- You will be using Text2 for writing the names of the roles of the people.
- Adjust the font, size, and V-anchor settings to match the roles text node.
- Use H-anchor to align the text to the left.
- Continue adding roles and names to fill up the screen, adjusting spacing and alignment as necessary.
Adjusting Scrolling Animation Speed and Fusion Composition Length
- Select the transform node.
- To adjust the speed of your scrolling animation, go to frame 0 in the timeline and drag the credits to the bottom, out of the frame. Drop a keyframe on the center of the Transform node.
- Go to the end of your Fusion Composition and drag the text through the frame until the credits are out of the frame at the top. The scrolling animation is now set.
- If you want to make the scrolling animation faster or slower, go to the Spline Editor, click on the Transform node, and select “Zoom to Fit.” Adjust the end point by holding Shift, clicking on the point, and dragging it left to make the scrolling faster or right to make it slower.
- If you extend or shorten the Fusion Composition, remember to adjust the length on the Edit page as well. This ensures your scrolling animation will fit within the timeline.
Finalizing the End Credits
- Once you’re satisfied with your scrolling end credits’ layout, speed, and media timing, play the animation to ensure it looks polished and professional.
- Make any final adjustments to the text, positioning, or animation as needed.
With these detailed steps, you can create engaging and professional scrolling end credits for your film or video project using DaVinci Resolve’s Fusion page. This comprehensive guide will help you master the process and impress your audience with the perfect finishing touch.