
Hello, and you’re very welcome back to your one-stop for all things about DaVinci Resolve. So let’s just jump right in this article about how to change aspect ratio in Davinci Resolve . We’re going to look at three very handy methods to change aspect ratio in DaVinci Resolve each with some pros and cons. After reading this article you will find yourself having good options that should cover all bases and at last, we also have a have look at how to set a custom resolution setting in Davinci Resolve with an example.
Methods to Change Aspect Ratio in DaVinci Resolve
Here we will discuss what are all possible methods to change aspect ratio in DaVinci Resolve in full detail with the pros and cons of each method and pictorial representations.
1. Full Manual Option
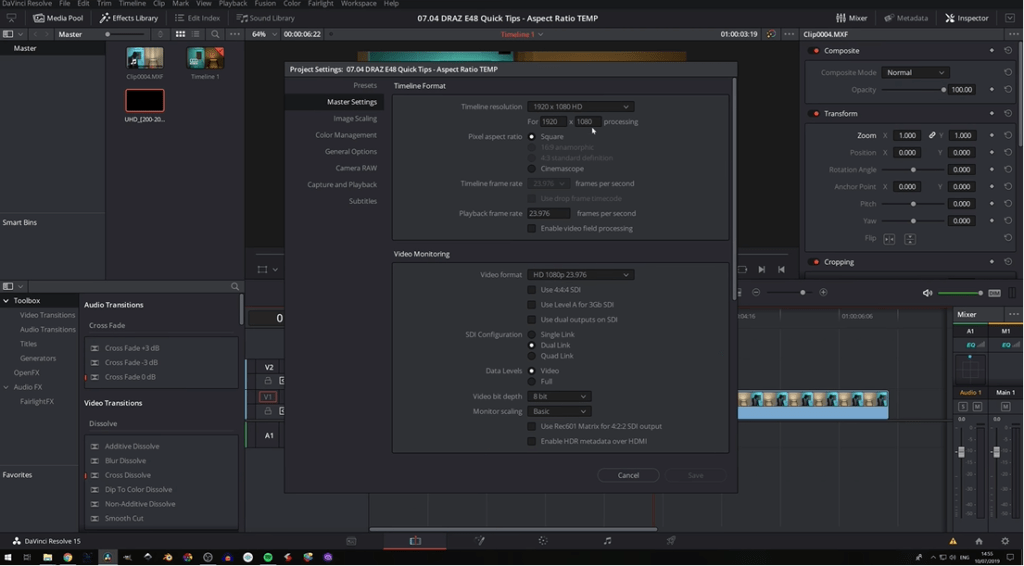
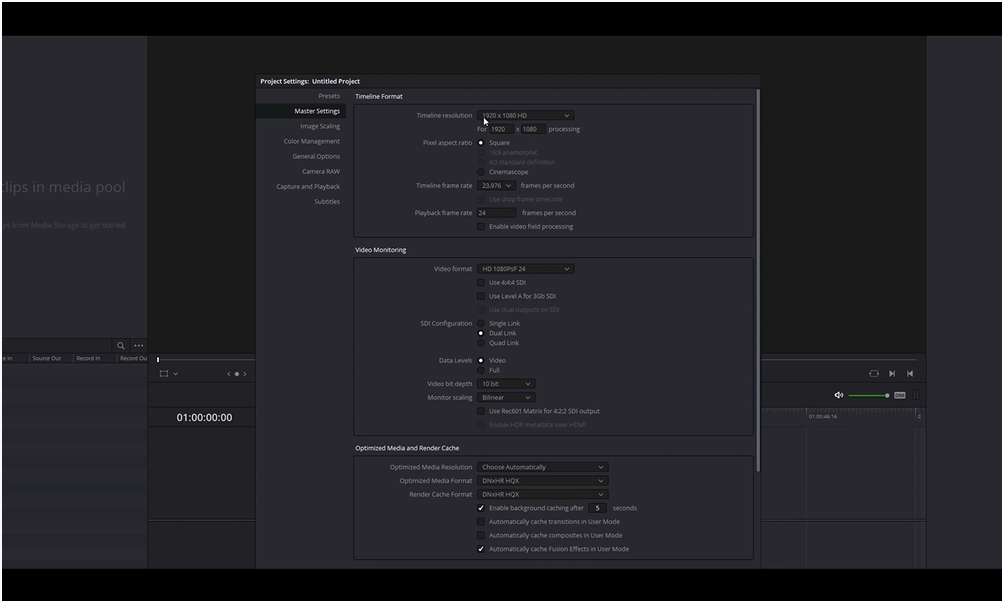
The first method to change aspect ratio in DaVinci Resolve is the full manual option. To do this simply come into your project settings (Cog) as shown in the picture, then go into your master settings to timeline resolution, and do the math. So, here we took an example of 1920×1080, just full HD footage. We shot it in a 2.35:1 aspect ratio in mind, the camera had the overlays for 2.35:1, so our composition and framing is for that aspect ratio. Therefore and if we change our height to 817 and we’ll hit save, that’ll automatically now go into a 2.35:1 aspect ratio. Here is a summary of the steps listed below-
- Come into your project settings.
- Go into your master settings to timeline resolution, and do the math.
- Change the height and length as per your requirement.
The pros of this method are, you will have a smaller file size versus doing an output blanking or overlays because you are not going to be rendering it a bunch of extra pixels. And even though it would it’s not that big a difference in file size because it is simple black pixels, but it still makes a difference.
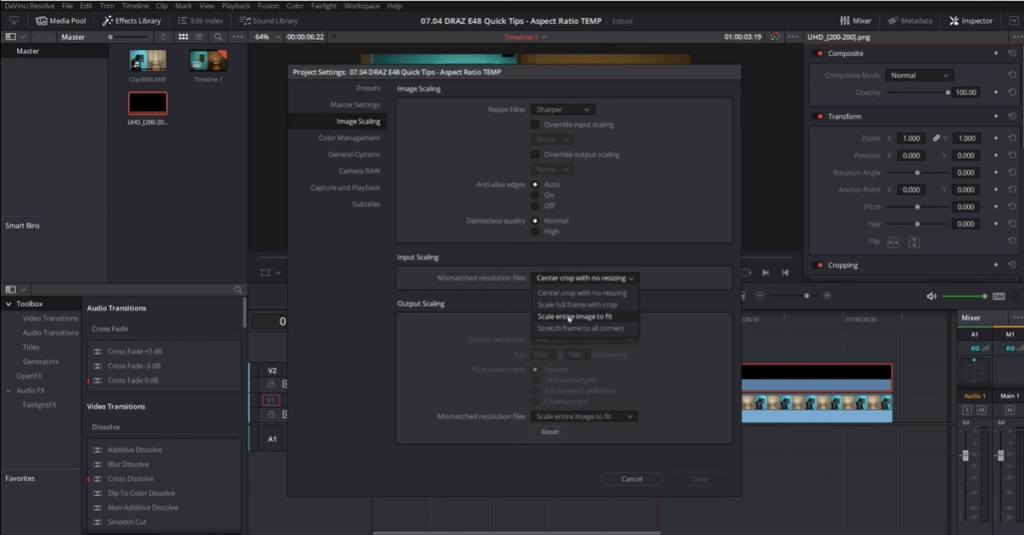
The downside of this is that if you don’t know the numbers off the top of your head. You’re gonna go do the calculations and it can get awkward and tricky and it is kind of a waste of a bit of your time, especially if you’re in a quick crunch, so that’s just something to be kept in mind. A little thing that might catch weight is the image scaling mismatched resolution files might be set to something like scaling the entire image to fit, for example, in which case you accidentally get these sidebars. So just make sure that you have that set up correctly. So you don’t get any unwanted results.
2. Fully Automatic Method
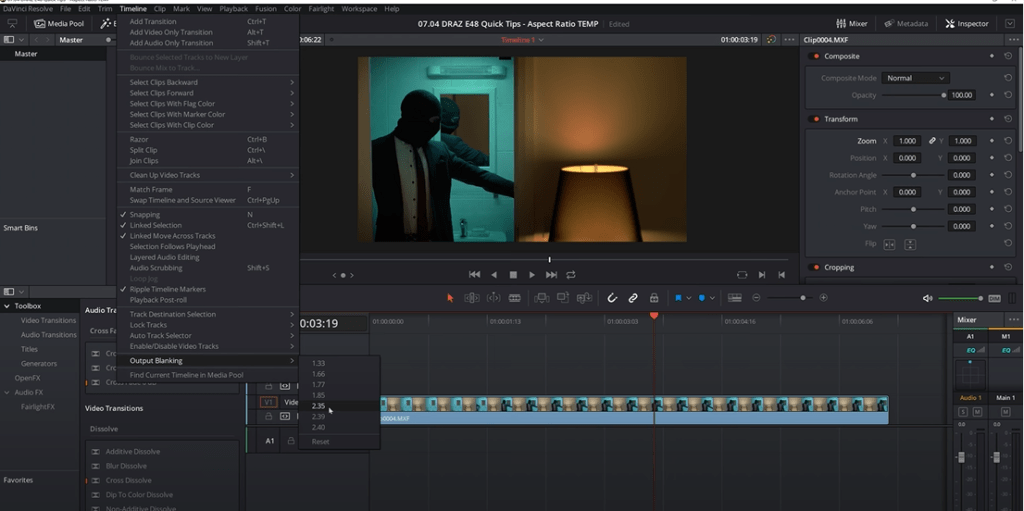
The next method to change aspect ratio in DaVinci Resolve is what I call the fully automatic method which is if we go to timeline down to output blanking as shown in the picture, we can select a 2.35:1 aspect ratio right here inside of resolve because it’s one of the presets, they haven’t decided to implement. We can click on that and it’ll give you your 2.35:1 aspect ratio bars within your 1920×1080 project as settings. Here is a summary of stops listed below-
- Go to timeline.
- Down to output blanking.
- Select the required aspect ratio in Davinci Resolve .
The Plus of using this method is the same as before you can opt-in your delivery type settings to ditch these black pixels and save on hard drive space, though there are situations where you want to keep those and in which case you can keep them on just slightly increase your file size. The other plus side is it’s fully automatic.
So, for example, if you’re working with 2K versus HD, 2K is ever so slightly wider. Therefore doesn’t require so much adjustment to the height to make a 2.35:1 aspect ratio. So you’d have to go recalculating to do that via method number one, for example, so by being fully automatic, it just reads, whatever the numbers are, and gives you the perfect aspect ratio. No matter what your settings are. So it’s a very quick and handy way of doing that.
The downside is, however, is it’s missing a lot of common popular aspect ratios, for example, and what we’re about to look at 2:1, super popular these days. So, off the top of my head, Chernobyl was shot in an aspect ratio of 2 to 1 and so is Stranger Things. So it’s a very popular aspect ratio that, for whatever reason, just isn’t included. So, how do we go about doing that? To do this we will move to the third method of how to change aspect ratio in DaVinci Resolve.
3. Using Aspect Ratio Templates
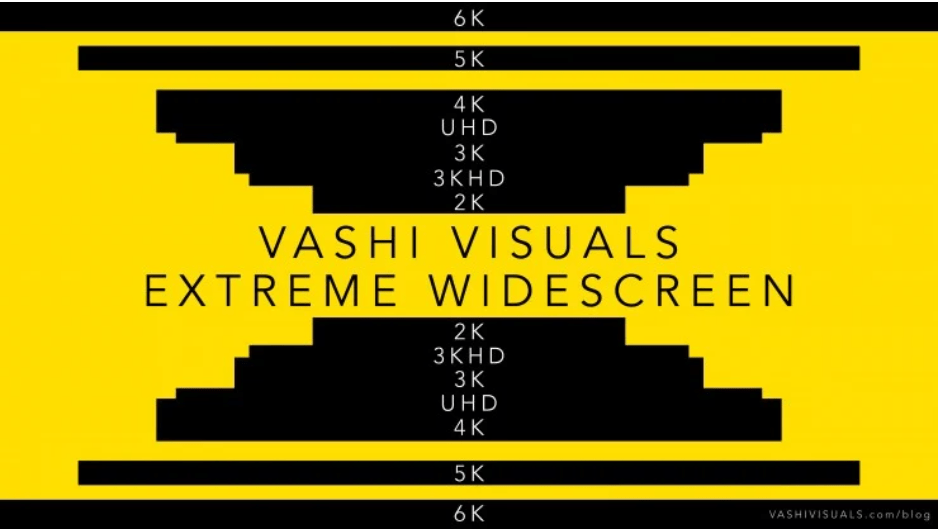
Another method to Well, the method change aspect ratio in DaVinci Resolve is using aspect ratio templates. I use to change aspect ratio in DaVinci Resolve is to use aspect ratio overlays, you can download the pack via no film school. So it’s a link within a link. So you will have 1.85:1, 2:1, 2.35:1, 2.55:1, 2.76:1, 3:1, 4:1 aspect ratios. It is there for projects having a resolution of 2K, 3K, 4K, 5K, 6K, and UHD.
Now for whatever reason, this pack just doesn’t have an HD unit or maybe I ditched them by accident. And but that’s fine because UHD is a very easy calculation, you just have to zoom for an HD project. So, we want our 1920×1080 p full HD in 2:1. So, I pulled in the UHD 2:1 overlay. Then, I’ll drag this into a timeline over footage and it’s not seen because it’s too big. It’s a UHD in a 1080p, so go to zoom in the inspector option, and if I hit this 0.5, that will scale it down to be the correct size as shown in pictire. And now I have a 2:1 aspect ratio.
- Also Read- How to Add Cinematic Black Bars in DaVinci Resolve
- Also Read- How To Make Youtube Shorts In Davinci Resolve
- Also Read- 10 Best Movies To Watch If You Like Cyberpunk Aesthetic
- Also Read- How to Record Audio in DaVinci Resolve? (Record Voice-Over)
- Also Read- Improve Audio Quality In Davinci Resolve (3 Easy Steps)

The other way of doing this would be, switching our image scaling mismatch resolution files back to “Scale entire image to fit” as shown in picture. So everything fits correctly within that project resolution setting. And again, 2.25:1 just automatically changes its zoom to 0.5, just behind the scenes. So, that’s two ways how you get those other aspect ratios.
The plus side of this is you don’t have to do a whole lot of thinking. It’s just kind of ready to go. The downside is, though, you can’t do anything to not render at these black pixels, which you may or may not want to do. And so, just keep that in mind.
The other thing is that this aspect ratio pack is free. It’s awesome, you should definitely go and download it and just have it in your back pocket. It may not include the aspect ratio you’re looking for, in that case, to do this method, you may have to go out and find another aspect ratio pack that may or may not be free. But the methodology will still be the same. So with that, we’ll leave it there. Hope you enjoyed it.
How to Set Custom Aspect Ratio In DaVinci Resolve
Here we’re going to talk about the ever-popular 18:9 or 2:1 aspect ratio. If you watch videos on a modern phone, which a lot of you do, you’ll notice that the video fully fills your screen. That’s because phones nowadays, especially Flagship or big ones have pixels to exile. They all have the 18:9 aspect ratio. So this is a great tip and is really useful to know, and you need to keep your viewers in mind.

Whenever I export my video, I generally export in 16:9. And that’s because only about 35% of my audience actually watch on the mobile phone because most people sit down and watch them on their PC. However, if you do a lot of vlogs, you’re probably going to have a higher percentage of people watching on their phones. Then this is definitely something you may want to consider.
Now, something else you need to keep in mind is that because cameras all recorded 16:9, you have to crop some of the bottoms and the top of your video, in order to get it to work, so, make sure you leave enough room.
Here you’ll see four common resolutions to use to get that 18:9 aspect ratio-
- 1080p: 1920×960 and 2160×1080
- 4k: 2880×1440 and 4320×2160
There are two for 1080p and two for 4k, now there are two options for each because you have a choice, you can either upscale or stretch your footage a little bit or you can just bring it down and downscale. Honestly for YouTube, it doesn’t really make that much of a difference.
My preferred method of filming is 4k, and then taking it down to 2880×1440, results of which are really good and it enhances the experience of the viewers. But if you can only film at 1080p, don’t be afraid to upscale that 2160×1080 because it’ll still look great, especially on YouTube.
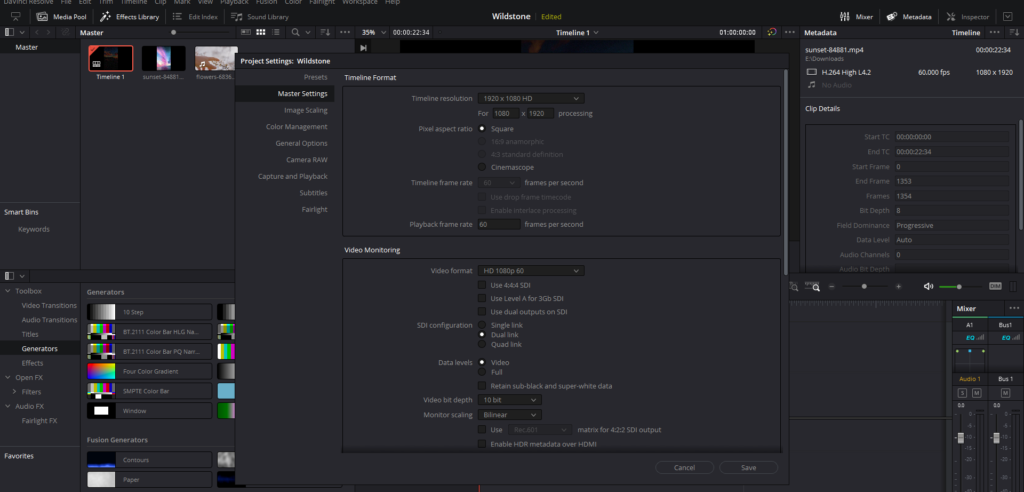
Anyway with all that out the way. Let’s begin with DaVinci Resolve or have a look. So, open DaVinci Resolve, and you will be on the edit tab. So this is a nice quick easy one. We just need to open up the project settings, which you can do by clicking on cog down in the bottom right-hand corner. Then we need to go to the master settings. So, select Master settings from the left and you should see the screen shown in the screenshot below.
Then go to the timeline format box at the top, and you’ll see the timeline resolution. And you’re probably set to the same as me 1920×1080. If you click on the drop-down, you’ll see a selection of standard resolutions like shown in the screenshot.

But what is not immediately clear is that if you scroll right to the top, you’ve got an option to select custom, give that a click then two boxes will appear underneath it, here is where you can type your custom resolution, know if you’ve shot at 1080P and you don’t want to upscale anything, and you just actually want to bring the resolution down, leave it as 1920 and then change 1080 to 960. 960 is half of 1920, so that will either give you the 2:1 or 18:9 aspect ratio.
If you don’t mind upscaling, do a little bit change up to 2160×1080, if you shot a 4k a really nice way is to use 2880×1440. Once you are happy with the resolution, set the custom resolution simply click on save and it will take you back to the edit screen, as shown in the screenshot, now, it does not get any different at the moment because you’ve got nothing in the preview window.
But if you just import some media, like in this case the clip was shot 4K and it’s in the standard 16:9 aspect ratio, and that’s why usually when I put this on the timeline it would fill the preview completely but because we’re at this wider aspect ratio, we’ve got these black bars on the left and right-hand side.
So, all we need to do is zoom in so that our image fits the entire preview window and there’s a few ways you can do that, but the simplest way is to go your inspector option on the top left-hand side of the screen, and then simply go to transform and then you’ve got the option here to zoom, as shown in the screenshot, just try to zoom in.

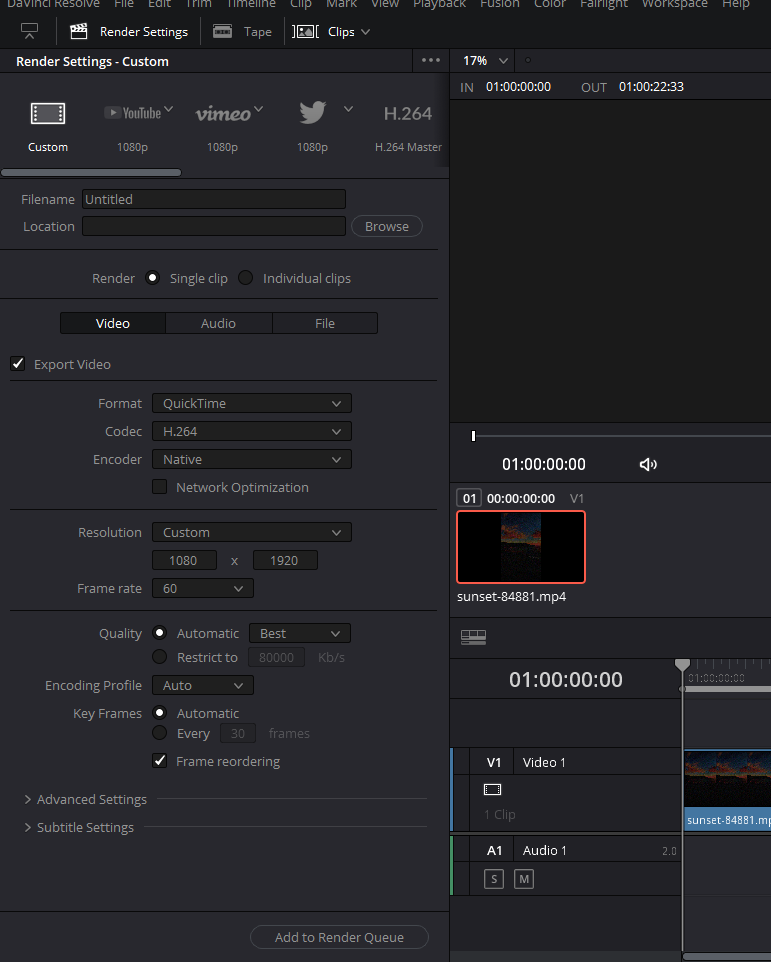
Then you can also reposition it on the X or Y-axis. Alternatively, click on this little icon as shown in the picture and it’ll bring the box up and you can just drag it, move it, resize it, do whatever you need to do. When you’re happy, you can edit your video as you usually would. Head to deliver and you’ll notice straight away to pull through the custom resolution into the resolution box. Then you can just enter your export settings as normal with that custom resolution and they will export at the resolution that you’ve set it.
Now, another quick tip before we go, go back into the setting menu or Cog, head to presets and you will get a list of presets here. Let’s say for example, you don’t want to set this setting as 2880×1440 every time step by step. All you can do is to go to this preset screen select the current project. You can see 2880×1440 in the screenshot. Then hit the save button and put this as 4K 18:9. That becomes a preset now.
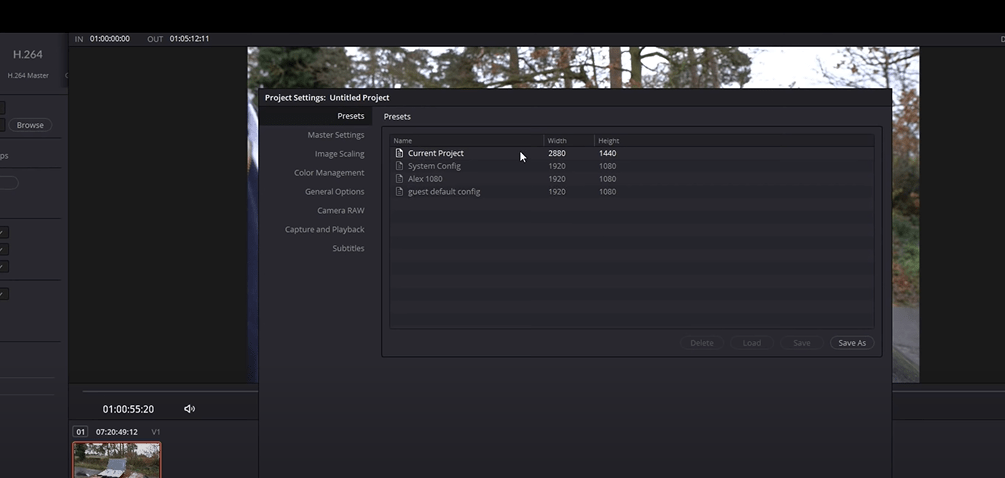
So now whenever you open DaVinci Resolve. You can go to the project settings-preset- 4k 18:9 and load it in. Now alternatively, if you only edit or shoot in this resolution, you can right-click on the current project and set it as a default configuration. So, whenever you will open the DaVinci Resolve, it will be the setting that will automatically get selected.
Vertical Aspect Ratios In Davinci Resolve
In this part, I’ll teach you how to change the aspect ratio in DaVinci Resolve to begin editing a vertical or portrait orientation video.
The first step is to import the vertically oriented video file into Resolve. You can accomplish this by dragging and dropping files into the media pool.
Davinci Resolve’s aspect ratio will now be set to landscape by default. If you drag a clip onto the timeline, you’ll notice a lot of black area around the edges of your timeline. So changing the aspect ratio or the timeline resolution is a reasonably simple process.
- Go up to the File menu on the top left corner and go down to Project Settings.
- In Master Settings there’s an option there for Timeline Resolution.
- We’re going to need to change this value to change the aspect ratio but before we do that we should know what the resolution of the video we want to edit is.
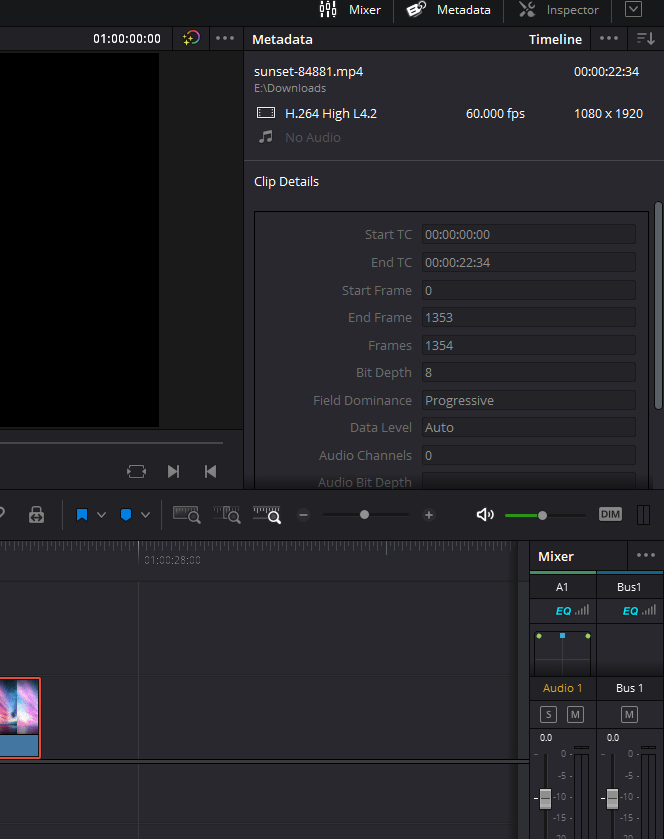
- Left-click on our video clip inside of the media pool and have metadata open on the top right. So that you can see the resolution of your video file.
- For it to appear correctly in the timeline we will change multiple settings.
- Go up to File, Project Settings once again and change the standard landscape resolution to a custom resolution, which you just saw in your video.
- Hit save and what you’ll notice after we refresh the timeline is that the video should now perfectly fit the timeline frame.
Exporting Vertical Aspect Ratios From Davinci Resolve
When you go to the deliver tab, you must be cautious when selecting your export file size settings. When you change the timeline resolution in the project settings, Davinci Resolve will use the same aspect ratio in the custom render settings, which is your default choice; you’ll see those same timeline resolutions here.
You can always check the file project options to make sure.
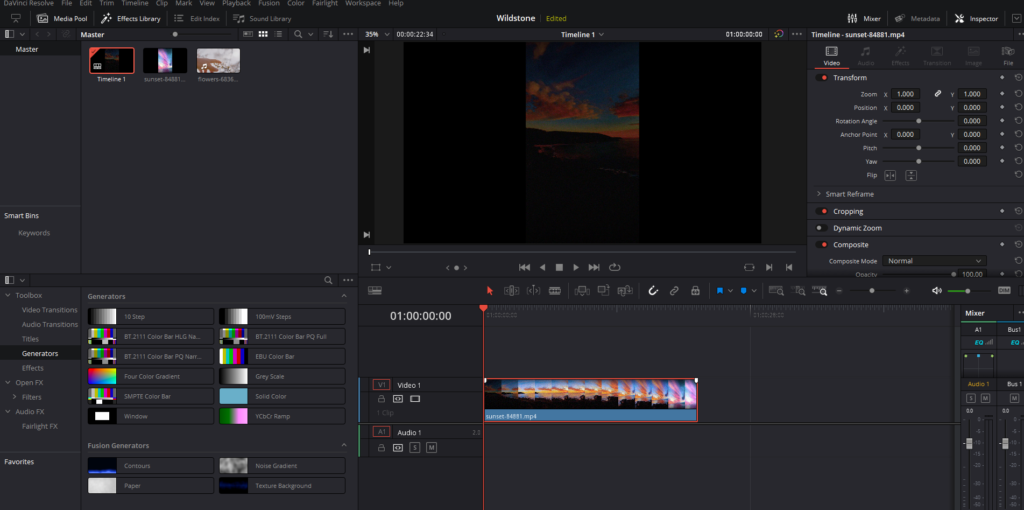
Changing Aspect Ratio Of Horizontal Videos to Vertical In Davinci Resolve
Supposedly, if you don’t have vertical videos shot and want to change your landscape or horizontal videos to vertical you can follow the steps mentioned below.
- Drag your horizontal videos onto the timeline.
- You will notice by default the aspect ratio remains in the landscape.
- To change that, go to File from the top left corner and click on project settings.
- In master settings put your custom vertical aspect ratio or resolution to 1080 x 1920. This is a vertical aspect ratio good for uploading Youtube Shorts, Instagram Reels, and even TikTok videos.
- At this point, if you hit Save, the aspect ratio will change but your landscape video will remain the same, leaving you with huge black space on top and bottom.
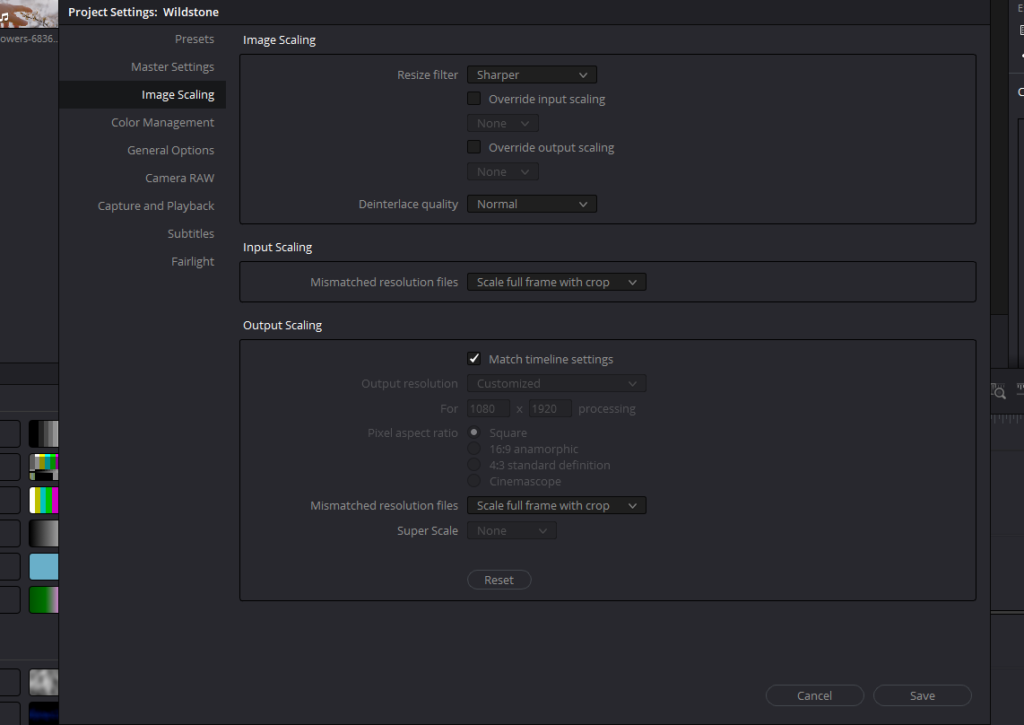
- Go back to Project settings.
- Go to Image Scaling
- In the Input Scaling, change the Mismatched resolution files option to ‘Scale full frame with crop.’
- Do the same in the Output Scaling.
- Now hit save.
- Your horizontal videos will also now be treated as vertical videos.
- To reframe your videos, right-click on the Inspector button and you can use the Position option to reframe the video.
I hope you found this article informative and found out how to change aspect ratio in Davinci Resolve. If you guys have any suggestions feel free to contact us.