This is a detailed guide on How To Make Youtube Shorts In Davinci Resolve.
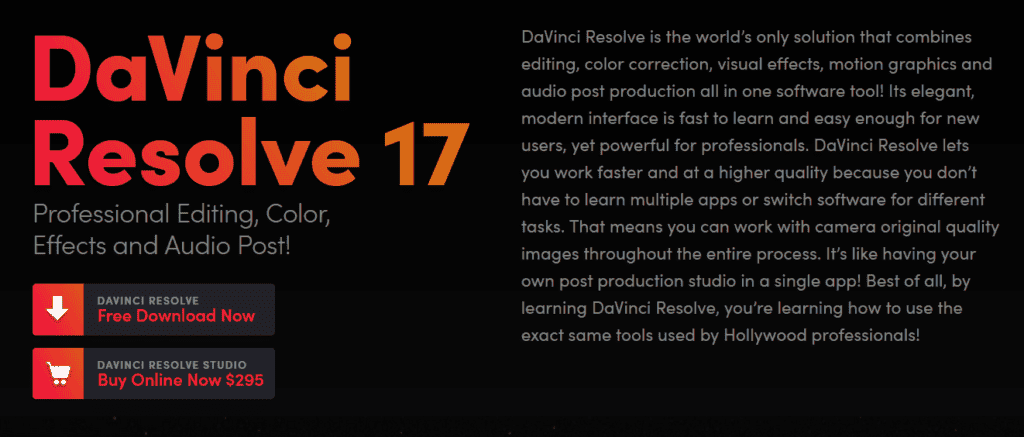
DaVinci Resolve is a fully-fledged editing suite. It’s available for Mac and Windows, and it’s perfect for anyone that wants to get into YouTube short creating or just making your first YouTube video.
Davinci Resolve packs a punch with all the tools that are included for free. Not to mention it’s free!
No catch, no shady installations, no weird websites. A free, fantastic product. I really would recommend it to everybody. So today, we’re just going to go over some of the basic features that DaVinci has to offer for you guys so that finally, you can go ahead and start producing your own YouTube short from today itself.
Davinci Resolve In Brief
So once you’ve got DaVinci Resolve all installed, We’re going to go ahead and set up our first project. So when you first open DaVinci Resolve, you’re going to be greeted with a screen with all the projects that have been created yet. Davinci Resolve does not open straight away unless you start a new project or choose an already created one.
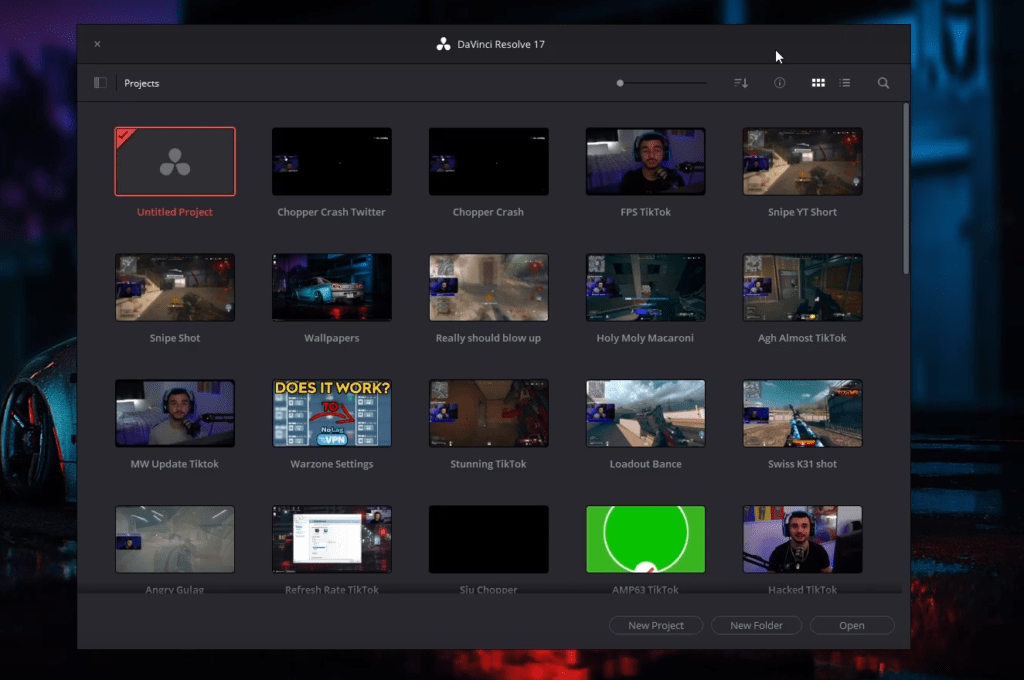
Now, you’re not going to have all the projects as I do, but this is your project database where all your previous and your current projects are stored.
What we are going to do today is create a new project, so you want to hit new projects at the bottom. So once your project has been created, you’ll be greeted with Davinci Resolve opening up.
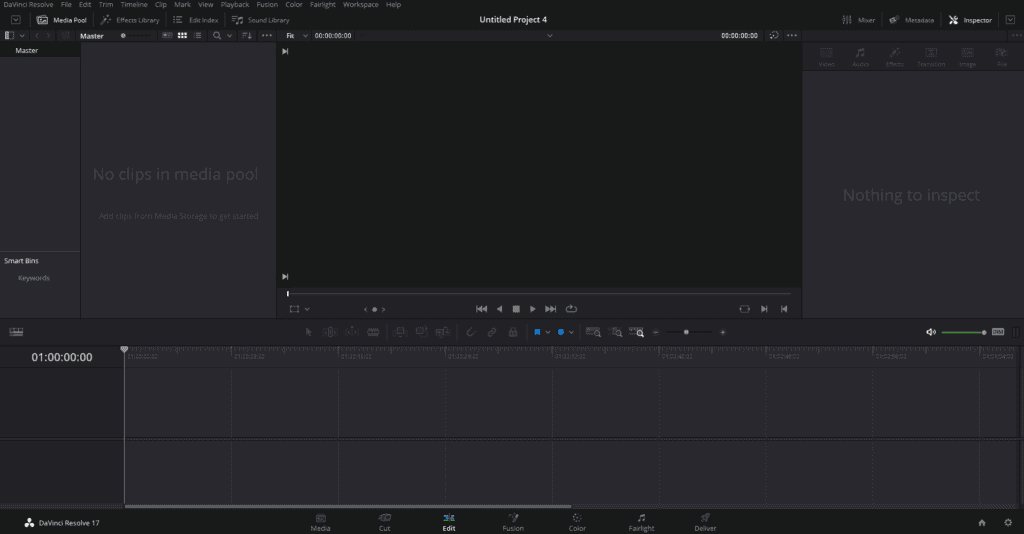
Now, I know it all looks a bit confusing and a bit too much, but trust me, I’m here to talk to you guys through it and help you understand it as much as possible. So just at a brief glimpse, I’m going to show you guys how to navigate through the different tools and features that DaVinci Resolve has to offer for you. To create Youtube Shorts in Davinci Resolve, it is essential to understand all the available tools; it will not only make you more efficient but also improve your production quality.

Now, at the bottom, you will see all the different applications within DaVinci, which all have their own specialty at first, going from left to right.
Starting with the Media tab, you can use this tab to import and manage your media. You can also import footage directly into the Edit tab as well.
We have the Cut tab where DaVinci gives you all the necessary tools to cut out all the unused footage in big clusters, making it absolutely worth it to see which footage you have to edit, and you’re not sitting there cutting out all your silence.
Next up is the editor of where all the edits are done. So transitions from scene to scene, adding clips or sounds to your project, any text or subtitles that you want to add to your project. You also get a lot of free presets and effects that you can use to make your Youtube Shorts look cool and unique.
Next in line is the Fusion tab. This is where you can do all sorts of green screening, adding any masks to your clips and loads of other super cool and in-depth effects. Fusion can also be used for advanced animations and motion graphics. It’s a perfect place to add visual effects to your Youtube Shorts.
The next tab across is the Color tab. This is where you can handle all the colors in your selected clips. You can apply LUTS; you can change it to monochrome and fiddle with all the different color levels. All of that is done within the Color tab. Do keep in mind that the Color Tab of Davinci Resolve is used even for Hollywood movies. It’s a highly professional tool but very easy to learn. Color grading your footage will make your Youtube Shorts stand out from the crowd.
The Music symbol is the Fairlight utility after color, where you can add all kinds of audio effects to your project. Anything from compressors and echoes. The Fairlight tab can also be used to clean up the audio and audio manipulation. I use it for background noise reduction very often.
Last of all, the Rocket symbol is the Delivery tab, where you have all your final settings and all the adjustments you make before rendering your final masterpiece.
Understanding Resolutions For Youtube Shorts
So first things first. Before you get creating your masterpiece, you need to prep your canvas. Now, if you’re making YouTube shorts, your resolution is going to be 1080×1920. This means 1080 pixels across and 1920 top to bottom.
If you’re making regular YouTube videos, you’re going to be doing the opposite, which is 1920×1080. 1920 pixels across and 1080 pixels top to bottom.
Your aspect ratio for your Youtube Shorts needs to be correct no matter what. It’s the most crucial part of starting the edit. Also, not even Youtube qualifies a video as a Short if it does not follow the 1080×1920 resolution.
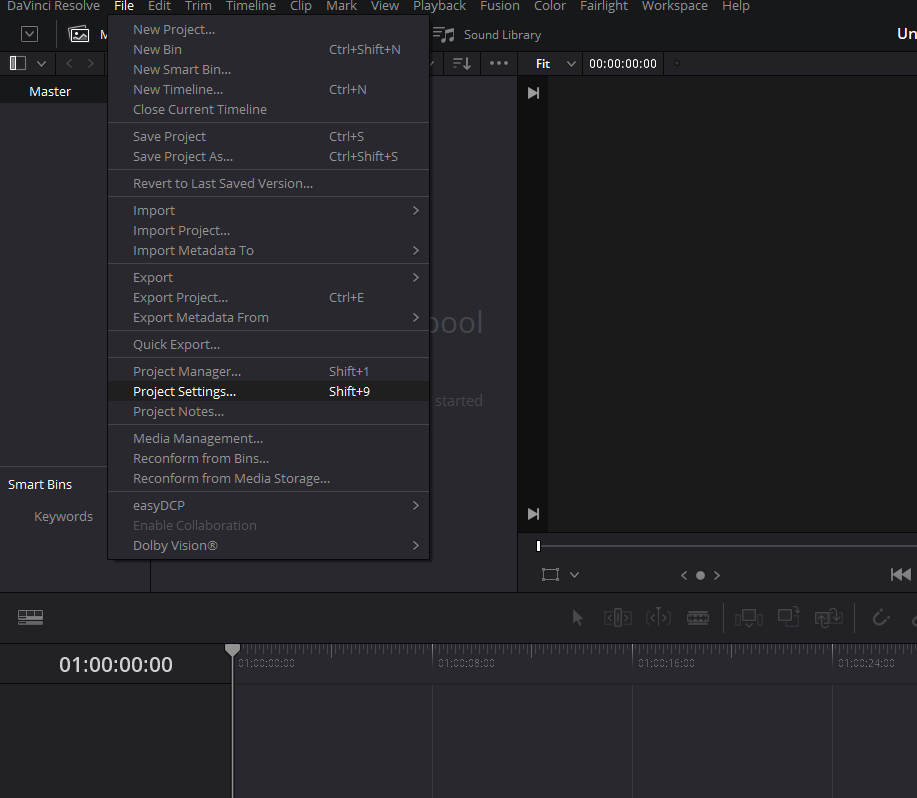
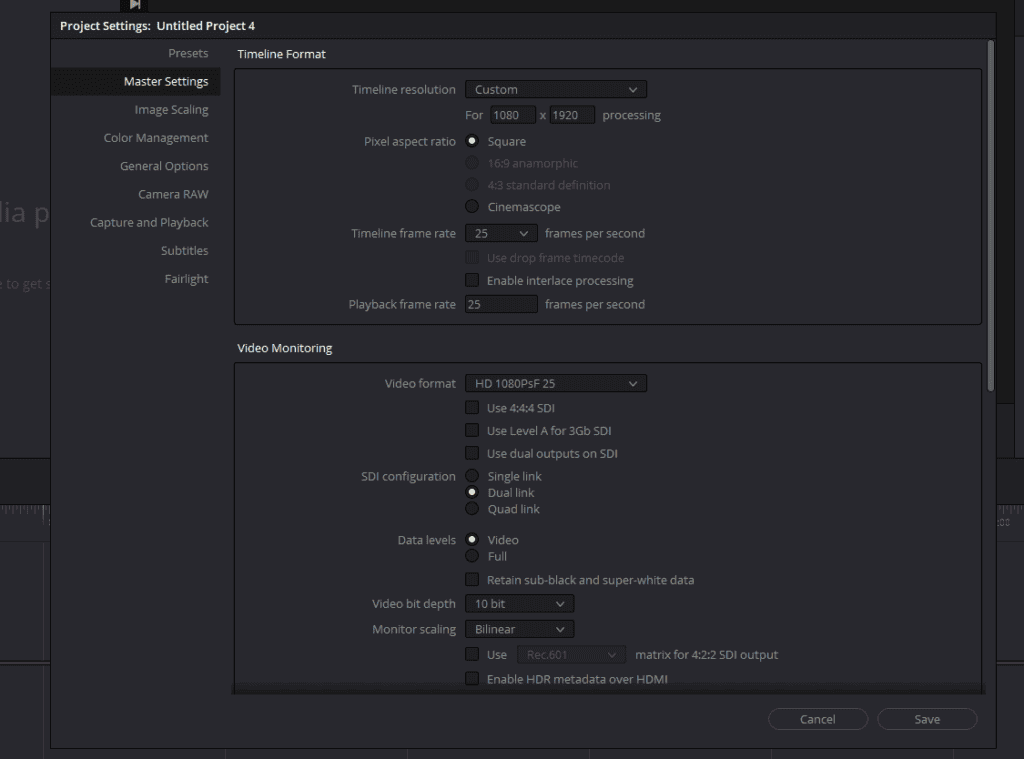
So to set the resolution to 1080×1920, you need to go to File>Project Setting>Master Settings and change your Timeline Resolution to Custom and type in 1080×1920 and click on Save. Now you can start editing vertical videos as you edit your normal videos.
So in the next section, we will discuss what resolution to choose in Davinci Resolve if the resolution you recorded is much higher than Full HD.
Understanding Resolutions for Youtube Shorts- Advanced
The first thing that I’m going to do is to bring in a vertical orientation video clip into Davinci Resolve. You can assume this is a video you shot on your smartphone for Youtube Shorts and are looking to edit it.
I’ll drag and drop this into the media pool. Now by default, the settings in resolve are going to have you editing inside of a landscape orientation.
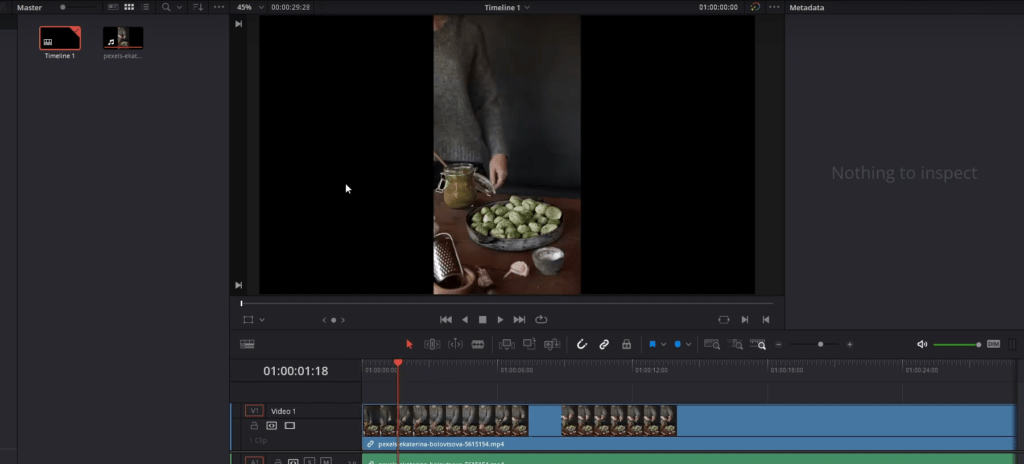
If I drag this clip onto the timeline just like, then you’re going to see a lot of black space around the edges for your timeline. The resolution of our vertical video is 2160×4096. What we need to do in order to change this timeline resolution is relatively straightforward.
Let’s go up to the File menu, which is at the top, and go down to project settings, and then in Master Settings, there’s an option to change timeline resolution.
We’re going to need to change the default value to suit our vertical video. But before we do that, we should know what the resolution of the video we want to add is.
I’m going to left-click on our video clip inside of the media pool and have metadata open on the top right. Here you can see the resolution of your video file. In order for it to appear correctly in the timeline, we’re going to want multiples of these numbers.
So you can go up to file project settings once again, and we’re going to change the standard landscape resolution to one for Youtube Shorts by choosing a custom resolution.
- Also Read- How to Use Dual Screens in DaVinci Resolve
- Also Read- How to Record Audio in DaVinci Resolve
- Also Read- Improve Audio Quality In Davinci Resolve
- Also Read- How to Add Cinematic Black Bars in DaVinci Resolve
- Also Read- How to Change Aspect Ratio in Davinci Resolve
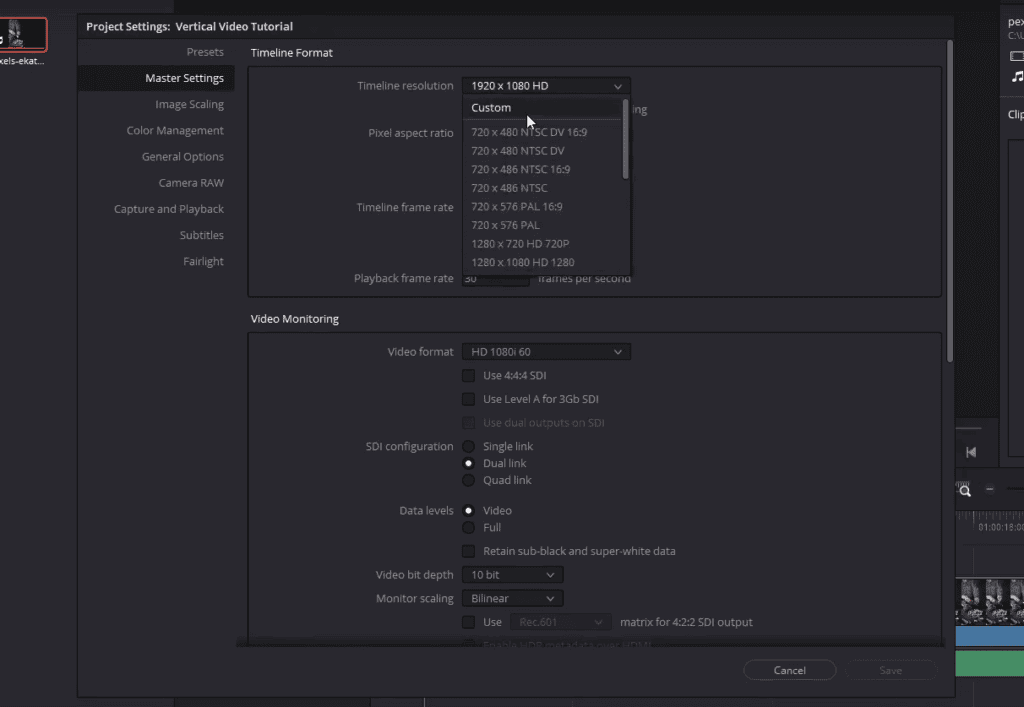
Now we’re going to need some multiple of the resolution in which we shot our video for it to look correctly. Unfortunately, we can’t put 4096 into the vertical resolution for the free version of DaVinci Resolve.
If you have the pro version, it can go higher. If you’re working with high-resolution video files and you can’t just put in the resolution straight as is, then what you can do is open up a calculator and then find a way to reduce this value without causing decimal points.
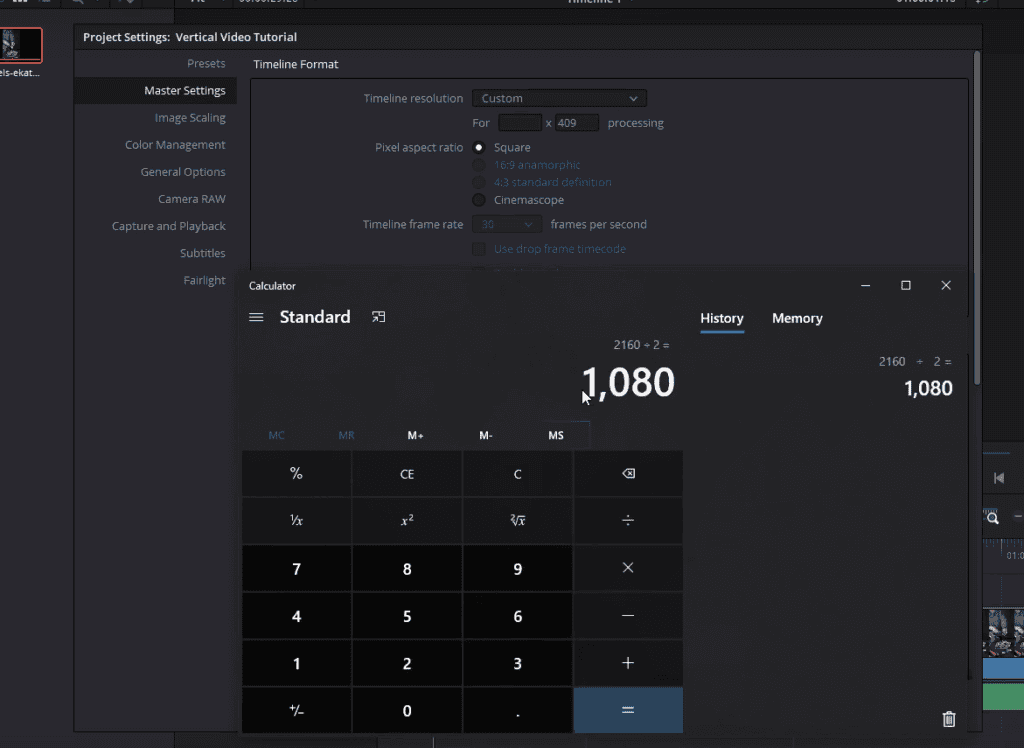
For instance, if I divide by 2160 (which is our horizontal resolution) by 2, we get 1080 for the horizontal resolution, and I can type that in for the custom resolution. And then, for the vertical resolution, we can divide 4096 by 2. We got 2048 for our vertical resolution.
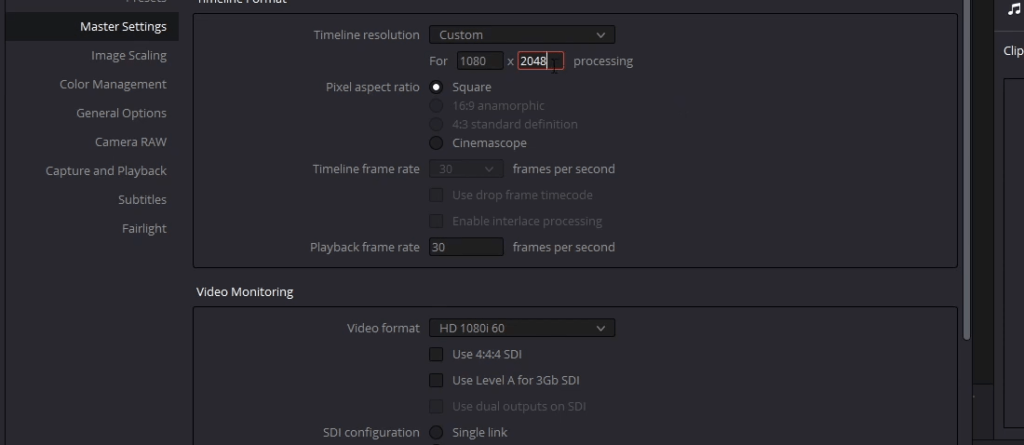
I’m going to put in 2048 for the vertical resolution. Okay, so now we have dimensions we can work with. Note that this is still pretty high resolution. It’s pretty close to 1080p resolution if you’re streaming a YouTube video. Anyway, let’s go ahead and hit Save.
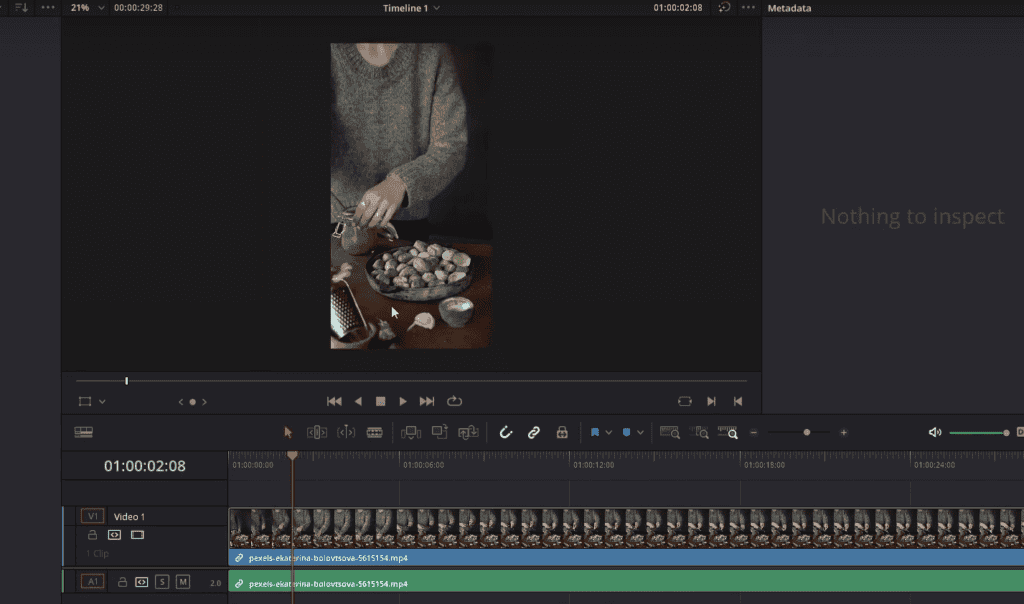
What you’ll notice after we refresh the timeline is that the video should now perfectly fit the timeline frame. Now you can edit your video as usual for your Youtube Shorts. You can use different effects on the edit page and color grade your video in the color tab.
You can watch our other tutorials if you want to learn editing more advanced level.
Delivery Tab settings for Youtube Shorts
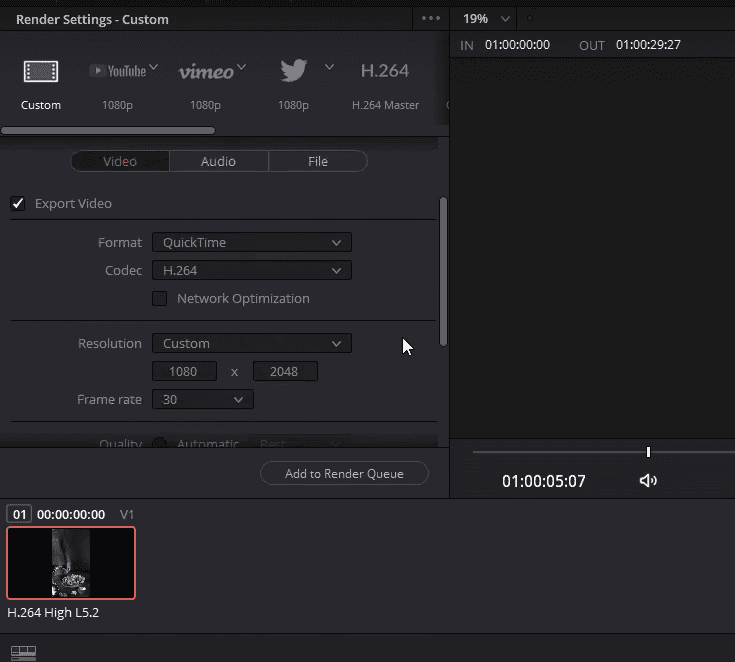
When you go to the Delivery tab, you’re going to need to be careful when you’re choosing your export file size settings. When you change the timeline resolution in the project settings in the Custom Render settings, which is your default option, you’ll see those same timeline resolutions appear here automatically.
Assuming you want the exported file to reflect the timeline, you should definitely leave these alone, and if you try to switch to one of the other defaults like YouTube 1080p, then you’ll see that the resolution gets put back to the landscape value.
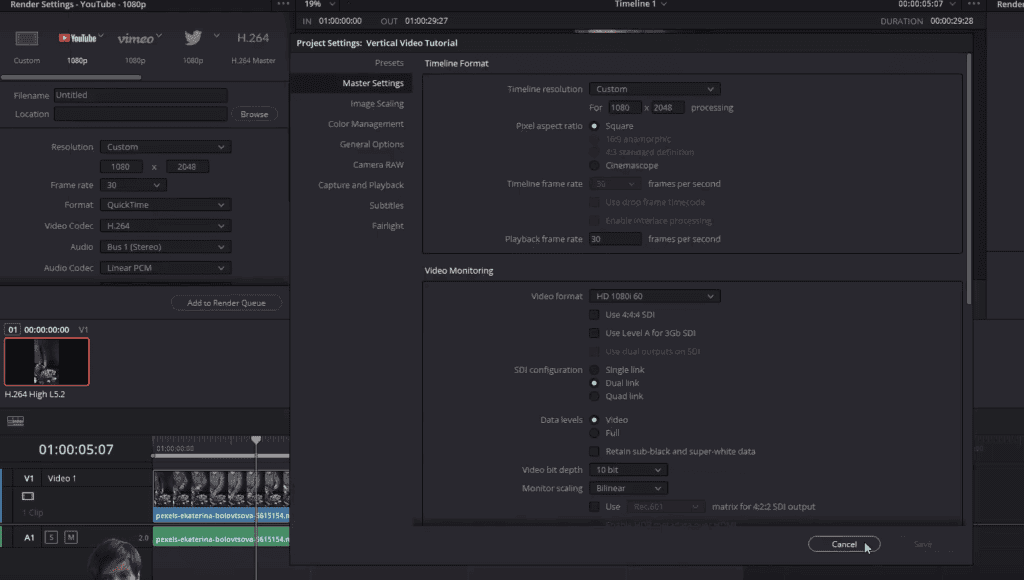
If you want to use the YouTube render settings instead of Custom, you’re going to need to go to the resolution and choose Custom from the menu and then type in those changed values again. That was 1080×2048; you can always go to file>Project settings>Master Settings to verify that as well.
Now when you add your file to the render queue, save it as normal and export it. You will get the video to output in a vertical format which can be uploaded on Youtube as Shorts.
One last thing for this article, if you’re going to edit vertical videos frequently, you might want to set a preset so that whenever you start a new project, you can load up the settings and have the timeline resolution at the correct resolution.
To do that, we go up to file>Project settings and then with the master settings already set up, which we did earlier for this video project, which was 1080 for the horizontal and then 2048 for the vertical resolution, we can take these settings, the current timeline frame rate, and playback frame rate, and then we go to presets, and we click “save as.”
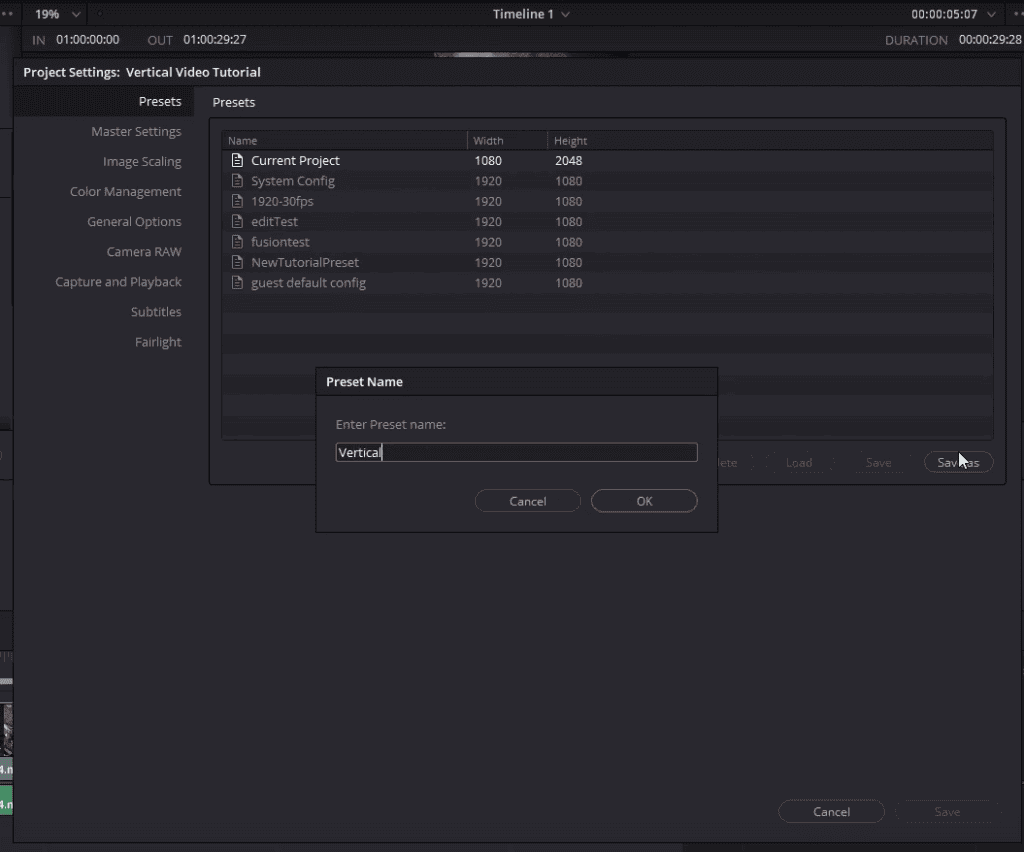
We can name it something like vertical preset save that, anytime you want to use these settings you come back here and select the preset and click on load.
If all you do is edit vertical videos for Youtube Shorts, you can save this as a default option for any new projects we start in DaVinci resolve. We can right-click the vertical preset and then click on “save as user default config.”
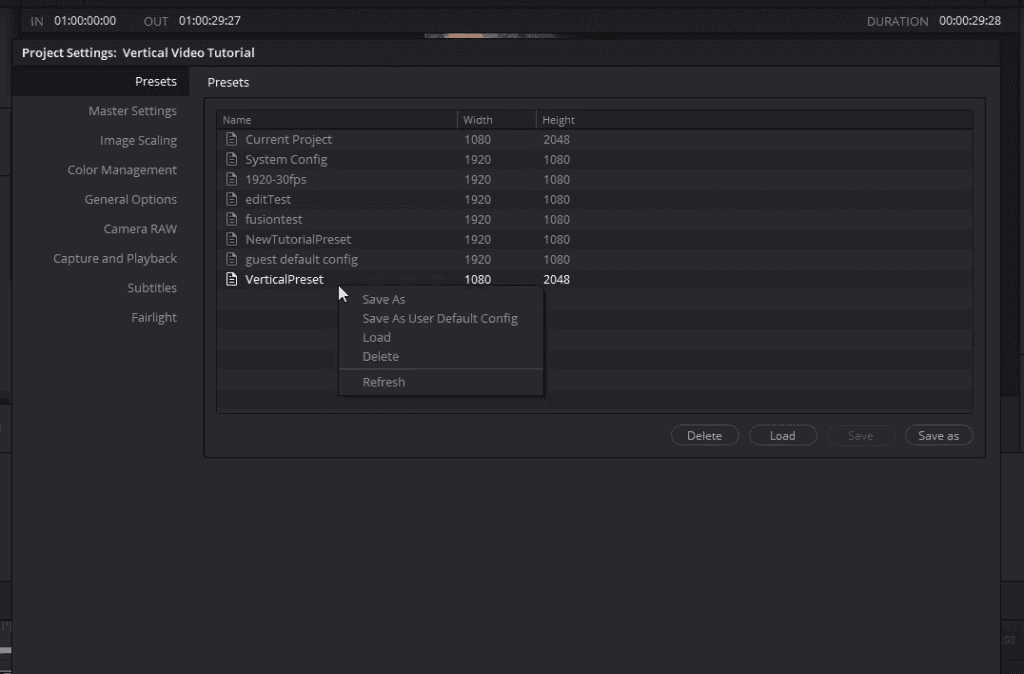
Now when you start a new project, it will use the custom settings of the width and height.
That’s pretty much everything you need to know about setting up DaVinci resolve so that you can edit a vertical video with a portrait-sized resolution for your Youtube Shorts. You can also use these settings to edit videos for other platforms like Tiktok and Instagram Reels.