
Hi, I’m Salik, the author of FilmmakingElements.com. I have been a filmmaker for over 10 years. I am also a certified DaVinci Resolve Trainer and I have used DaVinci Resolve for many of my projects. In this article, we will take a look at the color warper. A tool I’ve personally used countless times. Imagine merging the functionality of secondary curves like “hue vs hue” and “hue vs sat” and overlaying them on the vectorscope – that’s the color warper for you.
Where Can you find the Color Warper In Davinci Resolve?
Where Can you find the Color Warper In Davinci Resolve?
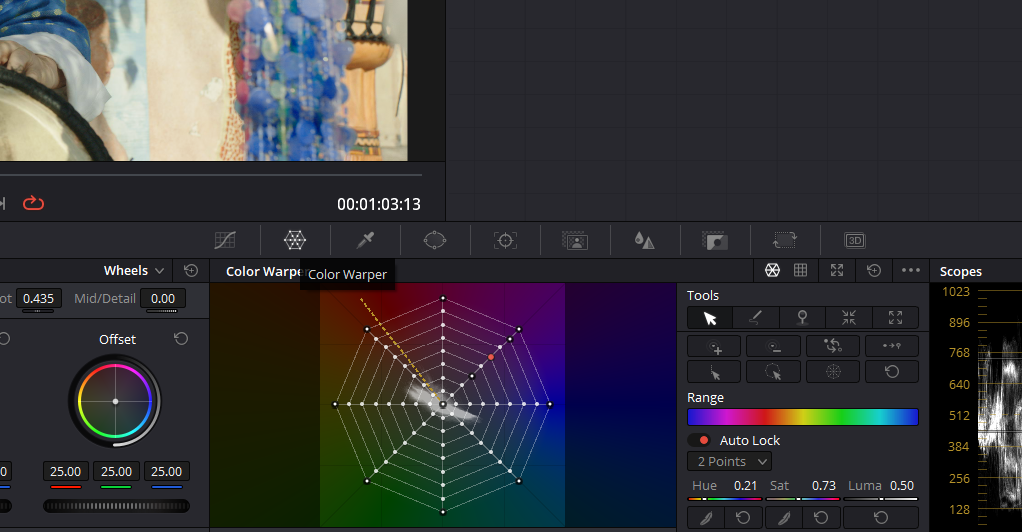
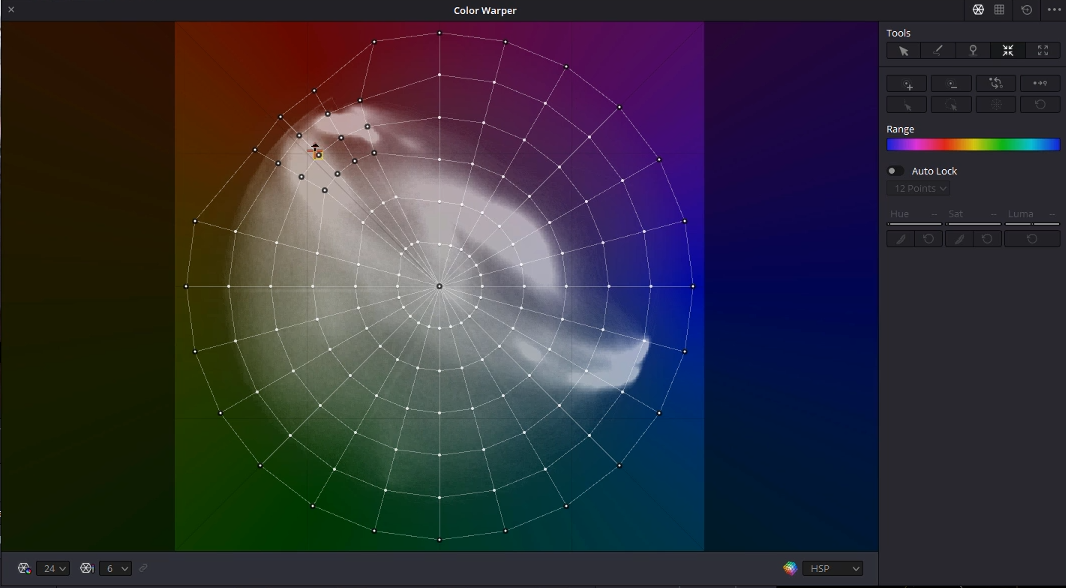
The path to the color warper is right next to the curves on the Color page of Davinci Resolve. Seek out an icon resembling a spider’s web and, upon clicking, a new window will appear with Color Warper. You’ll encounter a diagram akin to the same web. Delving into its abilities reveals the robust nature of this tool, which reimagines the manipulation of color within DaVinci Resolve.
What is the Color Warper in Davinci Resolve?
The Color Warper is a unique tool that allows you to manipulate colors in an image, much like reshaping a mesh. Rather than changing the position of pixels, it alters one set of colors into another. Unlike traditional HSL curves, the Color Warper can adjust two color attributes simultaneously, targeting specific color ranges.
This tool uses a grid of movable control points. By dragging these points, you create a transition from the selected colors to others that remain unaltered. The smoothness of this transition depends on the proximity of the moved points to those that are static.
How to Use the Color Warper:
- Direct Manipulation: Drag the control points in the grid for precise adjustments.
- Sampling and Adjusting: Click on a color in your image to select the nearest grid point that influences that color. Then, drag this point to adjust.
The Color Warper can be employed for specific tweaks—like adjusting a shirt’s shade, modifying skin tone, or changing the greenery’s hue in a photo. This is akin to using tools like the Qualifier key or HSL curves. The difference? With the Color Warper’s grid, you can modify two color aspects simultaneously, such as hue and saturation or chroma and luma.
Exploring Color Warper
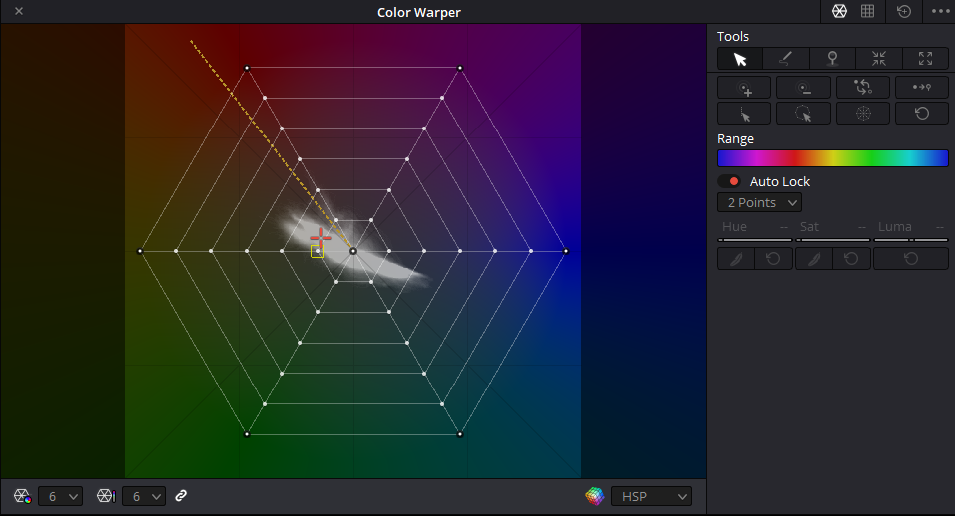
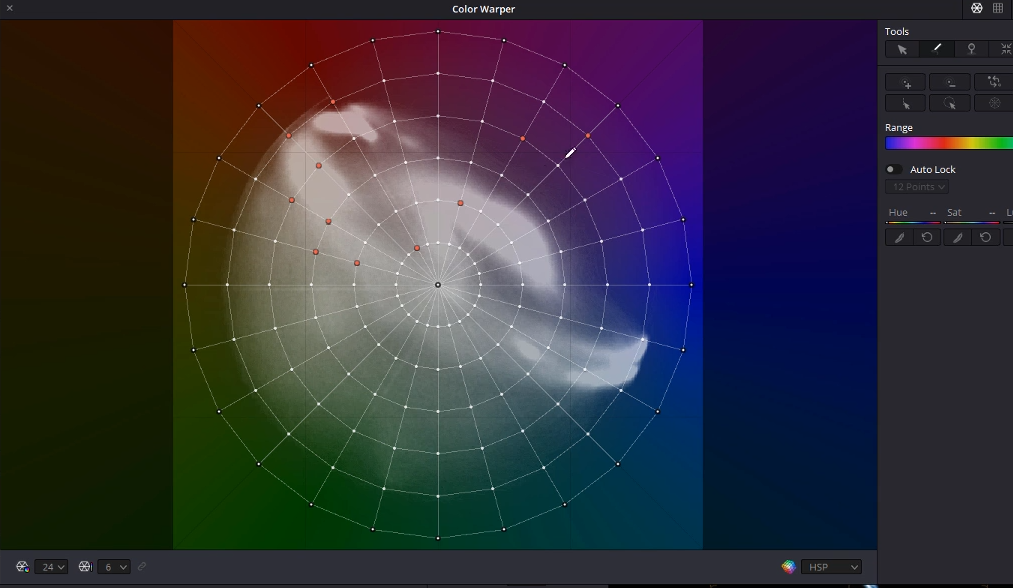
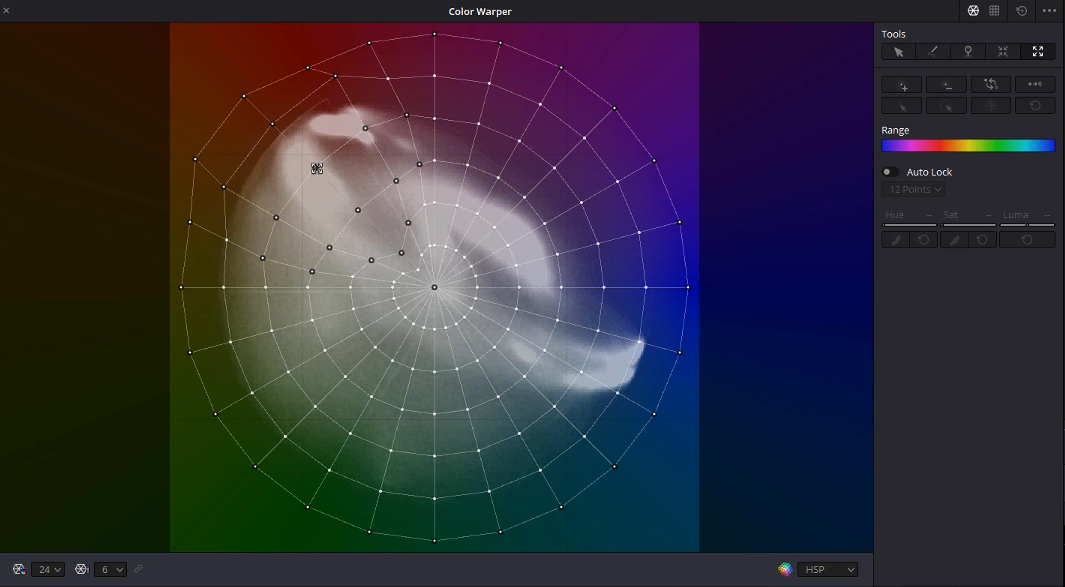
The default setting showcases a six-by-six web, which limits manipulation to six primary colors: red, cyan, magenta, yellow, and green. However, at the lower left corner, you can expand these points from six to a comprehensive 24. While 24 might feel overwhelming, maximizing the color warper window can aid visibility.
You can often take this onto a separate monitor and work with it because you want to see what you’re doing in quite a bit of detail.
Basic Use Of Color Warper In Davinci Resolve
The Color Warper in Davinci Resolve is a dynamic tool designed to offer unparalleled precision and flexibility when it comes to color grading. This guide will delve deeper into its capabilities, ensuring that even beginners can harness its full potential.
- Initialization and Configuration:
- Before diving into color modifications, start by setting your web grid to 12×12 by selecting it from the bottom left corner of the Color Warper window. This default setting typically provides a balanced level of granularity for a wide range of color correction tasks.
- The Art of Saturation Adjustments:
- Choosing the Color: The first step to adjusting saturation is pinpointing the specific color you wish to modify.
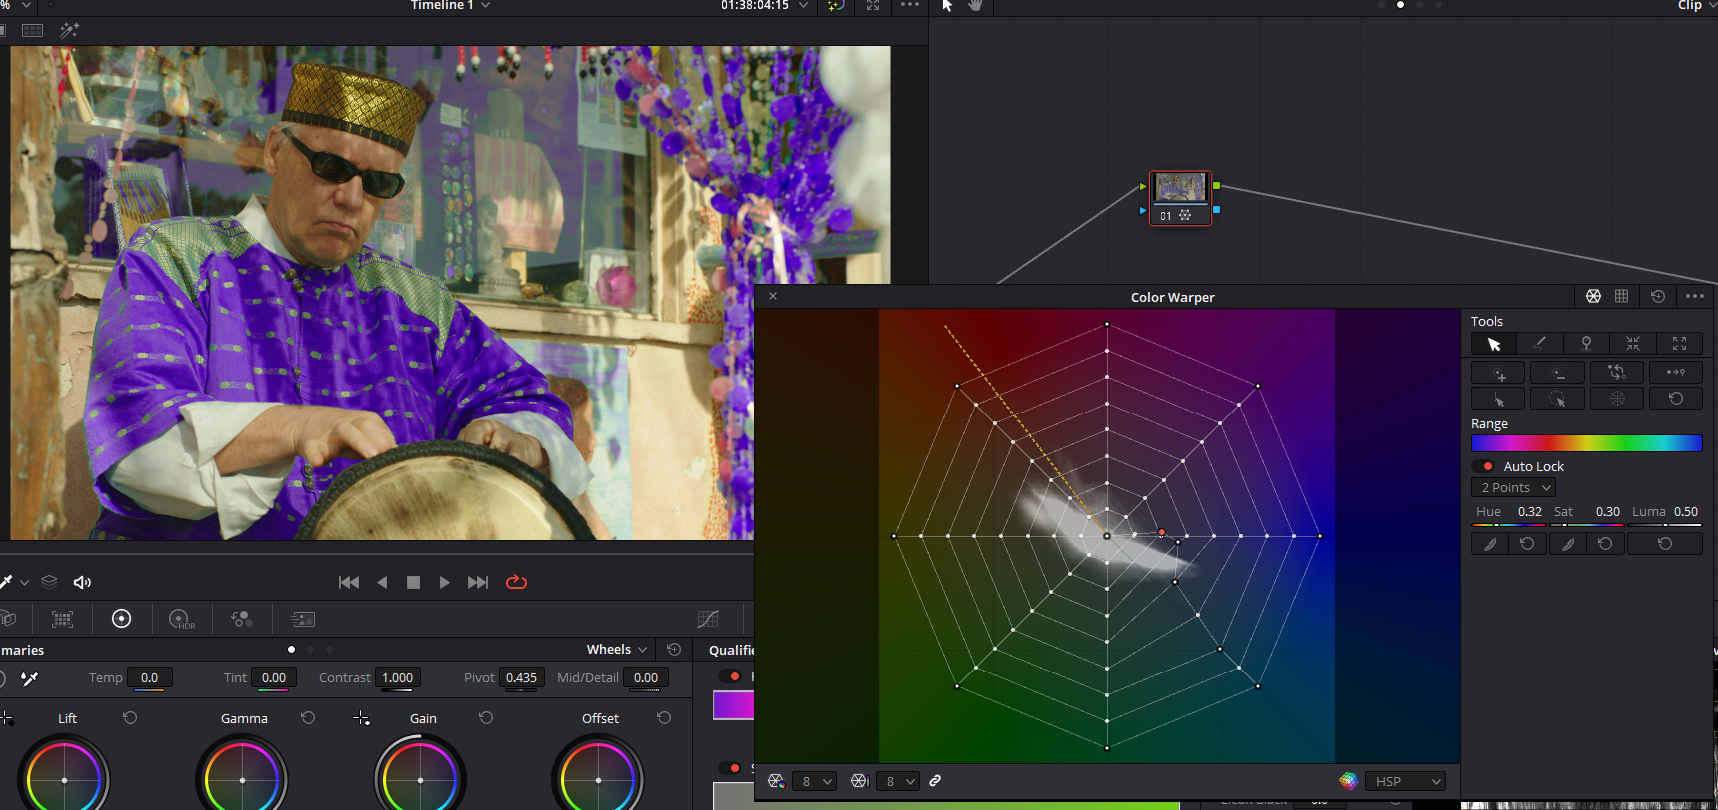
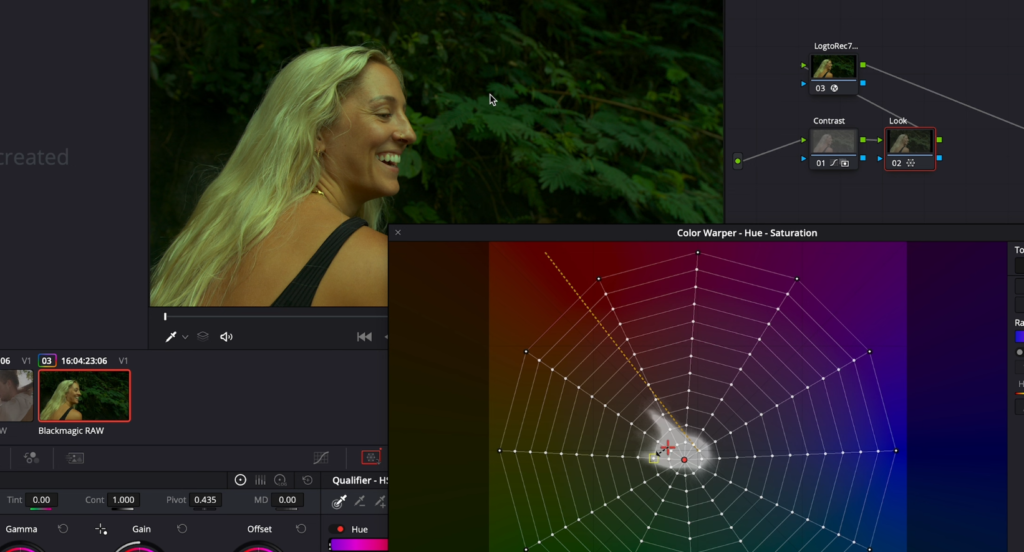
- Interactive Selection: One of the standout features of the Color Warper is its ability to let users interactively select colors. With the Color Warper active and the qualifier visible in the bottom left of the viewer, you can directly select and adjust colors by merely clicking and dragging within the viewer.
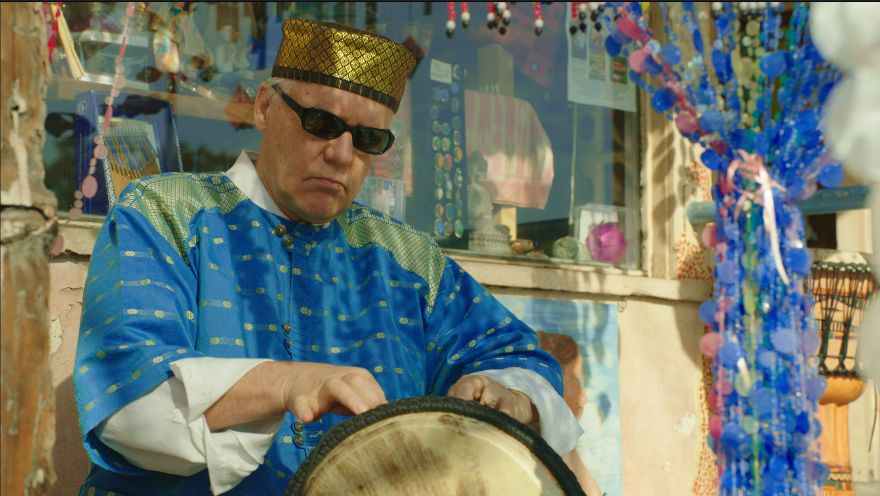
- Initiate by clicking on the blue shirt within the viewer. Doing this will spotlight the corresponding hue within the Color Warper’s diagram.
- Subsequently, drag the highlighted dot towards the purple region to transform the shirt’s hue.
- Precision in Refinement:
- Sometimes, the initial selection might not cover every nuance of the color. If parts of the shirt remain blue after the initial adjustment, they can be manually corrected. Simply click on the unadjusted areas in the viewer and further drag to fine-tune the hue transformation.
- Mastering Saturation Control:
- The Color Warper provides an intuitive way to adjust saturation. By dragging the designated dot either away from (to increase saturation) or towards (to decrease saturation) the center, users can fluidly control color intensity.
- The graphical representation offers visual feedback, making the adjustment process more intuitive and accurate.
- Versatility with Skin Tones:
- Beyond objects and clothing, the Color Warper is adept at handling skin tones. It ensures skin colors remain natural-looking, avoiding the over-saturated or washed-out appearance that can sometimes plague color grading processes.
- Navigating Target Subdivisions:
- The number of subdivisions or targets in the Color Warper can be modified based on the precision required.
- Increasing subdivisions allows for more detailed and granular adjustments, evidenced by a denser color diagram.
- However, exercise caution when switching subdivisions after initial adjustments, as this could introduce anomalies in the color grading. Moreover, excessively high subdivisions, like 24×24, can overcomplicate the process, leading to color inconsistencies.
- Also Read- How To Buy Davinci Resolve Online (In 1 Minute)
- Also Read- How To Export In Davinci Resolve- Absolute Guide
- Also Read- How To Nest In Davinci Resolve (Compound Clips)
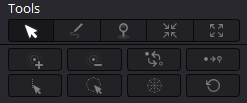
Tools In Color Warper
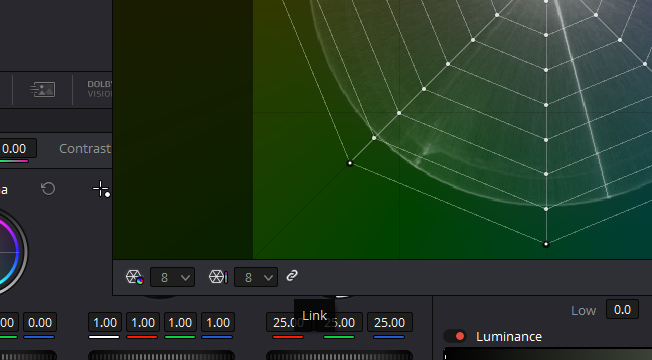
Davinci Resolve’s Color Warper offers an intricate array of tools to fine-tune and elevate your color grading tasks. The Color Warper comes equipped with a ‘gang chain’ icon at its bottom. When this chain is linked, altering one subdivision setting automatically adjusts the other.
For more detailed control, you can unlink them by clicking the chain. This allows you to individually set parameters, such as having 6 saturation steps while configuring 16 or even 24 hue steps.
Select/Deselect
As the foundational tool, it facilitates the selection of desired hues within the warper. Not only is it the default upon opening the tool, but it also permits the drawing of selection boxes and dragging of hues. This tool also lets you draw a selection box.
Draw Selection
Then you’ve got a tool that looks like a bit of stick of chalk known as Draw Selection. This will let you draw, click and drag over individual points. And they will then be included in the selection, and when you go back to the primary tool, “Select/Deselect,” they all move together.
Pin/De-pin

It is quite important to be aware of this tool if we’re going to make accurate adjustments. If we look closely at some of these white dots, the outer white dots have a black border. And if you click the Pin/De-pin tool and you click and drag over white dots, they get a black border.
The way this works is if you click and drag a white dot, every dot between it and the center on that straight line will be pulled along. More or less, every dot on that kind of vertices going out or vertex going out will be dragged along. But the pins stop that.
Only the white dots get dragged around; if we make a black pin, then they stay rigid. That means that we can avoid accidentally changing certain colors.
That’s really important because if you say, OK, you want to bring up the skin tone and make that stronger, you could boost red or orange noise elsewhere. You can Establish these pens and draw them to make what is basically a safe area on the spectrum that you don’t want to change when fixing the skin tone.
If we want to un-pin something, we click it the second time. These tools might look intimidating for the first time but trust me; it’s such an advanced tool that you can make very sophisticated LUTs using it.
Pull Points and Push Points
There’s a really useful tool that lets me squeeze everything (Pull Points) in towards a single point or expand things out away from a single point(Push Points). By Pull Points, you can actually squeeze the gamut and can create complementary colors, and introduce split toning to increase the color contrast in the shot.
You can use Push Points to push out the colors if you have used the Pull Points a lot. You can also use Push Points to introduce more shades of color in the image. That’s a really useful tool.
The idea is not to use these tools very aggressively. Typically, you want to kind of get things to be solid colors. You don’t want to heighten color noise.
Increase Fall Off and Decrease Fall Off
What this tool does is when you click the plus button, i.e., “Increase Fall Off,” it adds additional points nearby, or when you click the minus button that is “Decrease Fall Of,” it subtracts the additional points.
Invert Selection
This tool inverts and selects the points you have already selected in the warper, supposedly if you have all the blue shades selected in the warper. When you click the invert selection tool, it will invert the selection; all the hues except blue will get chosen.
Convert Selected to Pin
The “Convert Selected to Pin” tool changes your selected dot; it doesn’t matter if you have selected multiple dots and converts them into pins, as I have mentioned earlier. A selected dot is white, and a pin is a white dot with a black border. Converting a selection to a pin will make it rigid and stop moving.
Select/Pin Column
This tool selects the whole column of the particular hue that you have already selected in the Color Warper. You can also pin the whole column using this.
Select/Pin Ring
This tool selects or pins the whole ring you are currently on. It’s a very useful tool if you want to see a shift in all the hues. Again, when you are using this tool, use it very wisely. Especially when working with 8-bit footage, you might introduce a lot of Luma and Chroma Noise.
Changing the color space in the color warper

You can also change the color space of the warper for different results. To access the color space menu of the warper, all you have to do is, select the menu beside the colorful cube at the bottom of the warper.
By default, it uses “HSP” as the color space. However I have noticed that when using it with LOG footage shifting to the “HSP LOG” color space gives more accurate shifts.
Also, for better saturation control, using the HSL color space can enhance your shots.
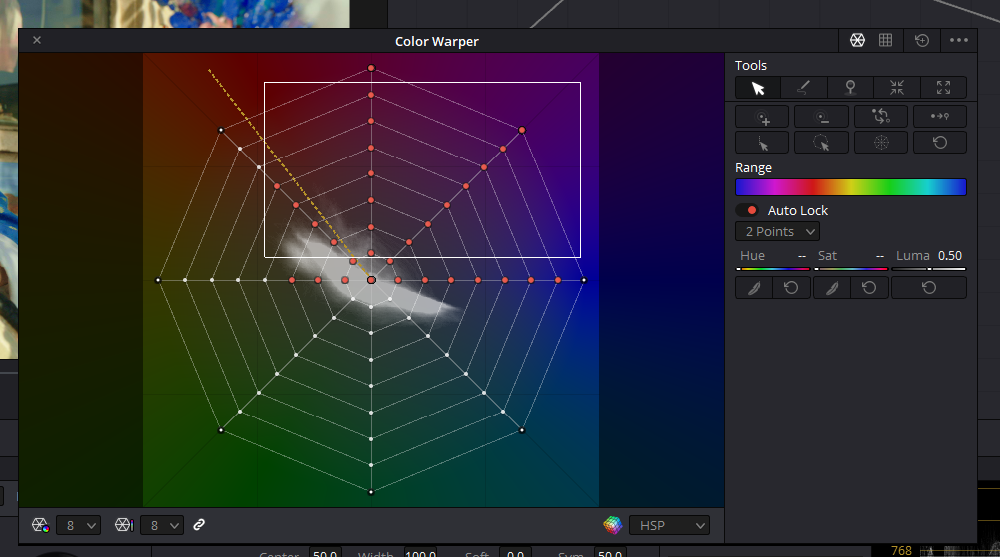
Auto Locking In Warper

There is also a feature called “Auto-Lock” in the warper. After you turn this on, you will get the option to choose how many points to select. If you select 2 points, the warper will automatically pin after the two pins you have selected to lock that particular hue.
Harnessing the Power of Color Warper for Distinctive Visual Looks
Visual storytelling goes beyond mere cinematography. A significant aspect of it lies in post-production, where tools like the Color Warper come into play, letting creators produce both subtle refinements and dramatic visual shifts.
The Dual Facets of Color Grading
Before exploring the intricacies of Color Warper, let’s understand color grading:
- Color Correction: This foundational step ensures consistent visuals across footage. Typically, it’s about enhancing and standardizing colors, ensuring suitable contrast, and optimizing saturation levels.
- Creative Grading: This is where imagination takes flight. With a vast palette of colors, contrasts, and saturations at your disposal, you can sculpt the footage to reflect specific moods, tones, or atmospheres.
Diving into Color Warper
The Color Warper, with its dynamic mesh interface, offers an intuitive and responsive method to alter hues and saturation. Here’s a general overview of how you can utilize it:
- Initialization: Begin with color-corrected footage. This ensures you’re working on a consistent canvas, laying the foundation for further enhancements.
- Manipulating the Mesh: Adjust the mesh size in the Color Warper according to your needs. By dragging various points, you can subtly or dramatically shift hues and saturations, allowing for both broad and precise adjustments. You can increase the mesh size to 12 for better visibility and control.
- Targeted Color Adjustments: Whether you want to emphasize certain elements or neutralize others, the Color Warper lets you pick specific colors. For instance, you can tweak shades in the background without affecting the subject’s skin tone.
- Experiment and Iterate: The beauty of the Color Warper lies in its versatility. It encourages experimentation. Shift hues, adjust saturation, or play with contrasts. The tool’s real-time feedback lets you see changes as you make them.
- Applying Across Footage: Once you’ve crafted a desired look, it can be applied across various shots. Remember, each shot might require slight tweaks, especially in terms of shadows or contrasts, ensuring visual continuity.
That’s the color warper tool in Davinci Resolve. I hope this article helped!
Happy Color Grading!