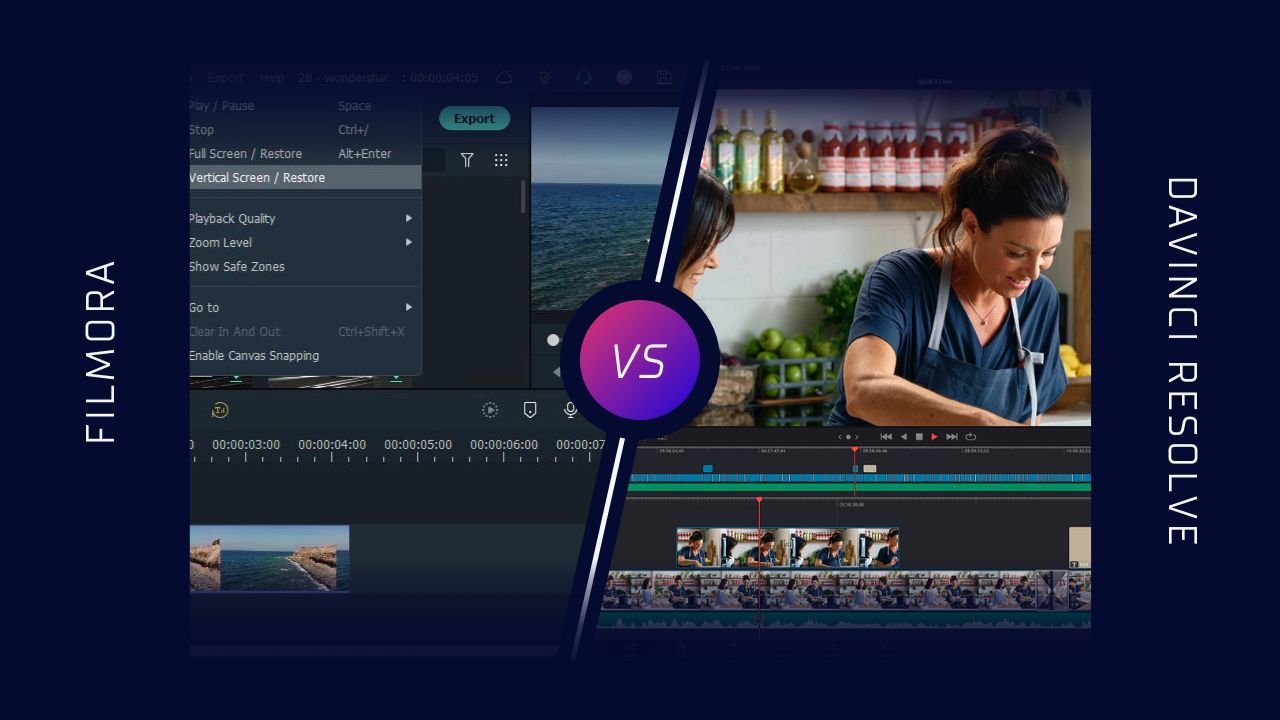
Hey there, folks! Welcome back to my awesome blog, Filmmakingelements.com. Today, we’re diving into an epic showdown between DaVinci Resolve vs Filmora to help you figure out which editor is the perfect match for you. So, buckle up and let’s get started!
Now, if you’ve been hanging out on my blog for a while, you already know that I’m a die-hard DaVinci Resolve fan. I use it to edit all the videos and for my client’s projects. But let me spill the tea: before I fell head over heels for DaVinci Resolve, I was actually in a committed relationship with Premiere Pro. And guess what? Before that, my first love was none other than Wondershare Filmora. Yep, you read that right. I genuinely adored Filmora, as it’s truly a fantastic piece of software.
So, this blog post isn’t about declaring a winner in the “Battle of the Editing Apps.” Instead, it’s all about helping you find the one that’s perfect for YOU. If, by the end of this post, you’re vibing with DaVinci Resolve, then please stick around and explore more of my blog, as I post DaVinci Resolve tutorials and insights regularly.
Filmora vs Davinci Resolve Which Is Better
Price Comparison of The Two
Alright, folks, let’s dive right into this epic battle of editing apps, starting with the price tag. Now, DaVinci Resolve does have a free version, and believe it or not, that’s the very version I used for a while to edit every single masterpiece I created when I switched to Davinci Resolve. But wait, there’s more! If you’re craving some extra features, fancy effects, and that oh-so-delicious GPU acceleration, then you can snag DaVinci Resolve Studio for a one-time payment of $300.

On the other hand, Filmora has a smorgasbord of pricing options to tickle your fancy. You can get the full version of the software, tech support, and all future updates with a one-time payment of $60. But hey, if you’re not ready to part with 60 big ones just yet, they’ve got you covered with a $40-a-year option, giving you pretty much the same deal. And if you’re feeling extra fancy and want unlimited downloads from the Filmstocks library and new effects every single month, you can shell out $100 a year to unlock all that goodness.
Disclaimer- Prices may differ depending upon when you are reading this.
Downloading and Using Them Regularly
Now, let’s talk about downloading and installing these bad boys. Spoiler alert: it’s a walk in the park for both. Just download the installer, click to open it up, and install. Easy-peasy, lemon squeezy. However, fair warning: DaVinci Resolve does take a tad longer to install since it’s a more robust piece of software, with more bells and whistles to unpack. But hey, a couple of clicks and you’re done, ready to unleash your editing prowess on the world!
Alright, let’s talk about stability because we all know unstable software is about as useful as a chocolate teapot. Good news, folks: both DaVinci Resolve and Filmora are super stable. However, if you’re rocking a low-spec computer that’s seen better days, you might want to lean towards Filmora, as it’s designed more for middle-of-the-road systems. Sure, every software has its system requirements, but Filmora might just play nicer with your vintage machine.
Now, don’t get me wrong, DaVinci Resolve is incredibly stable too—unless you’re daring enough to mess around with a buggy beta version, then you might experience a crash or two. But in general, the full versions of DaVinci Resolve are rock-solid. The only time it’s ever thrown in the towel on me was when I pushed my computer to its limits, forcing it to shut down DaVinci Resolve in self-preservation mode. Can’t blame it, really.
Making New Projects in Wondershare Filmora and Davinci Resolve
Starting a new project with either software is easier than stealing candy from a baby (not that I endorse that!). Just click on the icon, hit “New Project,” and you’re off to the races. The main difference between the two is that with DaVinci Resolve, you’ll name your project right off the bat, whereas with Filmora, you’ll name it when you first save. I guess Filmora likes to keep things mysterious.
Once you’ve got your project open, it’s smooth sailing. Dive into your project settings, adjust the resolution and frame rate, and you’re ready to unleash your creative genius!
Updating both the softwares
DaVinci Resolve is like an all-you-can-eat buffet of features, while Filmora is more like a well-curated à la carte menu. But let’s be honest, most of the time, you’ll only need to tweak the frame rate and resolution before diving into your editing adventure. And the cherry on top? Both Filmora and DaVinci Resolve (yes, even the free version) come with all future updates when you purchase them. Sweet deal, right?
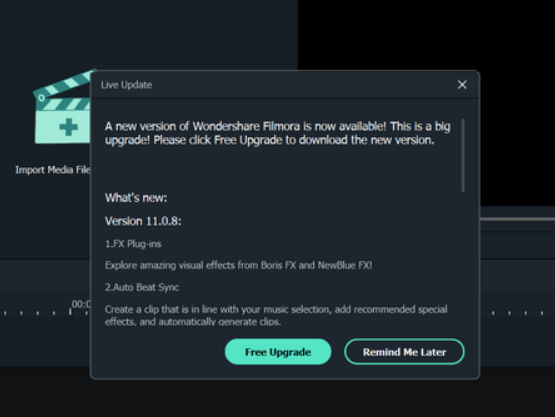
However, when it comes to the updating process, Filmora is like that overachieving friend who does everything in a snap. It alerts you when there’s an update, you click “Update,” and voilà! Done. But wait, before we get too carried away, always remember to back up your projects before updating any software. You never know when a sneaky bug or compatibility issue might show up uninvited.
DaVinci Resolve, on the other hand, is a tad more high-maintenance. You can start the update from within the app, but then you’ll have to close it, download the installer, open up the installer, and essentially go through a fresh install every time. It’s still a breeze, but there are extra steps involved, and let’s face it, I’m lazy and want my updates served on a silver platter. And of course, don’t forget to back up your projects before updating DaVinci Resolve too—better safe than sorry!
Comparing the Editing Workflow of Wondershare and Davinci Resolve
The real drama unfolds when we compare the workflows and editing processes of these two software titans. So, let’s start with editing and assembling a timeline, where we’ll find some key differences that’ll make you go, “Hmm…”
First off, DaVinci Resolve boasts both a source viewer and a playback viewer. Picture this: I can drag my entire video clip—yes, all of my raw, uncut footage—into the source viewer, then slice and dice it like a sushi chef to create smaller sections. And voilà! I can simply drag those little nuggets of gold into the timeline. Smooth, right?
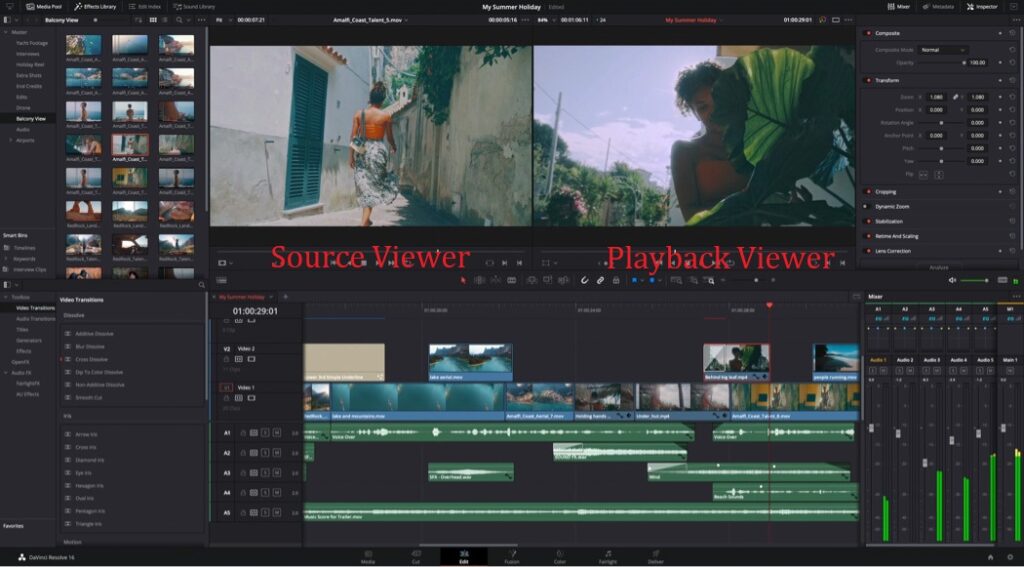
Now, let’s talk Filmora. Sorry to break it to you, but there’s no source viewer in this neck of the woods. Filmora only has a playback viewer, so to get the same result, you’ll have to drag your entire video clip into the timeline, then start hacking away like a lumberjack, moving things around and stitching it all together. It’s a different approach, but hey, to each their own.
Personally, I find DaVinci Resolve’s workflow faster since I can import clips directly into the source viewer and only add the bits I need to the timeline.

Another plot twist in this editing software showdown lies in the timeline assembly process. Let’s unravel the mystery, shall we?
In the world of DaVinci Resolve, when you drag a video clip into the timeline, the audio and video tracks are automatically separated like long-lost siblings. It’s a tear-jerking reunion, I know. But wait, there’s more!
Enter Filmora, where things are a bit cozier. You see, when you drag a clip into the timeline, the audio and video are still attached at the hip, sharing the same track. However, fear not, for you can right-click and hit “detach audio” to give the audio its own separate track, allowing you to edit in a similar fashion to DaVinci Resolve. Sure, it’s an added step, but who doesn’t love a little extra quality time with their tracks? Oh, right… I’m lazy.
Beyond these thrilling differences, both software options offer a plethora of basic tools, like the trusty blade tool, select tool, trimming, clipping, and ripple delete. So, when it comes to physically piecing together a timeline, with the exception of these two critical distinctions, they’re actually quite similar.
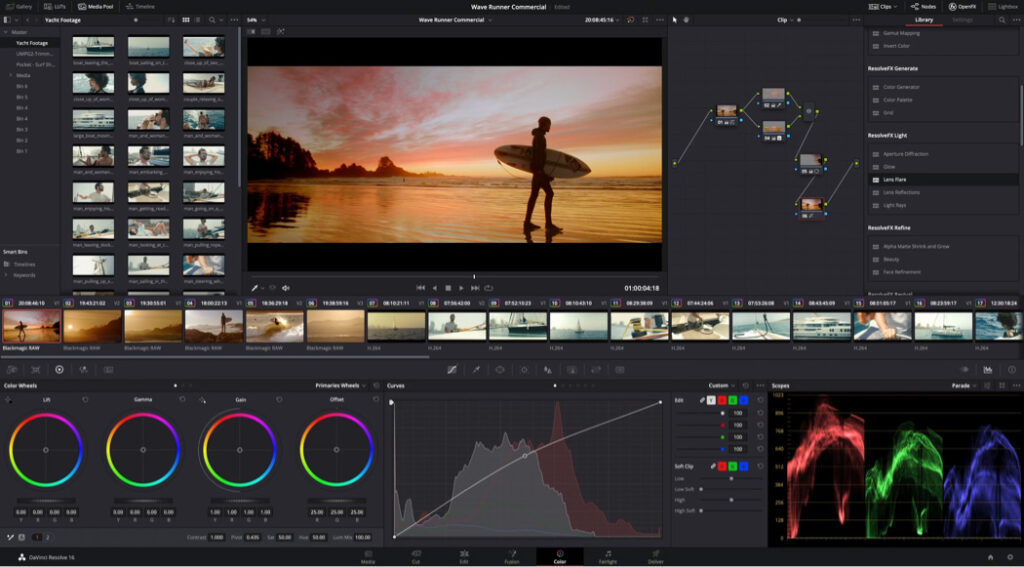
Color Grading On Davinci Resolve and Filmora

Hold on to your hats, folks! Once we venture beyond the basics, these two software contenders diverge like star-crossed lovers. Let’s start with color grading, where the playing field isn’t quite level.
You see, DaVinci Resolve has an unfair advantage, as it was originally crafted as a color grading tool for Hollywood films (fancy, right?). As a result, it’s packed with features and control, offering you grading, masking, curves, and basically everything your heart desires. The upside? Total control. The downside? A steeper learning curve that’ll make you sweat.
Now, Filmora may be the underdog here, but it’s no slouch. It handles basic color work like a champ, tackling white balance, exposure, temperature, hue, and more. Sure, it doesn’t boast as many features or as much control as DaVinci Resolve, but that also means the learning curve is less intimidating.
When it comes to LUTs (Look-Up Tables), both DaVinci Resolve and Filmora allow their use, and they even come with built-in ones. But there’s a twist! DaVinci Resolve’s LUTs are more like utility LUTs, while Filmora’s LUTs are all about creativity—think movie-inspired filters like 300, Terminator, or Star Wars. It’s fun, but a tad gimmicky.
Another key difference in color grading? Filmora lacks adjustment layers or nodes, meaning you’re doing “destructive color grading” (gasp!) and altering the original image. In the realm of DaVinci Resolve, non-destructive color grading reigns supreme, thanks to adjustment layers and nodes that keep your original image safe and sound.
So, whether you’re after full control or a simpler, more user-friendly experience, the choice is yours—just remember, with great power comes great responsibility (and sometimes, a steeper learning curve!).
Audio Editing On Both
When it comes to audio editing, we’re once again faced with a “David vs. Goliath” scenario. DaVinci Resolve is the audio editing powerhouse, equipped with every tool imaginable—EQ, compression, limiters, you name it! If you’ve ever dreamed of professional-sounding audio, DaVinci Resolve is your knight in shining armor.
But let’s not dismiss Filmora just yet. Sure, it’s simpler, but sometimes less is more. Filmora offers fade-in, fade-out, equalizer presets, a multi-band equalizer for that custom sound, and even background noise removal. It may not be as fancy as DaVinci Resolve, but it gets the job done, and with a gentler learning curve to boot.
So, the choice is yours: full control and professional sound with DaVinci Resolve, or a simpler, more user-friendly audio editing experience with Filmora. Either way, you’ll have a presentable soundtrack for your masterpiece.
Creating and Using Effects on both the software
DaVinci Resolve boasts the powerful Fusion, a node-based effects editor that lets you create anything your heart desires. Want to build your own effects from scratch? DaVinci Resolve is your trusty sidekick.
Filmora, on the other hand, keeps it simple and sweet. Its effects are mostly preset, but you can still layer them and do some minor customizations. Drag, drop, tweak, and you’re good to go! Titles follow a similar pattern—less custom but perfect for those who want to get a video out quickly.
Ultimately, it comes down to what you want. If you crave full control and endless creative possibilities, DaVinci Resolve is the way to go. However, if you’re working on a lower-spec computer, Filmora’s drag-and-drop effects might be your saving grace, as DaVinci Resolve can easily overwhelm your system.
Whichever you choose, rest assured that both software options have their own unique charm and capabilities.
Which one to choose?
So, let’s talk about some features that DaVinci Resolve and Filmora have in common. Both have the capability to create proxy files and render previews for smoother playback. They even have handy little tools like voiceover recording and timeline markers. However, I must confess, I do wish Filmora had the tracking feature that DaVinci Resolve boasts. But hey, nobody’s perfect, right?
Ultimately, your choice of editor depends on your needs. Are you aiming for professional-quality videos with complete control over color grading, sound design, and other intricate details? If so, DaVinci Resolve is your new best friend—no doubt about it!
On the other hand, if you’re more into YouTube videos, social media content, or whipping up some memorable home movies for family and friends, Filmora might be your perfect match. It’s great for putting together high-quality, presentable content quickly without the need to learn all the nitty-gritty details of DaVinci Resolve.
Comparing Specifications of Filmora and Davinci Resolve
| System Requirements | DaVinci Resolve | Filmora |
|---|---|---|
| Mac OS | macOS 10.14.6 (Mojave) or higher | macOS v10.14 (Mojave) to macOS V13 (Ventura) |
| Windows OS | Windows 10 with Creators Update | Windows 7/8.1/10/11 (64 bit) |
| Processor | Intel i3 or better multicore, 2GHz or above (6th Gen or newer recommended for HD/4K) | Intel i3 or better multicore, 2GHz or above (6th Gen or newer recommended for HD/4K) |
| RAM | 16GB (32GB minimum if using Fusion) | 8GB (16GB required for HD and 4K videos) |
| Graphics | Integrated GPU with 2GB VRAM (OpenCL 1.2 or Metal supported) | Intel HD Graphics 5000 or later; NVIDIA GeForce GTX 700 or later; AMD Radeon R5 or later |
| VRAM | 2GB | 2GB (4GB required for HD and 4K videos) |
| Hard Disk Space | At least 10GB | At least 10GB (SSD recommended for HD and 4K videos) |
| Additional Software | Blackmagic Design Desktop 10.4.1 or later | N/A |
| Apple M1 Chip Compatibility | Not mentioned | Yes |
Feature Comparison Table, Filmora vs Davinci Resolve
| Feature | DaVinci Resolve | Filmora |
|---|---|---|
| Price | Free version; Studio version: $300 (one-time payment) | $60 (one-time); $40/year or $100/year (subscription) |
| Learning Curve | Steeper | Easier |
| Color Grading | Advanced, professional features | Basic color work |
| Audio Editing | Comprehensive, professional tools | Simpler tools |
| Effects | Fusion built-in, highly customizable | Preset, drag-and-drop effects |
| Titles | Customizable | Less custom |
| LUTs | Utility LUTs, some creative LUTs | Mostly creative LUTs |
| Editing Workflow | Source and playback viewer, automatic audio/video separation | Only playback viewer, manual audio detachment |
| Performance on Low-spec PC | Can be overwhelming | Better optimized |
| Proxy Files & Previews | Yes | Yes |
| Voiceover & Timeline Markers | Yes | Yes |
| Tracking | Yes | No |
- Also Read- Top 7 Best Cinematography Courses In Germany
- Also Read- Red Komodo vs Canon C70 Which Is Better
- Also Read- Davinci Resolve Micro Panel Review, Is It Worth It?