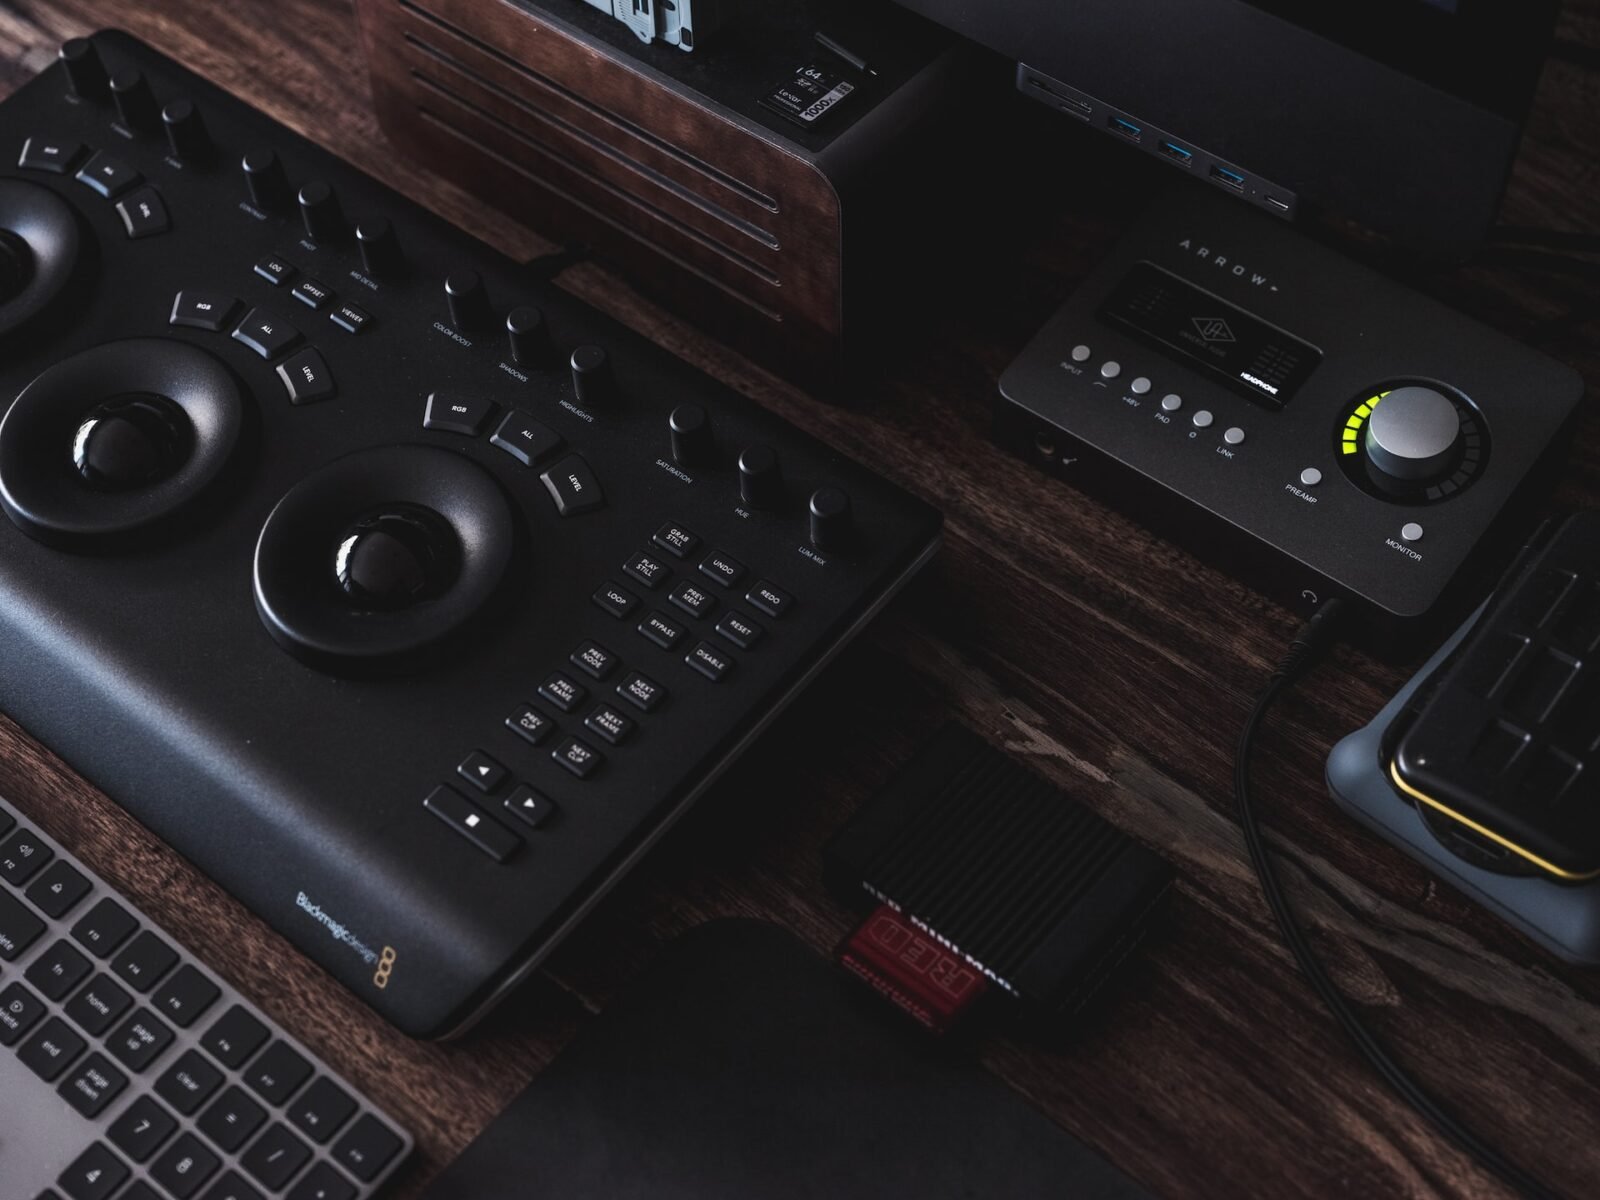
Hey guys, today I’m going to talk about my personal experience with the DaVinci Resolve Micro Panel. I’ve had this baby for three years now, and it’s been quite the journey. But first, let’s do a quick overview of what this gadget is all about.
The DaVinci Resolve Micro Panel is a control panel designed specifically for DaVinci Resolve. Picture this: it’s like a console that turns you into a color-grading maestro, giving you the power to create visual magic. I mean, who wouldn’t want that, right? When I first heard about it, I was intrigued and couldn’t resist getting my hands on one.
As a long-time user, I can assure you that the Micro Panel is a game-changer. But it’s not all sunshine and rainbows. While I have loads of positive things to say about it, there are a few hiccups along the way. So, buckle up and join me on DaVinci Resolve Micro Panel Review.
Personal experience with the Davinci Resolve Micro Panel
Now, let me take you back to when I first got the Micro Panel. Three years ago, I was in a creative rut. After my long career as a video editor and colorist, I knew I needed to up my game to stay ahead in the industry. After binge-watching countless YouTube tutorials and guzzling down cups of coffee, I finally decided to switch from Final Cut Pro to Premiere Pro, and then ultimately to DaVinci Resolve. It was a wild ride, but I’m glad I made the leap.

After doing pretty well on the new software, I decided to also invest some money in the panel. Once I got my hands on the Micro Panel, it felt like Christmas morning! It was love at first sight. It’s funny, but I remember the moment I unboxed it and stared at the beautiful trackballs and knobs like I had discovered a long-lost treasure.
But, as with any relationship, we had our ups and downs. There were times when I fumbled in the dark, struggling to see those top 12 knobs that weren’t backlit. On those nights, I felt like I was playing a weird game of whack-a-mole, trying to guess which knob I was turning.
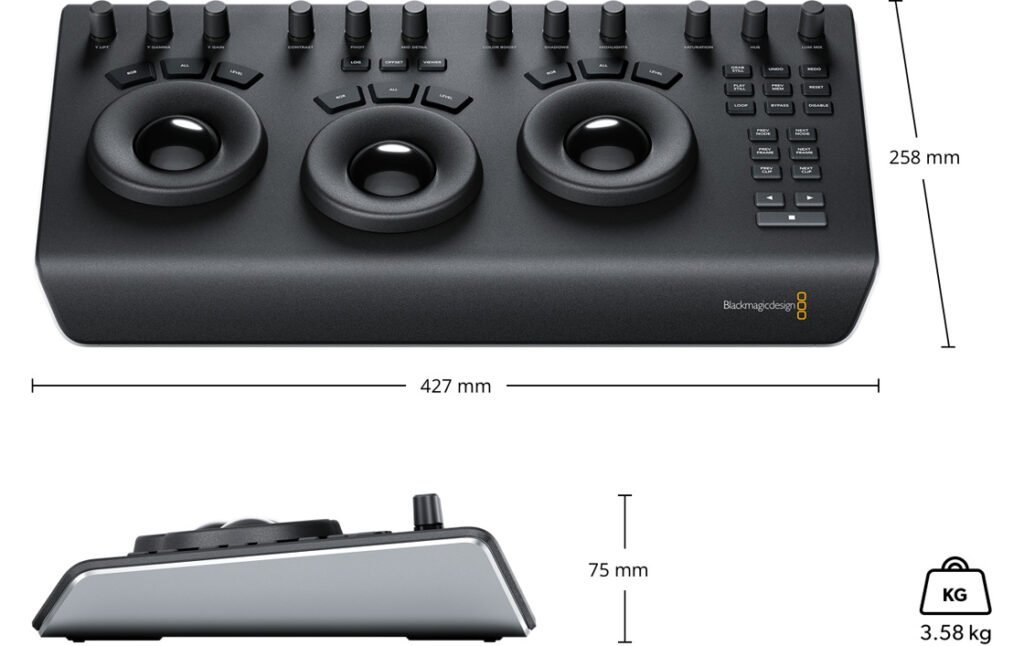
Size-wise, I found the Micro Panel’s name a bit misleading. It’s not exactly “micro” – it takes up a considerable chunk of my desk space. And forget about traveling with it – it’s not the most portable piece of gear. But hey, it’s like having a giant teddy bear. It may take up space, but you can’t help but love it.
Over the years, I’ve grown more familiar with the Micro Panel and DaVinci Resolve, and my workflow has become much faster and more precise. It’s been an incredible journey of growth and self-discovery. I’ve come to realize that the Micro Panel is like a trusty sidekick that’s always there to help me create visual masterpieces. It has its quirks, but it’s been a game-changer in my color grading journey.
All the Controls Of Micro Panel
In this section, we’ll take a closer look at the various controls the DaVinci Resolve Micro Panel offers.
A. Trackball Modes
- Primary Trackball Mode
- Default mode with Log, Offset, and Viewer keys off
- Trackballs control Lift, Gamma, and Gain
- Rotate trackballs for color balance adjustments
- Rotate rings around trackballs for contrast adjustments
- Log Trackball Mode
- Entered by pressing the Log key
- Trackballs control Shadow, Midtone, and Highlights parameters
- Rotate trackballs for color balance adjustments
- Rotate rings around trackballs for contrast adjustments
- Offset Trackball Mode
- Entered by pressing the Offset key
- Left trackball ring controls color temperature
- Center trackball ring controls color tint
- Right trackball ring controls image offset balance and master exposure
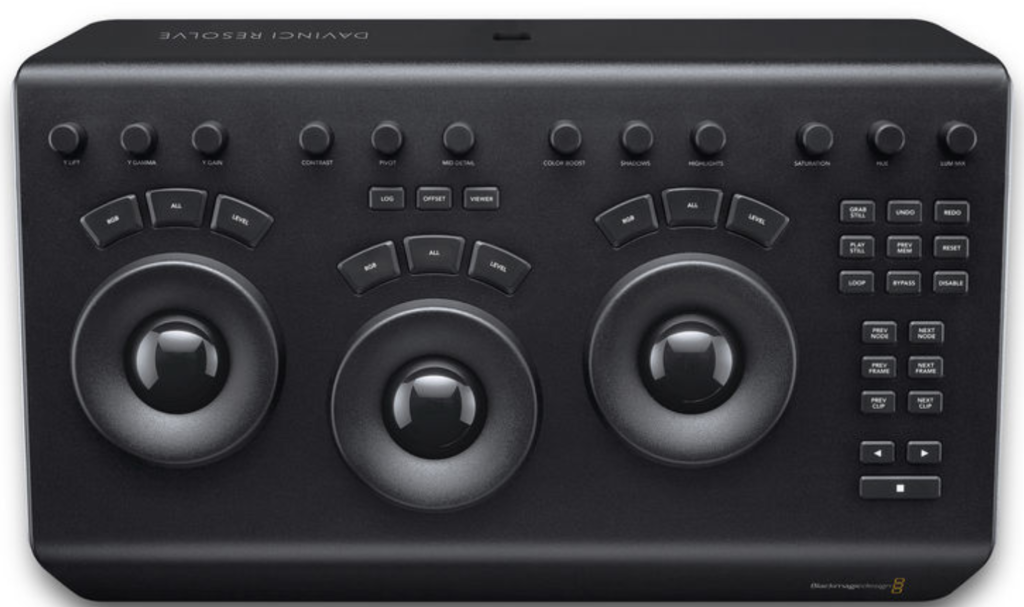
B. Control Knobs
- Y Lift
- Y Gamma
- Y Gain
- Contrast
- Contrast Pivot
- Midtone Detail
- Color Boost
- Shadow
- Highlight
- Saturation
- Hue Rotation
- Luminance Mix
C. Control Buttons
- Top Group
- Grab Still, Undo, Redo, Play Still, Prev Mem, Reset, Loop, Bypass, Disable
- Middle Group
- Prev Node, Next Node, Prev Frame, Next Frame, Prev Clip, Next Clip
- Bottom Group (Timeline Transport buttons)
- Left Arrow (reverse play), Stop, Right Arrow (forward play)
With these numerous controls, the Micro Panel provides a comprehensive and efficient color grading experience for DaVinci Resolve users.
Advantages of the Micro Panel
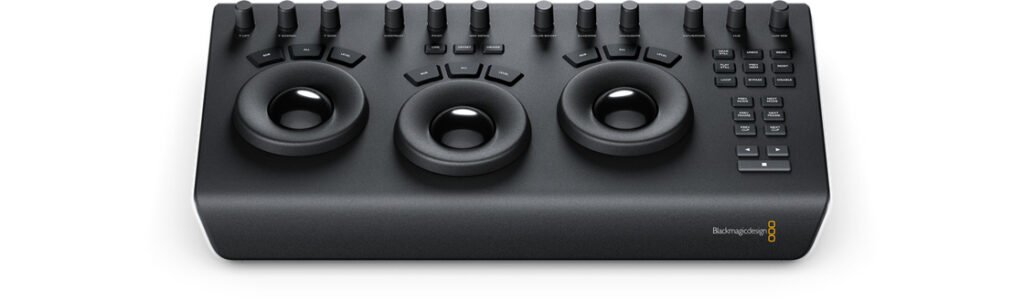
Natural feel of color grading with the panel
One of the most significant advantages I’ve found with the Micro Panel is how natural and intuitive it feels to color grade with it. Here’s a list of the fantastic features that make color grading a breeze:
- Three trackballs corresponding to lift, gamma, and gain: They feel like a magic wand at your fingertips, allowing you to effortlessly adjust settings.
- Turntables: These make it easy to fine-tune the intensity and luminosity of clips, similar to being a DJ for color grading.
- Perfect split tone or color separation: The trackballs help you achieve the ideal balance effortlessly.
- Full-screen mode adjustments: Keep your eyes glued to the screen and make adjustments without having to switch between menus or look down at the panel.
- Enhanced focus and speed: The Micro Panel makes color grading feel more like an art form rather than a chore.
In short, the Micro Panel makes color grading feel more like an enjoyable dance rather than a tedious task. It’s like finding the perfect dance partner – together, you glide through the color grading process with ease and finesse.
Quick adjustments and precise control
As I continued my color grading journey with the Micro Panel, I discovered another delightful aspect – the ability to make quick adjustments and gain precise control over my work. Here’s a list of amusing experiences and features that stood out to me:
- Speedy color temperature adjustments: It felt like having a magic wand that could change the weather with a flick of the wrist – quickly adjusting color temperatures without breaking a sweat! By pressing the “Offset” button, your two of the three wheels act like temperature and tint knobs.
- Effortless resets: Imagine having an “oopsie” moment and being able to reset it immediately by pressing the knobs. It’s like having a time machine at your fingertips!
- Wide range of knobs: Having access to all these knobs was like being a kid in a candy store, allowing me to make rapid adjustments and work faster.
- Quick access buttons: These nifty buttons let me grab stills, undo and redo actions, reset color nodes, and more, all with the ease of pressing a single button.
- Effortless navigation: Moving between frames, clips, and nodes felt like being a graceful ice skater, gliding effortlessly from one point to another.
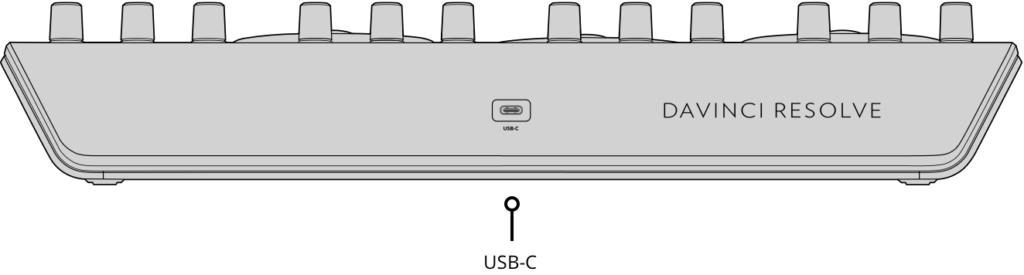
- Connectivity: One of the things I love about the Micro Panel is its plug-and-play simplicity. No need for a lengthy setup process or wrestling with tangled cables. The panel connects easily to your computer via a single USB-C cable, making it a breeze to get started. Plus, the DaVinci Resolve software instantly recognizes the panel, so you can dive right into color grading without any hiccups. It’s like the Micro Panel and DaVinci Resolve are long-lost friends reuniting for a color-grading party!
Full-screen mode for detailed adjustments
By pressing the “Viewer” you can get into full-screen mode.
- The big picture: The unobstructed view allowed me to see the overall impact of my work, like having a cinema screen for my project.
- Pixel-perfect adjustments: The enlarged view enabled me to scrutinize each pixel, ensuring a harmonious balance.
- Easy on the eyes: No more squinting at tiny images; full-screen mode made it more comfortable to work on detailed adjustments.
Drawbacks of the Micro Panel
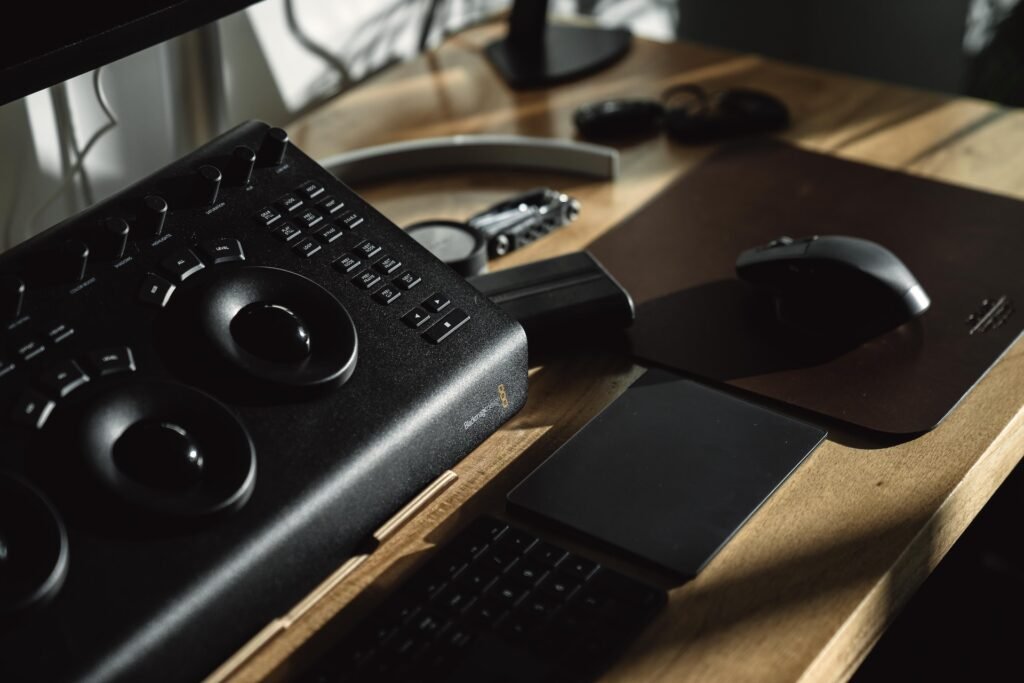
Size and portability issues
While the DaVinci Resolve Micro Panel undoubtedly elevated my color grading game, it wasn’t all sunshine and rainbows. The panel’s size and portability presented a few hiccups:
- Desk real estate: The Micro Panel, although smaller than its bigger siblings, still demanded a considerable chunk of my precious desk space. It was a constant battle between the panel, my keyboard, and my coffee mug.
- Travel woes: The idea of taking the panel on the go seemed great at first, but lugging it around felt like bringing a mini-fridge to a picnic. “Portable” became a relative term.
- Setup struggles: While not overly complicated, setting up the panel at a different workstation or a friend’s place felt like I was reassembling a puzzle every time. It was not the most efficient process.
Limited to DaVinci Resolve software
As much as I love the DaVinci Resolve Micro Panel, there’s one drawback that sometimes makes me ponder life’s great mysteries. The panel is specifically designed to work with DaVinci Resolve software, which means:
- Software fidelity: If you’re a die-hard fan of another color grading software, well, tough luck, my friend. The Micro Panel and other software are like two ships passing in the night, never to meet.
- Learning curve: If you’re not familiar with DaVinci Resolve, you’ll have to invest some time learning the software. I mean, it’s not rocket science, but you might have to watch a couple of tutorials and practice your skills.
- No multi-tasking: You may have dreams of using the Micro Panel for other purposes like video editing or perhaps as an elaborate paperweight, but sadly, it’s a one-trick pony.
In a nutshell, the Micro Panel’s exclusive relationship with DaVinci Resolve can be a bit limiting, but if you’re already a Resolve enthusiast, it’s a match made in color grading heaven.
No dedicated “add serial node” button
As much as I appreciate the Micro Panel’s functionality, I have to admit there is one small annoyance: the lack of a dedicated “add serial node” button. For those of us who frequently add nodes in DaVinci Resolve, this can slow down our workflow. Sure, it’s just a quick keyboard shortcut away (Alt+S), but having a dedicated button on the panel would have made the process even smoother.
Comparing the Micro Panel with other options
Upgrading to the Mini Panel
Now, let’s talk about the Micro Panel’s big sibling, the Mini Panel, which at times had me considering a panel upgrade. The Mini Panel has some features that are pretty tempting, like:
- More buttons and knobs: The Mini Panel is like the Micro Panel on steroids. It has additional buttons, knobs, and trackballs that make it feel like you’re piloting a spaceship (okay, maybe not quite, but you get the idea).
- Greater functionality: With all those extra controls, the Mini Panel offers a wider range of functions. You can delve deeper into your color grading without ever having to touch your mouse or keyboard. Talk about feeling like a pro!
But, as tempting as it is, I’ve stuck with the Micro Panel for a few reasons:
- Cost: The Mini Panel is like that fancy sports car you always dream of but can’t afford. It’s more expensive than the Micro Panel, and honestly, my wallet isn’t ready for that level of commitment.
- Size: The Mini Panel is more like a Mini-Me Panel – it takes up more desk space, which, in my humble abode, is a luxury I can’t afford.
Tangent panels: more customization and compatibility with other software
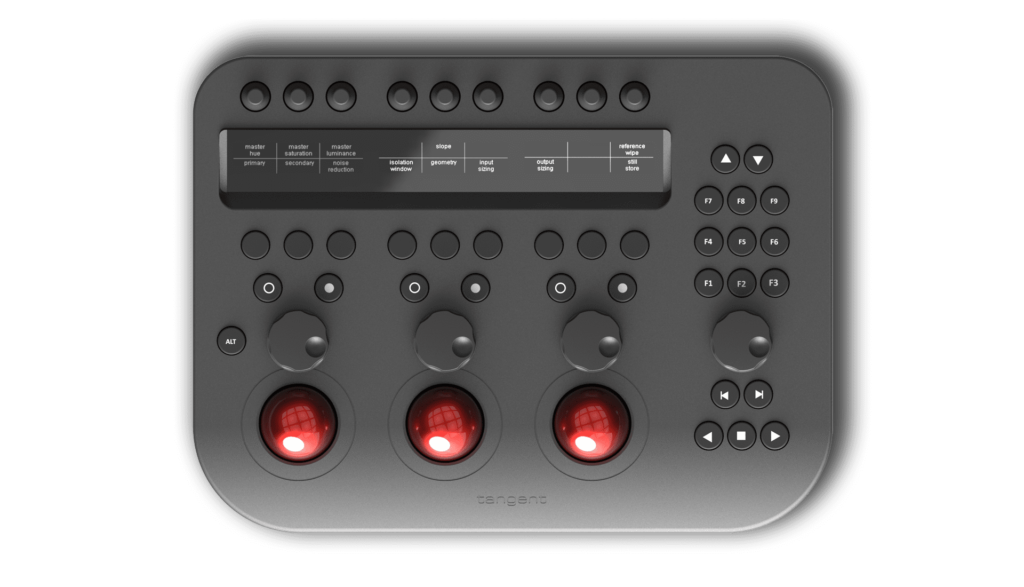
Now, if we’re talking about color grading panels, it would be remiss not to mention Tangent panels. They’ve been on my radar for quite some time, and here’s why:
- Customization: Tangent panels are like the Build-A-Bear Workshop of color-grading panels. You can tailor them to your workflow and preferences by mapping specific functions to different knobs and buttons. Talk about personalization!
- Compatibility: Unlike the Micro Panel, which only plays well with DaVinci Resolve, Tangent panels are the life of the party, getting along with multiple software applications. So, if you’re a social butterfly and work with various color grading software, Tangent might be your best buddy.
But, as great as Tangent panels sound, I chose the Micro Panel for a couple of reasons:
- Learning curve: While customization is cool, it also means more time spent figuring out how to set up and use the panel. With the Micro Panel, I was off to the races right away, thanks to its simple, user-friendly design.
- Integrated design: I have to admit, I’m a sucker for a well-designed product. The Micro Panel, specifically designed for DaVinci Resolve, just feels like a natural extension of the software. It’s like the peanut butter to my jelly, the Batman to my Robin, the… well, you get the idea.
Conclusion
Assessing the value of the Micro Panel based on the user’s needs
So, after all my thrilling adventures with the Micro Panel, the big question is: would I recommend it to others? Well, that depends on what you’re looking for. If you’re a DaVinci Resolve devotee and need an intuitive, easy-to-use panel that improves your color grading workflow, then the Micro Panel is a no-brainer. Sure, it might not be best friends with every software out there, and its size might not make it the perfect travel buddy, but its functionality and seamless integration are hard to beat.
Developing color grading skills and personal style
Using the Micro Panel has been a game-changer for me. Not only has it made my color grading process faster and more precise, but it’s also helped me develop my personal style. It’s like having a paintbrush that knows precisely how to mix the colors in my head. And the more I use it, the more I realize just how much I love color grading.
So, if you’re willing to invest in your color grading journey and you’re a DaVinci Resolve aficionado, give the Micro Panel a shot. It might just be the secret ingredient that takes your projects to the next level.