
Welcome back to FilmmakingElements.com. As video content creators strive for higher quality and more efficient storage solutions, the H.265 codec, also known as High Efficiency Video Coding (HEVC), has emerged as an essential tool for the trade. With its impressive compression capabilities, H.265 enables the delivery of crisp, high-quality videos at lower bit rates, reducing file sizes and easing the burden on storage and bandwidth requirements.
DaVinci Resolve, the industry-leading video editing software, boasts native support for this advanced codec, providing you with an optimal workflow for exporting H.265 videos.
In this comprehensive article, we’ll demystify the process of exporting H.265 videos from DaVinci Resolve, guiding you through the necessary settings, best practice.
Navigating the Delivery Page in DaVinci Resolve
After putting the finishing touches on your video project in DaVinci Resolve, the next crucial step is to export your masterpiece. The delivery page is where you’ll find all the necessary export settings to ensure your video is rendered in the desired format and quality. In this section, we’ll walk you through the two primary settings you’ll need to focus on to successfully export your H.265 video.
- Accessing the Delivery Page:
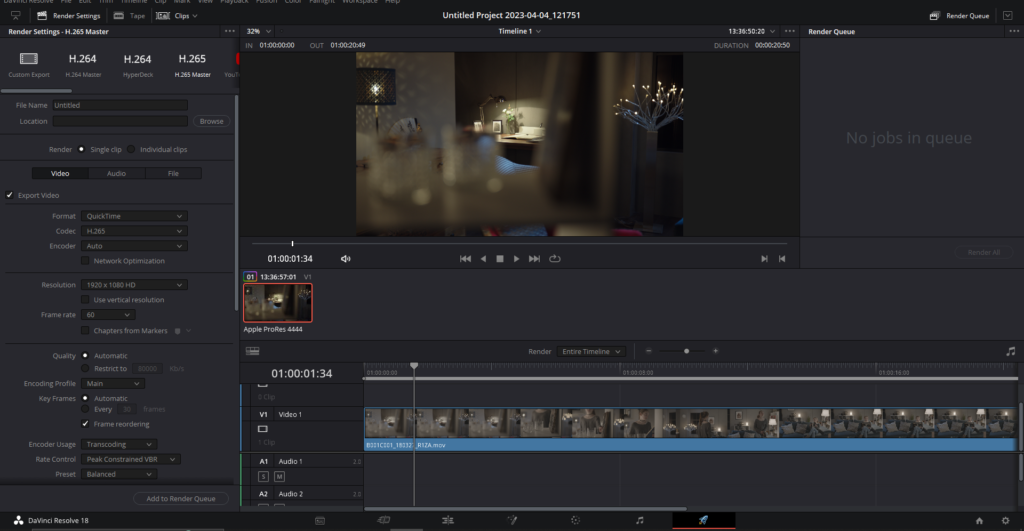
To access the delivery page, first, locate the ‘Deliver’ tab at the bottom of the screen and click on it. Upon doing so, you’ll be presented with the delivery page, showcasing your entire project timeline and thumbnails for each clip. This comprehensive overview allows you to review your project one last time before proceeding to export.
- Exploring the Left Panel:
The left panel on the delivery page is where you’ll configure the essential export settings for your video. Here, you’ll find numerous options, including the render settings, output format, codec, resolution, and more.
Understanding the Differences Between H.264 and H.265 Presets in DaVinci Resolve
While on the delivery page in Davinci Resolve, there are exporting presets at the top where you will come across two primary presets: H.264 Master and H.265 Master. You might be wondering about the differences between these two codecs and which one to choose for your project. In this section, we’ll delve into the distinctions between H.264 and H.265, and how to decide which preset is ideal for your needs.
- H.264 vs. H.265: A Brief Overview
H.264 and H.265 are both video compression algorithms. H.264 is an older method, whereas H.265, also known as High Efficiency Video Coding (HEVC), is a newer and more advanced approach. Many devices initially lacked support for H.265, but most modern devices now support this advanced codec.
H.265 compresses video files much more efficiently than H.264 without sacrificing quality. It doesn’t enhance the image quality but maintains the existing quality while significantly reducing the file size. This is particularly beneficial for platforms like VidFlow, where smaller file sizes save on storage and bandwidth consumption.
- When to Choose H.265 over H.264
For most projects, especially wedding films or high-quality videos, H.265 is the preferred choice due to its superior compression efficiency. However, there may be instances where you’ll opt for H.264, such as when dealing with older devices or platforms that lack H.265 support.
Exporting H.265 Videos in DaVinci Resolve
Now that you understand the differences between H.264 and H.265 codecs, let’s dive into the step-by-step process of exporting your video using the H.265 preset in DaVinci Resolve.
- Choose the H.265 Master preset:
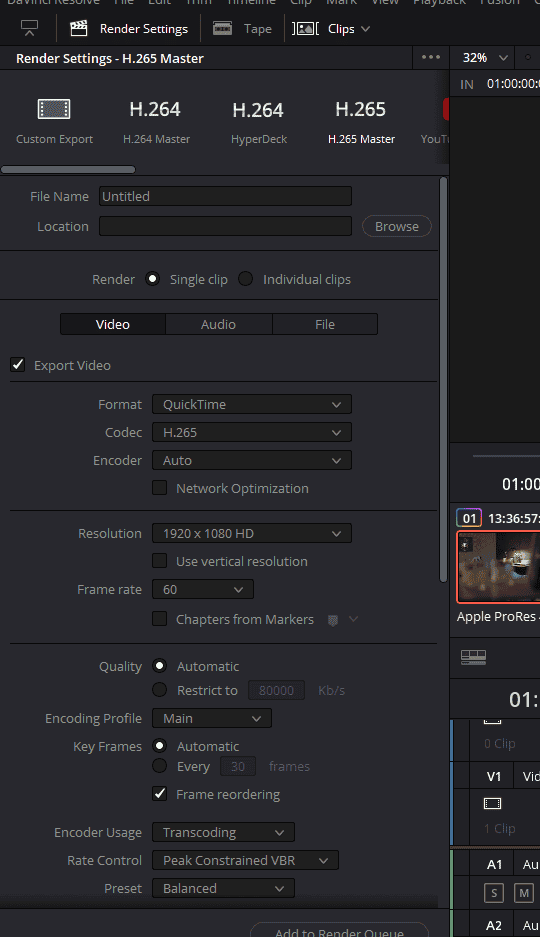
Navigate to the Delivery page in DaVinci Resolve. At the top of the interface, you’ll see a series of export presets. Select the “H.265 Master” preset, which will automatically adjust various settings in the left panel to optimize your export.
- Name your output file and set the destination:
Enter a suitable name for your output file. Click the ‘Browse’ button to open a file explorer window and select the appropriate destination folder for your exported video.
- Configure resolution settings:
Check the resolution settings in the left panel to ensure they match your project’s requirements. If your timeline is set to 1080p, but your footage was shot in 4K, simply change the export resolution to 4K to match your source material. You can see the resolution of the project by going clicking on the gear looking icon in the bottom right corner.
- Optimize quality settings:
Leave the quality setting at ‘Automatic’ to take full advantage of H.265’s compression capabilities. This allows the codec to analyze each clip and allocate more data to complex scenes without restricting the overall bit rate, resulting in a more efficient compression process.
- Adjust advanced settings:
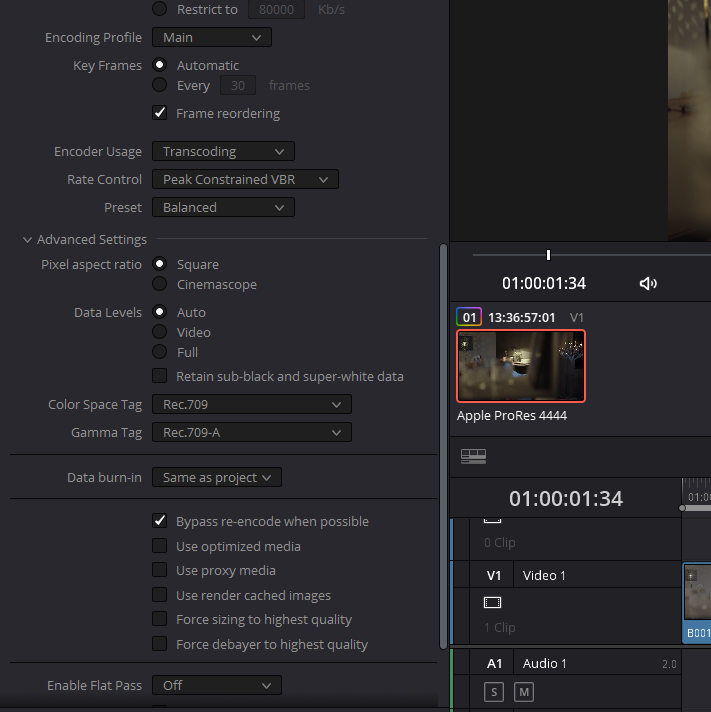
Click the ‘Advanced Settings’ button to access additional export options. Here, change the gamma tag to Rec.709-A and color space tag to Rec.709 to prevent color shifts during the export process. This setting ensures that your exported video’s colors match what you see on your editing screen.
- Set the export range:
In the timeline panel, you can choose which portion of your project to export. Select ‘In/Out Range’ and set the in and out points to define the specific section you want to render. This is particularly useful if you only need to export a certain part of your project.
- Add your project to the render queue and render:
Once you’ve configured all the settings, click ‘Add to Render Queue’ to prepare your video for rendering. Your video will appear in the render queue panel on the right side of the screen. To begin rendering, click ‘Render All.’
Exporting H.264 Videos in DaVinci Resolve
Before comparing both the options, Let’s go over exporting H.264. In addition to H.265, DaVinci Resolve offers another widely-used codec for exporting video projects: H.264. Here’s a step-by-step guide to help you export your projects using the H.264 preset and compare it with H.265.
- Choose the H.264 Master preset:
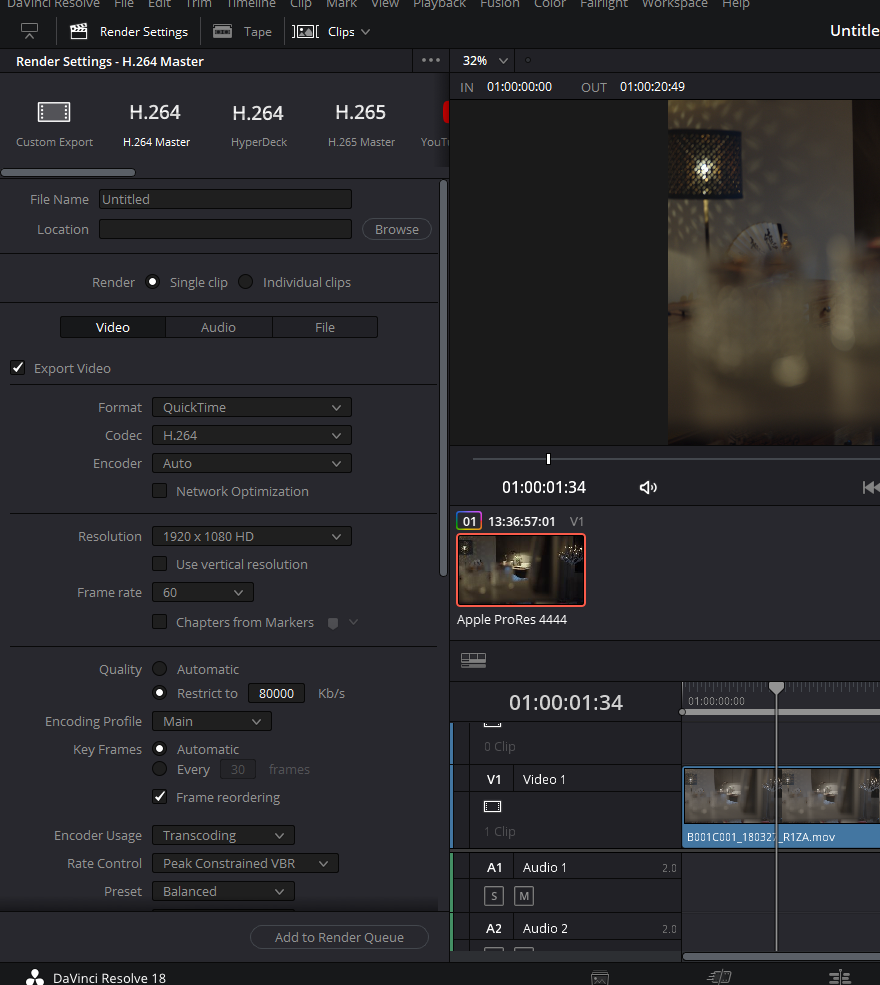
Navigate to the Delivery page in DaVinci Resolve and select the “H.264 Master” preset. This will automatically adjust various settings in the left panel to accommodate H.264 export.
- Name your output file and set the destination:
Enter a suitable name for your output file and choose the appropriate destination folder for your exported video by clicking the ‘Browse’ button.
- Configure resolution settings:
As with H.265, ensure that the export resolution is set to 4K if your footage was shot in 4K, even if your timeline is set to 1080p.
- Set the bit rate:
For 4K video exports in H.264, restrict the bit rate to 80,000 kilobytes. For 1080p exports, set the restriction to 40,000 kilobytes.
- Adjust advanced settings:
Click the ‘Advanced Settings’ button and make sure the gamma tag is set to Rec.709-A and color space tag to Rec.709 to maintain color accuracy during export. Additionally, enable both the ‘Force sizing to highest quality’ and ‘Force debayer to highest quality’ options. These settings ensure that DaVinci Resolve uses the highest quality source media, bypassing any proxy or optimized media settings that might be active in your project.
- Add your project to the render queue and render:
Click ‘Add to Render Queue’ and then ‘Render All’ to begin rendering your video using the H.264 codec. A warning may appear due to the higher resolution export, but since your footage is in 4K, it won’t pose any issues.
A Detailed Comparison of H.265 and H.264 Video Exports in DaVinci Resolve
Selecting the appropriate codec for exporting video projects can have a significant impact on the final output. H.265 and H.264 are two popular codecs that you might consider using in DaVinci Resolve. To help you make an informed decision, let’s take an in-depth look at the output of these two codecs when applied to the same video project.
- File size comparison:
Exporting videos with both H.265 and H.264 codecs allows you to directly compare the file sizes. The H.265 codec results in a smaller file size, whereas the H.264 codec generates a larger one. When I exported the same file in both the variants, the H.265 export produced a 1GB file, while the H.264 export yielded a 3.8GB file. This demonstrates that the H.265 file is approximately a third the size of the H.264 file, providing more efficient compression.
- Video quality comparison:
To assess the video quality of both codecs, it’s essential to analyze the exported videos side by side. Place the H.265 video on the left and the H.264 video on the right, and carefully observe the quality of each. Despite the significant difference in file size, you might find it difficult to spot any noticeable disparities in video quality between the two exports. This indicates that the H.265 codec maintains high video quality while providing superior compression compared to H.264.
- Bitrate and compression:
The H.265 codec uses more advanced compression techniques than H.264, allowing for better video quality at lower bitrates. When exporting videos in 4K resolution, restricting the bitrate to 80,000 kilobytes for H.264 is recommended. In contrast, you can leave the quality setting on ‘automatic’ for H.265, which enables the codec to intelligently adjust the compression and allocate the necessary data for each clip.
- Practical applications:
Given the comparable video quality and smaller file size, H.265 is a preferable choice for uploading videos to platforms like YouTube, Vimeo, and VidFlow, where storage and bandwidth are essential considerations.
Thank you for taking the time to read this blog post! We hope it provided valuable insight and helped you better understand the differences between H.265 and H.264 video codecs. If you have any questions or would like to explore more topics, please feel free to browse our other blog posts. Your interest and support are greatly appreciated. Happy video editing!
- Also Read- Davinci Resolve HEVC/H.265 Media Offline: 6 Fixes
- Also Read- How To Save Videos As MP4 In Davinci Resolve
- Also Read- Davinci Resolve Media Offline 7 Reasons & Fixes