
Hi! Welcome to Filmmaking Theory. This article is a comprehensive guide on How To Save Videos As MP4 In Davinci Resolve.
How To Save Videos As MP4 In Davinci Resolve
How To Import Mp4 Footage in Davinci Resolve
I have an empty new project open in DaVinci resolve to get started. Let’s begin by going down to the Edit tab. To import MP4 video, go towards the upper left corner and select Media pool. Then right-click inside the media pool and go to import media.
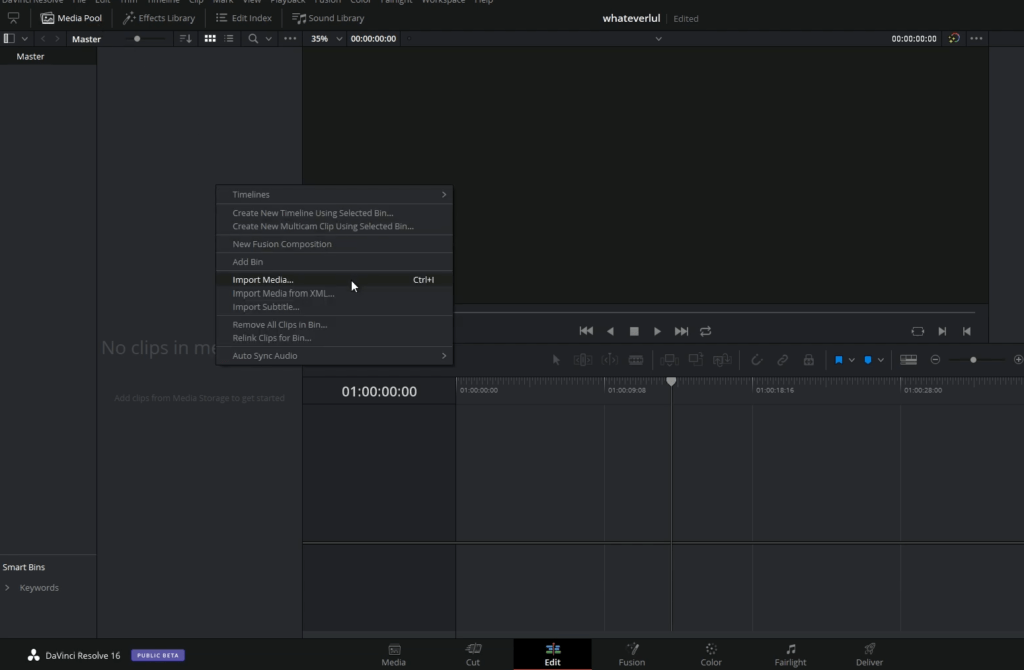
You can also use the Control+I keyboard shortcut. Now go to the location where you keep your videos. Select one and click Open. Okay. And there, I imported my video into the media pool.
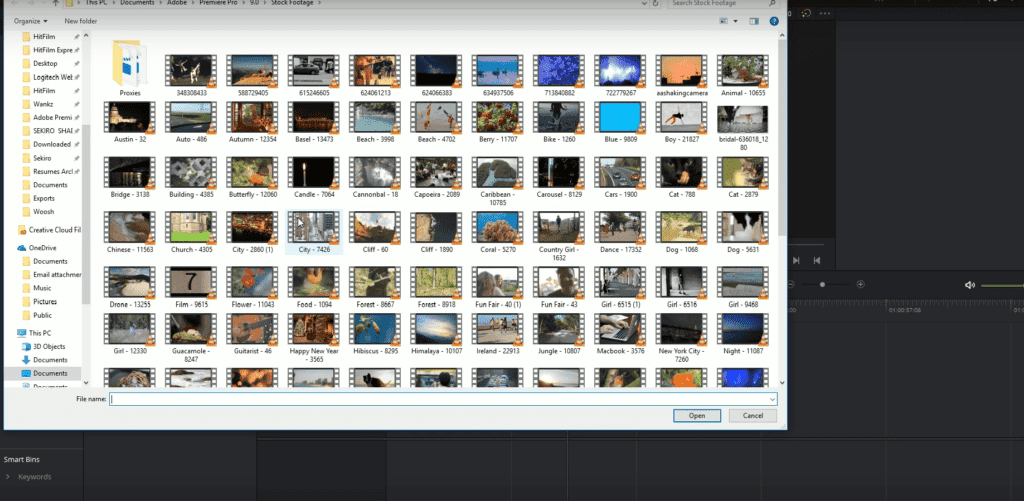
If you’d like to import multiple videos simultaneously, go back to the Import Videos setting. While holding down the CTRL key on the keyboard, select all the videos you’d like to import. You can also Shift and select multiple videos when importing.
Once you have everything selected, click the Open button. Okay. And there are imported three more videos that I just selected.
To add a video to your project, drag it from the media pool onto the timeline.
You can add multiple videos at once to your timeline by holding down the CTRL key on your keyboard and selecting your desired videos from the media pool. Then drag them onto your timeline.
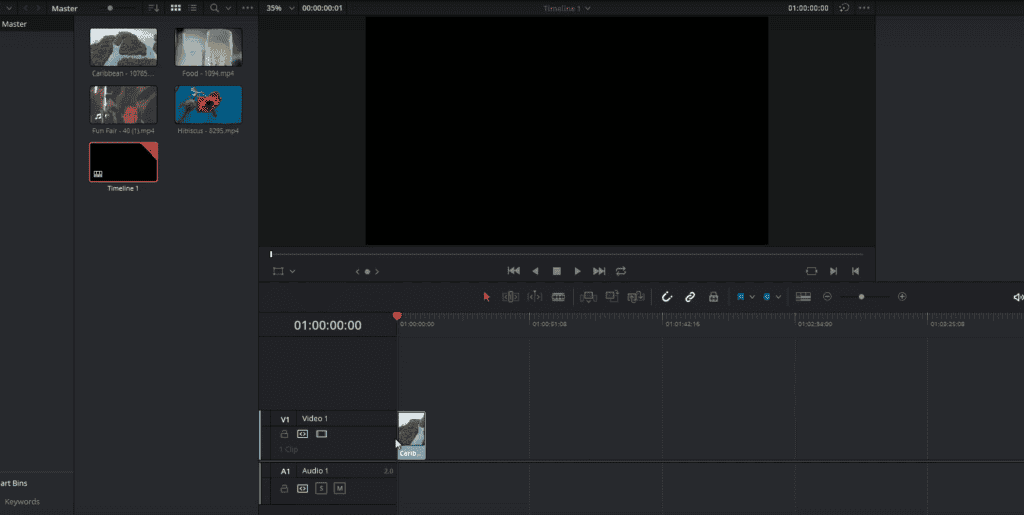
To change the order of your videos on the timeline, drag them around. Okay. And that’s it for this part of the tutorial on importing MP4 videos in DaVinci Resolve.
How To Export Videos As MP4 In Davinci Resolve
In this part of the article, I’m going to teach you How To Export Videos As MP4 In Davinci Resolve so that you can put them on YouTube, Vimeo or deliver it to your client.
So you have your files and footage; you edited them. What you do is you go down to the little rocket ship icon at the bottom menu, and you click that. And that is how you get to the export delivery screen.

You use presets for Youtube or Vimeo to export, which will also export your videos in MP4. That can also work, but you can go to the Custom tab for more control over the Export and for better quality.
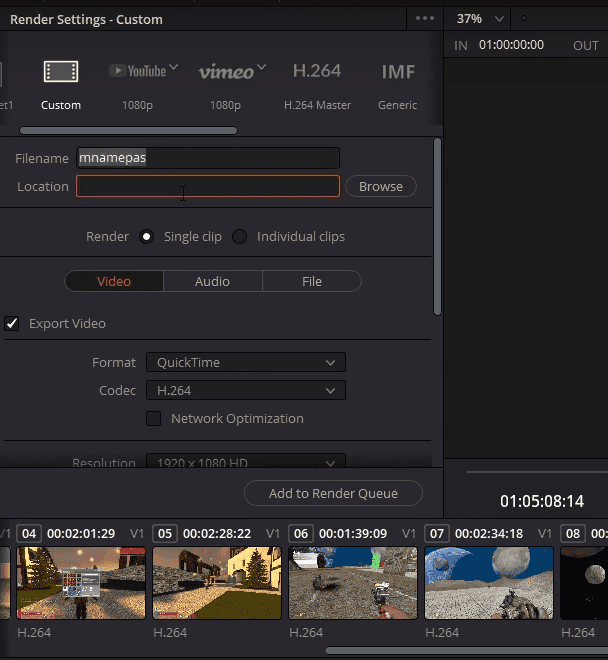
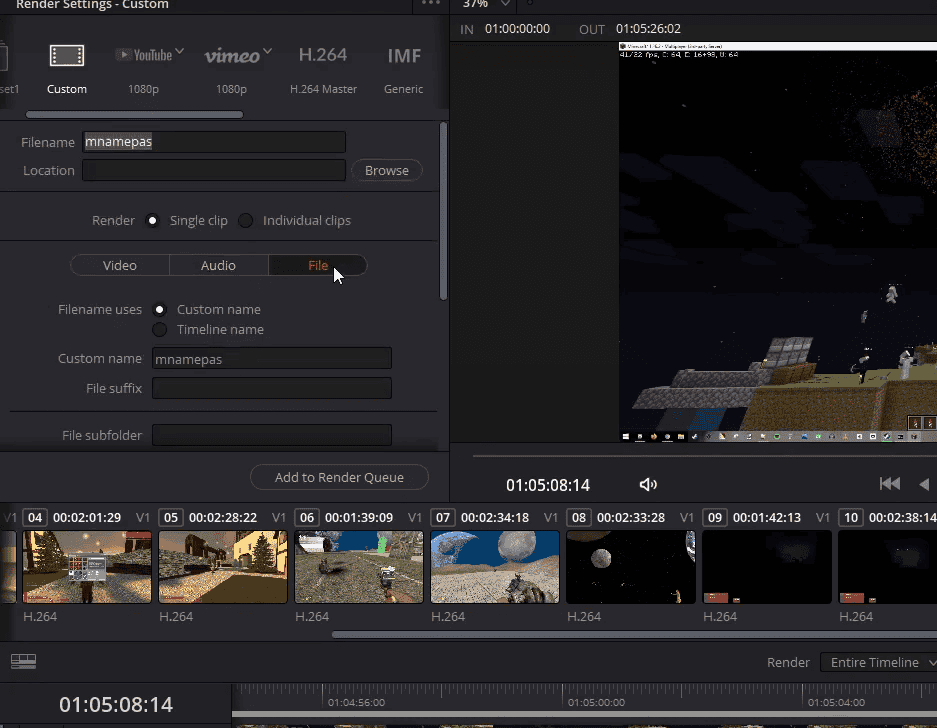
You type in the name you are willing to give to the Export and choose a location where you want the file to save after the render. Then you go down; there’s a couple of settings you have to change. You head to Format and Codec options.
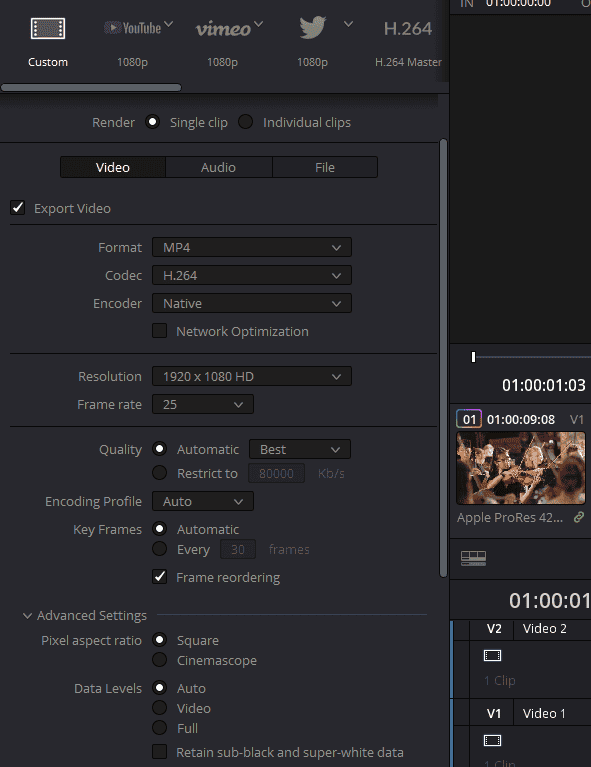
Choose MP4 for the format and H.264 for the codec. H.264 is actually the compression that will be applied to the footage.
After that, you can change your resolution to 1080p or 4k, whatever resolution suits you. Also, change the frame rate; I usually keep it at 24 or 25.
Resolution and Frame Rate are actually set when you make a new project. You can see it from File>Project settings.
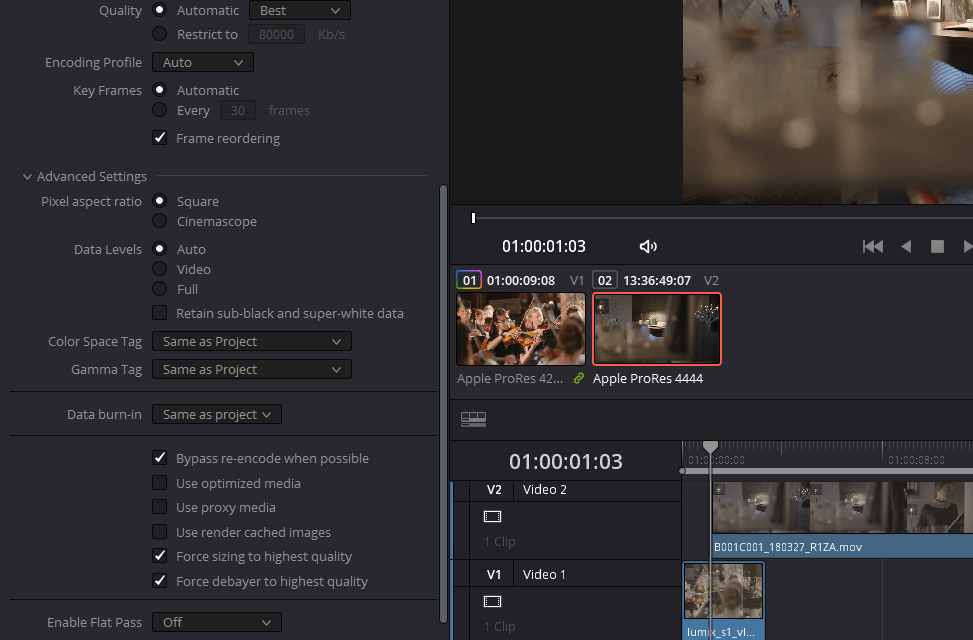
You can also head to Advanced Settings and make sure your Data Levels is set to Auto. Also, do make sure that Use optimized media box is unchecked and Force sizing to the highest quality, and Force debayer to the highest quality is checked. What it does is, forces Davinci Resolve to export your MP4 video in the highest quality possible.
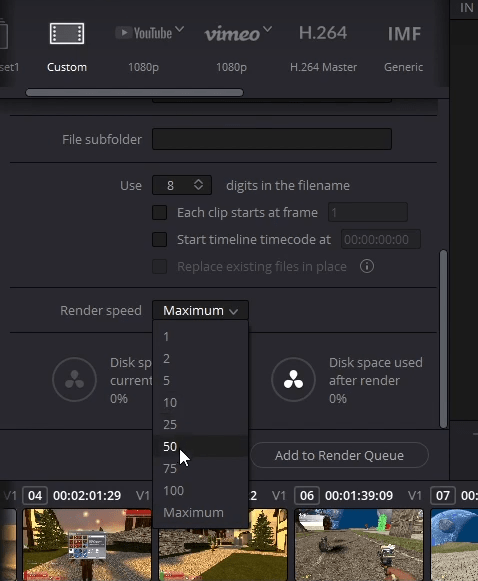
If you see your Davinci Resolve crashing while exporting and you are on a low-end PC, you come back up, go to File, scroll down. And what you want to do is set render speed to 50.
You can also save these settings as a preset for future use by going on the three-dot icon. Click on Save as new preset and then type a name for the preset.
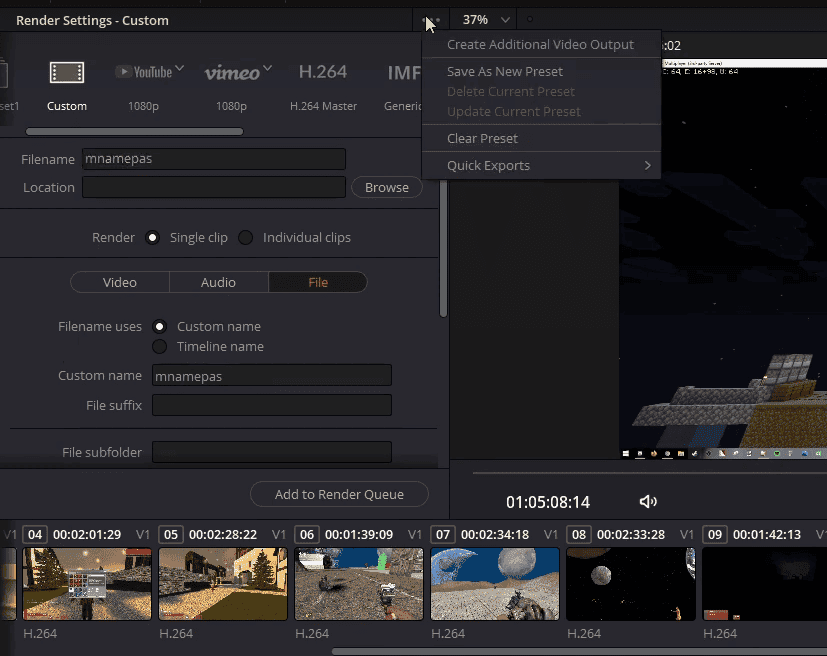
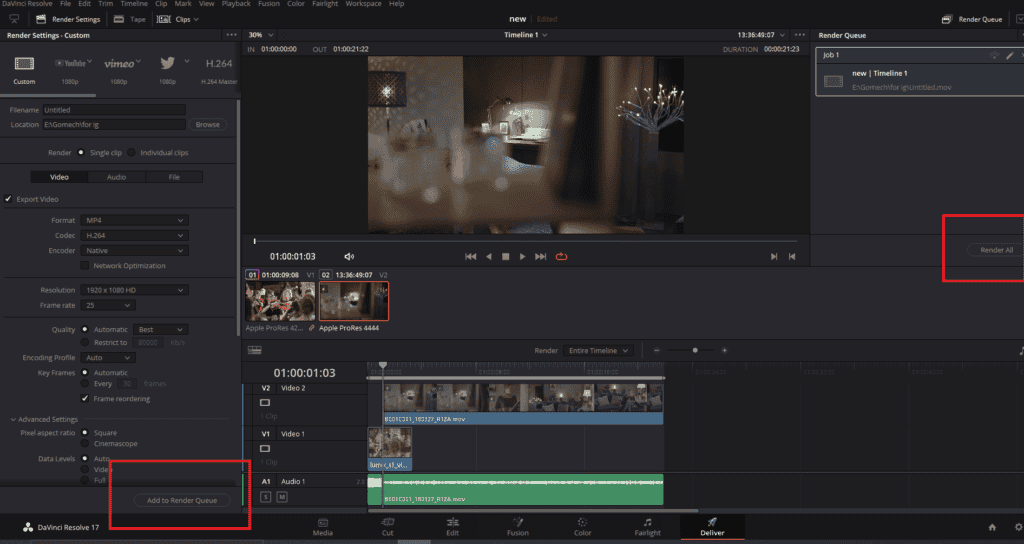
Now, what you want to do is to click on Add to the render queue, and then you’re going to save it as whatever you want to save it as. What it does is it adds your Export in a queue. This way, you export your videos in different formats and codecs altogether just by adding them to the queue. But after this step, It’s not done rendering yet.
To start exporting your MP4 video, you need to click on the Start Render.
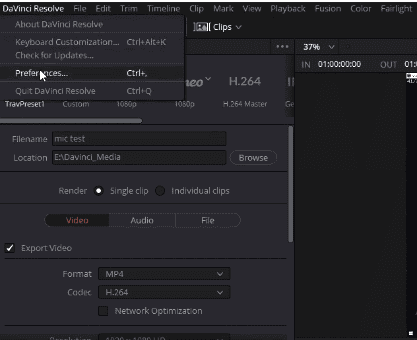
A few additional settings you can make sure about before exporting your final edit is, you can head to Davinci Resolve>Prefrences>User>UI settings and make sure “Stop playback when a dropped frame is detected” is unchecked and “Stop renders when a frame or clip cannot be processed” is checked.
When you keep your “Stop playback when a dropped frame is detected” unchecked, you basically tell resolve that a few drops here and there are fine. 99% of the time, this won’t make a difference, so don’t stress about it.
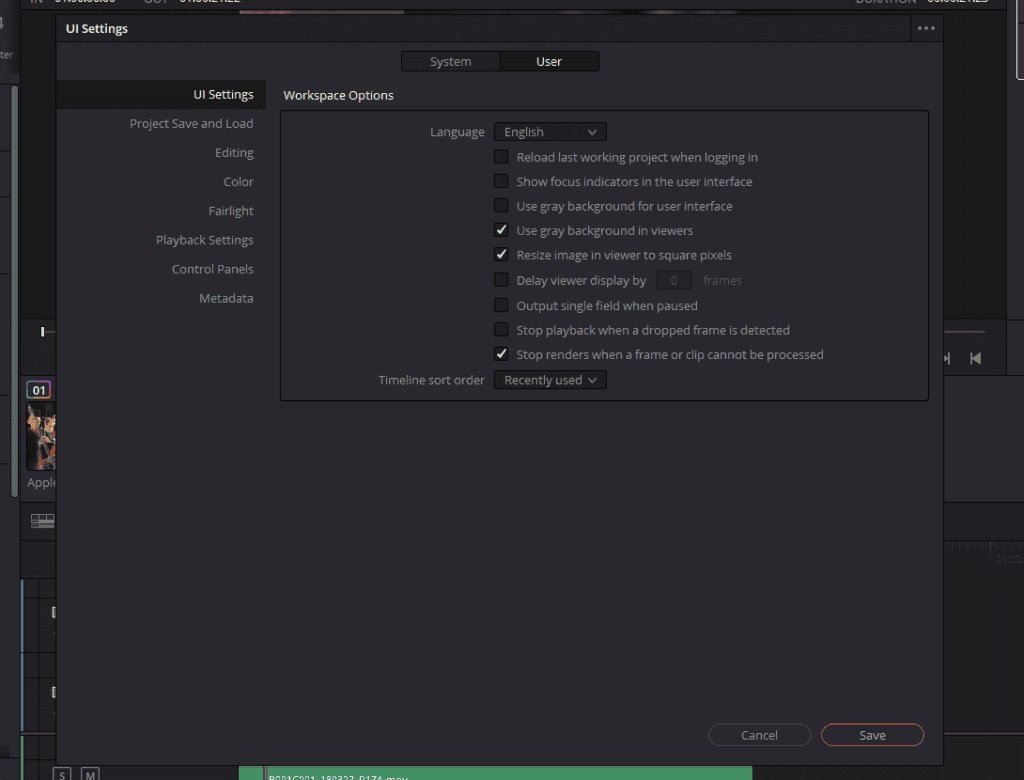
When you keep your “Stop renders when a frame or clip cannot be processed” checked, Davinci Resolve stops the render when it is unable to process the footage or a clip. This saves a lot of time when you hit Start Render and go ahead with the rest of your day.
That’s about everything that I do to export MP4 videos from Davinci Resolve. So the next step you’re going to do is you’re going to hit start render. You can see the progress while it’s rendering.
- Also Read-Ways To Get More Color Grading Projects
- Also Read-Assistant Colorist: Job Description, Responsibilities, Skills Needed
- Also Read- Who Is A Film Producer And How To Be One?
Fixing Gamma Shift After MP4 or H.264 Export From Davinci Resolve
This part is specifically with Apple users. Guys, have you ever had this? You go through your grade and edit your project. It’s looking fantastic, Full of contrast; the skin tones are perfect, and then you hit Export for your MP4 video or any other format or codec, for that instance, in Davinci Resolve, and everything changes.
The skin tones are all off, the Blacks are lifted, the highs are lifted, and overall it just looks washed out. I know I have, and for a lot of years, we’ve struggled with this. But with DaVinci Resolve, we’ve finally got to the bottom of it.
So this is how you get the perfect colors on a Mac screen. It can be a P3 wide gamut screen. You don’t need expensive external monitors or color-calibrated workflow.
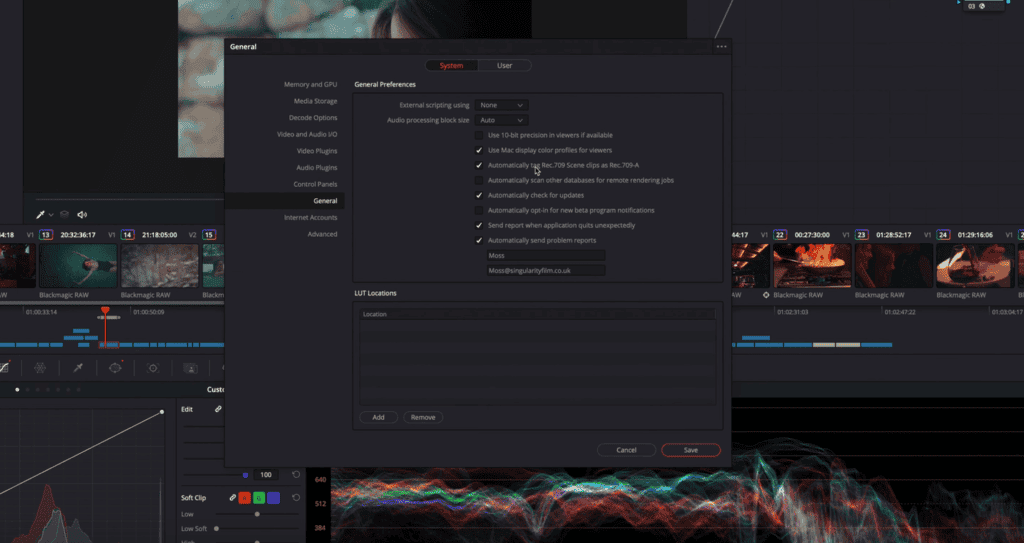
For this to work, you just need the correct settings. So without further Ado, here they are. The first thing you want to do is make sure you go to Preferences and make sure go to System>General and “Use Mac display color profiles for viewers” and “Automatically tag REC.709 Scene clips as REC.709-A” is ticked.
That’s going to tell DaVinci Resolve to emulate the P3 wide gamut that your Mac needs to view. You then hit Save and see Nothing’s changed.
The next thing you need to do is go to your project settings, go to Color Management and change Timeline color space, which is on default at Rec.709 (Scene) to Rec. 709-A. I’m going to assume A stands for Apple.

If you watch the contrast now, you’ll see it revert to what you actually get any export. There you go; you have actually fixed it. What now you are doing is trying to bypass Apple’s own color management from Davinci Resolve’s end.
But that’s not the end of the story. You need to make sure that the workflow is Rec.709 from beginning to end. So in your deliver settings, when you export the project, you need to make sure that you clicked Advanced settings.
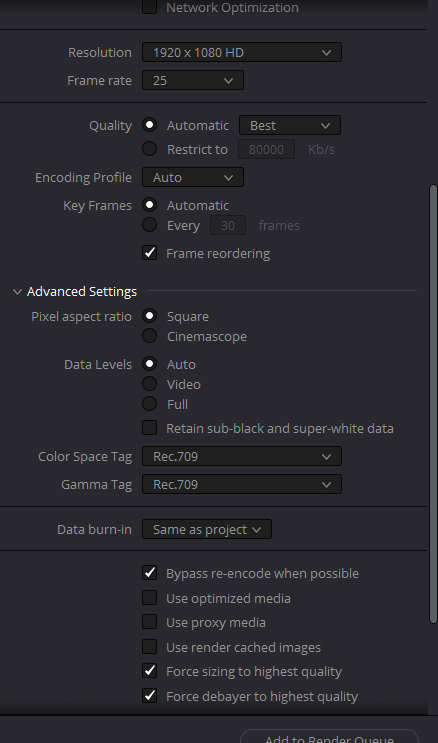
Scroll down and change “Color Space Tag” and “Gamma Tag” to Rec.709. By default, it will be on the same project. I wouldn’t trust it. I’d make sure it’s manually selected to Rec 709.
Then when you export, it will look identical. Of course, now we need to go through and regrade because what we were viewing here was wrong. So we need to regrade.
So then, when we hit Export, we get the correct image that looks exactly as we graded it, and this is going to be like this everywhere. It doesn’t matter what screen you’re on, it’s going to be a Rec.709 gamma tag, and it’s what we wanted when we graded it, so I hope that helps.
Audio Not Importing In Your MP4 Project
This part of the is a tutorial on how to import your audio, your music to DaVinci Resolve when it’s not importing.
Like if you just import audio in the media pool nothing happens. So I’m going to do a quick easy fix for this.
This is because if you hover over the audio file it says M4A, and Davinci Resolve does not support M4A files. If your audio file is not M4A you can still follow this fix.
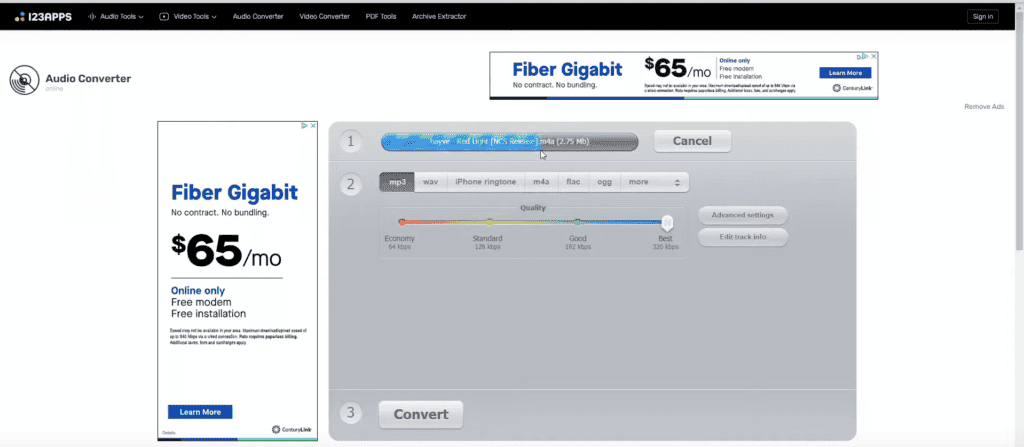
The best solution for this is to convert your audio file to mp3 or wav audio file for your MP4 project.
So this is how you could switch that to an MP3.
What you do is you’re going to go into this online audio converter. It’s 100% safe, with no viruses. You can then import your audio on the website.
Wait for the blue bar to load. Select MP3 which is what you really want and then you can select the quality to the best which I like to do.
Just click on convert and it will start converting to MP3. After the conversion has taken place you can download your converted version.
No audio after the MP4 export

There can also be an instance when you get no audio after exporting your MP4 video. Head to your delivery page and to the audio tab and make sure the “Export Audio” box is checked.
Also, the best bitrate for good quality audio is 192 kbit/s, 256 kbit/s, and 320 kbit/s (the highest level).
So that’s it, guys!
Happy Editing!