How To Rotate Video In Davinci Resolve- 2 Ways using Transform Tools.
In this article, I will show you how to rotate, move and zoom with Davinci Resolve and how you can use those tools to do things like the picture in picture effect.
I’ll show you how to reset them individually or as a whole. And last but not least, I’ll show you how to copy and paste those transforms attribute from one clip to another.
Let’s get straight to it, shall we?
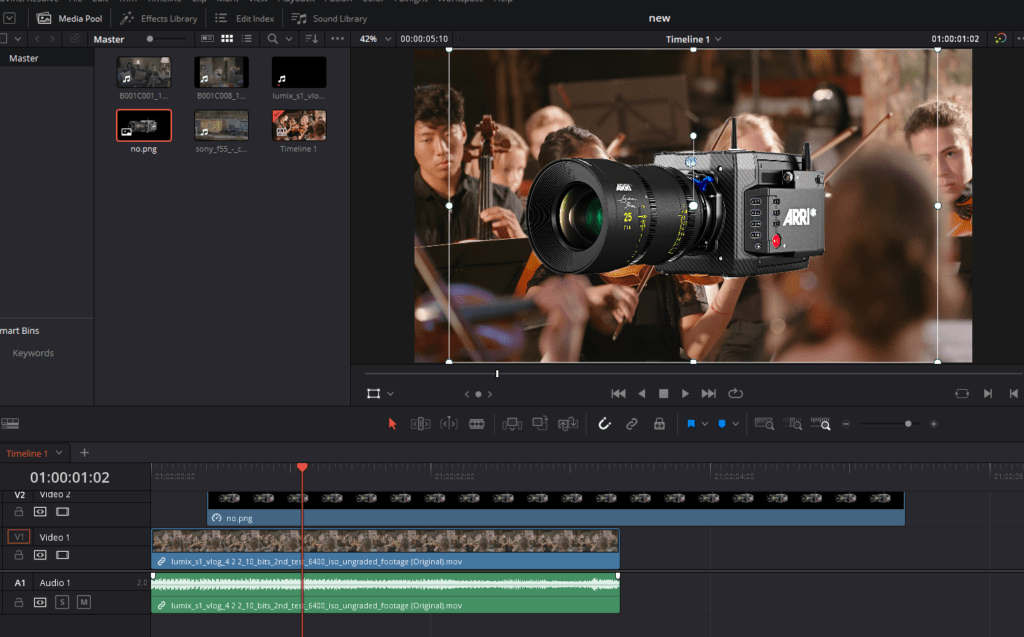
So here we are within DaVinci Resolve, and we’re currently on the Edit tab. I’ve already got a clip set up on my timeline, and as you can see, it’s already wholly filling my frame like so. But let’s say we want to move it around. There are two ways to do it. You can either do it visually on the preview window, or you can do it within the Inspector. I’m going to show you both.

Two ways To Rotate Video In Davinci Resolve and change other attributes.
1. The first method for rotating, stretching, resizing, and moving in Davinci Resolve
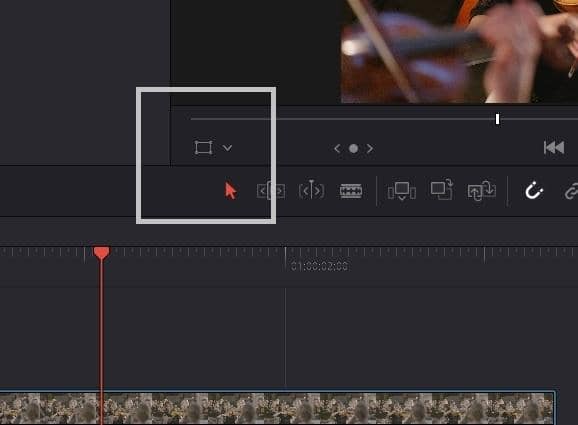
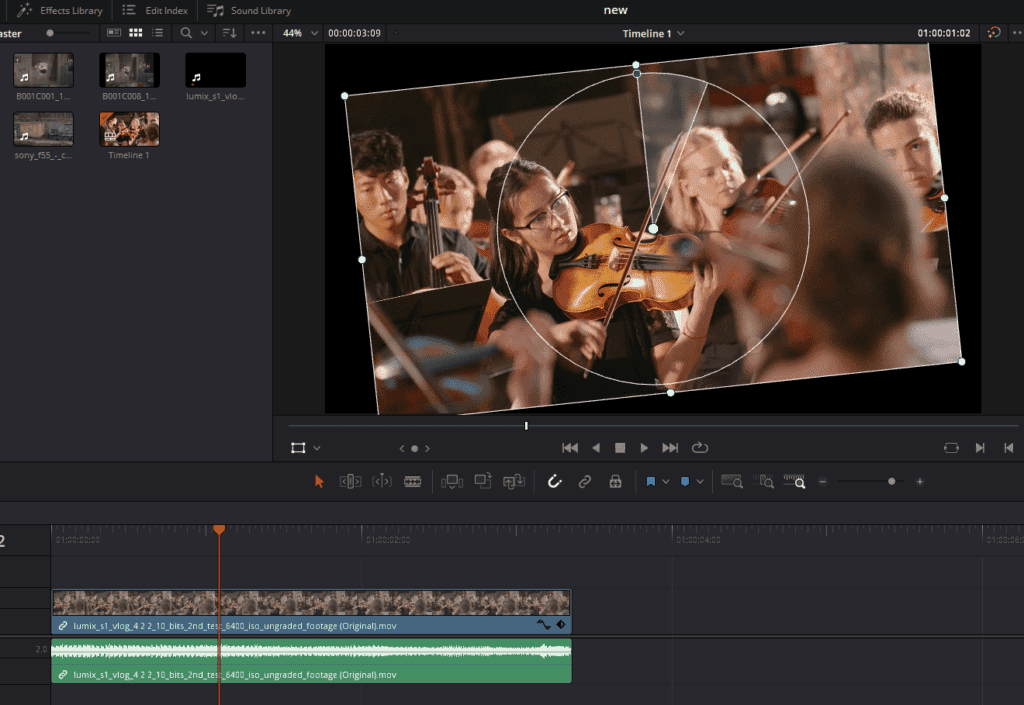
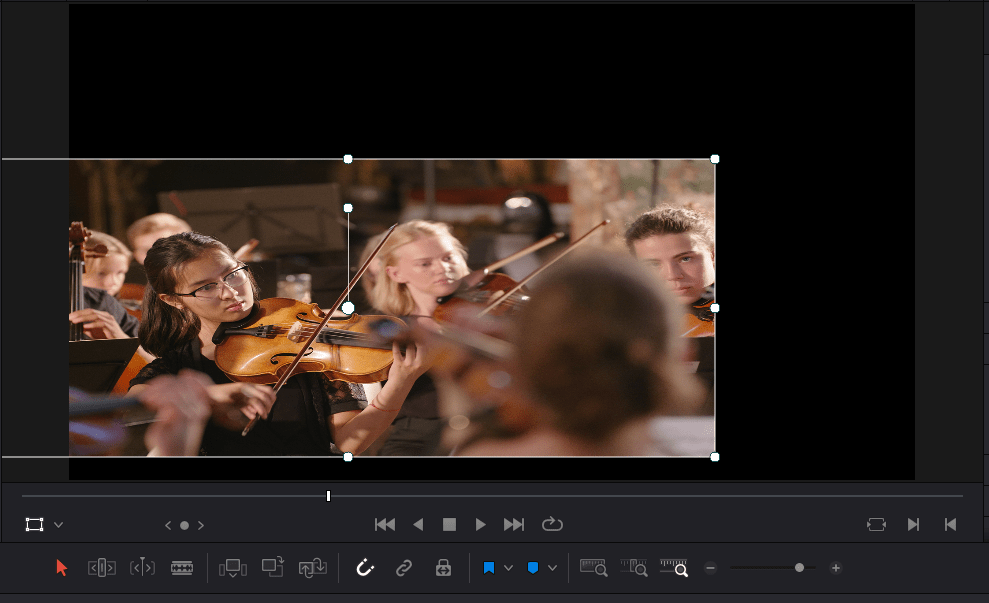
We’ll start with the visual method first. So underneath your preview window, you should see a little icon and a little drop-down menu. Give the little drop down a click, and you can see you’ve got a few options.
Now, we have to use the Transform tool for this method. Transform has this square box-looking icon next to it, the square with the four little points. Just give that a click.
Now, whenever you see the square box in your preview window, you can use these transform controls by giving that button a click to activate or deactivate.
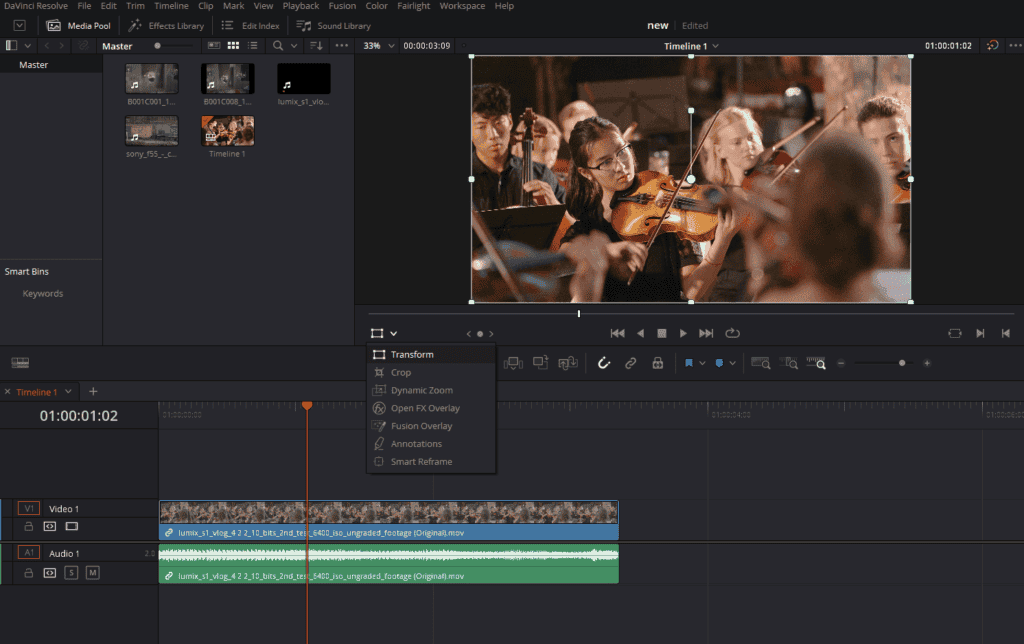
Suppose you see any of the other icons. So let’s say you’ve got the pen icon here. For annotation, you need to use the drop-down to switch to the Transform Tools. With these Transform tools are activated, you can see points appearing on your preview window.
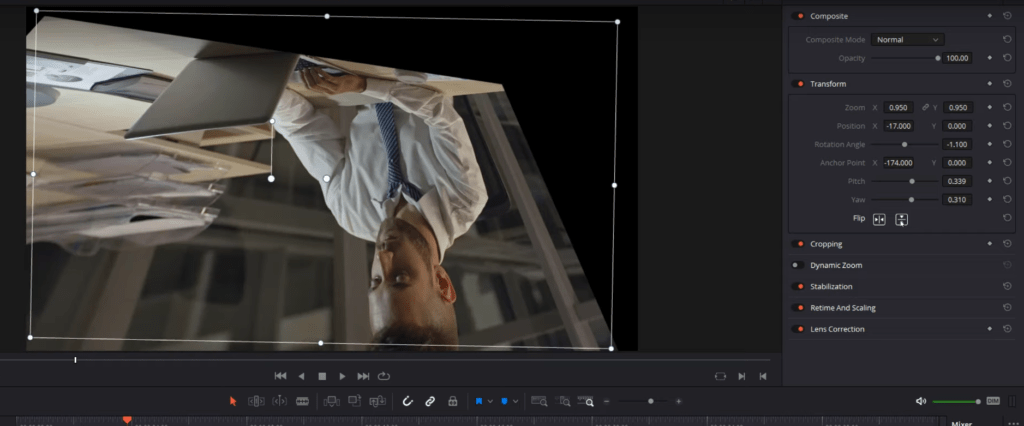
To rotate, you can see you’ve got these two little points in the middle. We click on this top one, hold our mouse, and then drag it to the left to the right to rotate our image. Now another quick tip for you here. You can see that a circle appears when rotating the video. If I drag my mouse down, I can make the circle smaller, and if there’s a smaller circle, I can rotate faster.

If I drag my mouse up to make the circle bigger, I can rotate slower, which gives me finer control over the rotation.
Now lastly, you can see that we’re rotating around the middle. We’re rotating around the icon present in the middle. If you give that a click and move that, you can move that to wherever you want it.
Wherever you put the center point, you will see we’re now rotating around that point instead. That’s called your anchor point.
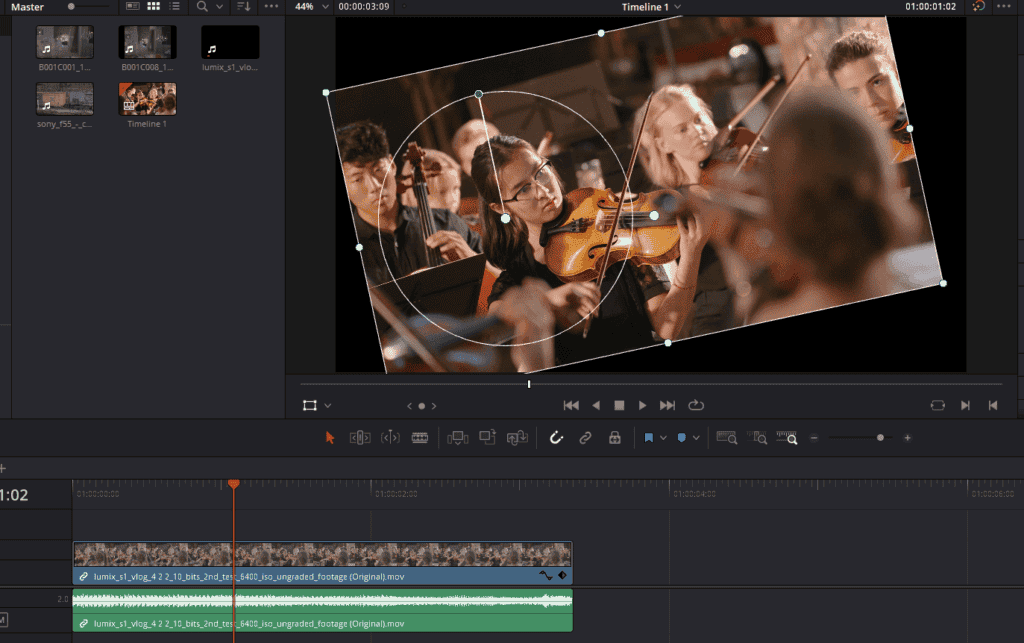
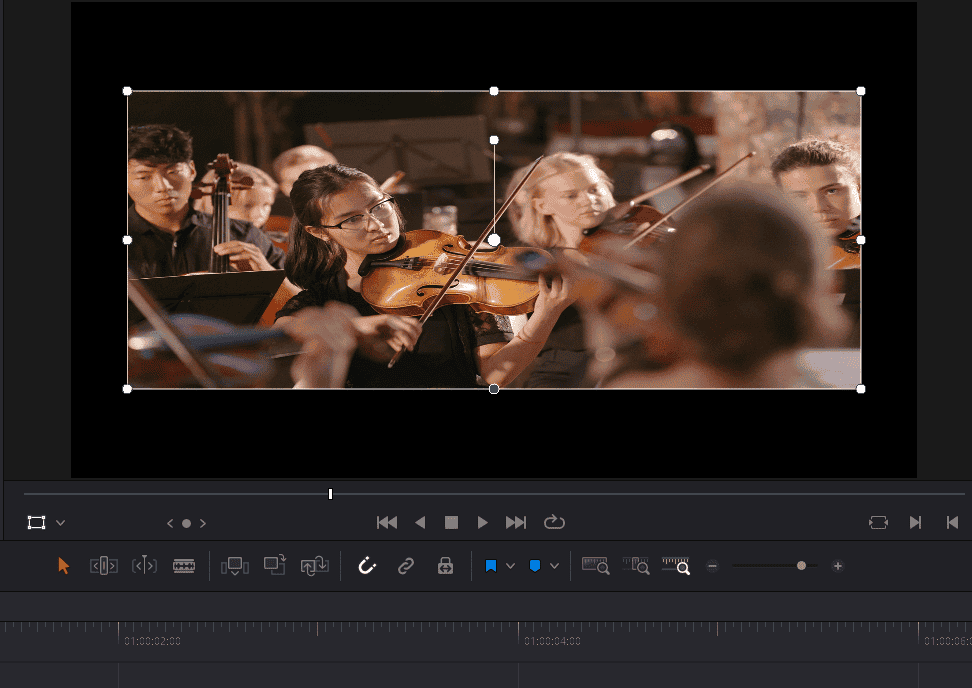
So if we want to Resize it, all we need to do is click on either of the four corners, and we can drag in and drag out without affecting our aspect ratio.
If we want to stretch our videos, we use little dots on either the sides, top, or bottom. And then, we can stretch our video. This will change the aspect ratio of your video, of course (your project resolution will be unaffected).
To move your video around, click anywhere within the frame, and you can drag it around with your mouse.
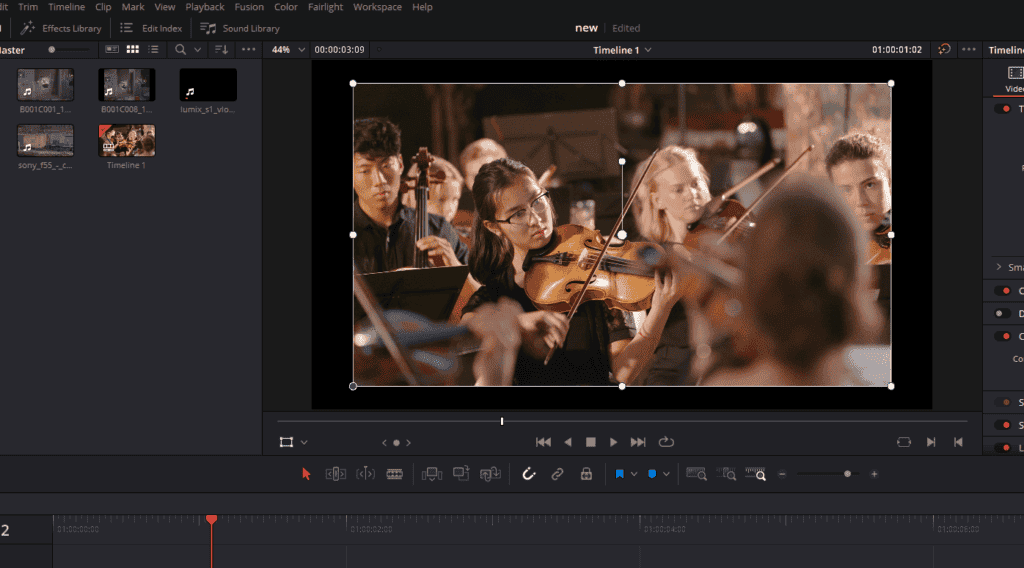
Now that’s the visual method of using the preview window to rotate and do other stuff in Davinci Resolve.
- Also Read- Printer Lights in Davinci Resolve
- Also Read- What is a Prequel to a Film?
- Also Read- Important Continuity Editing Rules in Filmmaking!
- Also Read- What Is A 3×3 Matrix In Color Grading
2. The second method for rotating, stretching, resizing, and moving in Davinci Resolve
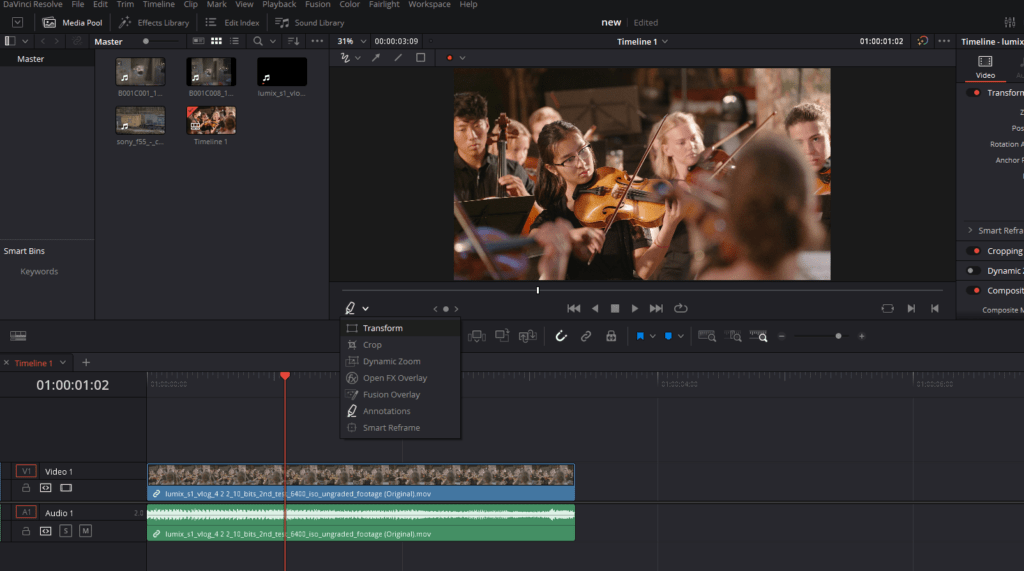
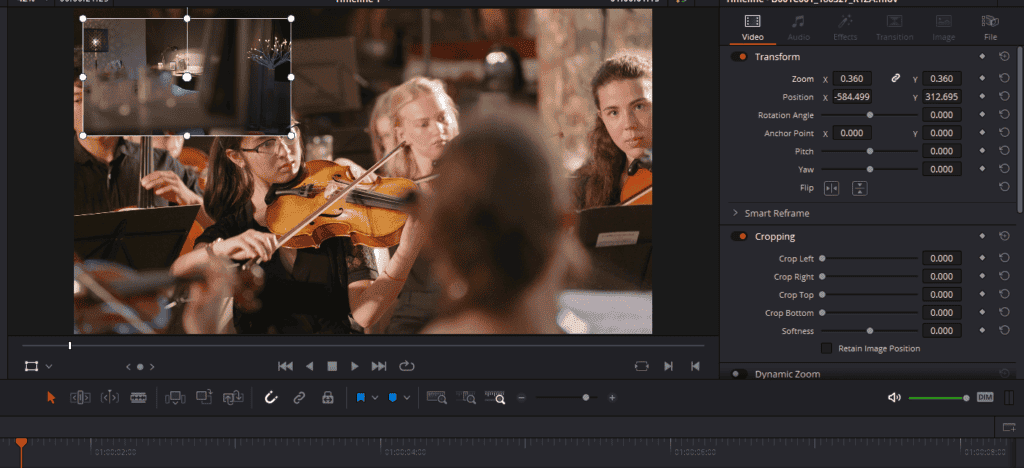
There’s another method using the Inspector. So still, with your clip selected on the timeline, open up the Inspector in the top right-hand corner, and you should see the word transform.
Well, I’ve got no options open here because my transform is closed. So all I need to do is double click on the word transform to show these options.
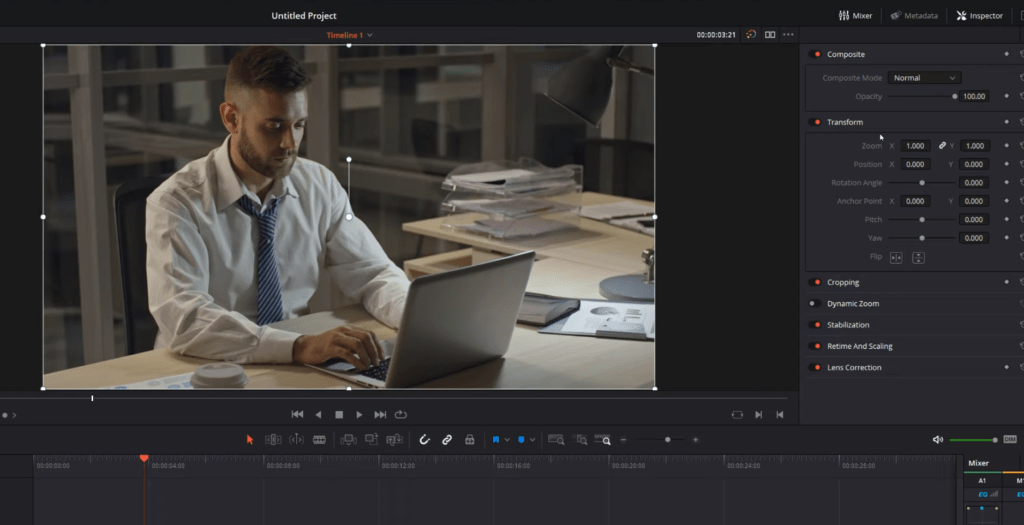
Now, these generally correlate to what we’ve just been doing. So we’ve got Zoom, position, rotation, anchor point, pitch, yaw, and then flip.
So to control the rotation angle, I can either use the little slider in the middle or hold my mouse, click and drag on the number.

To control the Zoom, by the Inspector, all you do, Hover your mouse over the actual numbers, and you can see your cursor will change, click your mouse, and then you can drag, so I can drag, left to Zoom out, right to Zoom in.
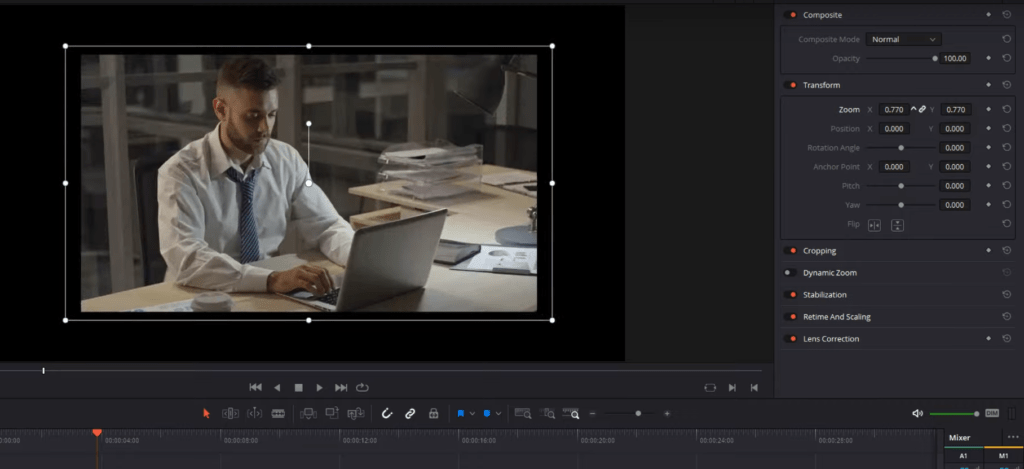
I’m not stretching it; it’s maintaining the aspect ratio, which is the default setting. If I want to stretch it, I can untick the little chain icon, and then I control my X and Y zooms independently.
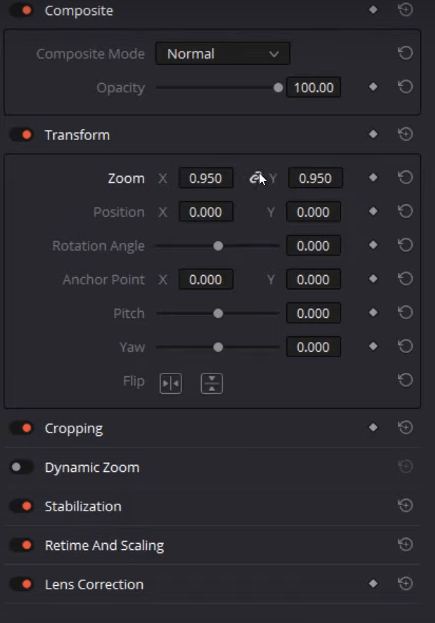
The position is the same, so I can click and drag to move the X and Y-axis of the footage accordingly.
The anchor point is the same so that I can move that left and right. And then you’ve also got pitch, which changes the pitch, and You’ve also got yaw. Pitch and yaw change the perspective of your footage.
And then you’ve got flip horizontally, and then you’ve got vertically. Now, if you want to reset anything you’ve changed. There are two ways to do it. You can either double-click on the actual word.
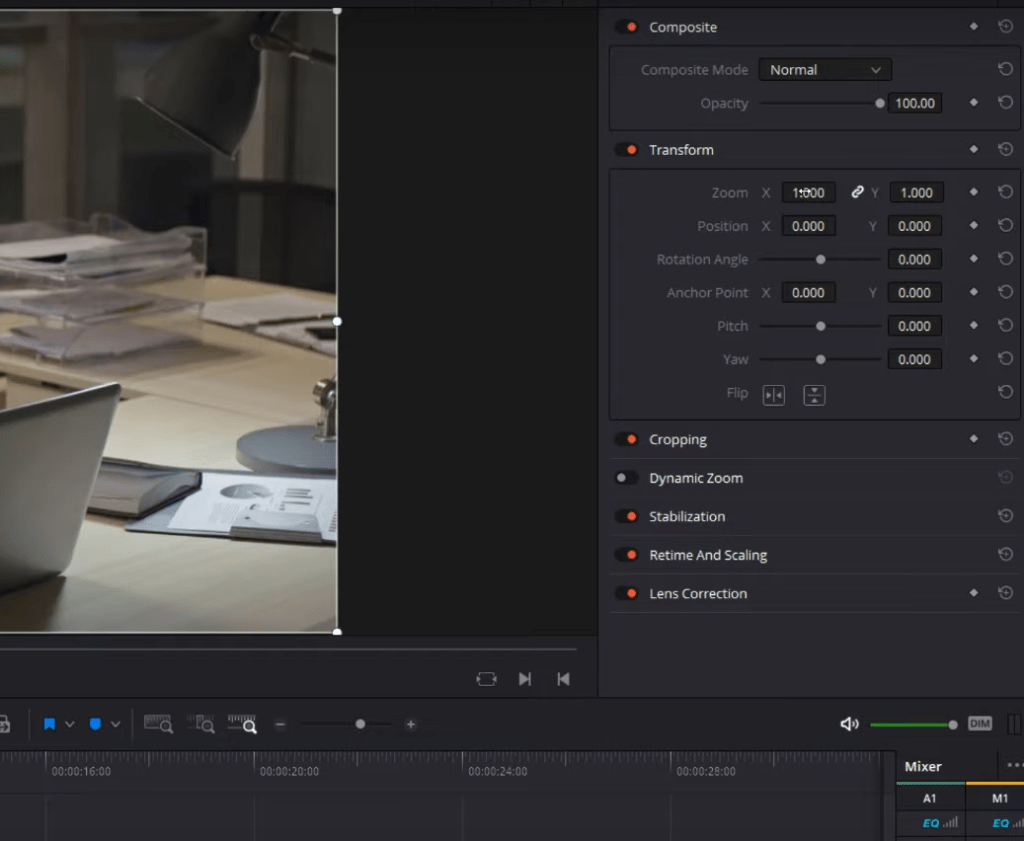
So supposedly, I want to reset the Zoom, I’m just going to double click my mouse, and I’ll reset my Zoom to the default parameters.
Or we can use this little sort of refresh icon over the right-hand side. So supposedly, I want to reset my position. I will give that icon a click, and I’ll reset the position.
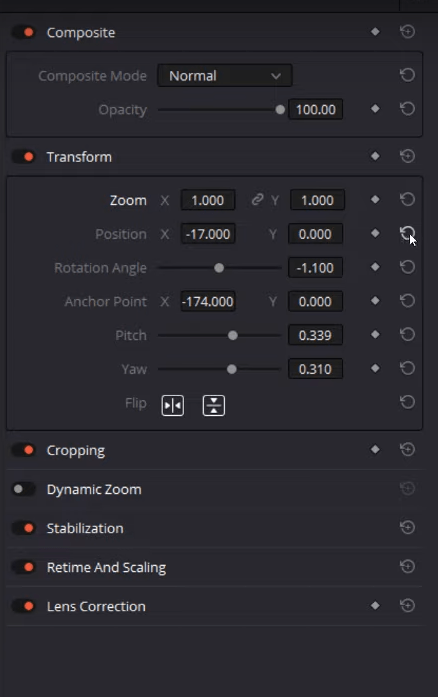
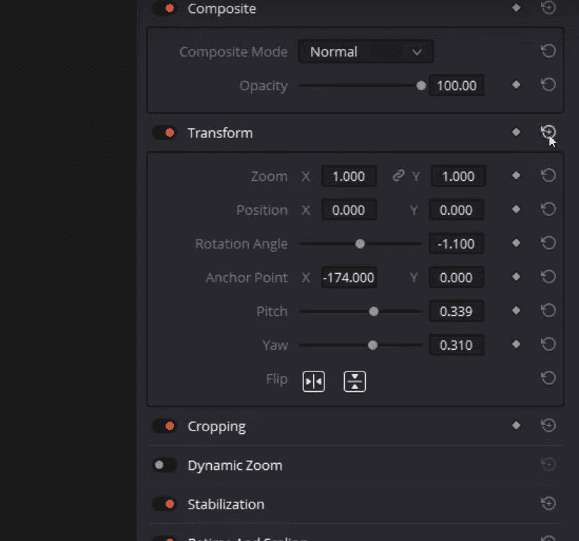
If I want to reset everything within the transform area. If I move my mouse up a little bit, we’ve got the same refresh icon, but this time it’s next to the word transform. We can give that a click, which will reset everything to the default parameters.
How to put your logo and place it using the transform tool
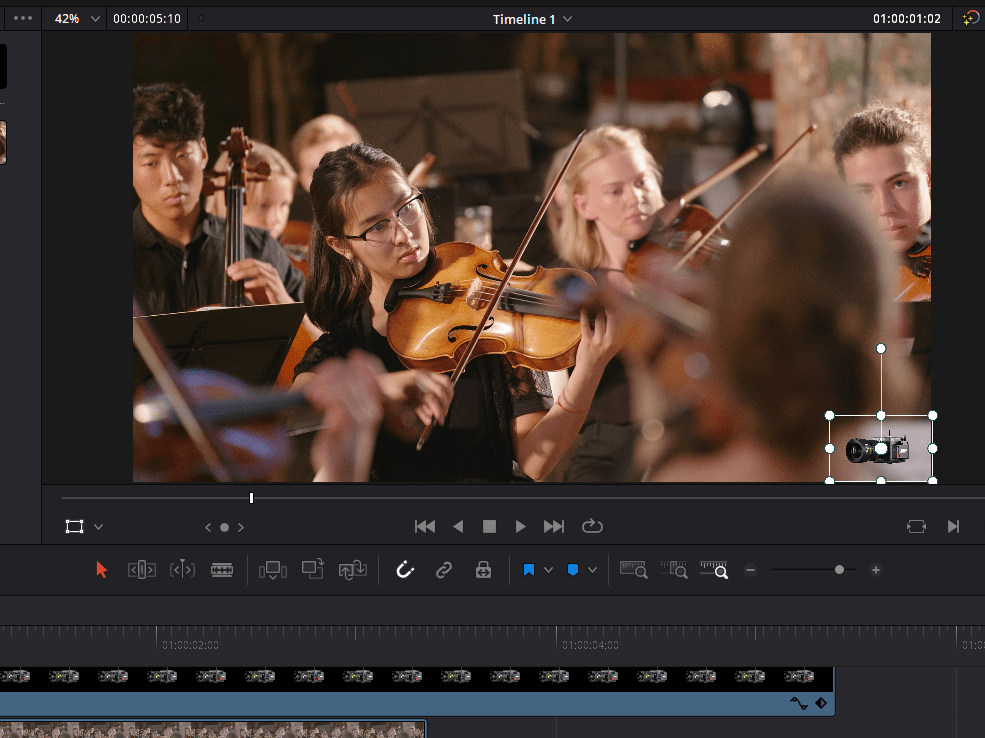
So as a quick practical demonstration, I’m just going to grab a logo from my media pool, drag it onto my timeline above my video like so, and then release my mouse. I can give that logo a click. I still have my transform tools enabled to click on the bottom left-hand corner, drag in, and then I can click and drag it over, place the logo in the bottom right-hand corner as I want it.
Alternatively, I could have used the parameters within the Inspector tool.
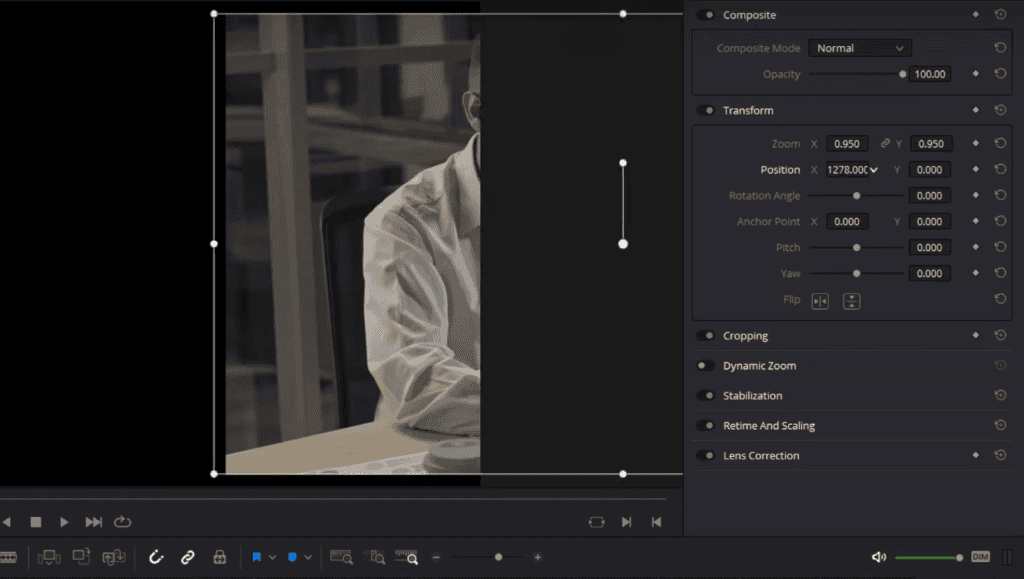
How to do the Picture in Picture effect in Davinci Resolve
Now another example is for the picture in picture effect in Davinci Resolve. I’m just going to grab another video from my media pool, drag that onto my timeline above this one, and again we can give it a click on our timeline. We’ve got our tools active, or we can use the transform tools within the Inspector this time.
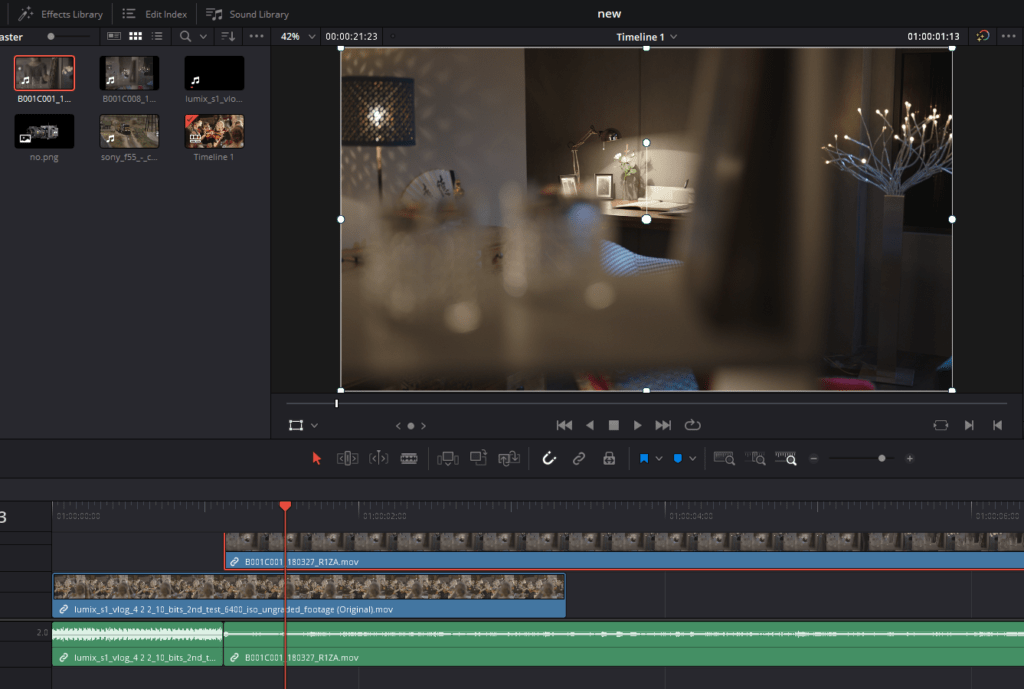
You can Zoom the video out, make it a little bit smaller, drag it to wherever I want it, and then we hit play. We’ve got the two videos running at once which is exactly what we want.
You can keyframe your rotation or other attributes for a smooth-looking transition effect.
So, I’ve made all these transform changes up, but let’s say I want to see what it was like before and do a quick before and after comparison. All I need to do next to the word transform here within the Inspector, there’s a little toggle switch.
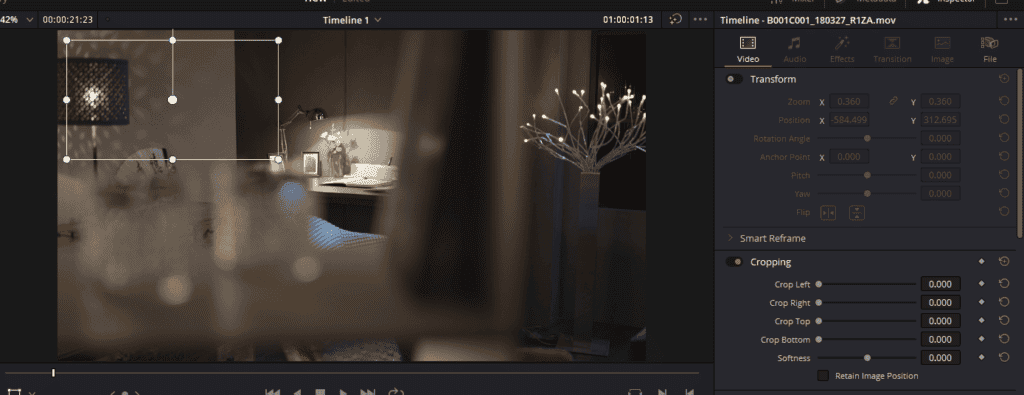
If I turn that off, I can see what my clip would look like without any of the transform options applied, and I can turn it on again to enable those. So we can flick it on and off to do a quick before and after comparison.
How to copy rotation and other attributes to other clips
Now last quick tip, it’s really easy to copy and paste any of those transform attributes from one clip to another. All we’re going to do is right-click on the clip we want to copy from on our timeline, and then we’re going to go to copy.
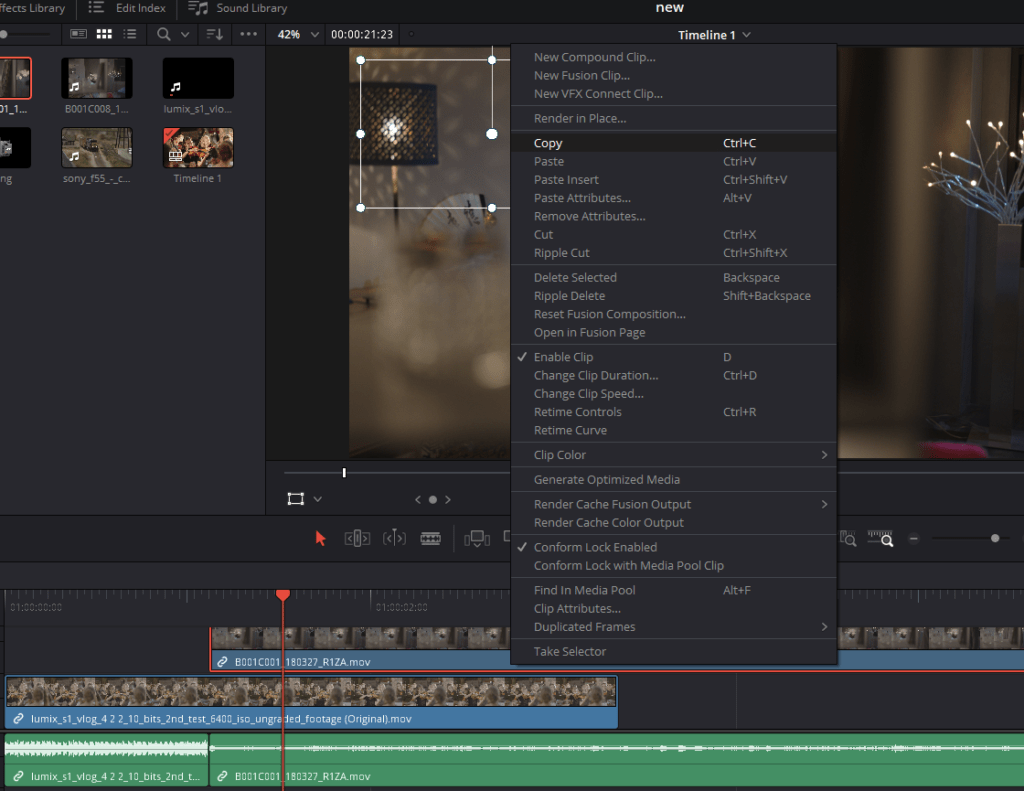
Or we can use the keyboard shortcut of Ctrl+C, and then we’re going to click on the clip that we want to paste those attributes to or right-click again, and this time, we’re going to go to paste attributes. Or we could have used the keyboard shortcut of Alt+V.
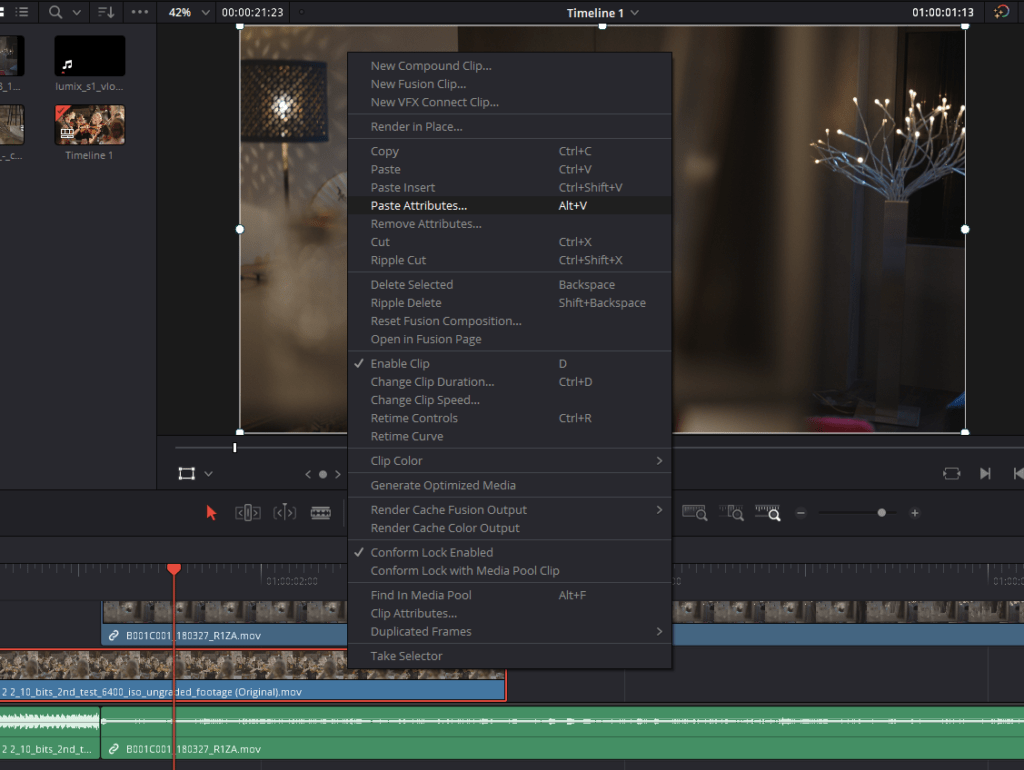
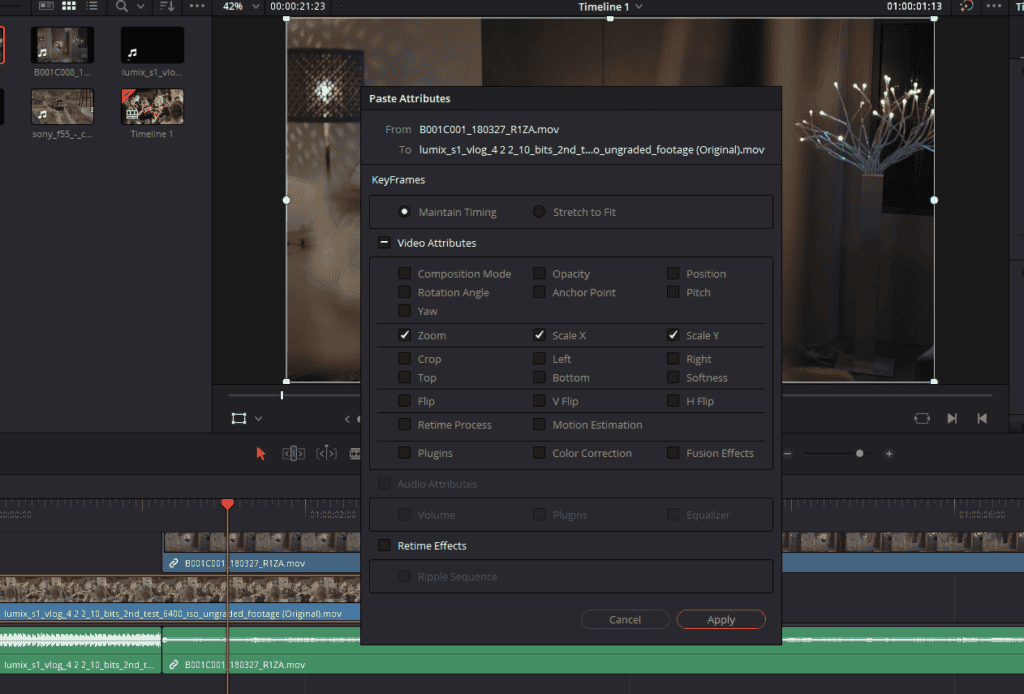
After clicking paste, an attributes window will appear, and then we can click the attributes we want to copy. So I’m just going to have Zoom ticked. I’m not going to bother with the scale or the rotation or anything like that. Just Zoom, and then I can click on apply, and as you can see, it’s copied those Zoom attributes from our first clip onto our second clip, and it’s as easy as that to transform and copy and paste transform attributes within the edit tab.
It’s that easy to Rotate Video In Davinci Resolve or to manipulate other attributes using the transform tool.