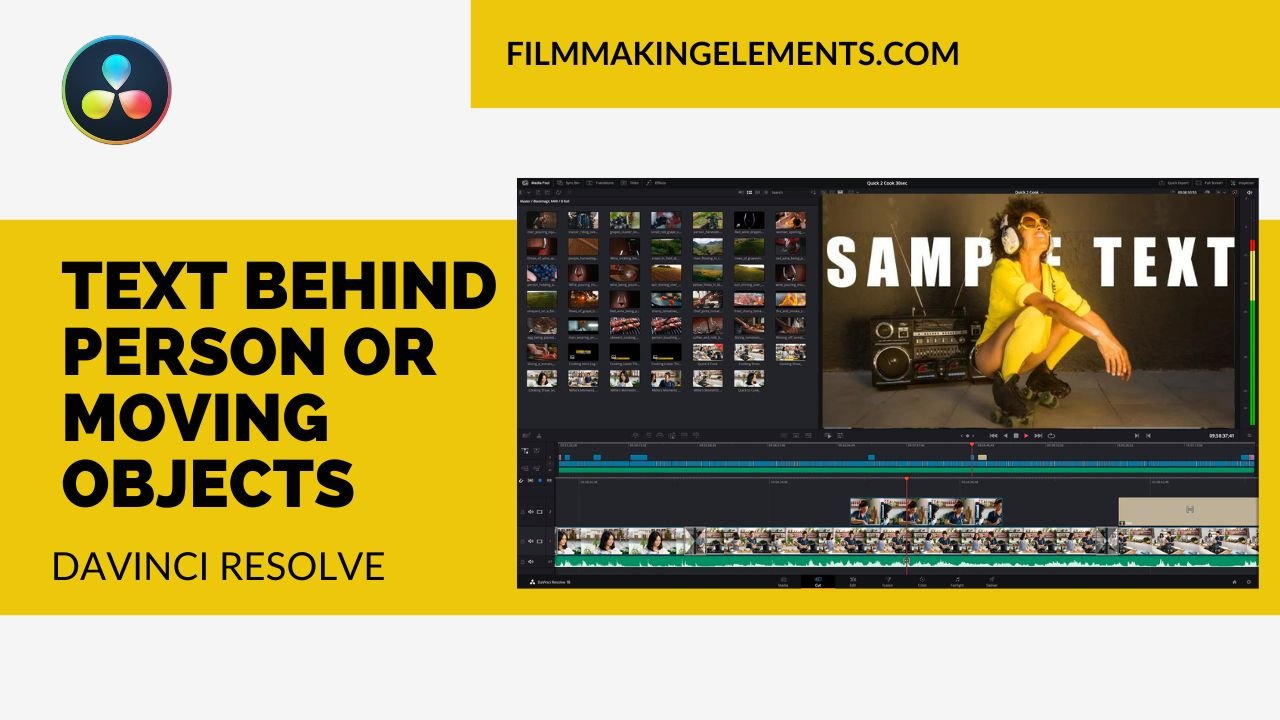
Welcome back to filmmakingelements.com! In this article, we’ll explore three distinct methods for adding text behind a person or moving objects using DaVinci Resolve. Two of these techniques are compatible with the free version of the software, while the third is tailored for the studio version. By offering a variety of approaches, you can choose the one that best suits your needs and video style. So without further ado, let’s dive in!
Method 1 – Using Masks to Add Text Behind Person Or Objects in DaVinci Resolve
In this section, we will explore the first method of adding text behind person or objects in a video using DaVinci Resolve. This technique involves creating masks and tracking them to ensure the text remains behind the desired objects throughout the video. Follow the step-by-step guide below to achieve this effect.

Step 1: Duplicate the Video Clip
First, import your video into the timeline. Right-click on the video and select ‘Copy’ to duplicate the clip, then paste it back onto the timeline. You can also press and hold Alt and drag the video clip to video track 2, it will create a duplicate clip. For now, forget about the second clip, as we will use it later.

Step 2: Create a Manual Mask
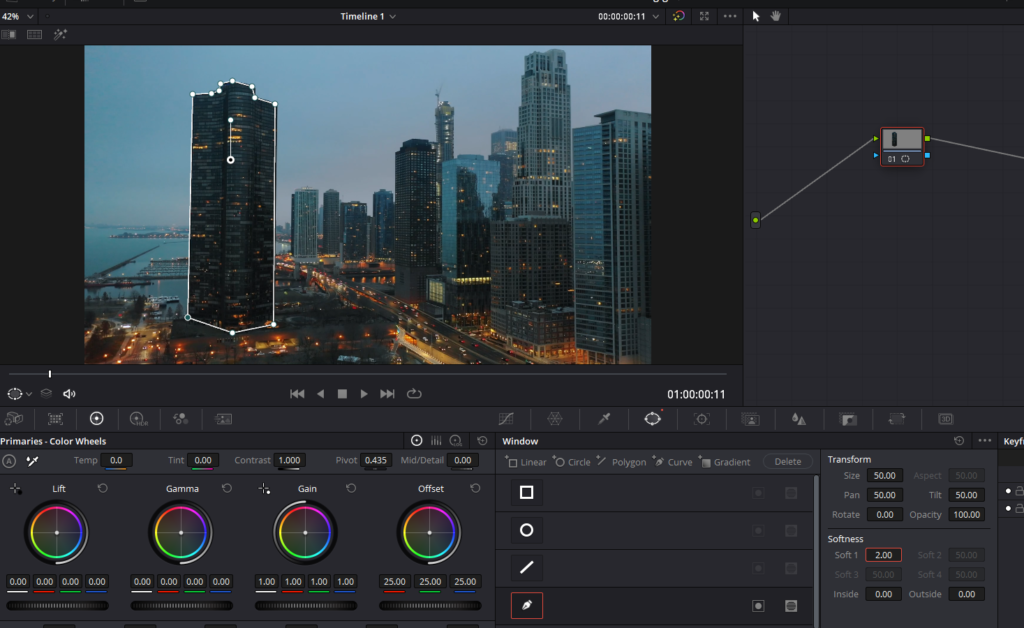
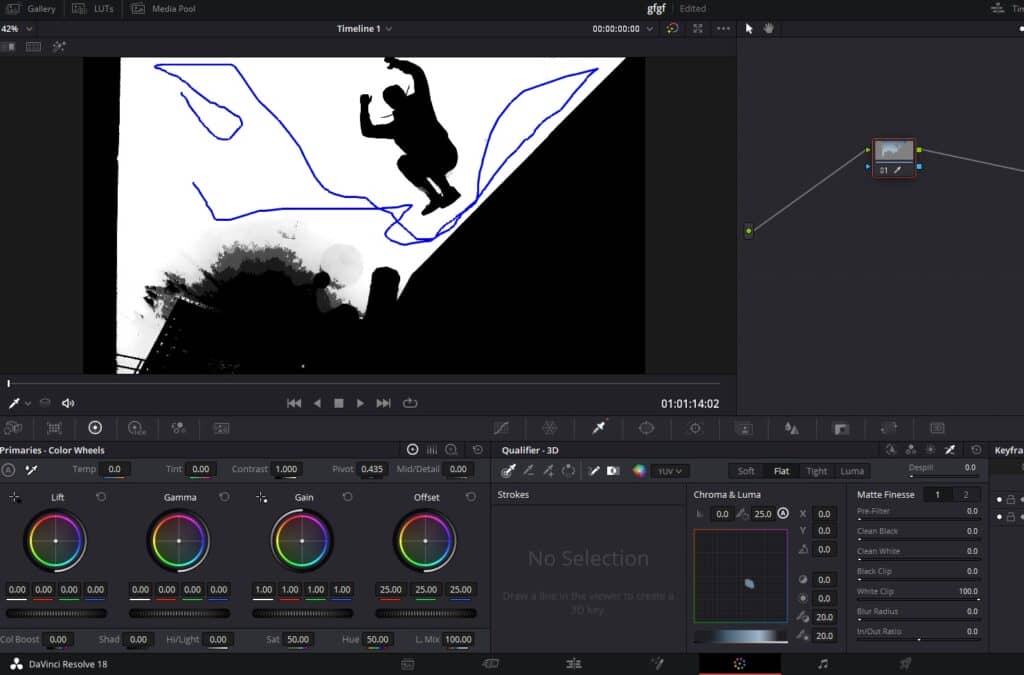
Focus on the first clip and go to the color page of DaVinci Resolve. Click on a node and navigate to the Window tab to access the masking menu. Choose the Curve tool (the icon looks like the tip of a pen) which allows us to create a manual mask.
Zoom in on the viewer and left-click to draw the mask around the objects. Draw the mask to cover the person or the object. Close the mask by joining the last point with the first point.

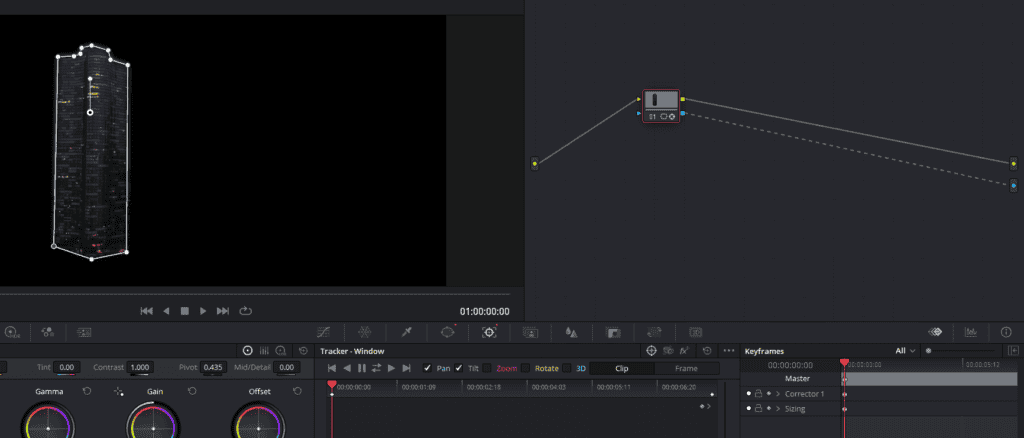
Step 3: Track the Mask
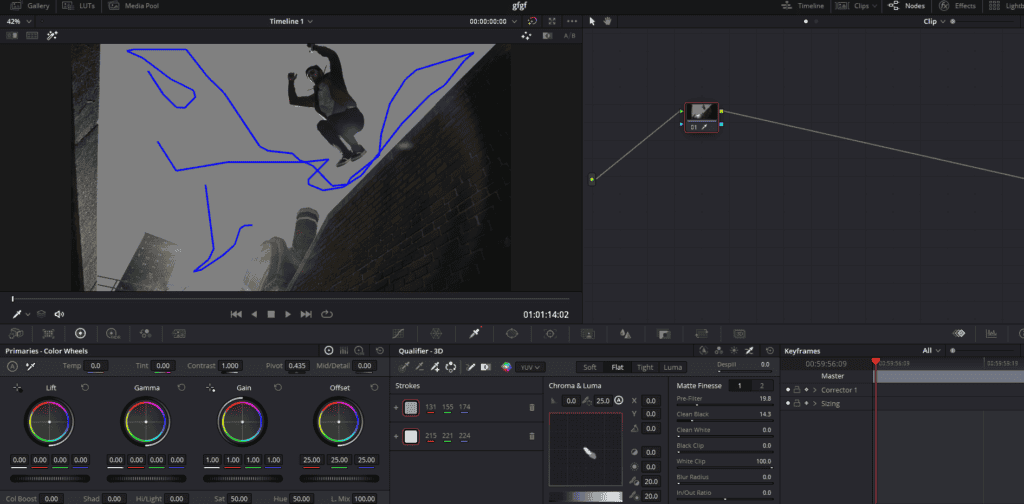
To ensure the mask follows the movement in the video, go to the tracker menu and click the icon with two arrows. Check that the mask tracks the movement correctly after the process is complete.
Step 4: Isolate the Masked Area
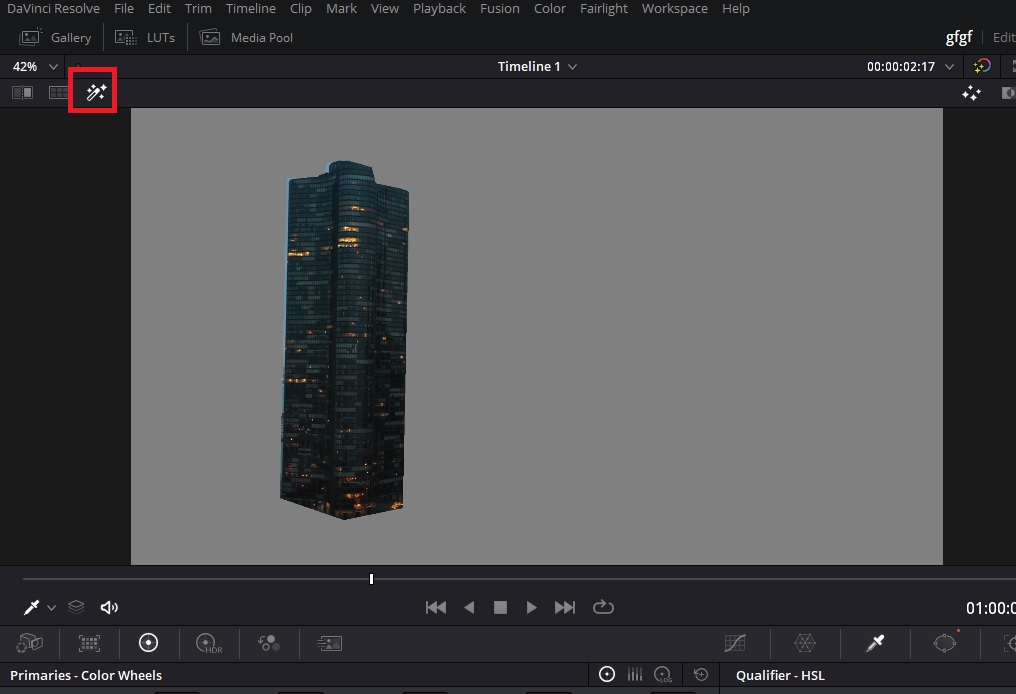
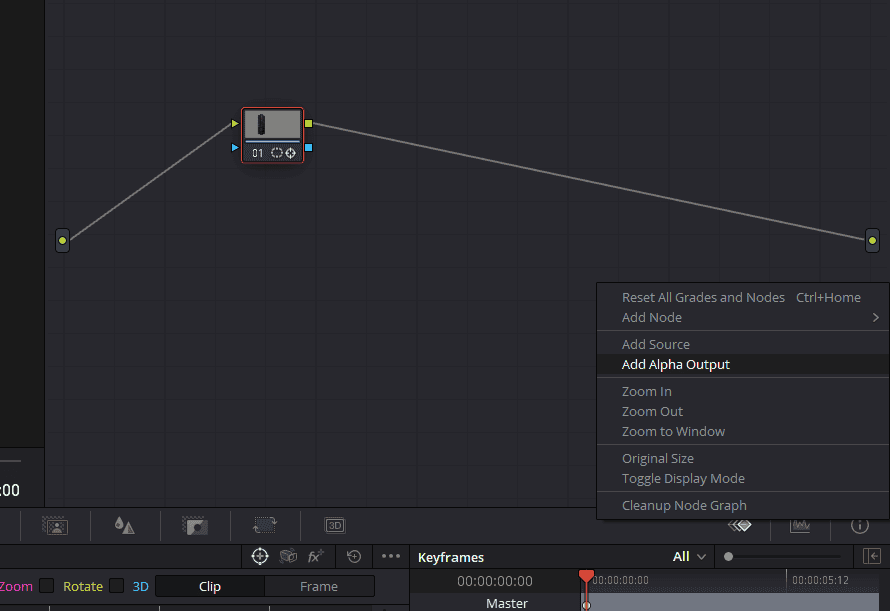
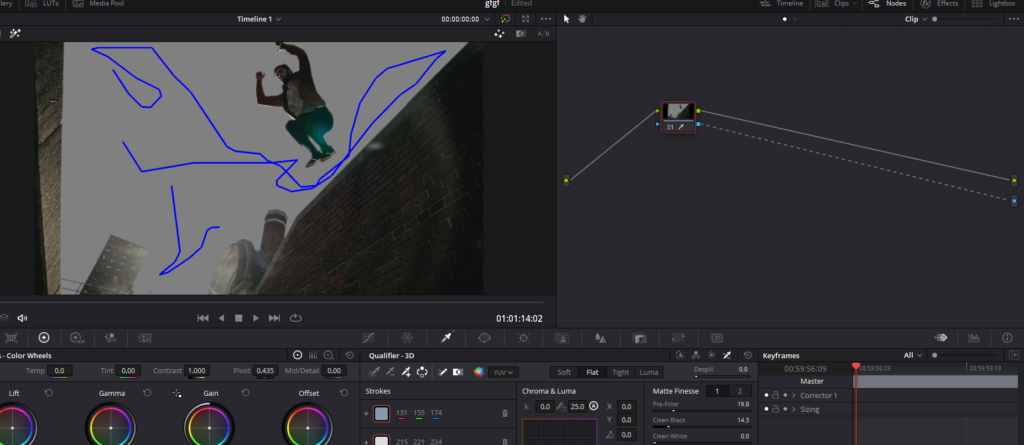
Activate the Highlight option to see only the masked objects. You can do so by clicking on the wand-looking icon above the viewer. Next, we need to remove the background from the video and leave only the masked area. To do this, go to the nodes, right-click, and select Add Alpha Output. Connect the blue square of the node with the mask to the alpha output, which will remove the background from the video.
To soften the mask’s edges, go back to the Window tab and increase the softness on the left side of the tab.
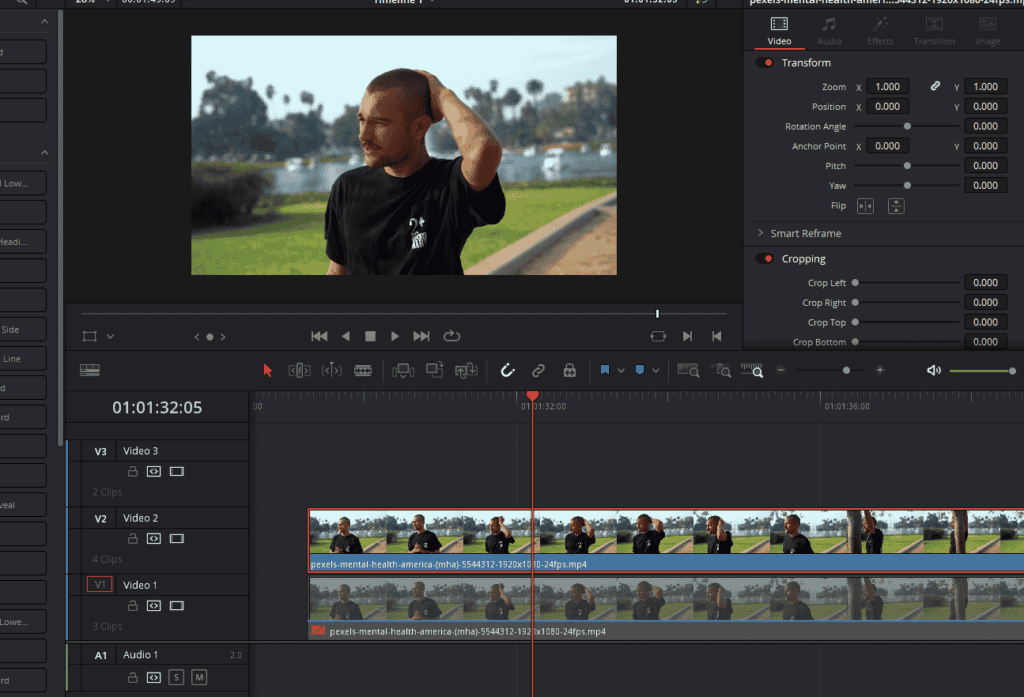
Step 5: Arrange the Clips and Add Text
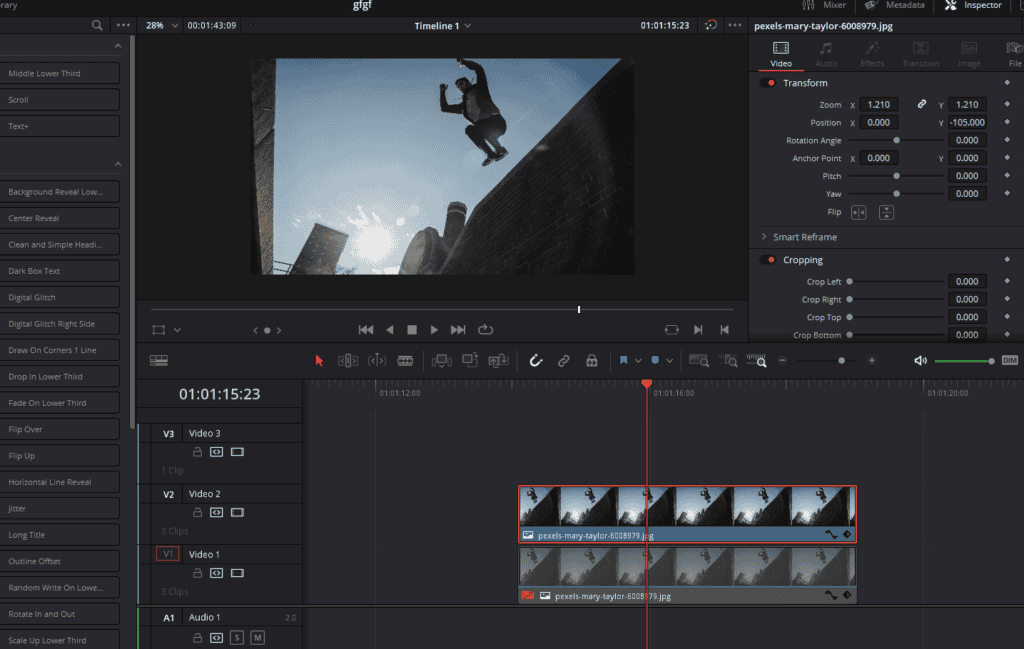
Return to the editing tab of Davinci Resolve and move the first video up on track number 3 on the timeline, placing the second video below it. Leave an empty space between the two clips for the text.
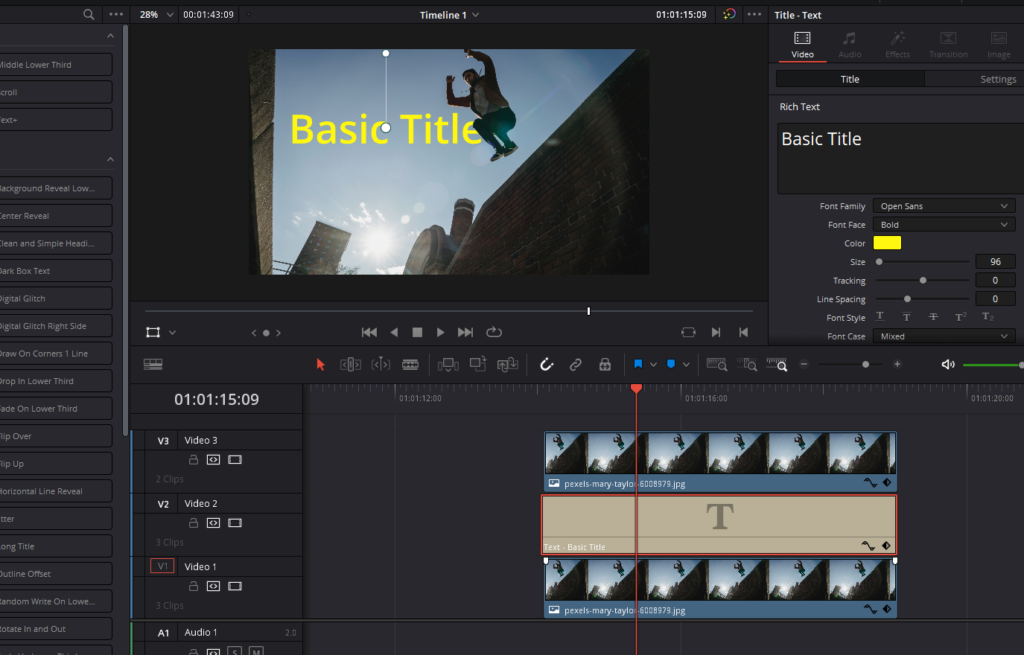
Go to the effects menu by clicking on it from the top left corner, and click on the Titles section. Drag the text effect onto the timeline, placing it between the two video clips. Adjust the duration of the text clip to match the length of the video.
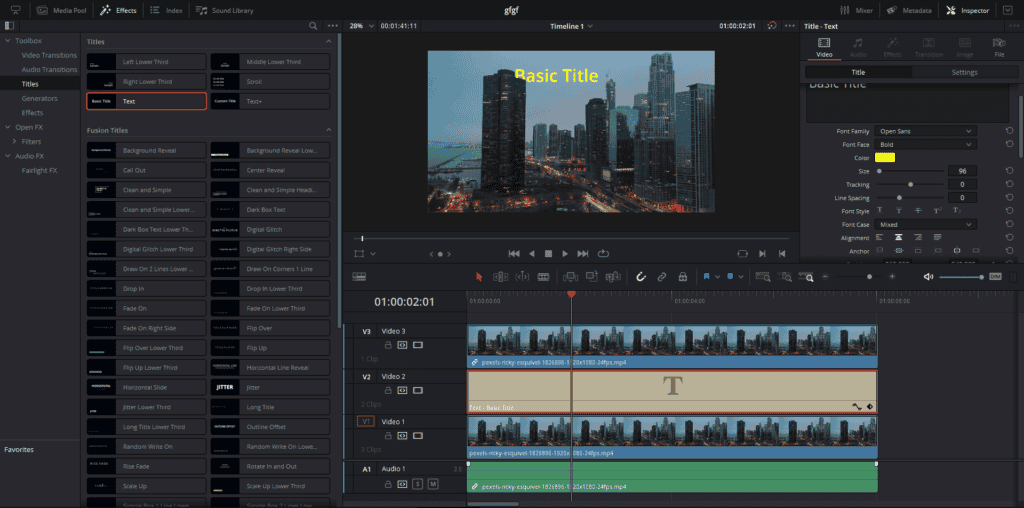
Step 6: Customize the Title
Click on the Title clip in the timeline and select Inspector from the top right corner on the edit page of Davinci Resolve. Change the text to your desired message. Increase the font size and choose a font family. In the Settings, modify the position of the text to achieve the desired effect.
And there you have it! The first method of adding text behind objects in DaVinci Resolve using masks is complete. By creating and tracking a mask around the objects, we’ve successfully placed the text behind them
Method 2 – Using Qualifiers to Add Text Behind Person Or Objects in High-Contrast Scenes
In this section, we’ll explore an alternative approach to adding text behind a person or objects in DaVinci Resolve without using masks. This method is particularly effective when working with scenes featuring high contrast in light or color. Follow the step-by-step guide below to achieve this effect.
Step 1: Choose a High-Contrast Scene
Select a video clip with high contrast in light or color, such as a clear blue sky against a darker ground or a brightly lit sky contrasting with a darker landscape. Make sure there are no similar colors between the sky and ground to ensure accurate selection later on.
Step 2: Duplicate the Video Clip
As in the previous method, duplicate the video clip by right-clicking, copying, and pasting it onto the timeline. Then, go to the color page in DaVinci Resolve.
Step 3: Use Qualifiers for Selection
Click on the Qualifier menu ( to access different selection methods, such as HSL, RGB, Luminance, and 3D. To access the qualifier, you need to click on the dropper-looking icon. We recommend using the 3D qualifier as it typically yields the best results. Ensure that the picker icon and qualifier function are activated on the right corner of Qualifier settings.
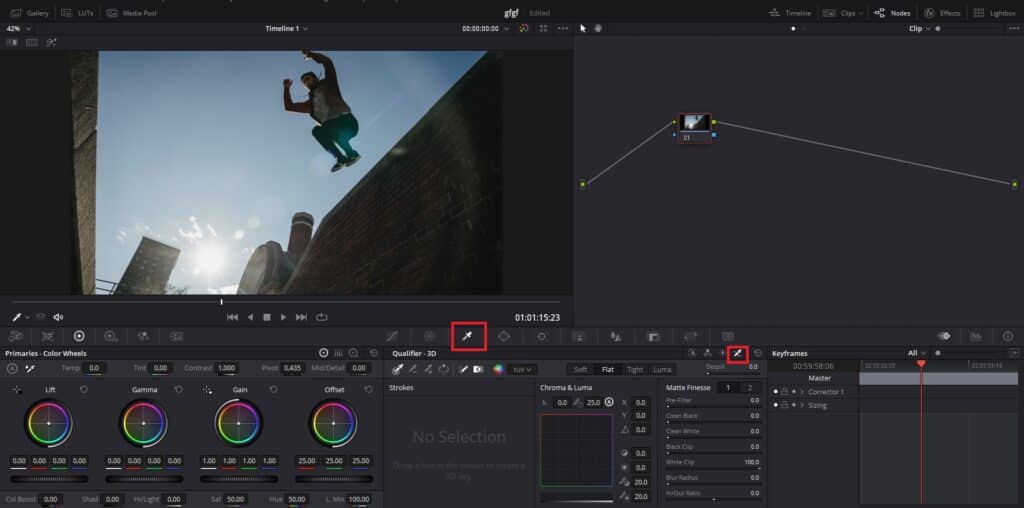
Step 4: Select the Sky
Left-click and hold on the sky area of the video while dragging to paint the entire sky with a thin blue line. To see the selection, click on the highlight icon. The sky should be fully selected, but we want to select the ground and person instead. Invert the selection to achieve this.

Step 5: Refine the Edges
Zoom in to view the edges of the selection, which may appear with a blue line. To fix this, increase the level of the Pre Filter and Clean Black settings to reduce the blue border.
Step 6: Add an Alpha Output
In the nodes panel, go to the nodes, right-click, and select Add Alpha Output. Connect the blue dot of the node to the alpha output you just created to remove the background.
Step 7: Arrange the Clips and Add Text
Return to the editing page and move the clip without the background three positions up to video track three. Place the other clip below it on video track one. Now, it’s time to add text to the middle track. Go to effects and select the text effect, dragging it onto video track two.
Step 8: Customize the Title
Adjust the duration of the text clip to match the video clips. Modify the title by changing the text, font family, color, and size to suit your preferences.
Method 3 – Utilizing Magic Mask in DaVinci Resolve Studio
In this section, we will discuss the third and final method to add Text Behind Person Or Moving Objects in Davinci Resolve. This method requires the Studio version of the software and leverages the Magic Mask function to make the process simpler and more efficient. Follow these steps to achieve the desired effect:
Step 1: Duplicate the Clip
As with the previous methods, begin by duplicating the video clip. Copy and paste the clip on the timeline.
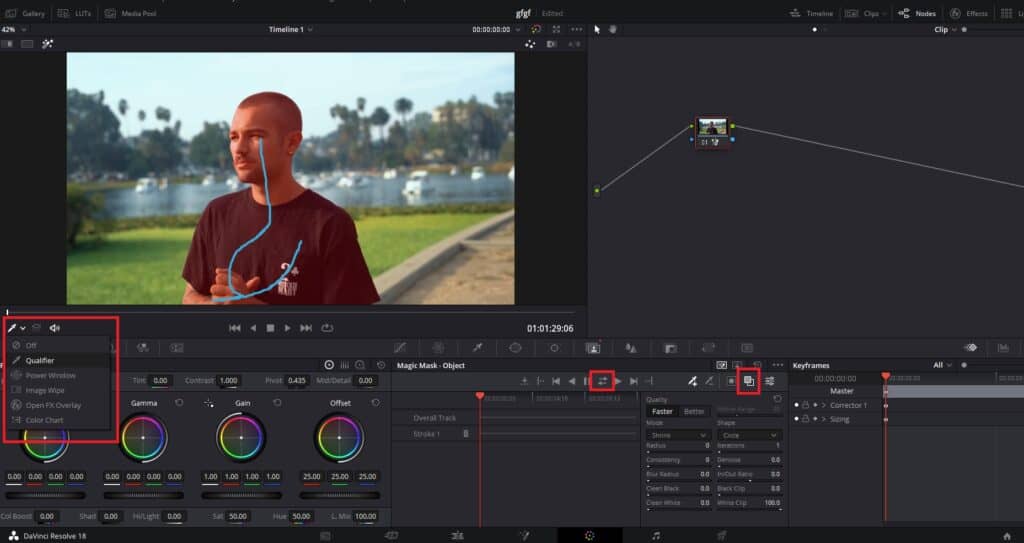
Step 2: Use Magic Mask Function
Click on the first video and navigate to the color page in DaVinci Resolve. Select the Magic Mask icon (it is before the blur option). Ensure the qualifier function is activated in the drop-down menu below the viewer.
Step 3: Create the Mask
Left-click on the element you want to mask and draw a blue line over it. The more you select with this blue line, the better DaVinci Resolve can understand where to create the mask. Once satisfied, activate the Toggle Mask Overlay icon to view the mask highlighted in red. In the Quality section, it’s recommended to change the setting to “better.”
Step 4: Apply Mask to Entire Video
Changing the position of the playhead will reveal that the mask disappears, as it’s only applied to one frame. To apply the mask throughout the video, use the tracking function by clicking on the icon with two arrows. DaVinci Resolve will automatically track and apply the mask.
Step 5: Add Alpha Output
Right-click on the nodes, add an alpha output, and connect the blue square of the node with the mask to the alpha output. Disable the Toggle Mask Overlay icon to view the result, which should show only the masked person with the background eliminated.
Step 6: Arrange Clips and Add Text
Return to the editing module, move the video without the background to video track 3, and place the second clip below it. Go to effects, click on text, and drag it between the two videos on video track 2.
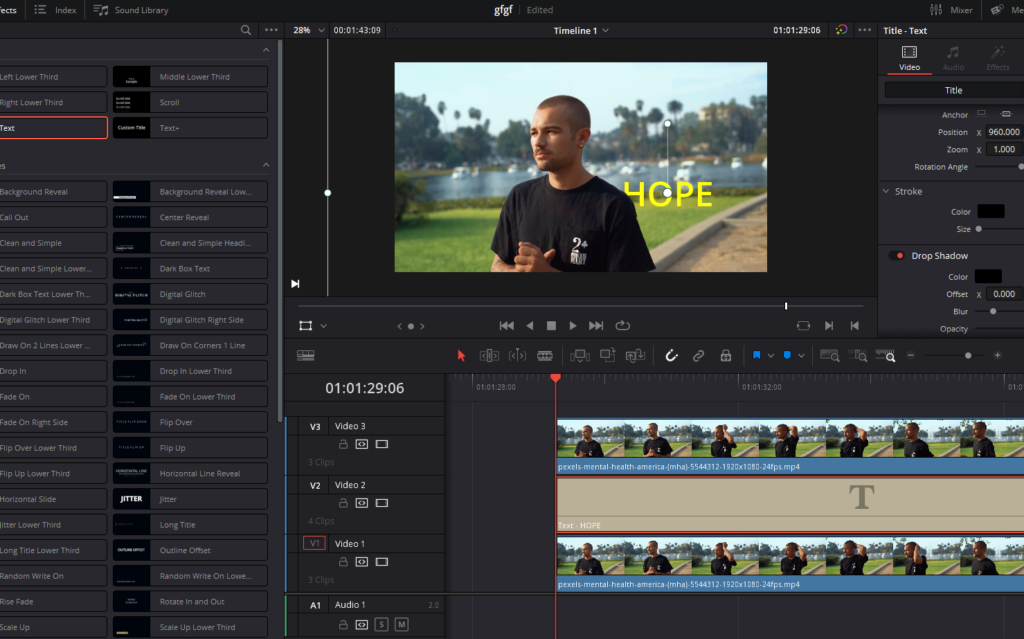
Step 7: Customize the Text
Configure the text to your liking, and you will have successfully added a title behind the person.
In conclusion, we have explored three different methods to place text behind persons or moving objects in DaVinci Resolve. Each technique offers its own set of advantages and may be more suitable for certain situations or project requirements. Whether you are using the free version of DaVinci Resolve or the Studio version, these methods provide you with the tools to enhance your video projects and create captivating visuals for your audience.
We would like to extend our heartfelt gratitude to our readers for joining us on this journey. Your time and interest in this article are greatly appreciated. We hope that the information provided has been helpful in expanding your knowledge and skills in DaVinci Resolve. Please continue to explore our blog for more tips, tricks, and insights into the world of filmmaking and video editing. Thank you for reading, and happy editing!