
Hi fellow filmmakers, in this article, we are teaching 2 Methods To Fake Depth Of Field or Bokeh Effect In Davinci Resolve.
Achieving the perfect depth of field or bokeh effect can be challenging when using smartphone cameras due to the limitations of their small sensors. However, with the right tools and techniques, you can create stunning visuals by faking these effects in post-production.
2 Methods To Fake Depth Of Field In Davinci Resolve (Bokeh Effect)
Method 1: Faking Depth of Field and Bokeh Effect in Davinci Resolve Using the Depth Map Feature
This comprehensive, step-by-step guide will walk you through the process of faking depth of field using the Depth Map feature in Davinci Resolve.
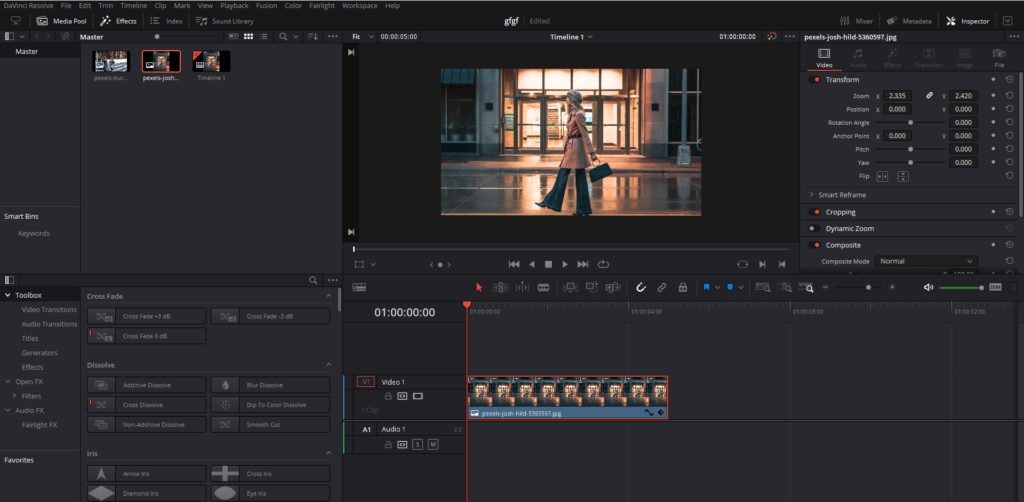

- Import and Select Your Clip
- Start by launching Davinci Resolve and creating a new project.
- Import the video clip you want to work on by clicking “File” and then “Import Media.”
- Drag the imported clip to the timeline.
- Ideally, the clip should be shot with a smartphone or a camera that doesn’t naturally produce a strong depth of field effect.
- Access the Color Tab and Add Depth Map
- With your clip selected, navigate to the Color tab at the bottom of the interface.
- Click the “Effects” button at the top right corner of the screen.
- In the library, search for “Depth Map” and drag it onto the node editor, it will create a new node.
- You can also drag it onto an existing node.
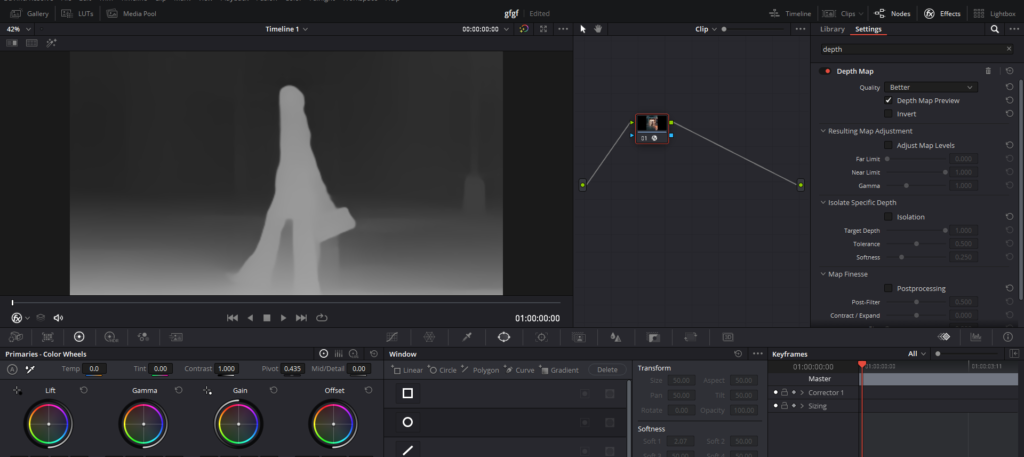
- Analyze and Adjust the Depth Map
- The Depth Map will generate a black and white image, with white representing foreground elements and black representing the background.
- The quality of the Depth Map depends on your computer’s performance. If it’s slow, switch to the “Faster” setting from the “Quality” drop-down menu, which may result in a slight loss of detail.
- Carefully inspect the automatically generated Depth Map. Keep in mind that the algorithm may not be perfect, and you may need to make manual adjustments.
- Create a New Node for Lens Blur
- Press ‘Alt’ or ‘Option + S’ to create a new node.
- Connect the blue square of the Depth Map node to the blue triangle of the new node.
- This connection will ensure that the Depth Map information is passed on to the new node, allowing you to apply the Lens Blur effect according to the depth information.
- Apply Lens Blur Effect
- Select the Depth Map node and turn off the Depth Map Preview.
- In the “Effects” library, search for “Lens Blur” and drag it onto the new node.
- As you apply the Lens Blur effect, you’ll notice that the background or foreground might become blurry, depending on the Depth Map’s interpretation.
- If the foreground is blurry instead of the background, click on the Depth Map node and select “Invert.”
- Fine-tune the Depth Map
- Turn the Depth Map preview back on for easier visualization.
- Enable “Adjust Map Levels” and adjust the “Far Limit” and “Near Limit” sliders to define the foreground and background areas. Experiment with these sliders to find the best balance for your particular footage.
- Use the “Isolate Specific Depth” option for a focus pull effect, if desired. This can be achieved by turning on “Isolation” and adjusting the sliders to create a focus pull effect. This technique simulates a focus pull, as if you were adjusting the focus on a camera lens.
- Enable “Post Processing” for more detailed edges and use the “Contract/Expand” and “Post-Filter” sliders to adjust the feathering between edges. This step helps to blend the in-focus and out-of-focus areas more naturally.
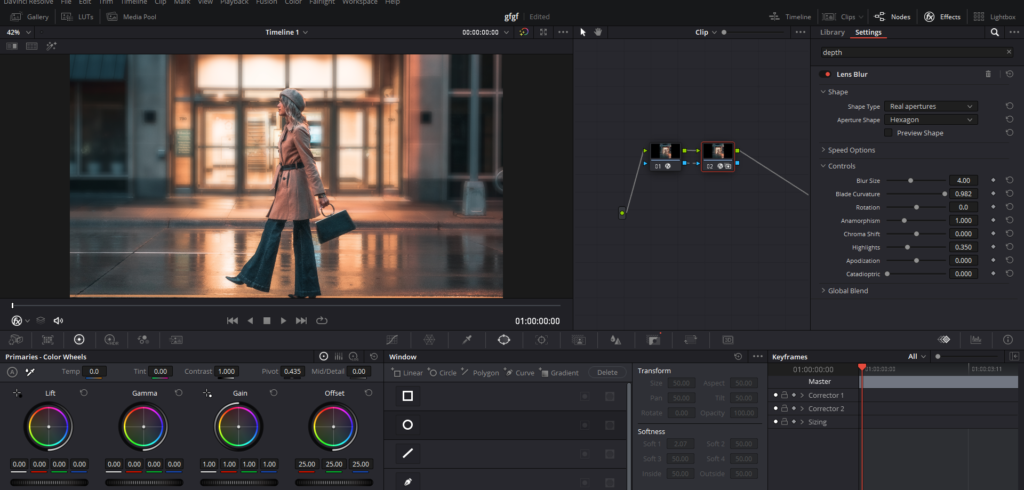
- Finalize the Lens Blur Effect
- Turn off the Depth Map preview to see the final result.
- Adjust the Lens Blur settings, such as blur size, aperture shape, and chroma shift, to achieve a realistic depth of field effect. Take your time to explore these settings and understand how they affect the final output. For instance, changing the aperture shape can help you mimic the bokeh produced by different types of camera lenses.
- Use the “Anamorphic” slider to add a subtle anamorphic look to the bokeh. This can help give your footage a more cinematic appearance.
- Refine the Edges and Adjust the Focus
- Zoom in on your footage and carefully inspect the edges of the subject in focus. The Depth Map may not be perfect, and you might need to fine-tune the settings to get a more realistic result.
- If necessary, go back to the Depth Map node and make any additional adjustments to the depth information.
- Experiment with Additional Effects (Optional)
- To further enhance your footage, consider adding other effects, such as color grading, film grain, or vignetting.
- Combine these effects with your depth of field adjustments to create a more visually appealing and polished video.
- Animate the Focus Pull (Optional)
- If you want to animate a focus pull, turn on the Isolation feature in the Depth Map node.
- Go to the frame where you want the focus pull to begin, and set keyframes for the Near Limit and Far Limit sliders.
- Move to the frame where the focus pull should end, and adjust the sliders to the desired final focus position. Davinci Resolve will automatically create keyframes for these adjustments.
- Play back your footage to ensure the focus pull animation is smooth and realistic.
- Review and Export
- Review your footage to ensure the desired depth of field effect has been achieved. Pay attention to the transitions between in-focus and out-of-focus areas, as well as the overall visual appeal of your footage.
- Make any necessary adjustments to the Depth Map or Lens Blur settings.
- Once satisfied, navigate to the “Deliver” tab to export your video. Choose your desired export settings and click “Add to Render Queue,” followed by “Start Render.”
Method 2: Magic Mask Option
The Magic Mask option in Davinci Resolve Studio allows you to create a fake bokeh effect or depth of field. For this method, you will need a clean plate also. Follow these detailed steps to achieve the effect:


- Import your clips: Start by importing two clips into Davinci Resolve – one with the subject and another with a clean plate (background without the subject).
- Placing Clips: Place the clean plate on video track number 1 and the one with the subject on video track number 2.
- Select a frame: In the color page, choose a frame that has sufficient information for masking purposes. This will make the masking process more accurate.
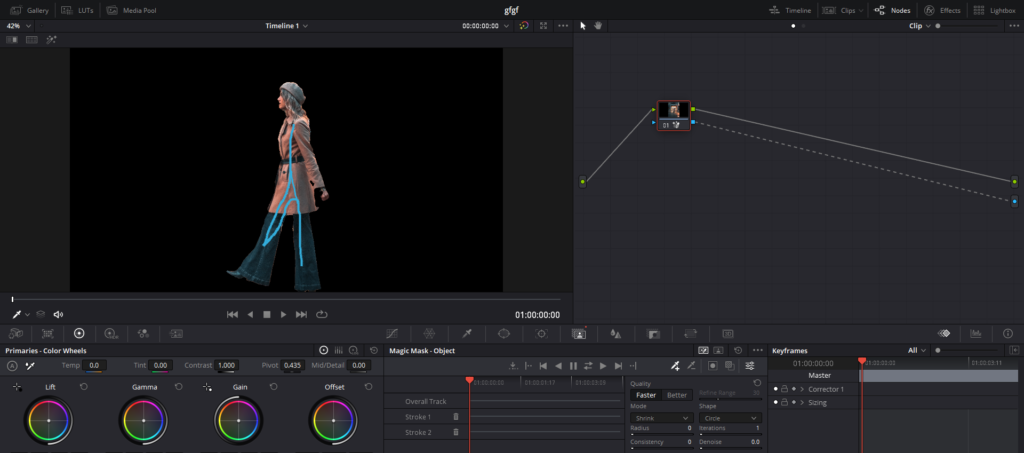
- Create the mask: Click on the Magic Mask icon and select the ‘Object’ mode. Draw a rough outline on the subject to create a mask. Make sure your “Toggle Mask Overlay” button is turned on so that your selected subject turns into red color for better masking.
- Adjust mask settings: Fine-tune the mask settings as follows:
- Refine Edge: Set this to around 30 to smooth out the mask edges.
- In and Out Ratio: Reduce this to about 10 to increase the accuracy of the mask.
- Clean Black and White: Adjust these sliders to remove unwanted black and white areas.
- Shrinking Radius: Set this to 1 to slightly shrink the mask for a better fit.
- Track and refine the mask: Click on the tracking button to track the mask forward and backward. Click on the icon with two arrows pointing in opposite directions for tracking. As the tracking progresses, you may need to pause and refine the mask by adding or removing strokes to ensure accuracy.
- Export the mask: In the node editor, right-click and select, the ‘Add Alpha Output’ node and connect the mask to it by linking the blue square with the blue circle. This will export the mask to the edit page.
- Apply lens blur to the clean plate: Select the clean plate on the edit page of Davinci Resolve and switch to the color page. Click on the Effect button on the top right corner and add a ‘Lens Blur’ effect. Adjust the blur strength to achieve the desired bokeh effect.
Adjustment Clip and Grading
- Create an adjustment clip: In the edit page, click on the ‘Effects’ tab, and drag an ‘Adjustment Clip’ onto the timeline, placing it above the masked subject clip.
- Apply grading for the bokeh effect: Switch to the color page and select the adjustment clip. Using color tools like lift gamma and gain for look development
- Refine the mask and grading: To enhance the result, you can further refine the mask and grading as needed. This may involve adjusting the mask settings or the strength of the lens blur effect.
- Review and export: After fine-tuning the mask and grading, review your footage to ensure the desired bokeh effect has been achieved. Once satisfied, export your video.
We hope you found this tutorial on adding fake depth of field or bokeh effect in DaVinci Resolve helpful. With these two methods, you can now easily transform your footage and achieve a more cinematic look. Thank you for reading, and we hope you’ll continue to explore the many creative possibilities DaVinci Resolve has to offer. Happy editing!