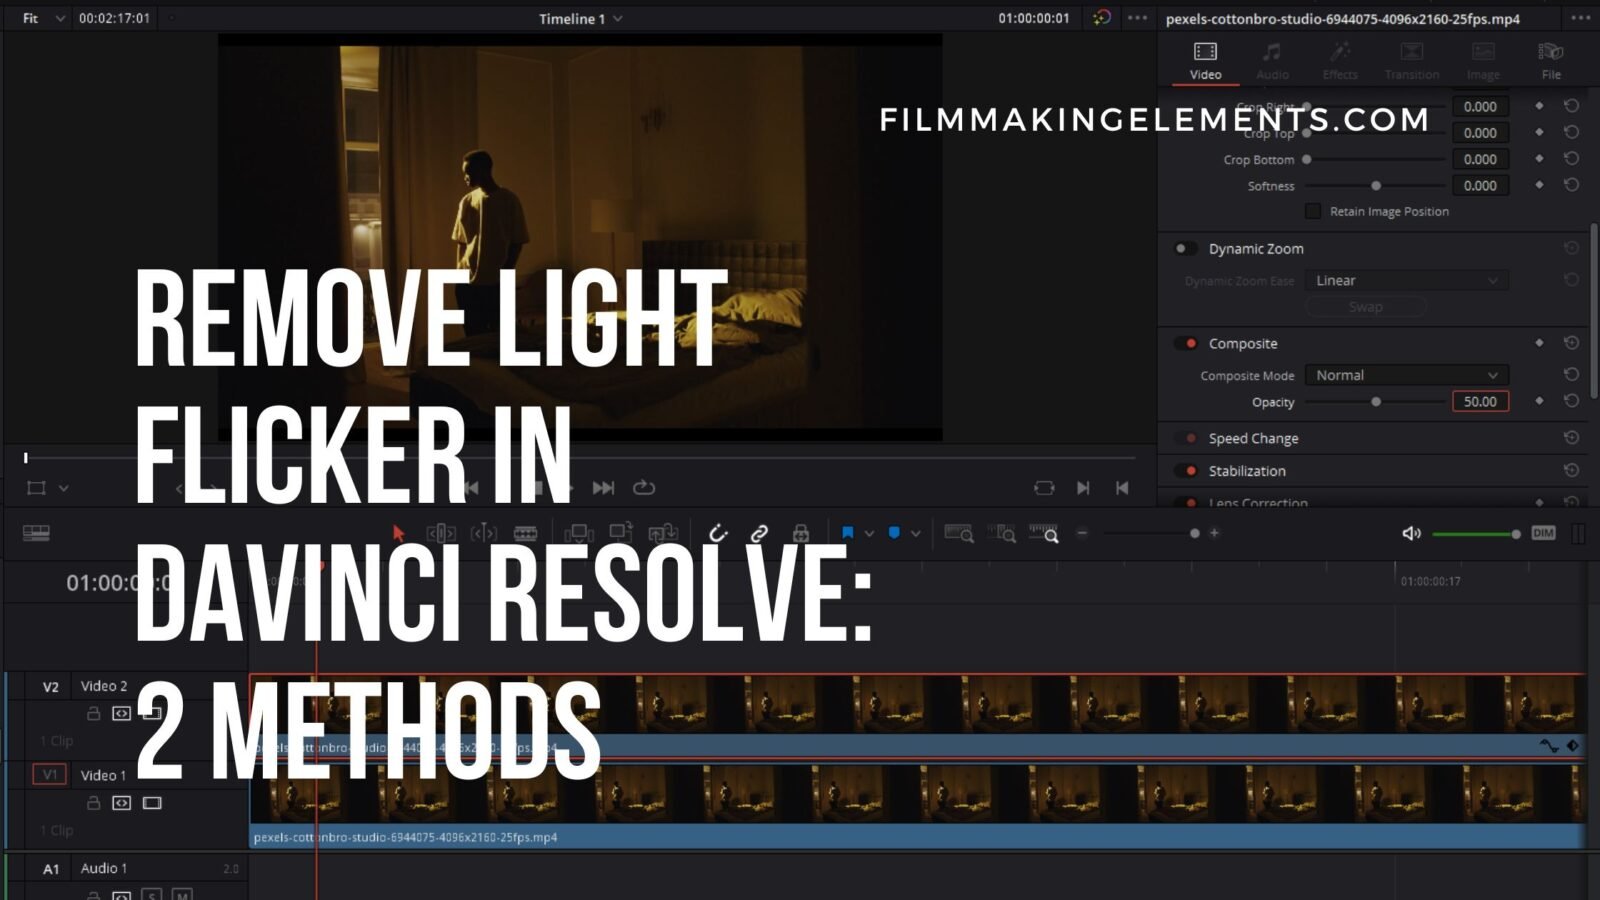
Welcome back to our platform FilmmakingElements.com. Today, we delve into the process of removing light flicker in DaVinci Resolve, utilizing two effective methods.
Picture this: You’ve been out on location, shooting a video. The scene is richly cinematic, the lighting is on point, and all the elements seem to be falling into place just as you envisioned. Now, brimming with excitement, you come back home, ready to see the magic unfold on your computer screen.
As you import the video into DaVinci Resolve, however, your enthusiasm quickly turns to dismay. You notice an unanticipated issue – the lights in the video have an irritating flicker. This isn’t an uncommon scenario and many of us have faced this situation before, including myself.
But don’t worry, all is not lost. In fact, there’s good news to be had. The post-production software at your disposal, DaVinci Resolve, is a remarkably powerful tool that’s perfectly capable of correcting this very issue.
In this post, we’re going to discuss how to eliminate flickering screens or any other flickering light anomalies from your video footage, making use of this fantastic software.
Method 1 – Eliminating Light Flicker in DaVinci Resolve Using the Editing Page
Step 1: Positioning the Clip on the Timeline
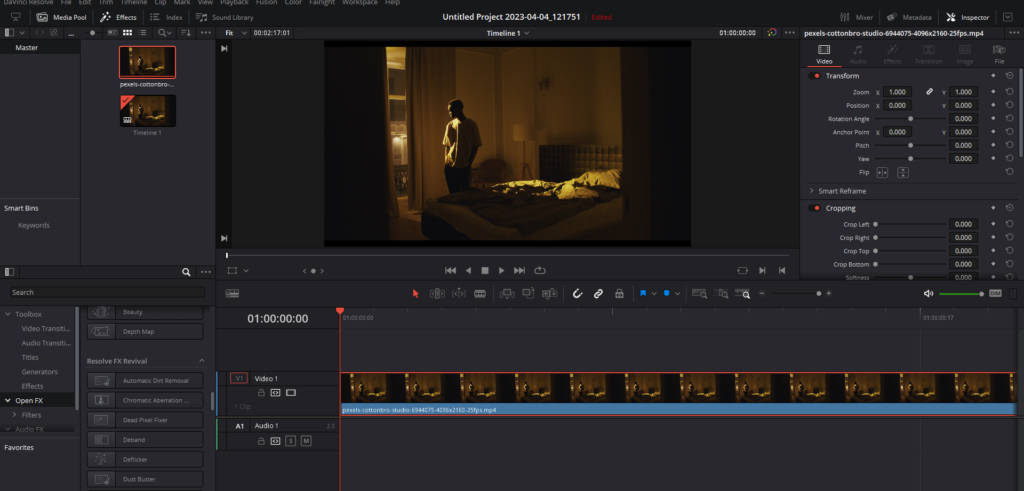
First things first, you need to locate the clip with the light flicker issue within your project. Once identified, place this clip on your timeline. This forms the base from which we will start our light flicker removal process. This step is crucial as it establishes the groundwork for the tasks ahead.
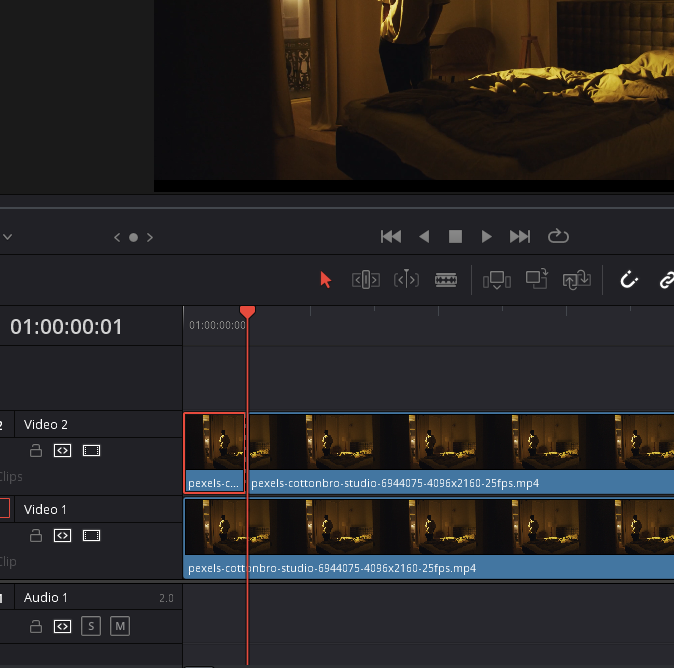
Step 2: Creating a Duplicate Clip
Now that you have your clip in position, it’s time to create a duplicate. This can be done quickly and easily by pressing the Alt key and dragging the selected clip. While still holding the Alt key, move your duplicated clip up to Video Track 2. This process creates an exact replica of your original clip.
Step 3: Zooming In for Precision
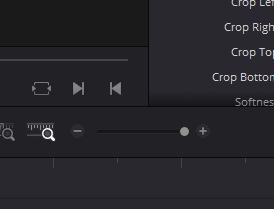
The next step involves zooming into the clip. This can be achieved in two ways. You can either use the Alt key while scrolling up, or you can use the Zoom slider located above the timeline. The goal here is to zoom in to the maximum level to ensure the highest degree of precision while moving through the clip frame by frame.
Step 4: Cutting the Duplicate Clip
With the clip magnified to its maximum extent, position your playhead at the start of the clip. Use the right arrow key on your keyboard to move one frame forward. Now, select the duplicated clip that you placed on top. With the clip selected, use the shortcut Ctrl + B to create a cut.
Step 5: Deleting the Initial Frame
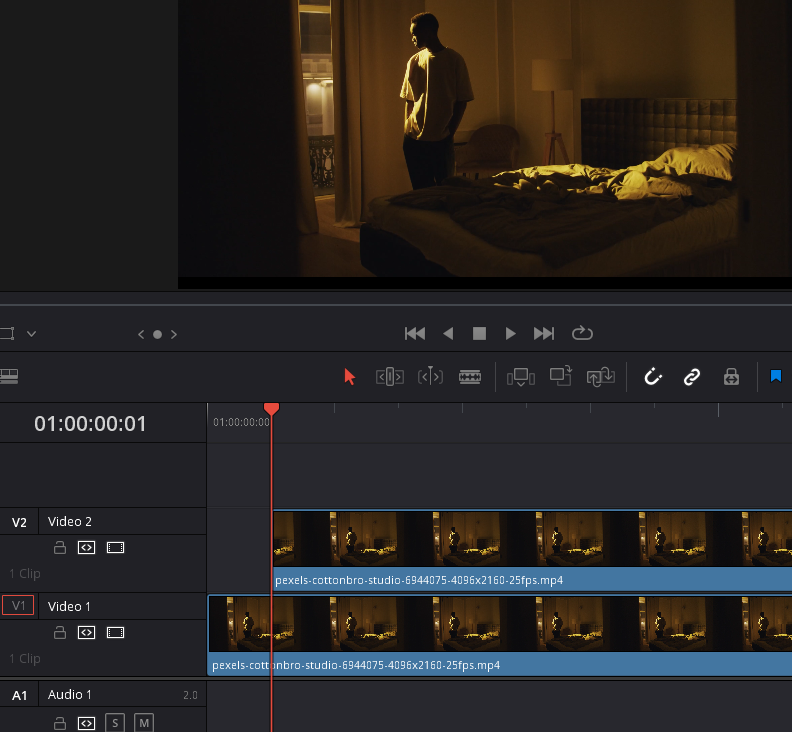
Once the cut is made, you need to delete the initial frame. This can be done by simply pressing the backspace key on your keyboard. This action removes the starting frame from the duplicated clip.
Step 6: Aligning the Duplicate Clip
Following the removal of the initial frame, the next step involves aligning the starting point of the duplicate clip with that of the original clip. This is achieved by dragging the duplicated clip to the left until it matches up perfectly with the start of the original clip.
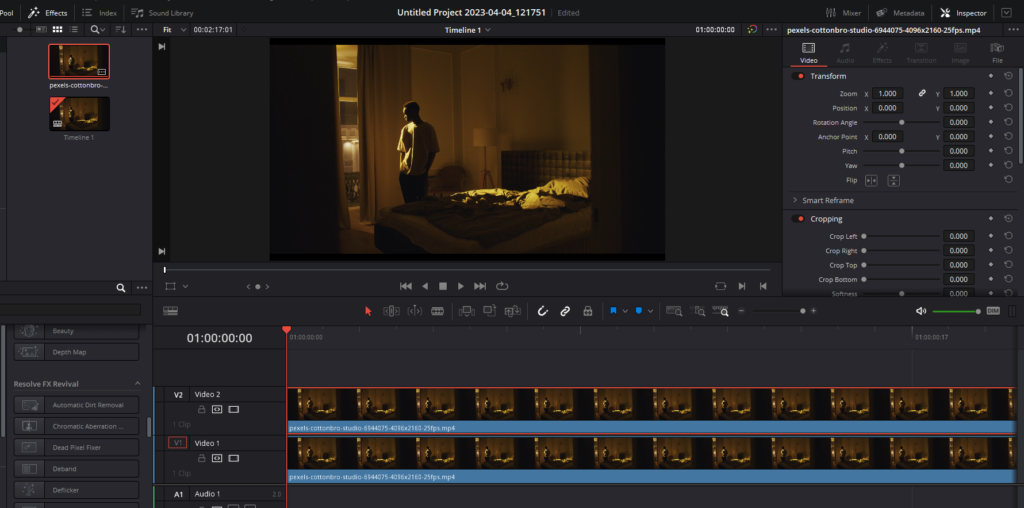
Step 7: Adjusting the Opacity
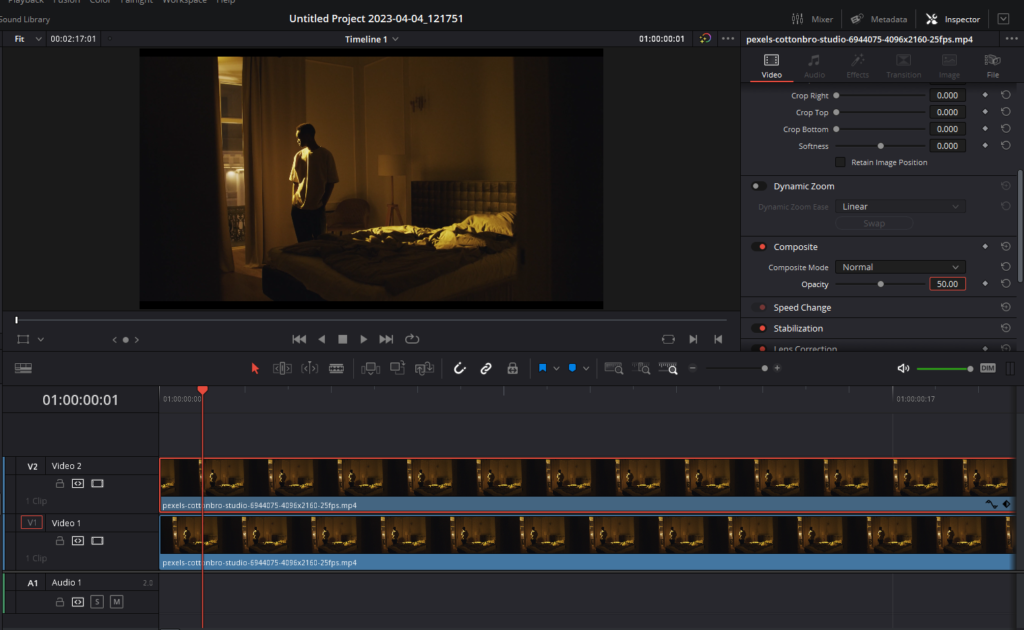
To enable the visibility of both clips simultaneously, the opacity of the clip on top needs to be adjusted. To do this, click on the top clip and navigate to the ‘Inspector’ tab on the top right corner and scroll down to ‘Composite’ settings. Here, you’ll find the setting for adjusting opacity. Reduce the opacity of the top clip to around halfway. This action makes the clip semi-transparent, allowing both the original and duplicate clips to be visible concurrently.
Step 8: Previewing the Changes
After adjusting the opacity, it’s time to preview the changes. Start by disabling the top clip by using the shortcut ‘D’. This gives you a clear view of the original clip in its unaltered state, still exhibiting the light flicker. By re-enabling the top clip, you’ll be able to see the significant reduction in light flicker caused by the addition of the slightly delayed, semi-transparent duplicate clip.
Method 2 – Eliminating Light Flicker in DaVinci Resolve Using the Color Page
Step 1: Assessing and Analyzing the Clip
Commence the procedure by opening your video clip in DaVinci Resolve. Make a mental note of the prominence and pattern of the light flicker. To acquire a better understanding, consider looping the clip to repetitively observe the flicker in action. This will help familiarize you with the flicker pattern and effectively set the stage for the following stages of the process.
Step 2: Transitioning to the Color Tab

After a thorough examination of the flicker issue, it’s time to transition to the correction phase. To achieve this, you need to navigate to the Color tab in DaVinci Resolve.
Step 3: Introducing a Serial Node
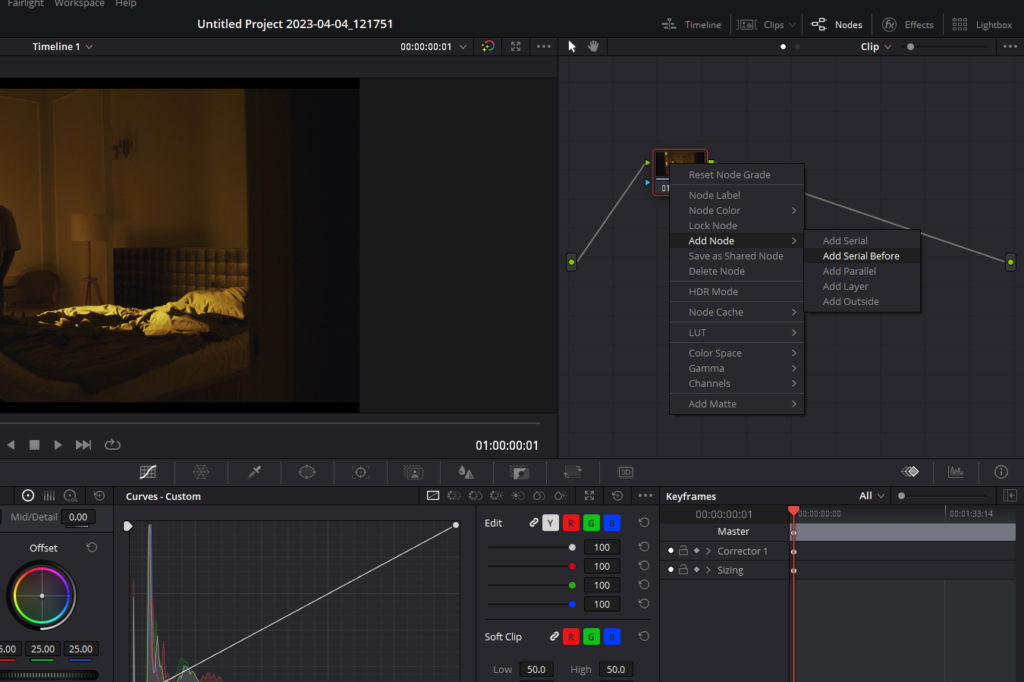
The first step within the Color tab is to introduce a serial node. To accomplish this, right-click on the first node and select Add Node> Add Serial Before. Based on my experience, incorporating the deflicker effect as the first element in the chain ensures it influences the rawest form of your footage, thus promoting more effective flicker removal.
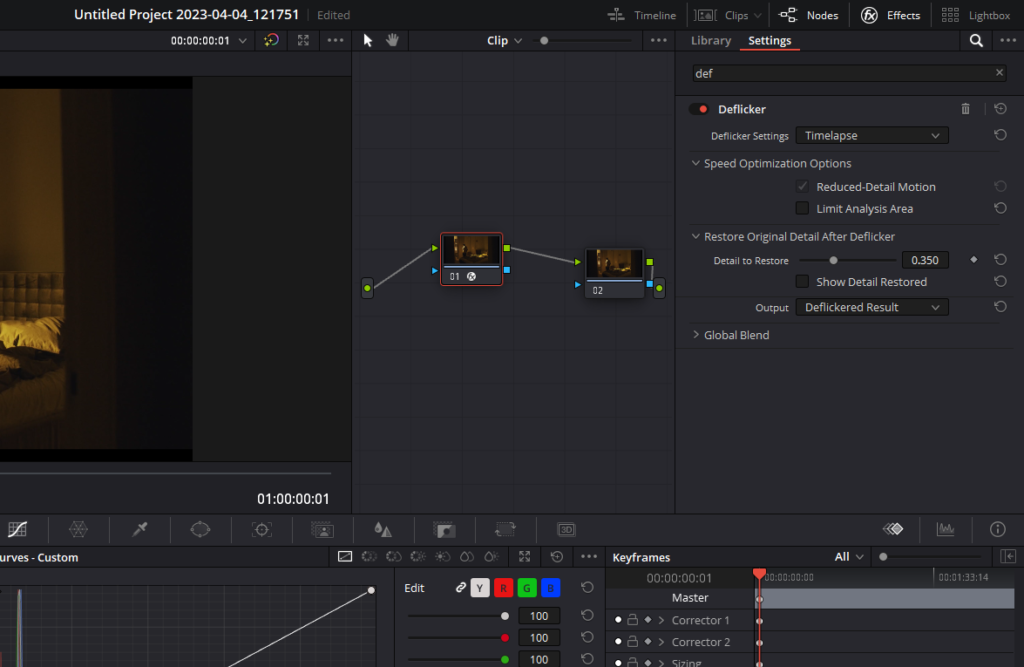
Step 4: Engaging the Deflicker Effect

The subsequent step entails applying the deflicker effect to the serial node. This is achieved by heading to the Effects panel by clicking on it from the top right corner, searching for the ‘Deflicker’ effect, and dragging it onto your newly created serial node. Upon doing this, you’ll be presented with several settings options on the right.
Step 5: Understanding the Deflicker Plug-in
The Deflicker plug-in in DaVinci Resolve is designed to target rapid, temporally unstable variations in lightness. It excels at selectively addressing areas where flickering appears while leaving other parts of the image untouched. This powerful tool can often repair previously deemed “unfixable” issues, making it an indispensable asset in your post-production workflow.
Main Parameters
When accessing the Deflicker plug-in, the top section exposes a single control by default, which may be sufficient in many cases. However, for more fine-tuned adjustments, you can explore the advanced controls.
Isolate Flicker
Hidden by default, the Isolate Flicker controls appear when you set the Deflicker Setting to Advanced Controls. They allow you to determine how motion is detected in the scene to accurately address the flickering relative to the motion of subjects and objects within the frame.
- Mo.Est. Type: This parameter allows you to choose the method DaVinci Resolve uses to analyze the image and detect motion. The available options include Faster, Better, and None. The default setting, Faster, is less processor-intensive but may be less accurate. The Better option provides greater accuracy but demands more processing power. None disables motion analysis altogether, which can be useful when there is no motion in the scene. The default option is Better.
- Frames Either Side: This parameter specifies the number of frames analyzed to determine motion. Higher values are not always better, as the optimal setting is scene-dependent. The default value is 3.
- Motion Range: This setting offers three options: Small, Medium, and Large. It allows you to choose the speed of motion in the frame that should be detected.
- Gang Luma Chroma: This parameter determines whether the Luma and Chroma Threshold sliders are linked together.
- Luma Threshold: The Luma Threshold controls the threshold above which changes in luma will be considered flicker. The range is 0-100, with 0 applying no deflickering and 100 applying deflickering to everything. The default value is 100.
- Chroma Threshold: Similarly, the Chroma Threshold determines the threshold above which changes in chroma will be considered flicker. It operates on a scale of 0-100, with 0 applying no deflickering and 100 applying deflickering to everything. The default value is 100.
- Motion Threshold: This parameter defines the threshold above which motion will not be considered flicker.
Speed Optimization Options
Closed by default, the Speed Optimization Options control group provides additional controls to fine-tune the deflicker process.
- Reduced-Detail Motion: This checkbox, enabled by default, reduces the amount of detail analyzed for flicker detection. In most cases, this setting has no visible impact but improves processing speed. If your clip contains fine details that are overly smoothed, you can disable this setting.
- Limit Analysis Area: Enabling this checkbox reveals controls for defining a sample box to restrict deflickering to a specific region of the image. This option is beneficial when only a particular part of the image exhibits flickering, speeding up the operation. It can also be useful when deflickering affects one part of the image more than desired.
Restore Original Detail After Deflicker
Closed by default, this control group allows you to restore original details in your footage after the deflicker operation.
- Detail to Restore Slider: Use this slider to isolate grain, fine details, and sharp edges that should not be affected by the deflicker operation. This preserves those fine details precisely.
- Show Detail Restored Checkbox: Enabling this checkbox provides a visual representation of the edges detected and used by the Detail to Restore slider. This assists in fine-tuning the operation and ensuring optimal results.
Output Options
The Output pop-up menu allows you to choose the desired output from the Deflicker plug-in. Several options are available to assist in troubleshooting problematic clips:
- Deflickered Result: This option displays the final result after the deflickering process. It is the default setting.
- Detected Flicker: Selecting this option reveals a mask that highlights the areas of the image detected as flickering. This helps evaluate whether the correct parts of the image are being targeted. Note that the flicker mask can be subtle.
- Magnified Flicker: This option shows an exaggerated version of the Detected Flicker mask, making it easier to visualize the adjustments made by the Deflicker plug-in.
By utilizing these advanced controls and customization options within the Deflicker plug-in, you can fine-tune the settings to effectively remove light flicker from your footage, whether it’s caused by timelapse exposure variations, fluorescent lights, or other flickering artifacts. Take advantage of the precision offered by DaVinci Resolve and elevate the visual quality of your videos to new heights.
In conclusion, with the power of DaVinci Resolve and the two methods outlined above, you can effectively remove light flicker from your footage, ensuring a visually stunning final product.