Hi fellow filmmakers, welcome back to FilmmakingElements.com. In this article, we are sharing How To Do Map Animation In Davinci Resolve.
An often overlooked, yet highly captivating technique at your disposal is the use of animated maps in your projects. Providing a unique visual narrative of your journey, these animations can significantly elevate your film’s aesthetic appeal.
In this article, we will delve into a comprehensive tutorial on creating exciting and visually striking maps in DaVinci Resolve. With the tips and techniques that we will share, you’ll be well-equipped to infuse an additional layer of depth and context to your travel videos, making them not just better, but exceptional.
Acquiring and Preparing Your Map for Animation
Creating an animated map begins with the critical step of procuring a map. The following steps detail the process:
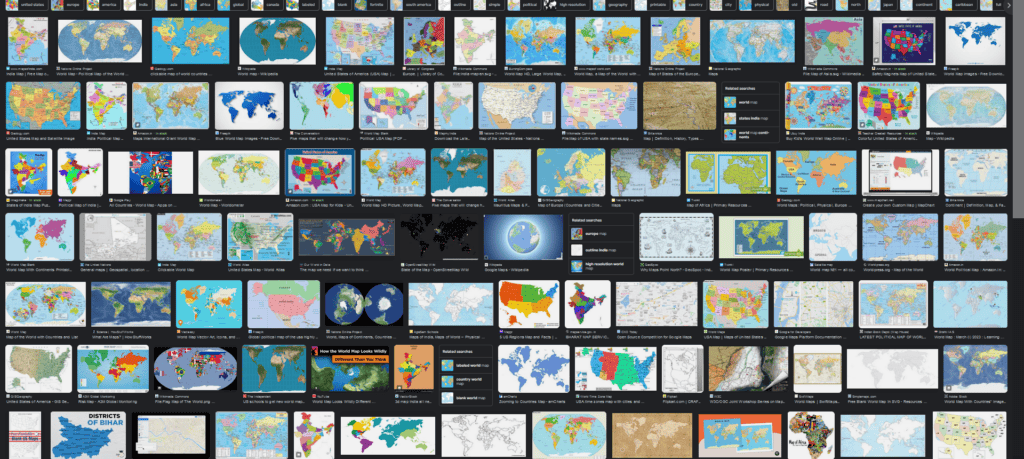
Step 1: Find and Download a Map
There are several places to find a map suitable for your project. Google Maps is a convenient and straightforward source. Just search for the location you want, capture the map, and download it.
Step 2: Import Your Map into DaVinci Resolve
Once you have your map, the next step is to import it into DaVinci Resolve. This can be done by simply dragging and dropping your map in the media pool of the Edit tab.
Step 3: Position Your Map on the Timeline
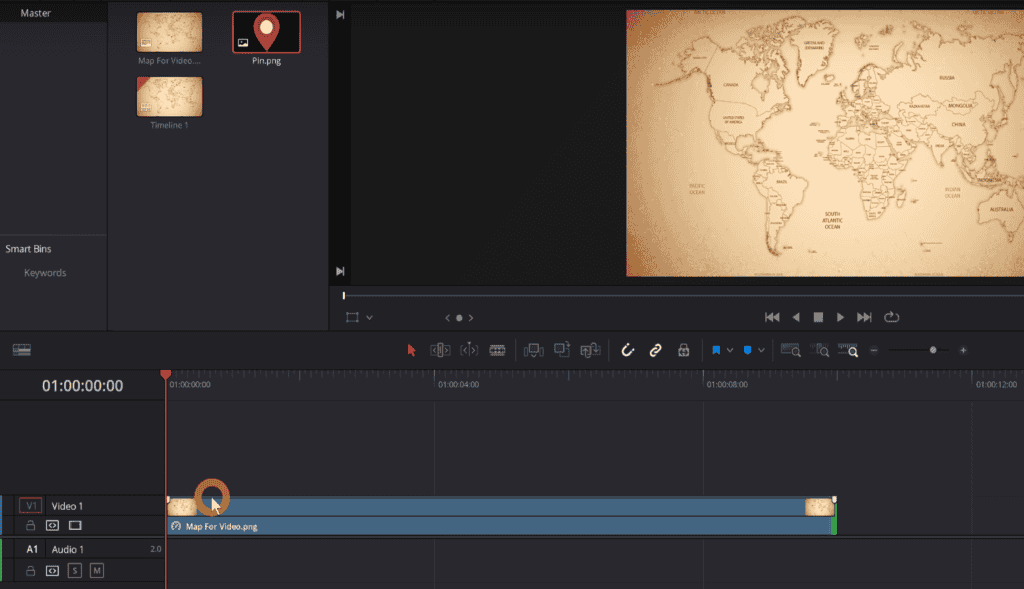
After importing the map, drag it onto the timeline. At this point, it’s important to set the duration for the animation. We recommend a duration of 10 seconds to start, which gives ample time for the animation to play out.
Step 4: Open Fusion
With your map placed and prepped on the timeline, you’re now ready to start the animation process. To do this, select your map on the timeline and then click on the Fusion tab at the bottom of the screen.
Crafting Your Line Travel For Map Animation
Once your map is ready in DaVinci Resolve, the next part of the process is creating the line travel animation. This is the visual cue that traces your journey from one location to another. Here’s a step-by-step guide on how to go about this:
Step 1: Creating a Background Node
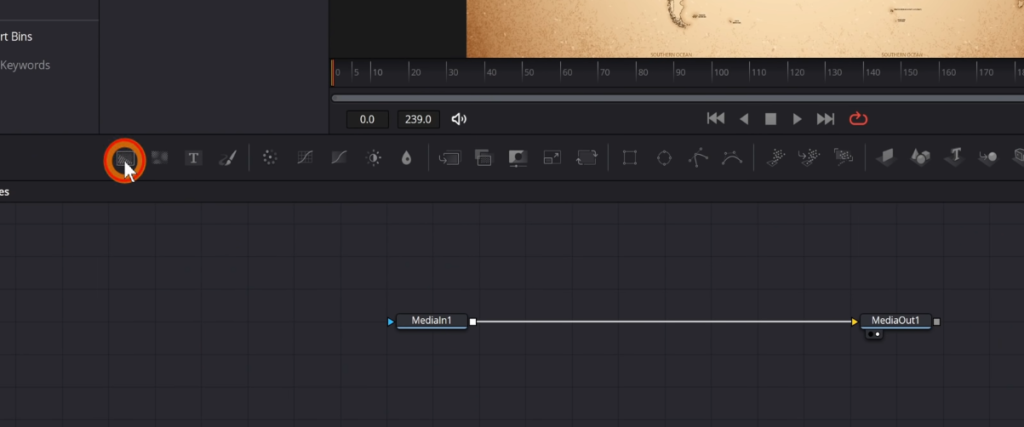
Your first step within the Fusion interface is to create a Background node. You can find this node in the toolbar at the top of your node editor. It’s the first tool from the left, represented by a rectangle. Click and drag it into the Node Editor – the area at the bottom of your screen where all your nodes and their connections are displayed.
Step 2: Connecting the Nodes
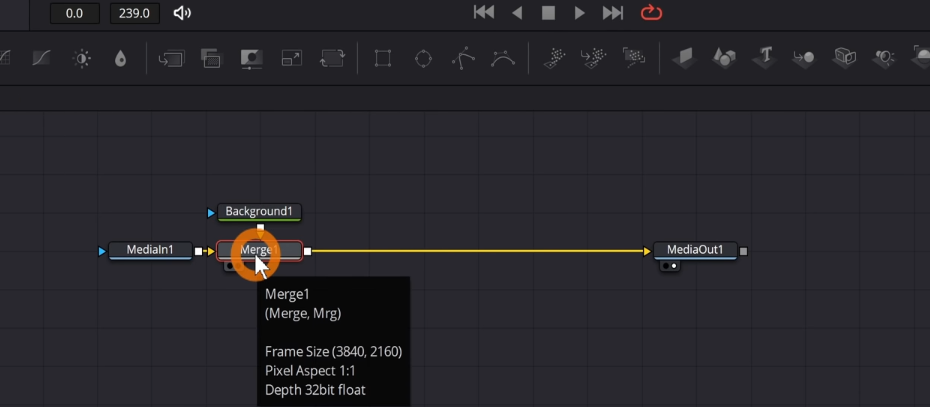
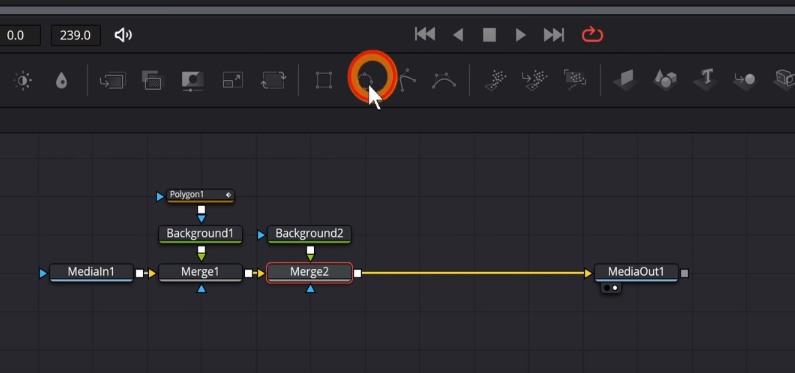
Next, you need to connect the Background node to your imported map. Click and drag from the output (represented by a small square on the right) of the Background node to the output of the MediaIn1 node on the right (which represents your map). This action will automatically create a Merge node, indicating that the map and the Background node are now combined.
Step 3: Incorporating a Polygon Node
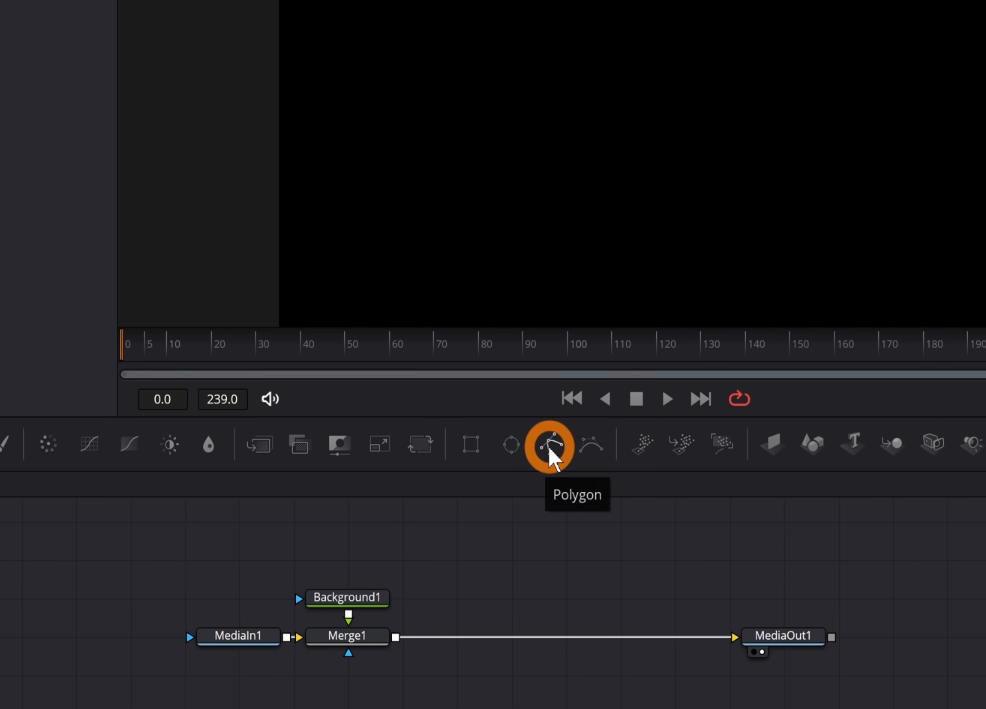
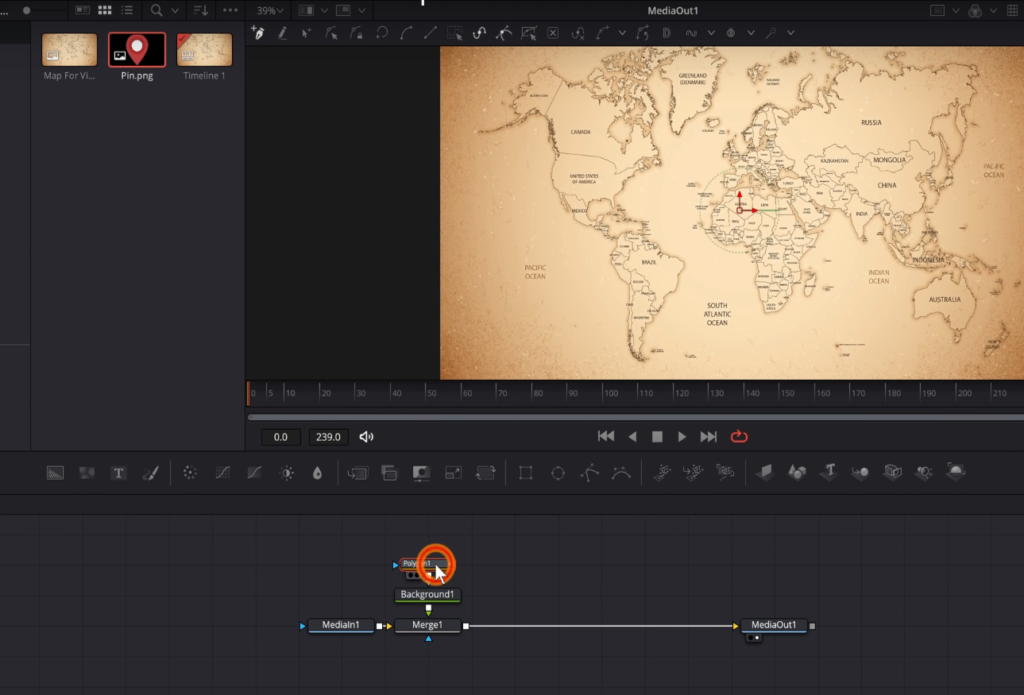
Once your Merge node is in place, it’s time to bring in a Polygon node. Just as you did with the Background node, find the Polygon node in the toolbar above the node editor and drag it into your Node Editor. Connect this new node to the Background node.
Step 4: Plotting Your Travel Path
With the nodes correctly arranged, it’s time to start drawing your journey! This process is where you get to engage your creative side. To begin, select your Polygon1 node in the Node Editor. Then, using the Viewer – the large area at the top of your screen where your map is displayed – start clicking to create points that outline your journey. For example, if you’re starting your journey in New York, your first click (or point) will be there.
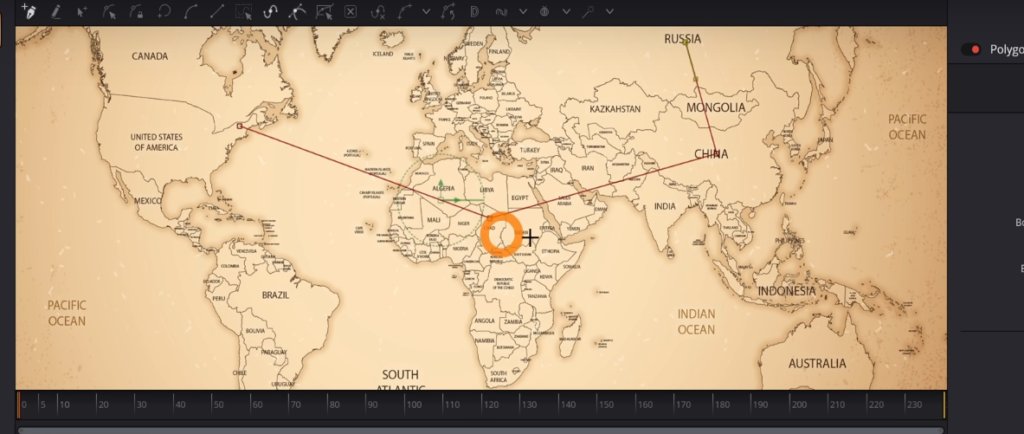
Step 5: Choosing Your Stops
After marking your initial location, it’s time to plot the rest of your journey. Suppose the next stop after New York is Russia. Click on the location on your map in the Viewer, creating another point. Repeat this step for as many stops as you have on your journey.
Step 6: Adjusting Line Thickness
With the journey plotted, it’s time to give some depth to the line representing your route. To do this, keep your Polygon node selected. Then, in the Inspector – the panel on the top right of your screen – adjust the ‘Border Width’ setting. This setting changes the thickness of the line, allowing it to be clearly visible. You have complete creative control here, so adjust until it matches your desired aesthetic.
Step 7: Customizing Your Line’s Appearance
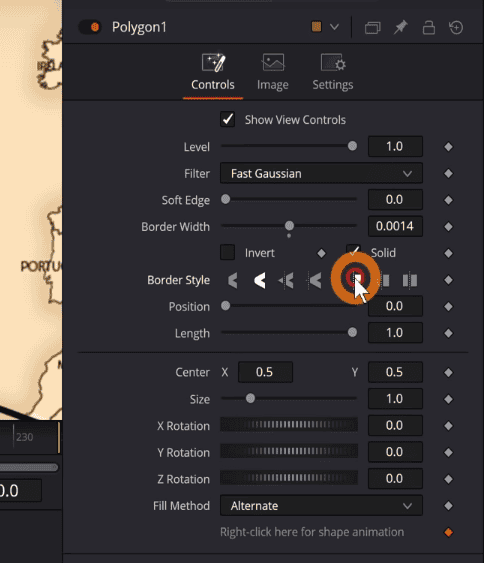
You also have control over how the ends of your line look. For a more modern, clean cut, change the line end from rounded to flat in the Border Style option. This setting can be found in the Inspector when the Polygon node is selected.
Step 8: Coloring Your Line
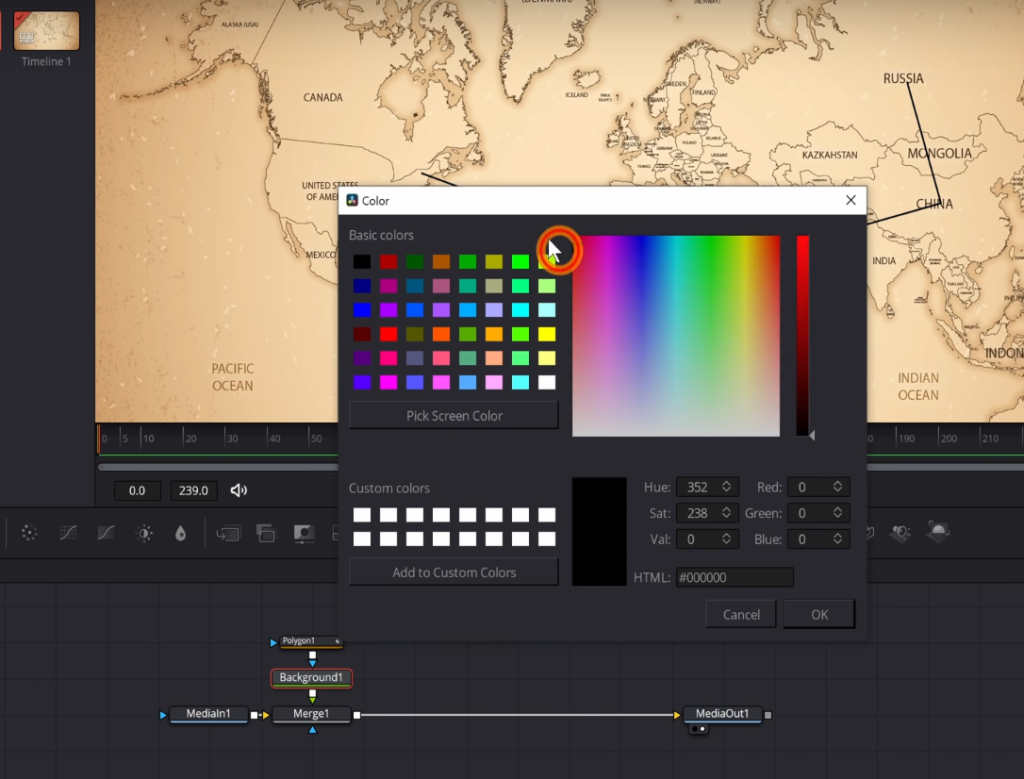
The last step in crafting your line is coloring it. Typically, travel map lines are red, but this is your creation – feel free to select a color that fits your vision best! To change the color, select the Background1 node, and adjust the color setting in the Inspector.
Animating Your Line On The Map
With your journey plotted and your line customized, we now move on to one of the most transformative parts of the process – animating your line. Contrary to what you might initially think, this part is quite simple. Let’s dive into the steps:
Step 1: Prepare for Animation
First, click on the ‘Polygon1’ node in your Node Editor to select it. Ensure that your timeline slider is at the beginning, i.e., frame zero.
Step 2: Set Initial Keyframe
Locate the ‘Length’ option in the Inspector panel. Here, click the diamond icon next to it to set a keyframe at frame zero, and then move the slider all the way down to zero. This step sets the initial state of the line to be invisible, which is the starting point for our animation.
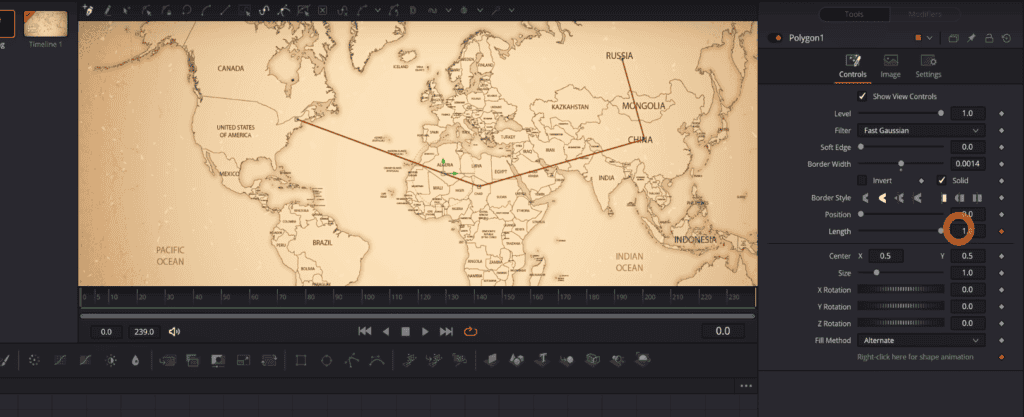
Step 3: Set Final Keyframe
Next, drag your timeline slider almost to the end. Move the slider all the way up to one. It will automatically add a keyframe. This ensures that the line becomes fully visible by the end of the animation, effectively tracing your journey across the map.
Step 4: Smoothen Your Animation
An excellent animation isn’t just about movement, it’s also about flow. So, we’re going to make our line animation super smooth. To do this, go to the ‘Spline’ tab on the top right corner of the Fusion tab, open it up, and turn on ‘Polygon1’. Click ‘Fit to Zoom’ (the icon looks like a small square with two arrows) to focus on your keyframes. Highlight both keyframes by clicking and dragging over them, and then hit ‘S’ on your keyboard.

Step 5: Adjust Ease In and Ease Out Controls
Further enhancing the smoothness of your animation involves adjusting the ‘Ease In’ and ‘Ease Out’ controls. Hit ‘Control + T’ on your keyboard to bring up these controls. Set ‘Ease In’ to 45 and ‘Ease Out’ to 35. This adjustment creates a more natural progression for the line’s animation, giving it a professional touch.
Step 6: Close the Spline Tab
Once you’ve completed the smoothing process, close out of the ‘Spline’ tab.
With these straightforward steps, you’ll have a line that doesn’t just statically sit on your map, but dynamically traces your journey, capturing the essence of your travels. This animation adds a significant layer of engagement to your video, holding your viewers’ interest and guiding them through your journey.
Adding Dynamic Points to Your Destinations On the Map
While the animated line beautifully depicts your journey’s progression, points at each destination add an extra layer of clarity and depth to your travel map. In this subtopic, we’ll provide a comprehensive guide to adding and animating these points.
Step 1: Add a Background Node for the Point
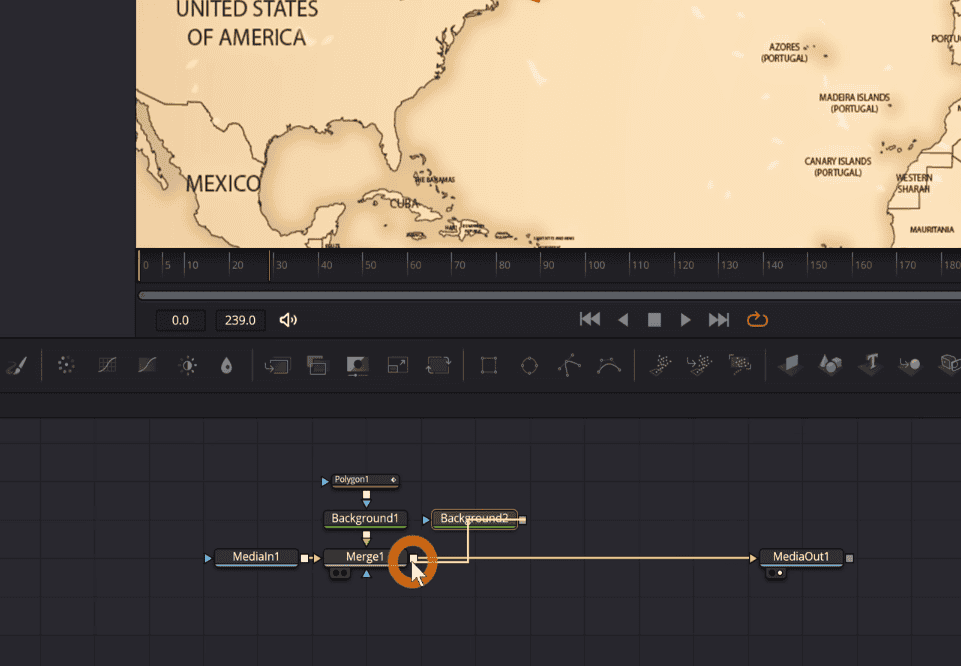
To start off, you need another Background node. Drag it into the Node Editor and connect it to the output of the existing Merge node.
Step 2: Add an Ellipse Node
Next, drag an Ellipse node from the toolbar into the Node Editor and connect it to the Background node you just added. This Ellipse node will serve as the visual representation of your point.
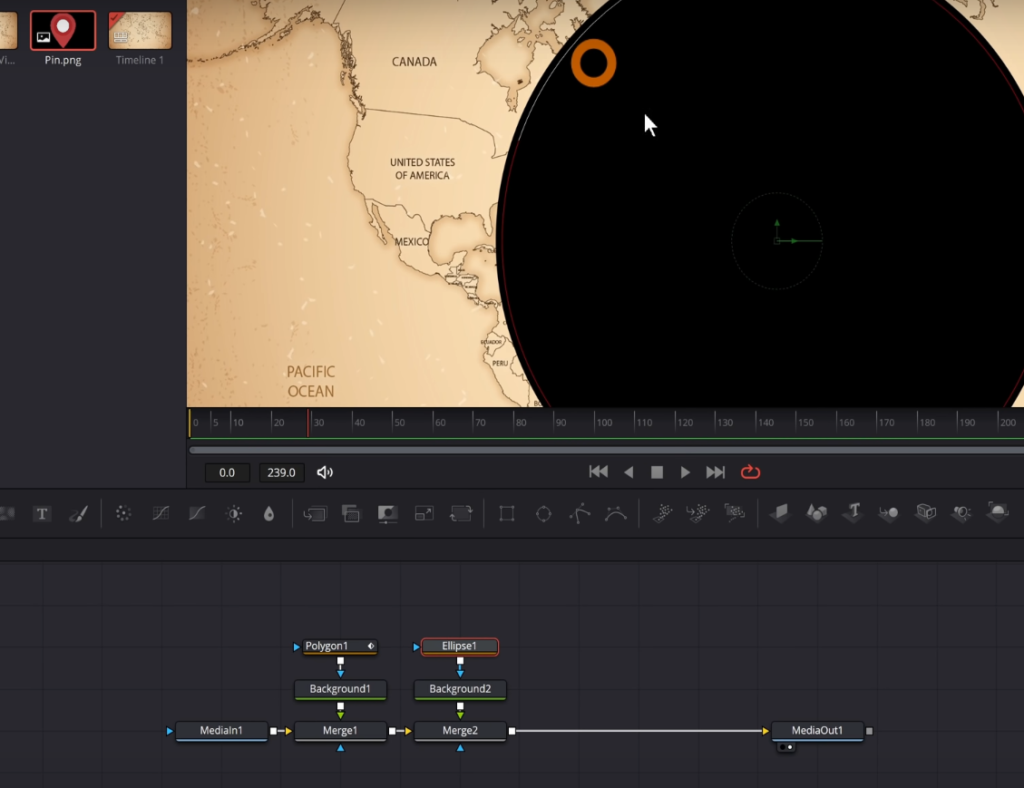
Step 3: Resize and Position Your Point
Click on the Ellipse node to select it and then adjust its size by dragging the edges in the Viewer until it’s small enough to serve as a location point. Position the point over your starting location.
Step 4: Customize the Point’s Color
You can now personalize your point’s color by selecting the associated Background node and changing its color in the Inspector panel.
Step 5: Add Bounce Animation to the Point
A static point might be clear, but an animated one is both clear and engaging. To add a bouncing effect, ensure your timeline slider is at frame zero. With the Ellipse node selected, in the Inspector panel on the right, under the ‘Border Width’ option, add a keyframe by pressing the diamond-looking button on the right of it and then decrease the ‘Border Width’ until the point disappears. This will be the start of our bouncing effect.
Step 6: Animate the Bounce
To animate the bounce, move forward four frames on your timeline and increase the ‘Border Width’ just above zero (0.0004 for a subtle effect). Then, advance another three frames and decrease the ‘Border Width’ slightly below zero. Finally, advance two more frames and set the ‘Border Width’ to zero.
Step 7: Smooth the Bounce Animation
Just like we did with the line, we’ll also smooth the bounce animation. Open the ‘Spline’ tab, turn off ‘Polygon1’, and ensure ‘Ellipse1’ is turned on. Click ‘Fit to Zoom’ to focus on your keyframes. Highlight all of them and hit ‘S’ on your keyboard, and then close the ‘Spline’ tab.
Step 8: Duplicate the Animated Point
Now, with one point fully animated, you can easily duplicate it for other locations. Click on the ‘Ellipse1’ node and hit ‘Ctrl + C’ to copy and ‘Ctrl + V’ to paste. Connect the newly created node to the already connected Ellipse node.
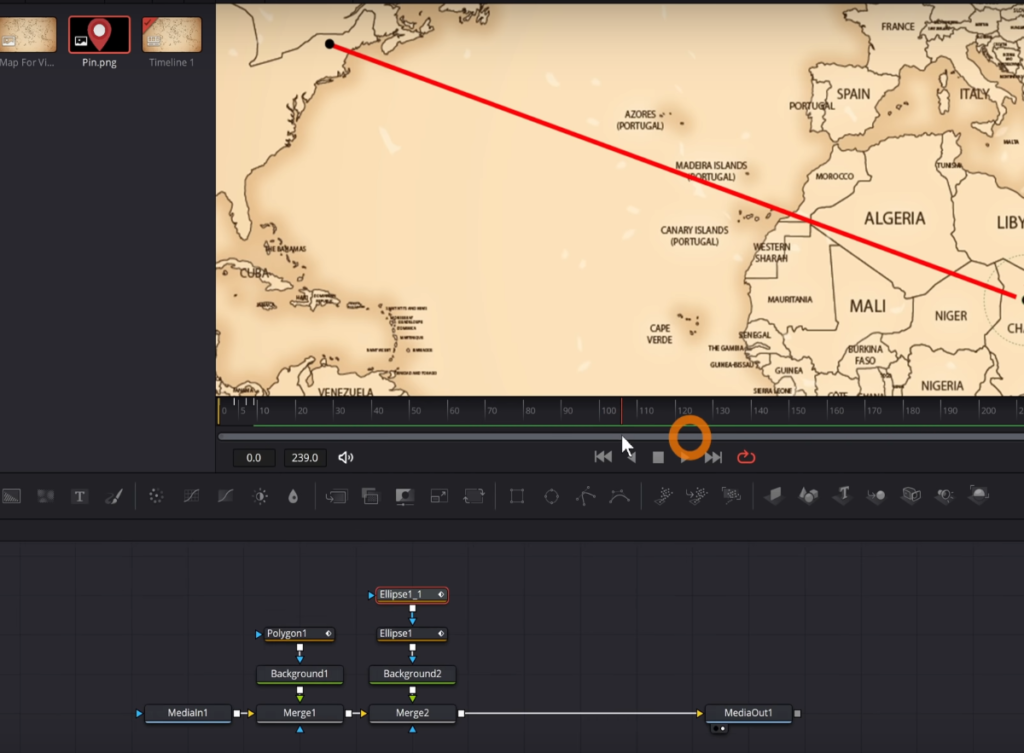
Step 9: Position and Synchronize Additional Points
Move forward on your timeline until the line reaches the next location. Select the copied Ellipse node, drag it onto the new location, and adjust the timing of its bounce animation to match when the line arrives. This synchronization ensures each point pops up as the line reaches the respective location.
Step 10: Repeat for All Locations
Repeat steps 8 and 9 for each location on your travel map, ensuring every stop has an animated point.
Adding Motion Blur for Realism In Map Animation
As the last step in crafting your animated travel map, adding motion blur to your journey line can create a sense of realism and movement. This small but significant addition can make your animation feel more fluid and dynamic, enhancing the overall viewer experience. Here’s how to add motion blur:
Step 1: Select the Polygon Node
Start by clicking on the ‘Polygon1’ node, which represents your journey line, to bring up its properties in the Inspector tab.
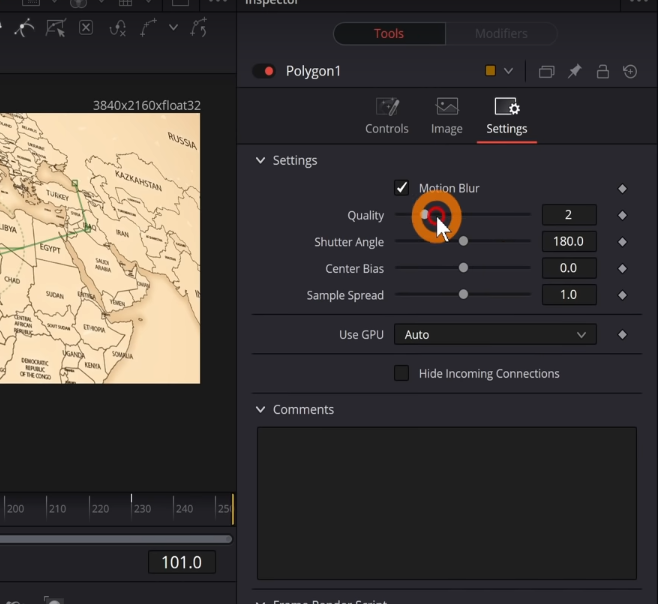
Step 2: Enable Motion Blur
Within the ‘Settings’ tab of the ‘Polygon1’ node, you’ll find an option for ‘Motion Blur’. Enable this feature by checking the box beside it.
Step 3: Adjust Motion Blur
Now that motion blur is activated, you can adjust its intensity to fit your needs by using the ‘Quality’ slider. A higher value will result in more noticeable blur. For this guide, we recommend setting it around 8 or 9, but feel free to experiment until you achieve a look you’re satisfied with.
Last Words
Thank you so much for spending time with us on FilmmakingElements.com. We greatly appreciate your interest in our content, and we’re glad we could share these tips on creating an animated travel map in DaVinci Resolve with you. Your continued readership inspires us to delve deeper and explore more filmmaking techniques to help enhance your creative journey.
Remember, the world of filmmaking is a playground for creative minds, and your willingness to learn and grow is the key to unlocking its limitless potential.
We look forward to sharing more insightful content and engaging discussions with you. Stay tuned for our next blog post and until then, keep experimenting, keep learning, and keep creating magic with your films.
Once again, thank you for reading. Happy filmmaking!