In the world of filmmaking, the ‘freeze frame’ stands as a testament to the power of a single moment. This technique, often used to highlight pivotal moments or to create dramatic emphasis, allows creators to halt the narrative momentarily, offering viewers a chance to delve deeper into the scene’s essence. DaVinci Resolve, a renowned tool in the world of post-production, offers a seamless way to incorporate freeze frames, especially in its user-friendly iPad version.
I am Salik from FilmmakingElements.com, and my journey in filmmaking has spanned over a decade. Throughout these years, I’ve navigated the intricate maze of equipment, software, and techniques to discover the most impactful ways to convey stories. Being a certified DaVinci Resolve Trainer, this software has been a cornerstone of my editing toolkit, allowing me to bring stories to life with precision and flair.
In this guide, I will share insights and steps on how to effectively Freeze Frame in DaVinci Resolve for iPad. Whether you’re a seasoned filmmaker keen on refining your editing techniques or a newbie eager to learn, this article promises clarity and ease of understanding.
Creating a Basic Freeze Frame in DaVinci Resolve on iPad
Freeze frames have always been a classic tool in the filmmaker’s arsenal. They can provide emphasis, create tension, or serve as a transitional element. With the DaVinci Resolve for iPad, incorporating this feature is straightforward, even if you’re just beginning your editing journey.
Let’s break down the process step-by-step:
Understanding the Workspace
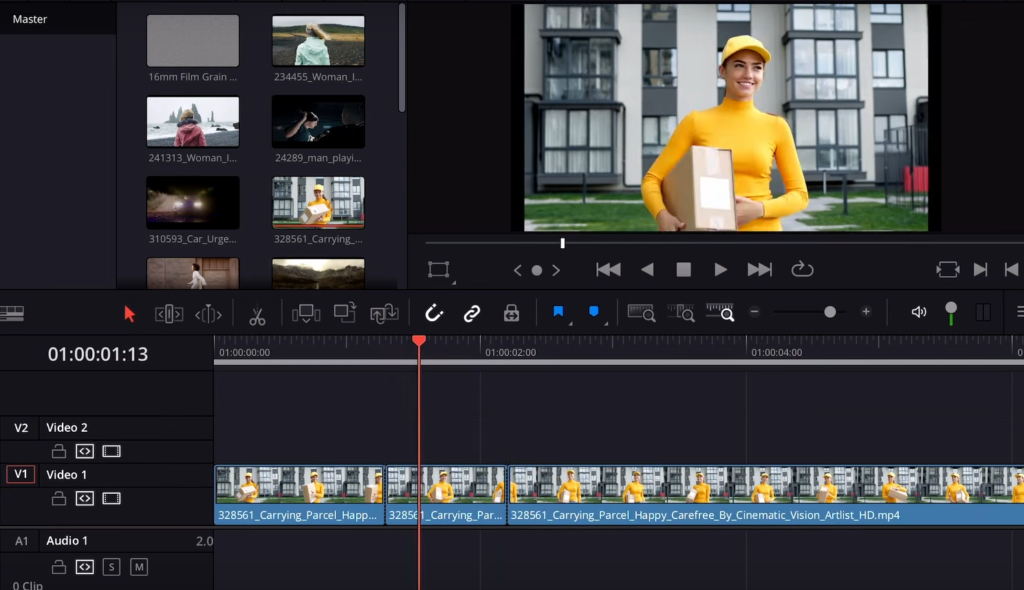
- First and foremost, familiarize yourself with DaVinci Resolve’s workspace on the iPad. The interface might seem daunting initially, but with a bit of exploration, it becomes intuitive.
- Locate your timeline on the ‘Edit’ page of the iPad version of Davinci Resolve, where all the clips are placed sequentially. This is where most of the editing magic happens.
Selecting Your Desired Clip
- On the timeline, identify the clip in which you wish to introduce a freeze frame.
- Scrub through the clip (drag your finger or stylus across it) to find the exact moment you want to freeze.
Creating the Freeze Frame
- Once you’ve pinpointed the desired moment, tap on the clip to select it.
- With the clip selected, you should see various editing options. Here’s how to freeze that perfect frame:
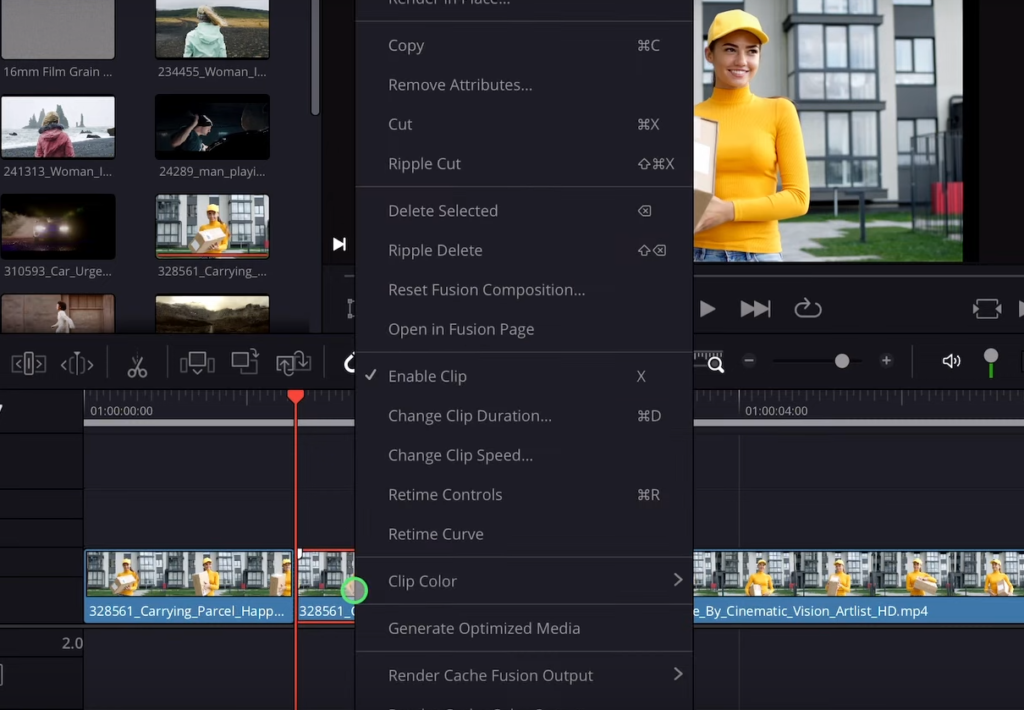
- Tap and hold on the desired moment in the clip until a contextual menu appears.
- Choose the option labeled ‘Change Clip Speed’.
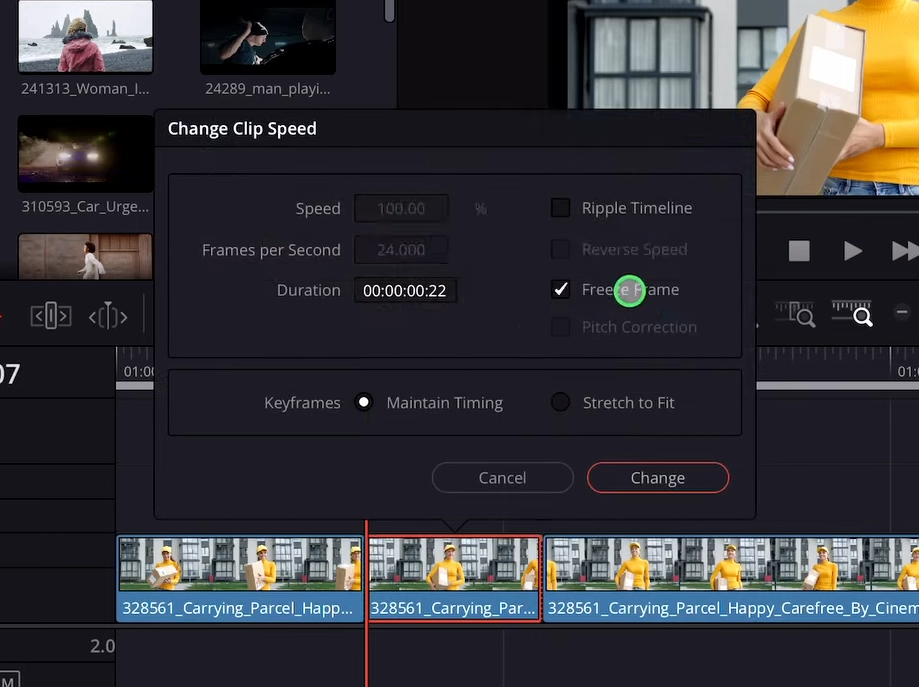
- Within this menu, you’ll find an option named ‘Freeze Frame’. Tap on it.
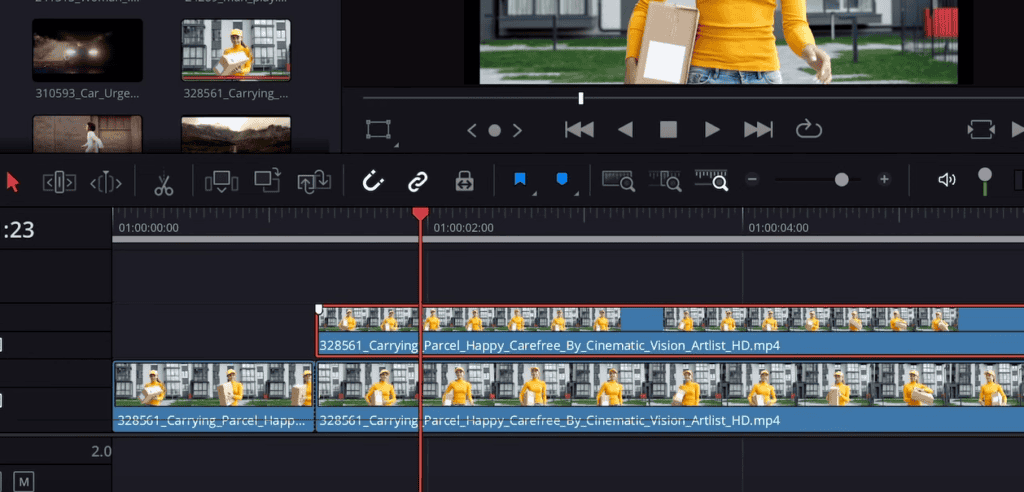
Understanding the Result
- The portion to the right of your selected moment will now transform into a freeze frame. Essentially, the frame you chose will be ‘frozen’ and extend to the right, creating a paused effect.
Fine-Tuning the Duration
- By default, the freeze frame might have a predetermined duration. However, in DaVinci Resolve on the iPad, you can easily adjust this:
- Tap on the freeze frame portion in the timeline.
- Drag its edges to increase or decrease its duration as per your liking.
Advanced Freeze Frame Techniques: Duplicating and Extending
Having mastered the basic freeze-frame in DaVinci Resolve on the iPad, it’s time to explore advanced techniques that offer more flexibility and creativity. One such method is duplicating and extending the freeze frame, a technique that allows you to sustain a paused moment and then seamlessly transition back into action. This can be particularly useful for dramatic pauses, recap moments, or when introducing text overlays during the freeze.
Let’s dive into the details:
Benefits of Duplicating a Freeze Frame
- Flexibility: By creating a duplicate, you can adjust the length of the freeze without affecting the original clip.
- Transitions: The technique allows for smoother transitions between freeze frames and moving footage.
- Layering: With duplicate freeze frames, you can introduce layers, such as text or effects, on one while leaving the other untouched.
Step-by-step Guide to Duplicating and Extending
- Identify the Freeze Frame Moment
- Scroll through your timeline and pinpoint the moment you want to freeze.
- Ensure this moment is visually compelling and serves a purpose in your narrative.
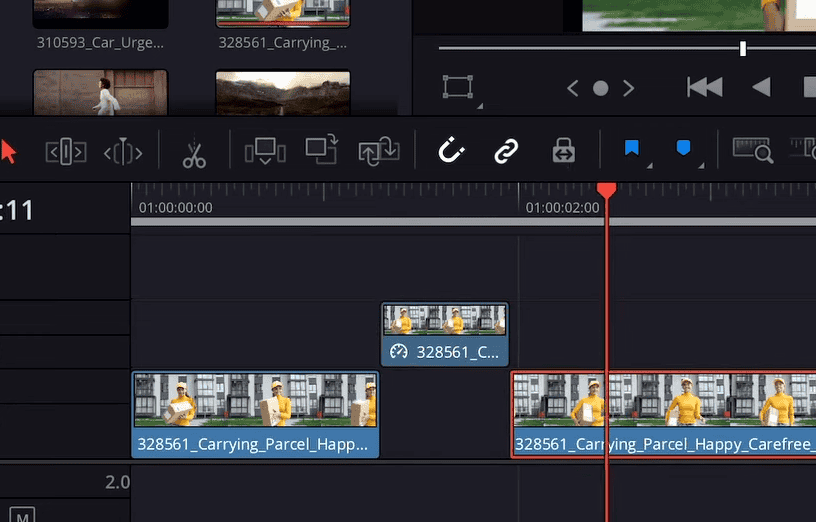
- Duplicating the Freeze Frame
- Don’t freeze the frame yet. With the video selected, duplicate it.
- This action will create a copy of your video directly above the original in the timeline.
- Creating the Initial Freeze Frame
- Follow the basic freeze frame technique as described in the previous section and freeze the frame on the duplicate video.
- Adjusting the Duplicate’s Length
- Click on the duplicated freeze frame.
- Drag its edges to adjust its duration. This allows you to decide how long you want the freeze effect to last before transitioning back to the moving footage.
- Transitioning Back to Moving Footage
- After the duplicated freeze frame, the video will continue from where the original freeze was made.
- If you want the video to continue from a different point, simply trim the original clip accordingly.
Enhancing the Experience
- Add Text or Graphics: One major advantage of having a duplicated freeze frame is that you can overlay text or graphics without disturbing the main footage. This is excellent for adding context, titles, or additional information.
- Apply Effects: Use the iPad’s touch-centric interface to add filters, adjust brightness, or introduce color grading, making it stand out.
- Transition Effects: To ensure a smoother shift and moving footage, consider adding transition effects like fade, dissolve, or a slide.
- Also Read: Davinci Resolve Not Recording Audio
- Also Read: How to Undo in DaVinci Resolve
- Also Read: Using Luma Keyer in DaVinci Resolve: Step-by-Step Guide