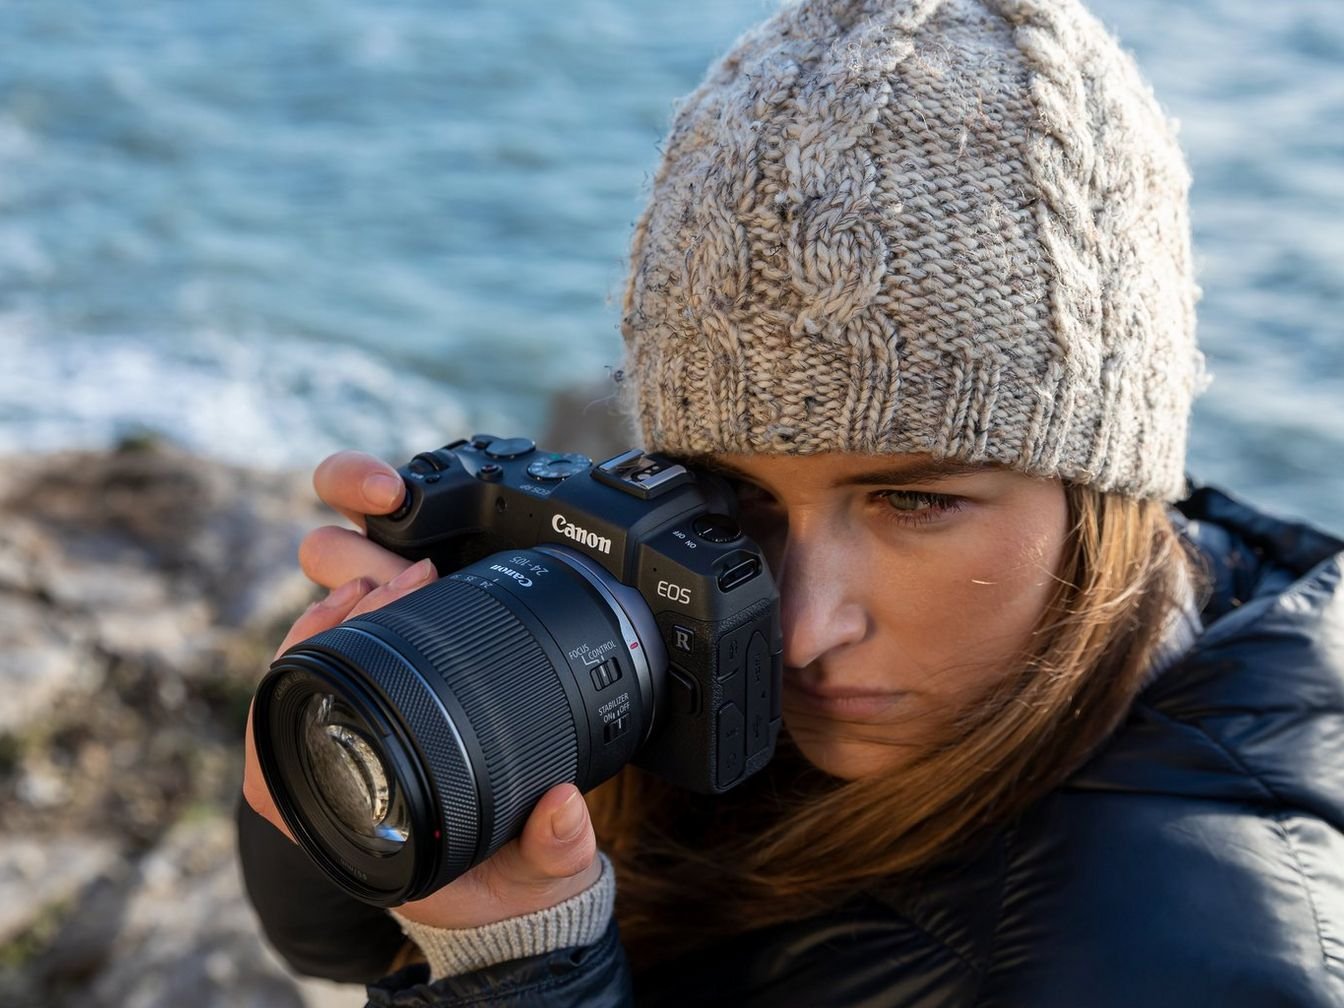
Are you a proud owner of the Canon EOS RP, eager to elevate your videography game? Look no further! In this blog post, we’ll delve into the Best Settings For Video on your Canon EOS RP, ensuring you capture stunning footage with ease.
Welcome to FilmmakingElements.com! If you’re here seeking guidance on unlocking the full potential of your Canon EOS RP for video recording, you’re in the right place. Whether you’re a budding filmmaker or a seasoned content creator, understanding the optimal video settings can significantly enhance the quality of your productions.
Canon EOS RP: Best Settings For Video
Mastering Frame Rates for Cinematic Footage on the Canon EOS RP
Understanding frame rates is crucial for achieving cinematic excellence with your Canon EOS RP. In this segment, we’ll explore how to navigate frame rate settings effectively to enhance the visual appeal of your footage.
Frame rate selection is fundamental when it comes to capturing videos on the EOS RP. By adjusting frame rates, you can tailor the look and feel of your footage to match your creative vision. Let’s break down the process step by step.

- Accessing Frame Rate Settings: Begin by familiarizing yourself with the camera’s interface. Locate the ‘Q’ button and click on the third button from the left side on the live view mode. On the EOS RP, this can typically be found by clicking a designated button and then selecting the appropriate option on the screen.
- Optimal Frame Rate Choices: For achieving a cinematic aesthetic reminiscent of traditional film, opt for a frame rate of 24 frames per second (fps). This setting is favored by filmmakers worldwide for its ability to impart a cinematic quality to footage. Selecting this option can elevate the overall look of your videos, providing a visually pleasing experience for your audience.
- Unlocking Slow Motion Potential: To capture captivating slow-motion sequences, consider experimenting with higher frame rates such as 60 fps. When slowed down during post-production, footage shot at this frame rate delivers smooth, fluid motion, adding depth and drama to your visuals. This technique is widely employed in films and documentaries to create impactful slow-motion shots.
- Exploring 4K Capability: Take advantage of the 4K recording option available on the Canon EOS RP. While shooting in 4K can yield stunningly detailed footage, it’s essential to be mindful of certain considerations. In some cases, autofocus performance may be compromised in 4K mode compared to HD mode. However, leveraging 4K for specific shots, such as B-roll footage, can enhance the overall production value of your content.
Maximizing Autofocus Capabilities for Cinematic Excellence on the Canon EOS RP
Unlocking the full potential of autofocus settings is essential for achieving professional-grade video results with the Canon EOS RP. In this segment, we’ll delve into the various autofocus modes available on the EOS RP, empowering you to capture sharp, focused footage effortlessly.
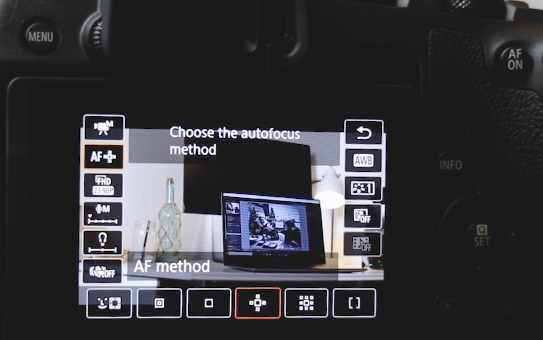
Here are the steps to access the autofocus settings on the Canon EOS RP:
- Accessing Autofocus Settings:
- Begin by powering on your Canon EOS RP camera and ensuring it is in video recording mode.
- Locate the “Q” (Quick Control) button on the camera body.
- Press the “Q” button to bring up the Quick Control menu on the camera screen.
- Navigating to Autofocus Settings:
- Within the Quick Control menu, navigate to the “AF” (Autofocus) option. This may require using the directional buttons or touchscreen interface, depending on your preference.
- Selecting Autofocus Mode:
- Once you’ve accessed the Autofocus settings, you’ll be presented with various autofocus mode options.
- Scroll through the available options to choose the desired autofocus mode based on your shooting requirements and creative vision.
- Exploring Autofocus Modes:
- Depending on the specific scene or subject you’re filming, explore the different autofocus modes available on the Canon EOS RP, such as Zone Autofocus, Single Point Zone Autofocus, Small Autofocus Point, and Face Tracking/Eye Autofocus.
- Experiment with each mode to understand their functionality and how they impact focus control and tracking.
- Adjusting Autofocus Settings:
- Within each autofocus mode, you may have additional settings or parameters that can be adjusted to fine-tune focus performance.
- Use the camera’s menu system or touchscreen interface to make adjustments such as focus area size, tracking sensitivity, or focus speed, as needed.
Autofocus functionality on the EOS RP is renowned for its precision and versatility. Let’s explore the different autofocus modes and how they can enhance your videography experience:
- Zone Autofocus: The Zone Autofocus mode features a large square that can be maneuvered across the screen to focus on different areas within the frame. Ideal for tracking moving subjects or focusing on larger objects, this mode offers flexibility and ease of use.
- Single Point Zone Autofocus: This variant of Zone Autofocus narrows the focus area to a single point, providing greater precision for focusing on smaller objects or achieving selective focus effects. Perfect for executing cinematic techniques such as focus pulls, this mode adds depth and visual interest to your footage.
- Small Autofocus Point: For capturing intricate details or focusing on tiny subjects within the scene, the Small Autofocus Point mode is indispensable. By isolating the focus to a specific area, such as the top of a bottle or a small object, this mode ensures razor-sharp focus and enhances the overall visual appeal of your videos.
- Face Tracking/Eye Autofocus: Among the most beloved features of the EOS RP is its Face Tracking and Eye Autofocus capability. This mode intelligently detects and tracks faces or eyes within the frame, ensuring consistent focus on subjects throughout the recording. Whether filming interviews, vlogs, or dynamic scenes involving people, this mode delivers unparalleled convenience and accuracy.
By familiarizing yourself with these autofocus modes and their respective applications, you can harness the full potential of the Canon EOS RP’s autofocus system to elevate your videography to new heights. Experiment with different modes to discover the perfect balance between precision and creative expression, enabling you to capture captivating footage with ease and confidence.
Unlocking Cinematic Potential: Exploring Picture Profile Video Settings on the Canon EOS RP
Picture profiles play a pivotal role in shaping the visual aesthetic of your video footage. In this segment, we’ll delve into the diverse range of picture profile options available on the Canon EOS RP, empowering you to customize your footage to suit your creative vision.
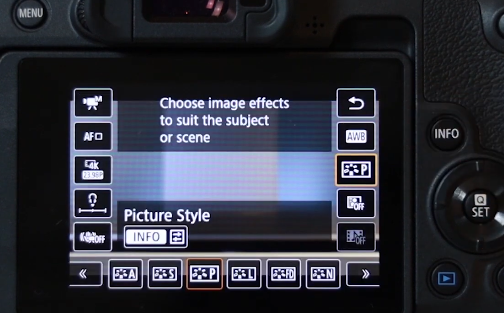
- Accessing Picture Profile Settings:
- Begin by navigating to the picture profile settings on your Canon EOS RP camera. Click on the ‘Q’ button on the top right corner and select the third button from the right.
- Understanding Picture Profile Options:
- Explore the various picture profile presets available on the EOS RP, each designed to enhance specific aspects of your footage.
- Auto mode optimizes processing for subjects or scenes automatically, providing convenience for quick shooting scenarios.
- Standard mode delivers sharp and vivid images, ideal for capturing scenes with rich detail and vibrant colors.
- Portrait mode emphasizes natural skin tones, making it perfect for portrait photography and capturing human subjects.
- Landscape mode enhances blues and greens, accentuating the beauty of natural landscapes and foliage.
- Customizing Picture Profiles:
- One of the standout features of the Canon EOS RP is the ability to create custom picture profiles tailored to your preferences.
- Explore the user-defined picture profile options, where you can adjust settings such as sharpness, contrast, saturation, and color tone to achieve your desired look.
- By creating a flat profile, you can lower these settings to produce footage with reduced contrast and saturation, allowing for greater flexibility in post-production color grading.
- Achieving Cinematic Effects:
- Utilize custom picture profiles and flat profiles to achieve cinematic effects in your video footage.
- By capturing footage in a flat profile and subsequently color grading it in post-production, you can achieve a cinematic look characterized by nuanced tones and enhanced dynamic range.
Mastering ISO Settings on the Canon EOS RP
Achieving the highest video quality on your Canon EOS RP entails understanding and effectively managing ISO settings. In this segment, we’ll explore the significance of ISO in relation to video quality and provide guidance on optimizing ISO settings for different shooting conditions.

- Accessing ISO Settings:
- Begin by accessing the ISO settings on your Canon EOS RP camera by clicking the ISO button on the bottom right corner of your touchscreen.
- Understanding ISO Levels:
- ISO measures the sensitivity of your camera’s sensor to light. A lower ISO setting, such as ISO 100, results in less sensitivity to light, while a higher ISO setting, such as ISO 1600, increases sensitivity.
- In daylight conditions, aim to keep ISO levels low (around 100 to 400) to achieve clean, noise-free footage with optimal image quality.
- Adapting to Low-Light Conditions:
- When shooting in low-light environments or during the evening, it may be necessary to increase the ISO setting to maintain proper exposure.
- Increase the ISO gradually, up to around 1600, to balance exposure without introducing excessive noise or degradation in video quality.
- Avoiding Overexposure:
- While higher ISO settings can enhance visibility in low-light situations, be cautious not to push ISO levels too high, as this can result in overexposure and loss of detail.
- Aim to balance ISO sensitivity and image quality to ensure optimal results in various lighting conditions.
Optimizing Sound Recording Settings for the Canon EOS RP
Ensuring high-quality audio is essential for creating engaging videos. In this segment, we’ll explore the optimal sound recording settings for the Canon EOS RP, along with recommendations for achieving superior audio performance.

- Accessing Sound Recording Settings:
- Begin by accessing the sound recording settings on your Canon EOS RP camera. Navigate to the menu (by clicking on the “menu’ button on the camera body) and locate the “Sound Recording” option.
- Selecting Manual Mode:
- Within the sound recording settings, ensure that the recording mode is set to “Manual.” This gives you greater control over audio levels and helps minimize background noise during recording.
- Adjusting Recording Levels:
- Once in manual mode, adjust the recording level or volume to the lowest setting. This prevents the camera from picking up unnecessary background noise, ensuring cleaner audio capture.
- Utilizing External Microphones:
- To achieve the best audio results, consider using an external microphone. External mics offer superior sound quality and help isolate the desired audio source from ambient noise.
- Explore a variety of external microphone options suitable for your Canon EOS RP. Check the description for recommended external mics to enhance your audio recording capabilities.
- Improving Video Stability:
- For smooth and stable footage, consider investing in equipment such as lenses with built-in stabilizers or gimbals.
- Lenses with stabilizers offer a cost-effective solution for reducing camera shake and producing steady footage in most situations. However, for professional-grade stability, especially in dynamic or challenging shooting environments, a gimbal may be necessary.