Welcome back to FilmmakingElements.com! Today, we’re excited to dive into a crucial aspect of the video editing workflow: enabling grids, guidelines, or rulers in DaVinci Resolve. This powerful feature is essential for achieving accurate framing, composition, and alignment in your projects, ultimately resulting in polished and professional video content.
As a versatile and user-friendly tool, DaVinci Resolve offers various options for customizing your workspace to suit your editing needs. With grids, guidelines, and rulers, you can ensure that your visuals are perfectly aligned and adhere to the rule of thirds, making your final product more aesthetically pleasing and engaging for your audience.
Method 1: Enabling Grids on the Edit Page in DaVinci Resolve
In this comprehensive guide, we’ll provide you with a detailed walkthrough on enabling grids on the Edit Page in DaVinci Resolve.
Open Effects and Search for Grid
- Start by opening your project in DaVinci Resolve and navigating to the Edit Page.
- Locate the Effects tab in the top left corner of your screen. If you can’t find it, ensure that you’ve enabled the Effects Library by clicking on the Effects button in the top left corner.
- Here, you’ll find a variety of tools, transitions, and effects that you can apply to your project.
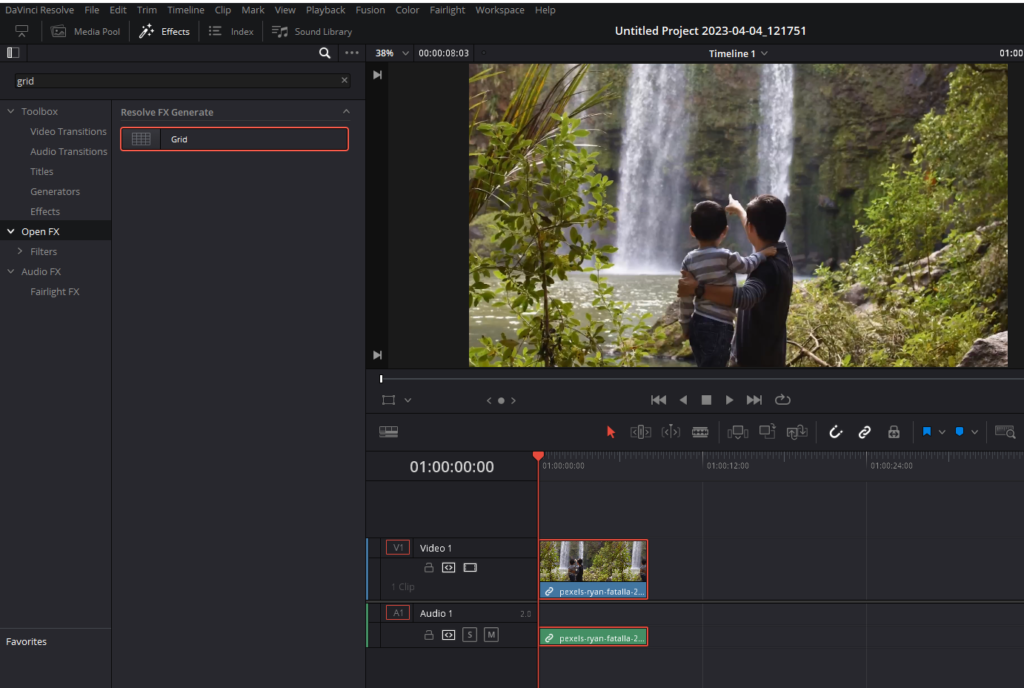
- At the top of the Effects Library, you’ll see a magnifying glass icon. Click on this to open the search bar.
- Type “grid” in the search bar, and the Grid effect should appear in the list of results.
Add Grid to a Specific Clip
If you want to apply the grid to a specific clip in your timeline, follow these steps:
- Click and hold the Grid effect in the Effects Library.
- Drag the effect onto the clip you want to add the grid to in your timeline. The grid will now be applied to that specific clip.
- To remove the grid from the clip, click on the clip in your timeline, go to the Inspector (top right corner of your screen) and click on the Effects tab, and either disable or delete the grid effect by clicking on the Dustbin-looking icon.
Add Grid to the Entire Timeline Using an Adjustment Clip
To apply the grid to your entire timeline, you’ll need to use an adjustment clip. This method is ideal for situations where you want to maintain consistency across all your clips. Here’s how to do it:
- Remove any existing grid effects from your clips by following the steps mentioned in the previous section.
- In the Effects library on the left, locate the Adjustment Clip effect (found under the Toolbox > Effects category).
- Click and hold the Adjustment Clip effect, then drag it onto your timeline. Make sure to place it on a track above all your clips and extend it to cover the entire length of your timeline.
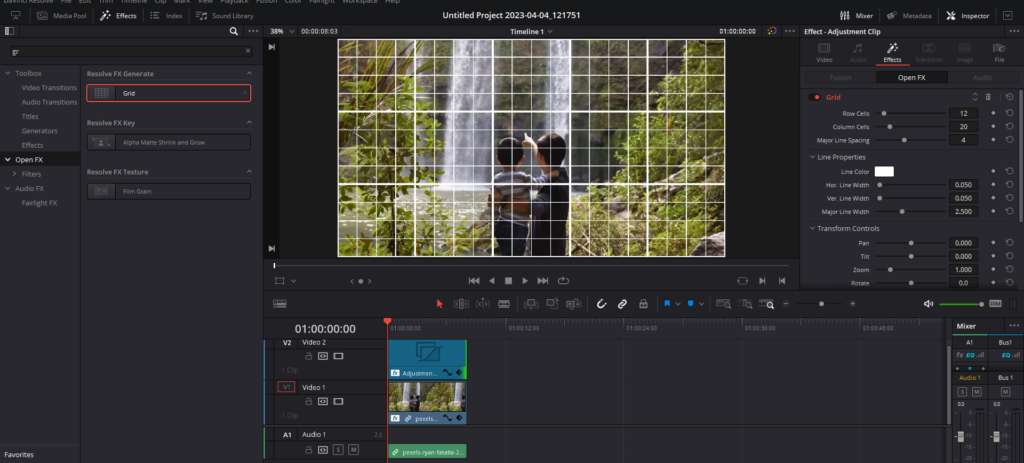
- Click and hold the Grid effect in the Effects library, then drag it onto the Adjustment Clip in your timeline.
- The grid will now be applied to all the clips in your timeline, beneath the Adjustment Clip layer.
Customize Your Grid
Once you’ve applied the grid to your Adjustment Clip, you can start customizing it according to your preferences:
- Click on the Adjustment Clip in your timeline to select it.
- Go to the Inspector panel in the top right corner of your screen, and click on the Effects tab.
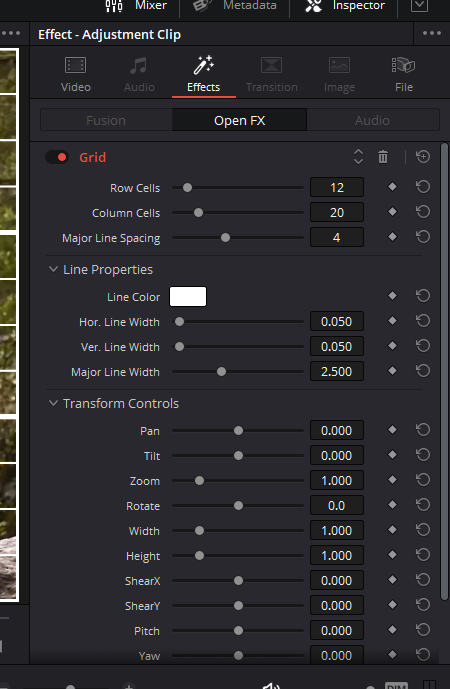
- Here, you’ll find various customization options for your grid:
- Row Cells and Column Cells: Change the number of rows and columns in your grid by adjusting the values in these fields. For example, if you want a 3×3 grid, set both Row Cells and Column Cells to 3.
- Line Color: Change the color of your grid lines by clicking on the color swatch and selecting a new color from the color picker.
- Horizontal Line Width and Vertical Line Width: Adjust the width of the horizontal and vertical grid lines by changing the values in these fields.
- Major Line Width: Modify the width of the major grid lines, which are the thicker lines that separate the primary sections of your grid.
- Global Blend: Adjust the opacity of your grid lines using this slider. A lower value will make the lines more transparent, while a higher value will make them more opaque.
- Once you’ve customized your grid, you can preview your changes in the video preview panel. Make any additional adjustments as necessary.
Toggle Grid Visibility
When working on your project, you may need to enable and disable the grid at different stages of the editing process. To do this, follow these steps:
- Click on the Adjustment Clip in your timeline to select it.
- Press “D” on your keyboard to toggle the visibility of the grid on and off. This command will enable or disable the Adjustment Clip layer, which contains your grid effect.
Note that this shortcut is not exclusive to Adjustment Clips; it can be used to enable and disable any clip in your timeline.
Method 2: Enabling Grids on the Color Page in DaVinci Resolve
In this section, we’ll show you how to enable grids on the Color Page in DaVinci Resolve. This method is particularly useful for color grading or performing other adjustments that require precise alignment. Follow these steps to apply and customize the grid on the Color Page:
- Navigate to the Color Page: Open your project in DaVinci Resolve and switch to the Color Page by clicking on the “Color” button at the bottom of the screen.
- Select the Clip: Choose the clip you want to apply the grid to.
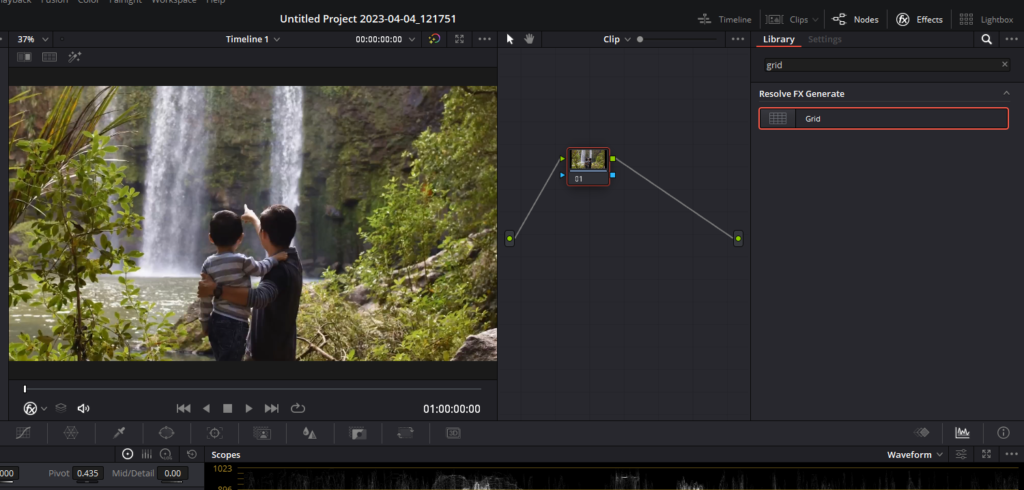
- Find the Grid Effect: Click on the Effects button in the top right corner to open the effects panel. Type “Grid” in the search bar to locate the Grid effect.
- Apply the Grid: Drag and drop the Grid effect onto a node in the Node Editor. The grid will instantly appear on your selected clip.
- Access Grid Settings: Click on the node containing the Grid effect to view and customize the grid settings.
Grid Settings
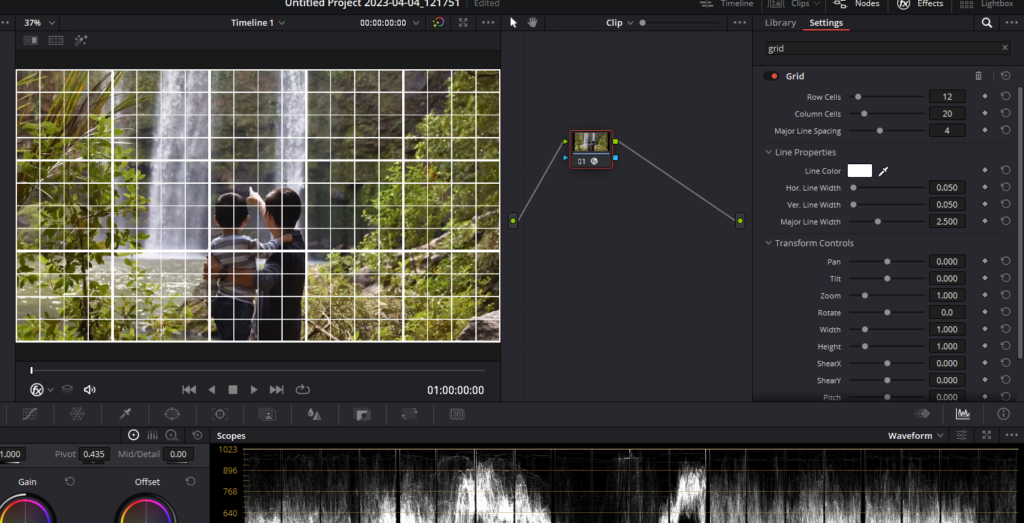
The Grid effect offers two sets of properties to help you fine-tune your grid:
- General Controls: These options allow you to adjust the overall density and orientation of the grid.
- Row Cells and Column Cells: Choose the number of vertical and horizontal cells in the grid.
- Pan, Tilt, Zoom, Rotate, Width, Height, ShearX, ShearY, Pitch, and Yaw: Use these controls to transform the grid to fit your needs.
- Line Properties: These options let you control the properties of the grid lines themselves.
- Line Color: Select a color for the grid lines using the color picker and eyedropper tools.
- Individual Hor. Line Width and Ver. Line Width: Adjust the thickness of all horizontal or vertical lines.
- Major Line Spacing: Set every nth line to be thicker, and use the Major Line Width control to choose the thickness of these major lines.
Method 3: Enabling Grids on the Fusion Page in DaVinci Resolve
In this section, we’ll explore how to enable grids on the Fusion Page in DaVinci Resolve. This method can be useful for compositing and motion graphics tasks that require precision and alignment. Here’s how to access and customize grids on the Fusion Page:
- Navigate to the Fusion Page: Open your project in DaVinci Resolve and in the edit page select the clip in which you want grid and switch to the Fusion Page by clicking the “Fusion” button at the bottom of the screen.
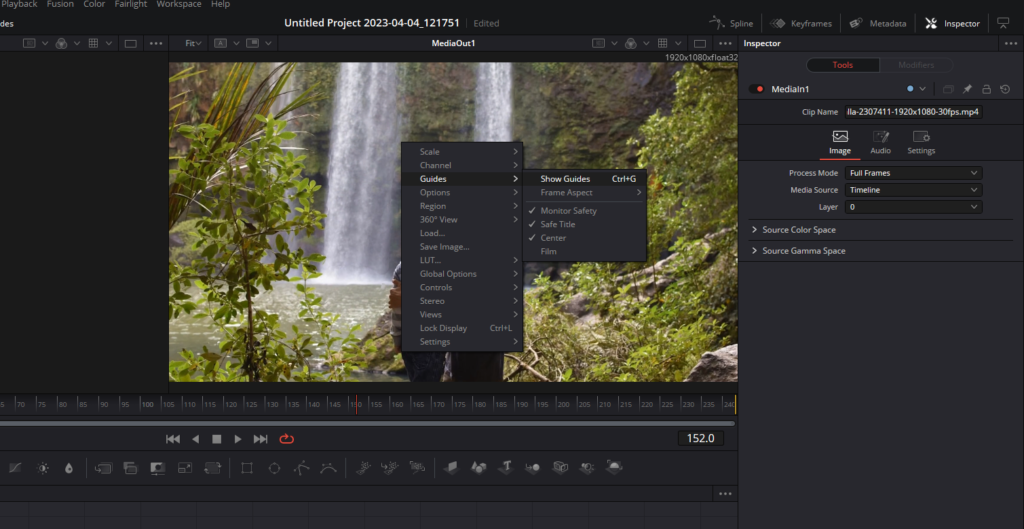
- Enable Guides: To enable grids on the Fusion Page, right-click in the viewer, go to “Guides,” and select “Show Guides.” This will display a different type of grid, which can help you compose elements within boundaries or along the center vertical and horizontal axes.
Guides are on-screen overlays that are not rendered into the scene. Here are some methods for using guides in DaVinci Resolve:
- Change the Aspect Ratio of Displayed Guides: Right-click in the viewer and choose an option from the “Guides” > “Frame Aspect” submenu. The frame aspect is usually set to “Default,” which matches the frame aspect to the resolution of the displayed image. When set to a specific value, the guides will conform to the exact boundaries of the specified format, and any image area outside of that will be dark gray.
- Show or Hide Specific Guides: Right-click in the viewer and choose an option from the “Guides” submenu. A variety of specific guides are provided, each of which can be individually enabled and disabled.
- Monitor Safety: Indicates the safe action area viewable on most monitors and TV screens.
- Safe Title: Indicates the safe area for titles viewable on all TV and monitor screens.
- Center: Shows a crosshair for the center point and x- and y-axis of the view.
- Film: Some frame formats include film guides preset for you, while others require customization. Film guides can be customized in the “Preferences” > “Frame Format” window.
Conclusion
In conclusion, DaVinci Resolve offers several methods for enabling grids, guidelines, and rulers to enhance your video editing workflow.
We’ve discussed three methods to enable grids in DaVinci Resolve, each suited for different tasks:
- Enabling Grids on the Edit Page: This method allows you to apply grids to individual clips or the entire timeline. It is ideal for maintaining consistency in your projects and ensuring that your visuals are perfectly aligned.
- Enabling Grids on the Color Page: This method is particularly useful for color grading or other adjustments that require precise alignment. You can apply and customize the grid settings to suit your specific needs.
- Enabling Grids on the Fusion Page: This method is perfect for compositing and motion graphics tasks that require precision and alignment. Guides on the Fusion Page help you compose elements within boundaries or along the center vertical and horizontal axes.
Thank you for joining us today at FilmmakingElements.com, where we’re dedicated to helping you bring your creative vision to life.