Welcome back to FilmmakingElements.com, this is Salik and I will teach you how to export without color grade in Davinci Resolve.
Davinci Resolve is recognized for its potent color grading tools which can transform the visual ambiance of video footage. However, there are instances where exporting ungraded, raw footage is necessary. This might be when sharing preliminary edits with collaborators, or intending to utilize other software for further color grading or compositing. This tutorial elucidates the steps to employ Davinci Resolve’s Flat Pass feature to render your project without color grading, ensuring the original color integrity is maintained.
What is Flat Pass?
Flat Pass is like a switch you can flip on or off in Davinci Resolve. When it’s on, it tells the software, “Hey, don’t change the colors when saving this video.” This way, the video stays as it was, with the original colors.
Why Use Flat Pass?
There are a few reasons why you might want to use Flat Pass:
- Keep Original Colors: Sometimes you or others might want to work on the video later, and having the original colors can be helpful.
- VFX Collaboration: If you are working with VFX (visual effects) artists, they usually prefer videos without color tweaks. This makes their job easier as they get to see and work with the original, unaltered colors. So, if you’re sending your video to a VFX team, using Flat Pass is a smart move.
- Using Other Software: If you plan to use another software to change the colors or add effects, it’s better to start with a video that hasn’t had its colors changed yet.
Davinci Resolve Export Without Grade: How to Enable Flat Pass?
Step 1: Getting to the Deliver Page
First off, you need to get to a place called the Deliver page in DaVinci Resolve. This is where you decide how you want to save your video.
- Opening DaVinci Resolve: Start by opening DaVinci Resolve and your project.
- Heading to the Deliver Page: Look at the bottom of the screen and find a rocket icon. Click it. Now you’re on the Deliver page. This page is where you tell DaVinci Resolve how you want to save your video.
Step 2: Choosing How to Save Your Video
Before turning on Flat Pass, you’ll need to decide how you want to save your video. There are a bunch of options here, but don’t worry, we’ll keep it simple.
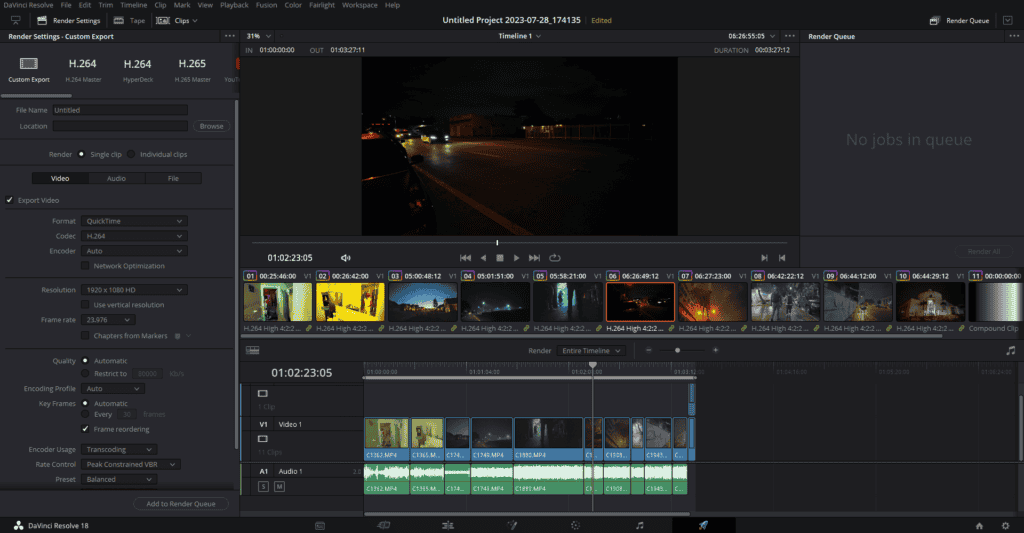
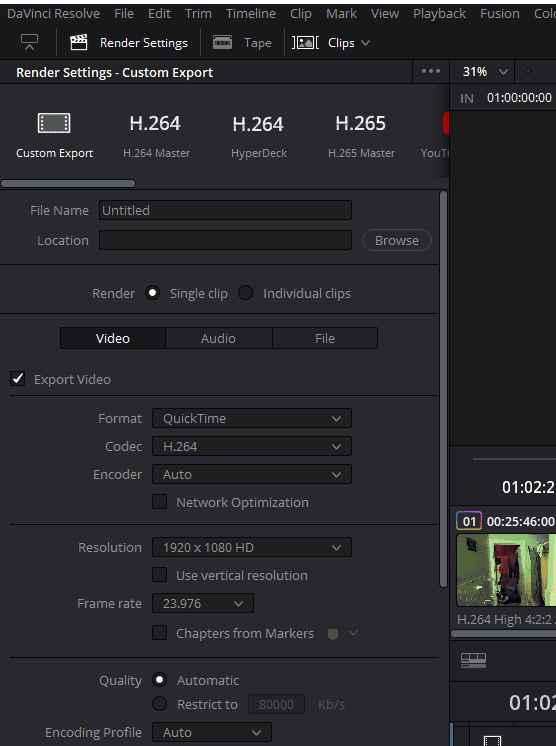
- Picking a Format and Codec: Under a tab called Render Settings on the left of the delivery page, choose the format and codec. These are just fancy terms for the kind of video file you’ll get. Some options are high-quality but big files, while others are smaller but lower quality.
- Setting the Size and Speed: Decide on the resolution (how sharp the video is) and frame rate (how smooth the video plays).
- Sorting Out Sound: If your video has sound, here’s where you can check the audio settings.
Step 3: Turning On Flat Pass
Now, the moment you’ve been waiting for – turning on Flat Pass!
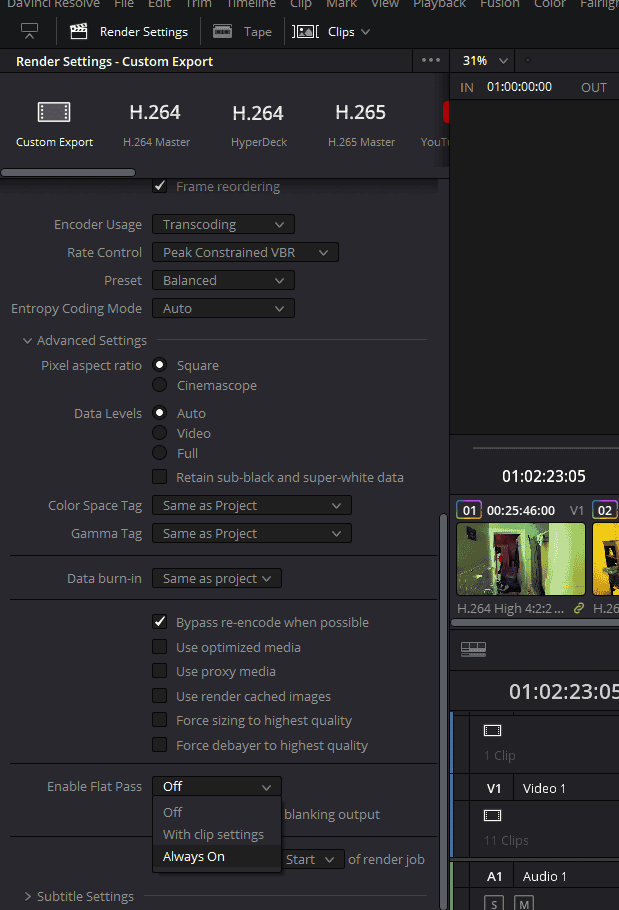
- Finding Advanced Settings: On the Deliver page, find a section called Video. Under that, there are Advanced Settings. Click on that to open up more options.
- Switching on Flat Pass: Look for ‘Enable Flat Pass’ and switch it to ‘On’. This tells DaVinci Resolve not to change the colors when it saves your video.
Step 4: Getting Ready to Save Your Video
With Flat Pass on, you’re almost ready to save your video.
- Adding to Render Queue: Click on ‘Add to Render Queue’. Now your project will appear in a list on the side, waiting to be saved.
- Saving Your Video: Hit ‘Start Render’ or ‘Render All’ to save your video. DaVinci Resolve will now work its magic, saving your video while keeping all the original colors.