Hey guys, welcome back to FilmmakingElements.com, this is Salik, the author of the blog. Today, we’re diving into a vibrant and technical realm that can transform your GoPro footage from good to breathtaking—color grading in DaVinci Resolve. If you’ve been capturing life’s adventures through the compact yet powerful lens of a GoPro, you know how crucial it is to give your footage that extra visual appeal that tells your story just right. DaVinci Resolve is a tool revered by many in the filmmaking community for its robust color grading suite. With its intricate but intuitive set of features, it allows both novices and professionals to sculpt the aesthetics of their footage, painting their narratives in more evocative shades. In this tutorial, we’re going to explore a step-by-step process to color grade your GoPro footage in Davinci Resolve.
How To Color Grade GoPro Footage In Davinci Resolve
Color grading is like adding the final touch of magic to your GoPro footage. It’s the step that takes your videos from looking good to looking amazing. Since GoPro footage already comes in a friendly color format called Rec.709, working with it in DaVinci Resolve is a breeze. Let’s get to the steps to color grade your GoPro footage and make it pop:
Setting Up Your Project Right:
Before anything else, you need to set up your project settings correctly.
- Project Settings: Click on the gear icon at the bottom right corner of DaVinci Resolve to open up project settings. Here, find and click on “color management.”
- Color Science: Choose DaVinci YRGB. This is a standard setting that works well.
- Timeline Color Space: Set it to “Rec.709 Gamma 2.4” to match your GoPro’s footage color space.
- Output Color Space: Set it to “Rec.709 Gamma 2.4”.

Getting Your Nodes Ready:
DaVinci Resolve uses something called nodes to apply color adjustments. Think of nodes like layers in Photoshop.
- Adding Your First Node: Go to the color page, and create a new node by hitting Alt + S or Option + S on your keyboard.
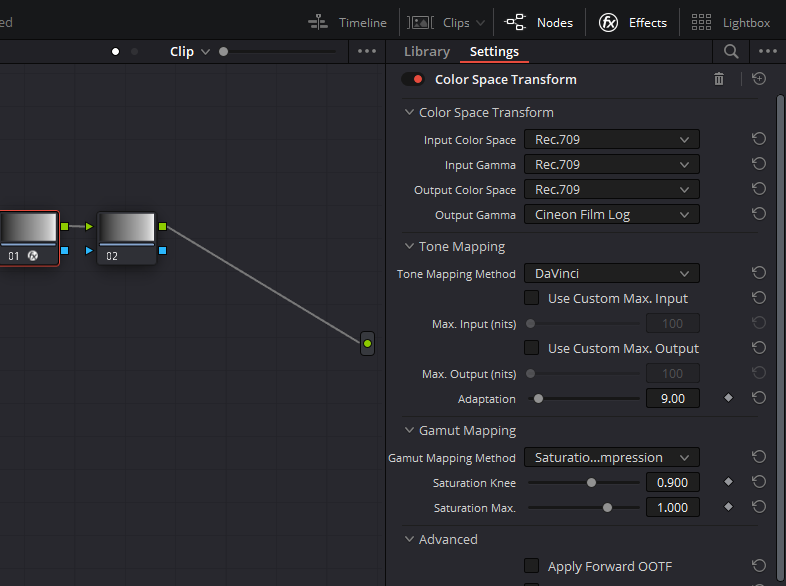
- Effects Library: Now, find the Effects library at the top right corner of the color page, and look for the Color Space Transform effect.
- Applying the Effect: Drag this effect onto your new node.
Even though your GoPro footage is already in the right color space (Rec.709), this step helps set things up for further grading.
Setting Up Your Color Space:
These settings will help keep colors accurate as you grade.
- Input Settings: Since you shot on a GoPro, set both the “input gamma” and the “Input Color Space” to Rec.709.
- Output Settings: Set the “Output gamma” to Cineon Film Log and the “Output Color Space” to “Rec.709”.
- Gamut Method: Under this, select “Saturation Compression” to help keep colors in check.
Adding Some Style with a LUT:
LUTs are like filters that can quickly change the look of your footage.
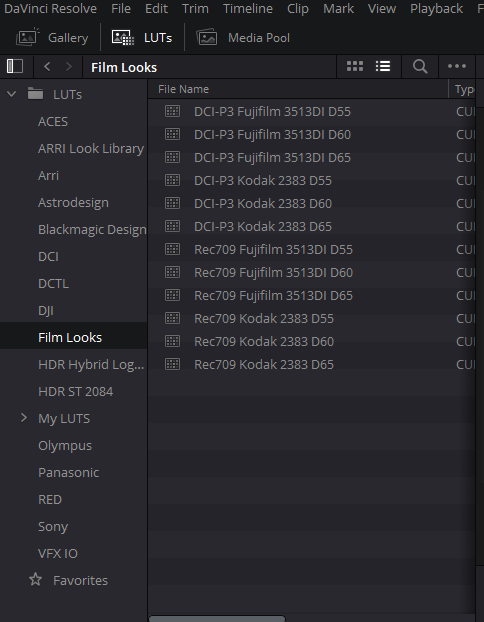
- New Node: Create another new node with Alt + S or Option + S.
- Applying a LUT: Right-click on the new node, go to “LUTs,” from top-left corner and choose “Film Looks” and choose a film look you like. We’ll use Rec.709 Kodak 2383 D60 here, but feel free to explore others.
- Color Temperature: The D60, D65, and D55 options will give you different color temperatures with the same film look.
Organizing For a Film Look:
Setting up a good workflow will make achieving a film look more straightforward.
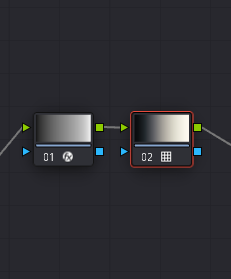
- Naming Your Nodes: Right-click on each node to give it a label like “CST” for Color Space Transform and “LUT” for Look-Up Table.
- Node Tree Organization: Place the CST and LUT nodes at the end of the node tree. This setup keeps things organized.
- Adding a Primaries Node: Press Shift + S to add a new node before the CST. Label it “Primaries” and adjust lift, gamma, and shadows to bring out more details.
- Protecting Highlights: When shooting, try to keep highlights well-exposed as they are important for a film look.
- Adjusting Saturation: In a new node labeled “Sat”, use the RGB Mixer to boost colors. Slide the red, green, and blue sliders to the max to make your image vibrant. You can play around with the intensity to get the look you want.
By following these steps, you’ll be on your way to achieving a professional film look for your GoPro footage using DaVinci Resolve. Each project might need different adjustments, so feel free to experiment with different settings and LUTs to find the perfect look for your project!
- Also Read: How To Color Grade DJI D-Log In Davinci Resolve (2 Ways)
- Also Read: Rec.709 vs Rec.709-A: Explained
- Also Read: Davinci Resolve Export File Size Calculator