
Hi, I’m Salik, the author of FilmmakingElements.com. I have been a filmmaker for over 10 years. I am also a certified DaVinci Resolve Trainer and I have used DaVinci Resolve for many of my projects. In today’s article, we aim to enlighten you with a comprehensive step-by-step tutorial on how to animate a logo in DaVinci Resolve.
In this digital age, branding holds a significant place.. Whether you’re looking to enhance your personal content or provide high-quality service to a client, learning to animate a logo can truly uplift your video creation skills. So, let’s dive straight into this exciting process and learn how you can animate a logo to take your video content to the next level.
How To Animate Logo In Davinci Resolve: Step-By-Step Guide
1. Preparing for Logo Animation in DaVinci Resolve
Before diving into the exciting world of animation in DaVinci Resolve, it’s important to understand the initial setup steps required for any logo animation project.
Firstly, you’ll need a logo to animate. Regardless of the style or complexity of your logo, the process we’re about to embark on will be universally applicable, providing you with the flexibility and control you need to animate any logo effectively.
The next essential component is a Fusion Composition. Here are the simple steps to add a Fusion Composition:
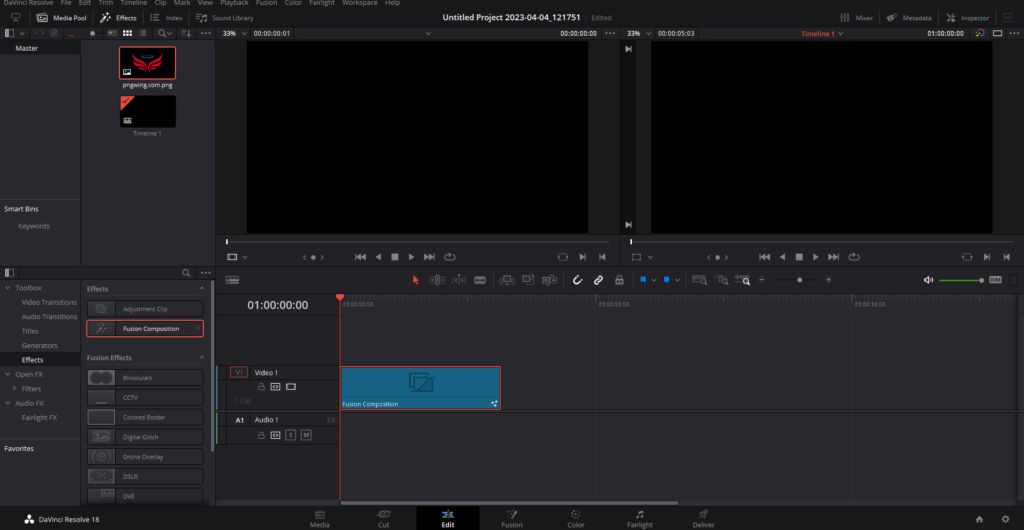
- Begin by launching DaVinci Resolve and navigating to the Edit page.
- Click on the ‘Effects’ button located at the top left corner of the screen. This action will bring up the ‘Effects Library’.
- In the Effects Library, look for ‘Fusion Composition’. Once found, click and drag it onto your timeline.
Usually, a duration of five seconds for your Fusion Composition should suffice for most logo animations.
Having added the Fusion Composition to your timeline, the next step is to enter the Fusion page within DaVinci Resolve. As we go along, you’ll discover why creating a Fusion Composition, instead of editing the logo image directly, is beneficial for the animation process.
2. Adding a Background Node and Introducing Your Logo
In our quest to animate logos in DaVinci Resolve, a solid starting point entails setting up an appropriate background and introducing the logo into the Fusion page.
Step 1: Adding a Background Node
A background node will serve as the canvas for your animation project. To add it, adhere to the following steps:
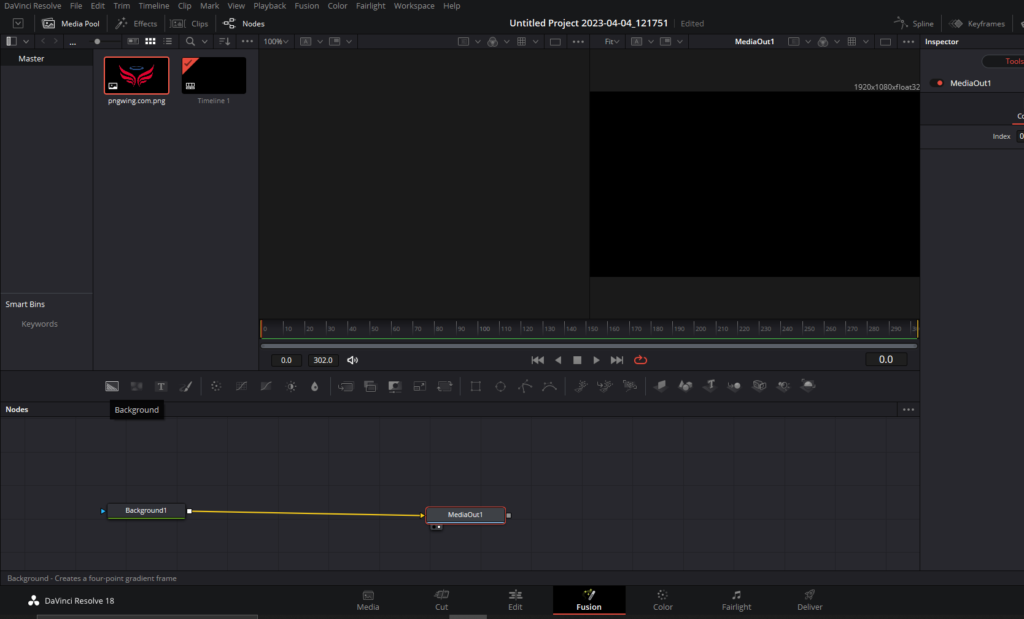
- Launch the Fusion page within DaVinci Resolve. Here, your attention should be directed towards the toolbar, located just above the node editor.
- This toolbar contains an array of icons, each representing different nodes. Your focus should be on the first icon – a rectangle. This represents the background node. Click and drag this icon into your node editor.
- Once the background node is in your node editor, connect it to the ‘MediaOut1’ node. This is done by dragging the line from the background node’s square output (located on the right) to the ‘MediaOut1’ node’s square input (located on the left).
By connecting your background node to the ‘MediaOut1’ node, we ensure we’re not directly working on the logo image, which provides a safety net during the animation process and allows us greater flexibility.
Step 2: Introducing Your Logo into the Fusion Composition
Now that you have your background set up, it’s time to bring your logo into the Fusion composition:
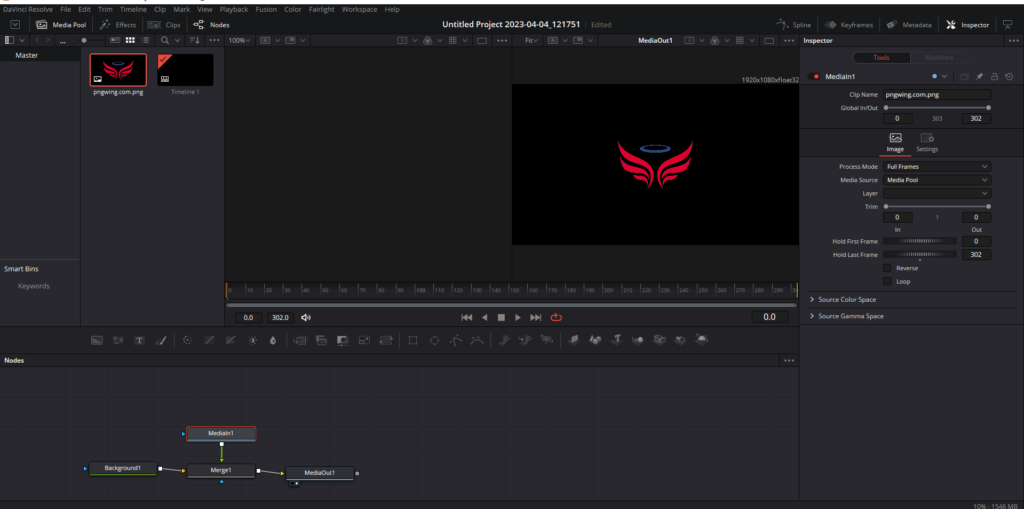
- Start by locating your logo file in the media pool. The media pool houses all your media files and can be found in the top left corner of the DaVinci Resolve interface.
- Once you find your logo, click and drag it from the media pool into the node editor. Your logo will appear as a node labeled ‘MediaIn1’.
- Now, connect your logo node (MediaIn1) to the background node. You can do this by dragging a line from the square of the logo node to the square of the background node.
Upon successful completion of these steps, a ‘merge’ node will automatically form, establishing a connection between your logo and the background. With this, you’ve successfully set up a foundational structure for your animation.
3. Animating Your Logo Using Masks and the Polygon Tool in DaVinci Resolve
Once you have your logo and background ready in the Fusion page of DaVinci Resolve, it’s time to bring your logo to life. One effective way to start the animation process is by using masks – in particular, the Polygon tool.
Step 1: Adding the Polygon Tool
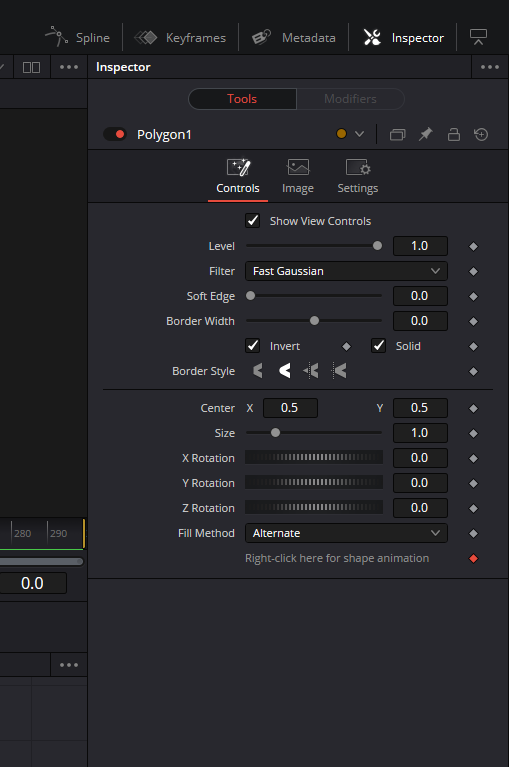
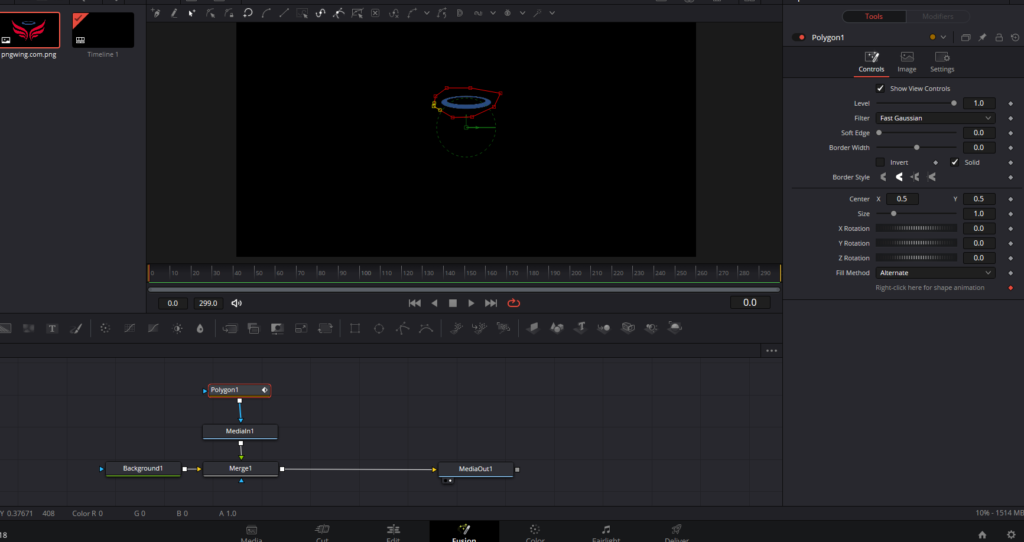
To add the Polygon tool, you need to click on your logo node, labeled as ‘MediaIn1’, and press ‘Shift + Space’. This keyboard shortcut will open the tool browser that contains all the tools. From the list, search for ‘Polygon’ and click on ‘Add’. Now, the Polygon tool is ready for use.
Once the polygon is connected to your logo, you’ll notice that your logo becomes invisible.
Go to the Inspector panel on the right. Under ‘Polygon 1’, hit ‘Invert’. This action will make your logo visible again.
Step 2: Creating Detailed Outlines with the Polygon Tool
Once the Polygon tool is added, it’s time to start outlining the elements of your logo you want to animate. Make sure to follow the shapes as accurately as possible, focusing on one element at a time. After successfully isolating one part, you’re ready to move on to the next elements.
Remember to unclick ‘Invert’ once you’re done. Failing to do so can cause confusion later in the process.
Step 3: Duplicating the Logo Node for Multiple Layers
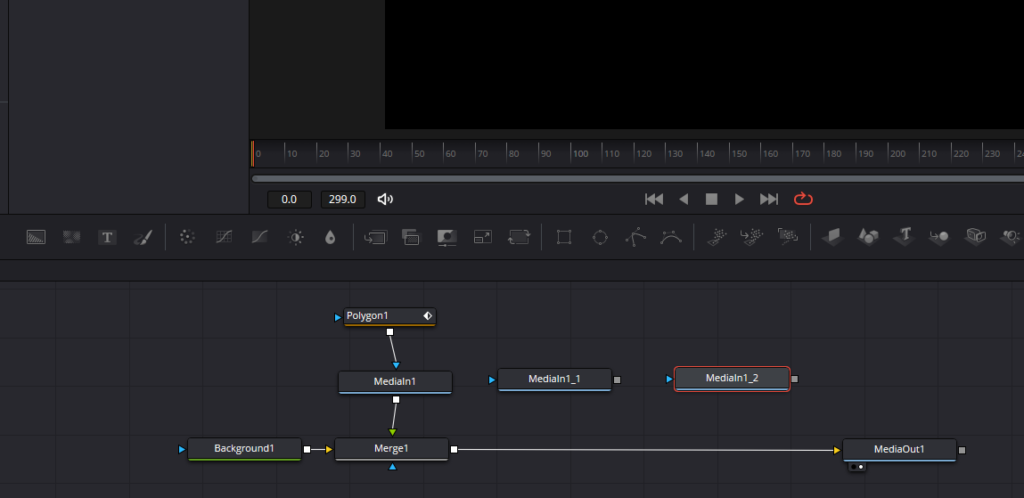
For each element of your logo that you want to animate separately, you need a duplicate of your logo node. To create a duplicate, select your logo node and copy it by pressing ‘Command + C’ on a Mac or ‘Ctrl + C’ on Windows. Then, click on any empty space in the node editor and paste it by pressing ‘Command + V’ on a Mac or ‘Ctrl + V’ on Windows.
The number of duplicates depends on how many different elements of your logo you want to animate. Each duplicate represents a different layer of your animation, providing a multi-dimensional effect.
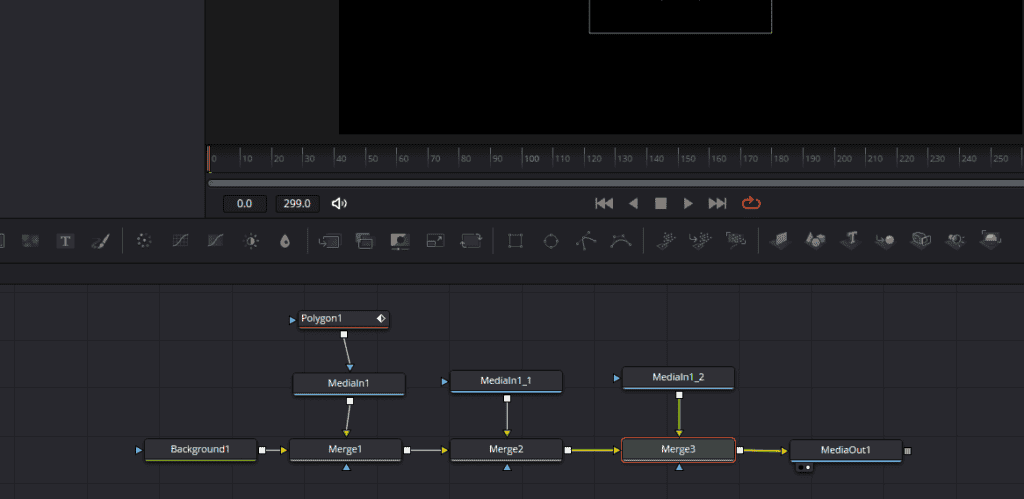
Step 4: Connecting the Nodes
After creating the necessary duplicates, connect each one to the merge node by connecting the square on the right side of the logo node to the square on the merge node. This action will create a new merge node. If you have more logo node duplicates, repeat this process, ensuring each logo node is connected to the latest merge node in your node tree.
Step 5: Outlining the Remaining Elements
Now, click on each of your logo node duplicates and add a Polygon tool to each, just like in Step 1. With the Polygon tool, outline each different part of your logo in each duplicate node. Make sure to be as precise as possible for a smooth and visually appealing animation.
After outlining all the parts of your logo, remember to unclick the invert checkbox for all the polygons to your logo. This step ensures that each part of your logo has its mask, setting up a robust framework for the animation.
4. Bringing Your Logo to Life: Animating the Layers
The key to a captivating logo animation lies in breaking it down into individual components and then bringing these layers to life. In this section, we will delve into the detailed process of animating the layers of your logo in DaVinci Resolve. This stage in the logo animation process provides the perfect opportunity to let your creativity take the reins.
Step 1: Avoiding Common Animation Mistakes
One common pitfall in the logo animation process is inadvertently distorting the polygon mask around your logo during animation. For instance, if you attempt to animate the polygon by rotating it on a specific frame (say, frame 25), it could disrupt the outline of your mask, creating a less-than-desirable effect. Therefore, the golden rule here is to solely animate the image or the logo itself, leaving the polygon mask untouched. This is crucial for ensuring a smooth and visually pleasing animation.
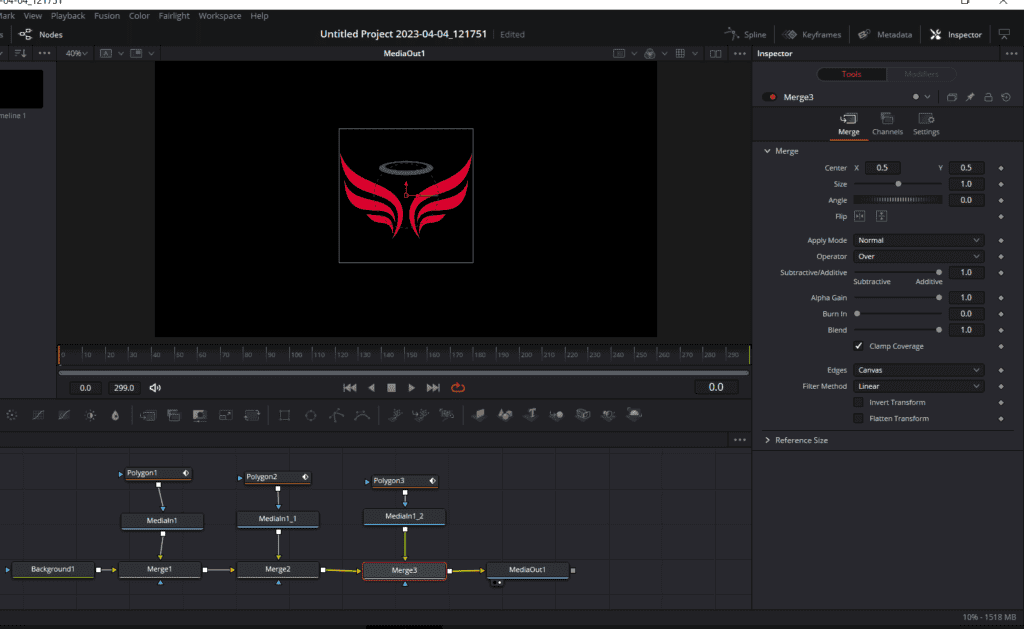
Step 2: The Importance of Merge or Transform Nodes
Given the potential issues that can arise when animating the polygon, it’s essential to focus your animation efforts on either the merge node or a transform node in your node tree. The merge node allows you to adjust the size and position of your image without interfering with the polygon mask.
To make these adjustments, simply select the merge node and make the necessary modifications. By doing this, you can overlay the images on top of each other without any fear of the polygon mask getting in the way.
Step 3: Animating Each Layer
Let’s suppose you created three polygon and merge nodes for isolating three elements in the logo. Let’s take a look at how can you animate it. Keep in mind the process will be the same no matter how many elements you have isolated. Animating each layer of your logo is where the real fun begins. Here’s how to do it:
Merge 1 Node:
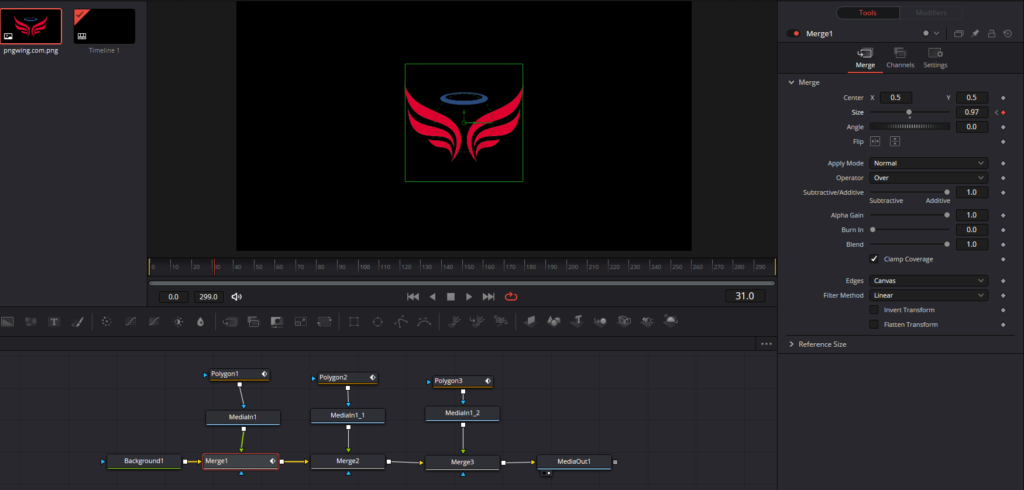
- Select the ‘Merge 1’ node and navigate to frame 15.
- In the ‘Inspector’ panel on the right, click on ‘Merge’, and add a keyframe to ‘Center’, ‘Size’, and ‘Angle’, by clicking on the diamond-looking icon on the right of each option.
- Go back to the start of your animation timeline (frame 0).
- Increase the size of your image, adjust its position, and rotate it as you like.
- Play through the animation to see how it transitions, making any adjustments as needed.
Merge 2 Node:
- Repeat the same process as for Merge 1. This time, manipulate the size, position, and rotation of your image to create a unique animation for this layer.
Merge 3 Node:
- You can do something different on this one. Rather than creating a sliding effect, you’ll make this layer gradually fade in.
- At frame 15, under ‘Settings’ inside the ‘Inspector’, add a keyframe on ‘Blend’.
- Navigate to the end frame and reduce the blend, allowing the layer to gracefully fade into the animation.
- You can create a subtle movement during the fade-in for ‘Merge 3’. Return to the ‘Merge’ settings, add a keyframe to the ‘X’ and ‘Y’ parameters at frame 15. This allows you to adjust the position of your logo as it fades in.
Step 4: Additional Fine-Tuning
Once you have successfully animated each layer and are satisfied with the results, your animated logo is ready for the final touches. The end product will be a dynamic, multi-layered animated logo that captures the essence of your brand.
Bear in mind that this guide is just a starting point. You can add as many layers as you need and use a plethora of different animation effects to truly make your logo animation unique and fitting to your brand.
5. Polishing Your Logo Animation: The Finishing Touches
In the realm of animation, it’s often the subtle details that make all the difference. In this final segment, we will explore two effective strategies to add a touch of professionalism to your animated logo in Davinci Resolve: Smoothing the animation transitions and incorporating motion blur.
1. Smoothing the Animation Transitions:
Harsh, abrupt transitions can distract the viewers and mar the entire aesthetic of your logo animation. Here’s how you can smooth out these transitions:
- Click on the ‘Spline’ tool on the top right corner in the Fusion page.
- Select ‘Merge 1’, ‘Merge 2’, and ‘Merge 3’ in the spline window.
- Zoom out to visualize the entire animation timeline.
- Highlight all the keyframes of these merges, then click the first icon at the bottom of the Spline tool which says ‘Smooth’ to ease out the transitions.
By smoothing out the animation, you ensure that each movement flows seamlessly into the next, creating a pleasing visual experience for the viewer.
2. Incorporating Motion Blur:
Motion blur adds a realistic touch to your animation, imitating the way objects in motion appear to our eyes in real life. Here’s how you can apply motion blur to your animation:
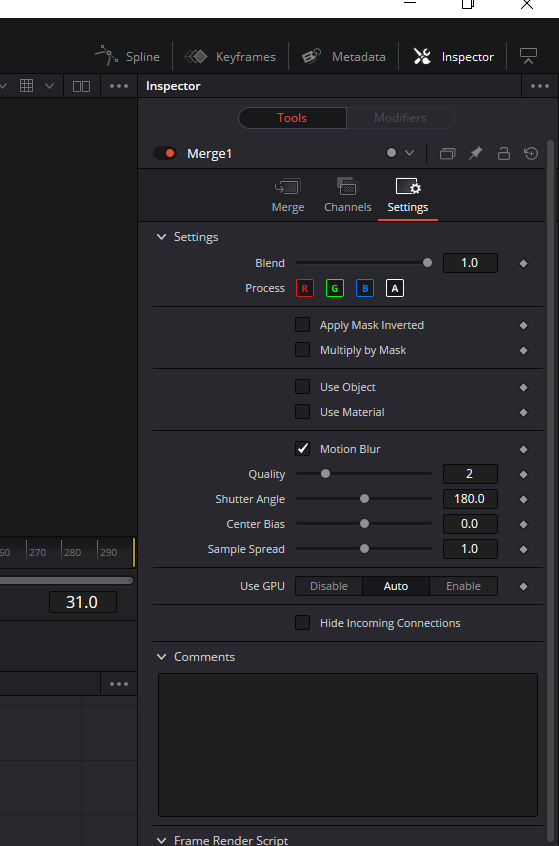
- Click on the “Merge1” node and navigate to ‘Settings’ on the right side.
- Click on ‘Motion Blur’ to activate this feature for that particular node.
- Repeat this process for all the ‘Merge’ nodes if you wish to add motion blur to.
Motion blur tends to be computationally intensive, which is why it’s advised to enable it as the final step of your animation process.
Once these final touches are applied, return to your editor and play through the animation. The resulting logo animation will not only be dynamic and engaging, but it will also exhibit a polished, professional quality.
Conclusion
As we wrap up this comprehensive guide, we trust that you have gained a wealth of knowledge, enabling you to transform a static logo into a dynamic and engaging visual element. Remember, logo animation is not just about bringing a still image to life; it’s about showcasing the essence of your brand in an innovative and visually striking manner.